- Zoom Cloud Recording allows you to capture meetings, webinars, and presentations without costly manual recording devices or software.
- Zoom records meetings directly to the cloud, enabling you to access and share them from anywhere with an internet connection.
- Cloud recording offers convenience, accessibility, and ease of sharing, helps teams stay organized, and strengthens collaboration.
Zoom Cloud Recording helps store and review your meetings, presentations, and discussions and share them with others. Thus, it eliminates the need for manual recording and storage management.
Zoom cloud recordings offer multiple benefits, cost-effectiveness, and increased collaboration. Moreover, they help streamline the recording, storage, and sharing of meeting content. Additionally, cloud recording enhances engagement in remote and hybrid work environments.
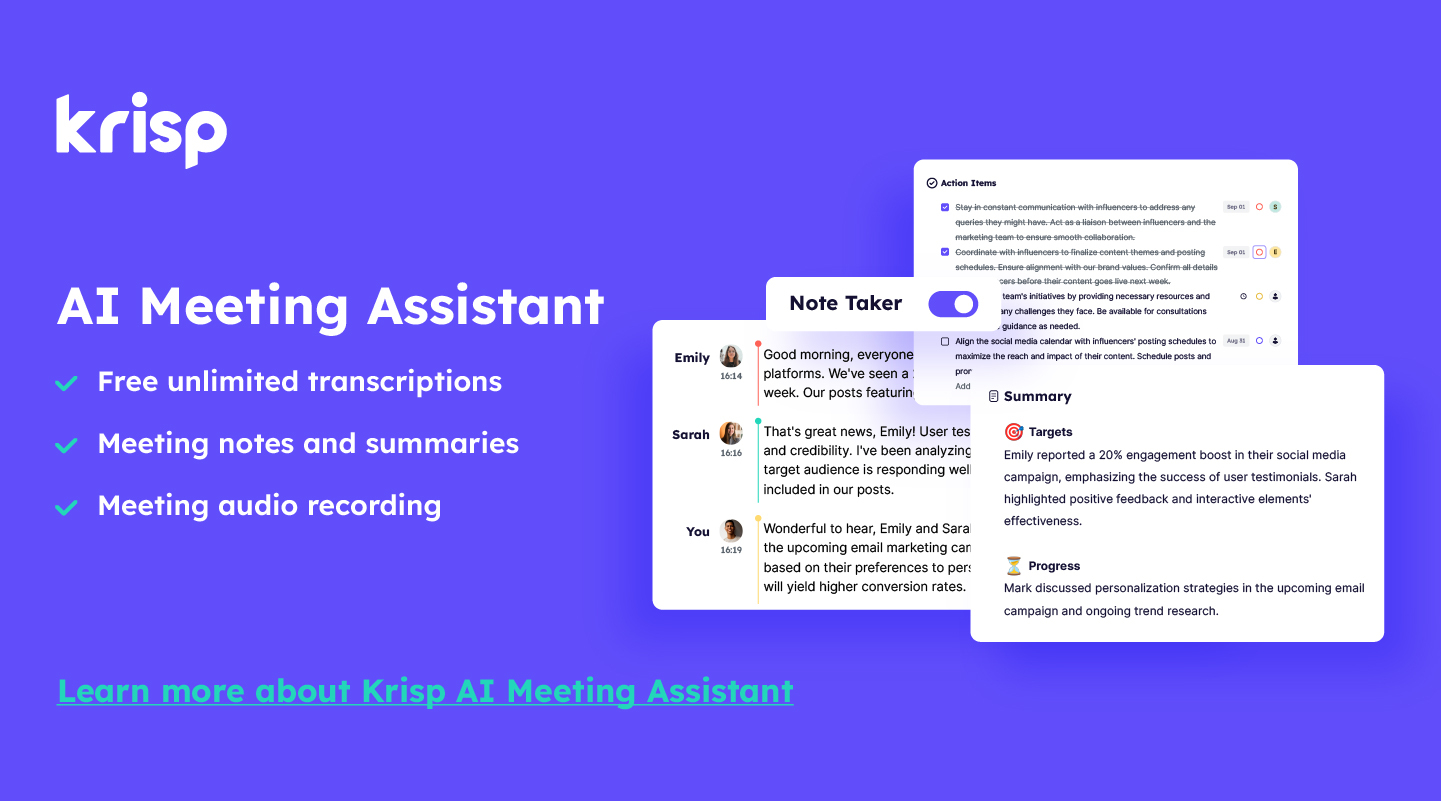
This guide will help you use cloud recording Zoom effectively. Also, it’ll tell you how AI meeting assistant Krisp removes background noise in real time and automates note-taking to enhance audio quality and boost meeting productivity.
Understanding Zoom Cloud Recording
Have you heard the video conferencing market is anticipated to reach $60.17 billion by 2032 from $33.04 billion in 2024, according to Fortune Business Insights? And this also speaks of the growth of cloud recordings.
What is Zoom Cloud Recording? The latter is one of the features of the video conferencing tool Zoom, allowing you to record online meetings in the cloud. As a result, you can store essential discussions, review meetings, playback them, and share them with absent participants.
The cloud is a server collection accessed over the internet. And cloud storage helps businesses and consumers save and retrieve data securely online via an internet-connected device.
Zoom has cloud recording storage to save, stream, and download your recordings. While recording, you will receive an email alert once the subscribed storage limit reaches 80%. And the meeting recording will not stop even if you reach that limit.
And the Zoom web portal makes accessing, sharing, and downloading your recordings easy. Here, you can customize your profile and configure your Zoom settings.
Specifically, Zoom offers Local and Cloud Recording options for video, audio, and chat text for your meeting. But what is the difference between cloud recording and local recording in Zoom?

Local recording lets you record a meeting video and audio to a local computer. And cloud recording is for recording to Zoom cloud or online storage. The latter also offers audio transcription.
The Zoom app is available on iOS and Android. Specifically, on a mobile device, you can start or join a Zoom meeting and record it by tapping the Record icon in the meeting controls toolbar. moreover, Zoom Cloud Recordings are also available on desktop.
Remember that local recordings mainly capture what you see on your end. But cloud recordings can capture different layouts at the same time, regardless of your view in the session. For instance, you can record an active speaker with a shared screen or a gallery view with a shared screen.
So, check out the settings on the Recording tab of your Settings page to pick what you would like to record in your video.
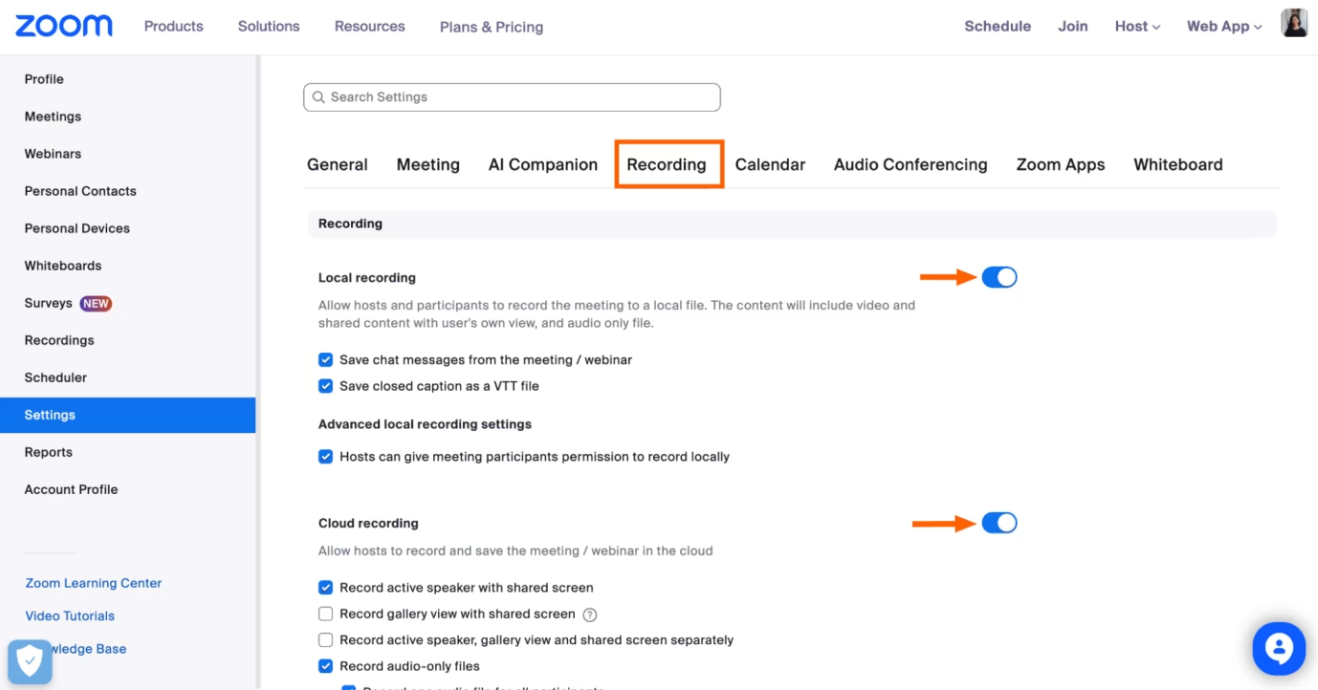
How Do I Enable Cloud Recording on Zoom?
Zoom Cloud Recording is available for Pro, Business, and Enterprise accounts. To ensure this feature is enabled in your Zoom account settings:
- Navigate to your Zoom web portal
- Open Settings in the navigation menu.
- Click the Recording tab to allow it to.
If you are wondering, “Is Zoom Cloud Recording free?” be aware that it is available for paid subscribers.
As for account and settings configuration, you can customize the recording settings by signing in to the Zoom web portal. Then, click the Recording tab to apply individual settings to the basic and advanced cloud recording options.
For example, you can customize the automatic recording start, recording file type, and notification about the recording start.
How Does Zoom Cloud Recording Work?
With cloud recording, you can view live, download, or share your recorded materials with greater flexibility and convenience. Let’s see how this feature works.
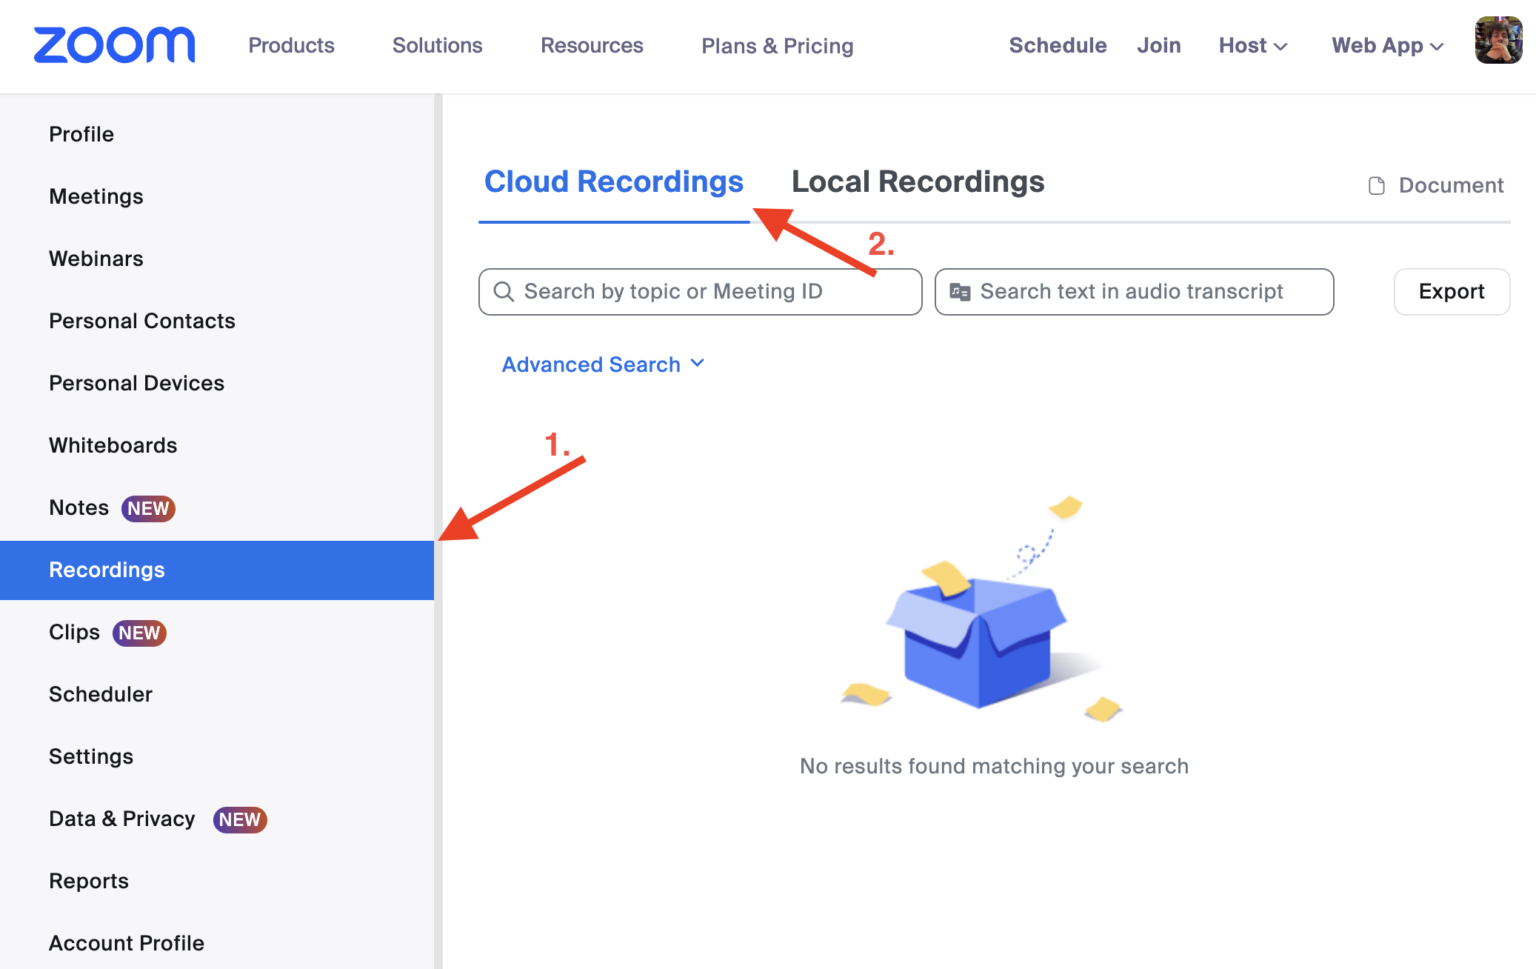
How to Access Zoom Cloud Recording?
Accessing Zoom cloud recordings is straightforward:
- Open your Zoom account
- Select My Account in the navigation bar
- Choose the Recordings tab to find Cloud Recordings and Local Recordings.
- Click Record
- Choose Record to the Cloud.
You can pause or stop your Zoom cloud record to control the meeting. Also, you can view, share, and download recordings from your Zoom account. However, it’s impossible to record locally from an iOS or Android device.
Forty minutes is the maximum duration of meetings for basic or free users. What happens if you go over 40 minutes on Zoom? You won’t have additional minutes, so you can end the meeting and restart it for an extra 40 minutes. Also, you can upgrade your account to allow meetings to last longer than 40 minutes.
Recording Processing Time and Files
Recordings typically require almost twice the recording duration for processing. However, due to higher processing loads, the process may extend up to 24 hours.
For example, an hour-long meeting with only 30 minutes recorded would generally require 30 to 60 minutes to process.
Recordings with video or screen share are typically .mp4 files. They work with any media player, such as Windows Media Player or QuickTime Player for Mac.
The maximum number of files generated from a live session’s cloud recordings is 150. So, Zoom recommends ending and then restarting the meeting if you need a larger number of files.
You will receive an email from Zoom that your recordings are ready when processing finishes. To share the recording, use the link under “Share recording with viewers” in the email. And the other link will open your personal Zoom account.
Does Zoom Cloud Recording Automatically Save?
If you are a licensed user, the Zoom cloud will automatically save your recordings. To manage your cloud recordings:
- Sign in to the Zoom web portal
- In the navigation menu, click Account Management
- Then click Recording Management to manage your account. You’ll see several cloud recordings on your account.
- Find your recordings under the Recordings section of the Zoom portal.
What about the Zoom Cloud Recording download?
- Select the meeting in the Topic column to pick the recording you need.
- Click the meeting link to download it for offline access or share it from the cloud.
- Check your storage usage regularly and delete old recordings to free up space.
What if you want to upload a Zoom recording to the cloud? Local recording files are saved on your computer, and you can’t upload them to the Zoom cloud. So, use cloud recording to store a video on the Zoom cloud.
However, you can upload your local recording to a third-party cloud storage platform like Dropbox or Google Drive. For this:
- Change the recording location in Zoom
- Login to the Start Zoom app
- Go to Settings to open the Recordings menu tab
- Choose your local recording location
- Open your Google Drive and pick the Zoom folder you have recreated.
11 Tips for Effective Zoom Cloud Recording

Audio quality is the #1 problem for any video meeting, according to TechTarget. And online communicators may even reschedule the video conference if the audio quality is poor enough to understand each other. So, make sure to:
- Ensure Recording Is Enabled: When enabled, the host or co-host can start and stop recording.
- Customize Recording Settings: Choose your preferred recording settings, such as recording video, audio, and screen sharing.
- Inform Participants: Notify participants before recording as a courtesy and compliance.
- Position the Camera: Ensure your camera properly captures clear visuals and the lighting is good.
- Minimize Background Distractions: Use AI-powered noise and voice cancellation app Krisp to enhance audio quality to make Zoom Cloud Recording clearer. Set up Zoom with Krisp to enjoy more effective, productive, and professional online meetings.
- Check Audio Settings: Test your microphone and audio settings to ensure clear and crisp audio quality. Specifically, headsets or headphones will also minimize background noise to some extent. Also, use a high-quality microphone.
- Manage Screen Sharing: Ensure your content is relevant and visible. Avoid unorganized screens or sensitive information unless necessary.
- Monitor Recording: During the meeting, check whether the recording functions appropriately. Don’t ignore the Zoom notifications you may receive.
- Engage Participants: Encourage all attendees to participate actively to make the meeting engaging and informative with valuable insights and discussions.
- End Recording Properly: Stop the recording promptly to avoid unnecessary recording of post-meeting discussions or informal conversations.
- Review and Share Recording: Before sharing the recording, ensure all content is captured correctly by trimming unnecessary parts.
Troubleshooting Zoom Cloud Recording Common Issues
Online video conferencing problems, including audio and recording issues, do not let participants be fully present. Here are common recording issues and troubleshooting suggestions to avoid distractions during online meetings:
- Insufficient Cloud Recording Storage: Regularly monitor your cloud storage and delete old recordings. As for larger storage, it requires upgrading your plan or deleting old recordings. For example, Pro and Business plan types offer 5 GB/licensed user storage capacity.
- Audio/Video Quality Problems: Ensure a stable internet connection and use external microphones or webcams for better quality. Namely, AI meeting assistant Krisp enables voice, echo, and noise cancellation, enhancing the clarity of your recordings.
- Zoom Cloud Recording Not Showing Up: Check your internet connection during the meeting and ensure you have enough cloud storage.
- Cloud Recordings Still Processing: Due to high loads, processing may take up to 24 hours. Wait for processing to complete. However, if the processing state continues after 48 hours, the system may have difficulty completing the finalization process. Contact Zoom Support.
- Audio Missing on a Saved Recording: If the audio of the recording saved in the .MP4 file format is missing, consider opening the recording file with a different video player. Additionally, consider changing the default video player on your Mac or Windows device.
Besides, ensure the mic or headset wasn’t muted in the Zoom app and that the latter had the right microphone selected. Finally, test the audio before starting the next recording to ensure no issues.
Enhancing Your Zoom Cloud Recording with Krisp
AI meeting assistant Krisp improves the quality of your Zoom Cloud Recording by removing background noise, from traffic to typing sounds. By enabling the smooth and accurate flow of recordings, Krisp makes your remote meetings more productive and professional and improves voice-to-text transcription.
Moreover, Krisp removes the echoes bouncing off hard surfaces in the room and acoustic echoes your microphone may cause. Zoom currently can not solve the latter problem.
Additionally, Krisp provides meeting transcriptions and notes so you can easily capture the gist of discussions. Thus, you do not need to rewatch the entire Zoom Cloud Recording.
“Before Krisp, there was no other technology that worked well on all types of noises. Our innovation was to build a deep neural network that is trained to recognize the human voice,” says co-founder Artavazd Minasyan.
Krisp’s new feature called Krisp Bot lets you capture not only the audio but also the visual dynamics of online meetings. This new offering is available only on Zoom.
How can you set up Zoom with Krisp?
- Get the Krisp app
- Install Krisp, following the Setup Wizard instructions
- Go to Settings on the Zoom Rooms controller device
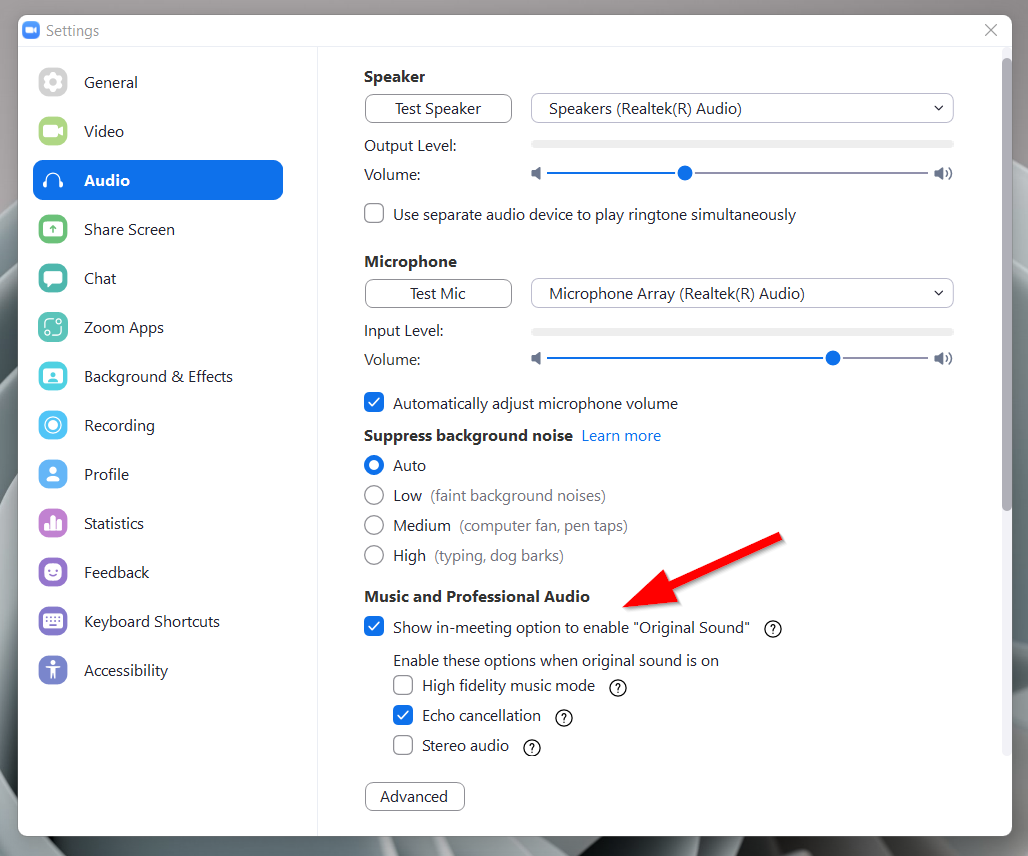
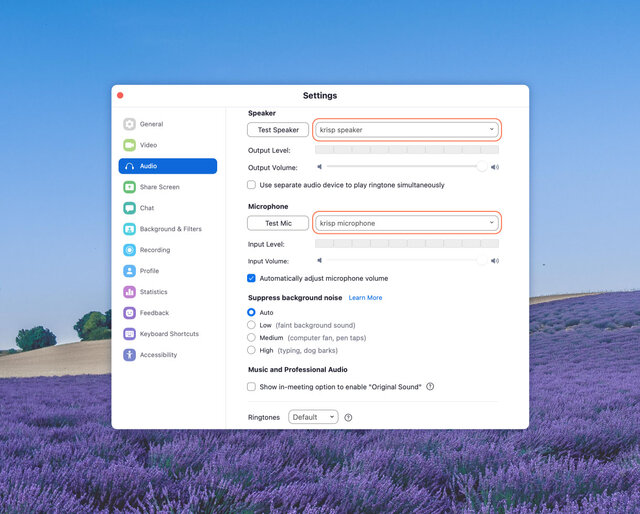
- From Settings, choose the Audio tab and change the Speaker/Microphone to Krisp
- Open Krisp, select a physical microphone and speaker and turn on Noise Cancellation toggles.
We recommend choosing Low from the Zoom Background noise removal options in the Zoom Audio settings. Why?
The Low option has a low audio suppression level, so it does not affect the audio when using Krisp. As a noise canceling technology, audio suppression removes the background noise to transfer your voice.
Conclusion
Zoom Cloud Recording lets you conveniently and securely capture, store, and share meeting content, enhancing remote collaboration. So you do not need to record and store your recordings manually. As a result, you enjoy increased flexibility, efficiency and effectiveness of remote collaboration.
Integrating external tools like AI meeting assistant Krisp with Zoom lets you record your meetings with crystal-clear audio and automate note-taking. How? Disruptive noise, voice, and echo get removed in real time to increase meeting productivity and participant engagement.
Frequently Asked Questions
You will receive the following in your computer’s Download folder: Complete Video/Audio (MP4 file), Audio Only (M4A file), and Transcripts (M3U playlist file). Pros of Recording Locally: Cons of Recording Locally: Pros of Recording on the Cloud: Cons of Recording on the Cloud: