Did you know Microsoft Teams allows you to record meetings, making it easier to revisit discussions, share insights, and collaborate more effectively? While this feature is incredibly convenient, many users find themselves asking a common question: “Where can I find my recordings?”
This confusion stems from an update in 2021 when Microsoft changed the default recording storage locations to integrate more seamlessly with OneDrive and SharePoint. As a result, understanding where is Teams recording location – and how to manage them – has become a bit more complex.
How to Find Microsoft Teams Recording Location?
The answer to the question of finding a Microsoft teams recording location depends on the type of meeting. Microsoft Teams saves recordings in different locations based on whether the meeting happened in a channel or was a private or scheduled meeting. It can also be accessed through meeting chats or your Team’s calendar, making it easier to find when you know where to look.
Here, we’ll break down where Microsoft Teams stores recordings for different types of meetings and how you can quickly locate them.
For Channel Meetings
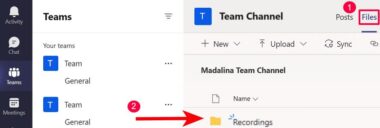
When a meeting happens in a Teams channel, the recording is automatically saved in the Files tab of that channel. Microsoft Teams stores these recordings in a folder called Recordings, making it easy for everyone in the channel to find and access them.

To locate your recording:
- Open the Teams channel where the meeting was hosted.
- Go to the Files tab at the top of the channel.
- Look for the Recordings folder, where all the meeting recordings are stored.
The best part? Everyone in the channel has access to these recordings automatically, so there’s no need to share permissions separately. However, it’s a good idea to keep the folder organized by renaming files or creating subfolders if your team has many recordings.
For Non-Channel Meetings (Private or Scheduled Meetings)
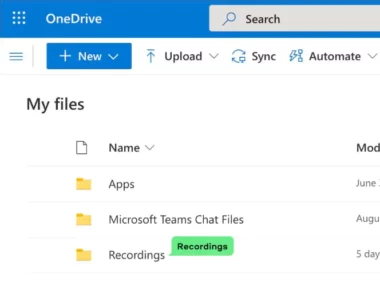
Recordings for private or scheduled meetings are saved in the OneDrive of the person who started the recording. Teams create a folder called Recordings in their OneDrive, where these files are stored.

Here’s how to find it:
- If you started the recording, log in to your OneDrive.
- Look for the folder named Recordings. Your file will be there.
- If you didn’t start the recording, the organizer will share a link to access the recording.
OneDrive makes it easy to manage and share recordings. If you need to share the file, you can send a link directly from OneDrive and even set permissions, like who can view or download the recording.
Using Meeting Chat or Calendar
An easy way to find your Team recordings is through the meeting chat or the Teams calendar. Once the meeting ends, Teams automatically posts a link to the recording in the chat, making it easy for participants to access.
Here’s how:
- Open the meeting chat in Teams after the meeting.
- Look for the message that says, “Recording is available,” and click the link.
- Alternatively, open the Teams calendar, find the meeting event, and check for the recording link there.
This method is perfect if you didn’t start the recording yourself. Just keep in mind that you can only access the recording if the person who started it has shared it with the participants. Always check the chat or calendar after a meeting to ensure you don’t miss any important recordings!
How to Manage Microsoft Teams Recording Location?
Managing your Microsoft Teams recording location is essential for staying organized and ensuring your recordings are easily accessible when you need them. While Microsoft Teams doesn’t allow you to change the default storage location directly, there are several ways to manage permissions and change the teams recording location effectively.
Changing the Recording Storage Location in Microsoft Teams
While Microsoft Teams doesn’t let you change the default storage location directly, you can still manage and move your recordings to better organize or share them. Depending on whether the recording is from a channel meeting or a private meeting, the steps vary slightly.
For Channel Recordings
Channel meeting recordings are automatically stored in the Files tab of the associated Teams channel. Behind the scenes, these files are stored in the channel’s connected SharePoint library. If you want to organize or move these recordings, you can easily do so within SharePoint.

Here’s how to manage them:
- Open the Teams channel where the recording was saved.
- Go to the Files tab at the top.
- Click the … (More options) next to the recording and select Open in SharePoint.
- From SharePoint, you can:
- Move the recording to another folder in the same library.
- Relocate it to a completely different document library within SharePoint.
SharePoint gives you more flexibility to manage files, such as sharing them with external users, setting advanced permissions, or creating custom folders for the organization.
For Non-Channel Recordings
Recordings for private or scheduled meetings are stored in the OneDrive of the person who started the recording. By default, these recordings are placed in a folder named Recordings. If you need to organize them or share them elsewhere, OneDrive provides straightforward options to relocate files.

To move a recording in OneDrive:
- Open your OneDrive and navigate to the Recordings folder.
- Select the recording you want to move and click on the Move to option.
- Choose a destination folder within your OneDrive or create a new folder.
- If needed, you can also share the recording externally by generating a shareable link or granting specific access to others.
OneDrive’s flexibility allows you to set expiration dates for shared links, restrict editing permissions, and ensure your recordings are only accessible to the right audience.
Managing Permissions for Microsoft Teams Recordings
Controlling who can access your Microsoft Teams recordings is crucial for maintaining privacy and ensuring that only the right people have access. You can manage permissions differently depending on where the recordings are stored: SharePoint for channel meetings or OneDrive for private and scheduled meetings. Here’s how you can adjust permissions on both platforms:
For SharePoint (Channel Recordings)
Channel meeting recordings are stored in SharePoint, where permissions are typically inherited from the Teams channel. If you need to adjust access to a specific recording, you can do so directly in SharePoint.
Steps to manage permissions:
- Navigate to the SharePoint site linked to the Teams channel.
- Locate the recording file in the Recordings folder (found under the channel’s Files tab).
- Select the recording and click on Manage Access (usually found in the file options or right-click menu).
- Adjust permissions as needed:
- Add or remove specific users or groups.
- Change access levels (e.g., view-only or edit access).
This flexibility allows you to ensure that sensitive recordings are only available to those who need them.
For OneDrive (Non-Channel Recordings)
Recordings from private or scheduled meetings are saved in the organizer’s OneDrive. OneDrive makes it easy to share recordings securely with specific individuals or groups and control how they interact with the file.
Steps to manage permissions in OneDrive:
- Open your OneDrive and navigate to the Recordings folder.
- Select the recording you want to manage.
- Click on the Share option to:
- Add individuals or groups by email.
- Set permissions (e.g., allow editing or view-only access).
- Customize settings like setting expiration dates for shared links or preventing downloads.
You can also remove access for specific users or disable shared links if the recording is no longer needed.
Best Practices for Managing Teams Recordings
Effectively managing Microsoft Teams recordings ensures they remain secure, organized, and accessible when needed. By following these best practices, you can maximize the benefits of Teams recordings while avoiding common pitfalls. Let’s dive deeper into each recommendation:
1. Set Permissions Appropriately
Sensitive recordings may contain private discussions, proprietary information, or confidential data, so it’s vital to control who has access to them.
- Restrict Access: For recordings with sensitive content, ensure only the relevant individuals or groups can view or download the file. Use SharePoint or OneDrive to set permissions based on roles, such as team members or external collaborators.
- Regular Permission Reviews: Over time, team structures may change, or projects may end. Regularly review permissions to remove access for users who no longer need it. This prevents accidental leaks or unauthorized access.
- Utilize Advanced Options: Leverage features like setting expiration dates for shared links, enabling password-protected links, or restricting download options for extra security.
By staying proactive with permissions, you safeguard your recordings while keeping them accessible to the right people.
2. Organize Recordings
A well-structured folder system can save time and reduce frustration when searching for specific recordings.
- Use Folder Hierarchies: Create dedicated folders for different projects, teams, or meeting types in SharePoint or OneDrive. For example:
- Project A > Recordings
- Marketing Team > Weekly Meetings > Recordings
- Consistent Naming Conventions: Use descriptive and consistent file names to make recordings easier to locate. For example, “Project_A_Status_Update_2025-01-10” is more helpful than “Meeting_Recording1.”
- Archive Older Recordings: Periodically move older recordings to an archive folder to keep your main workspace clean and focused on current work.
Good organization prevents clutter and ensures quick access when you need to revisit a recording.
3. Download Important Recordings
While OneDrive and SharePoint are reliable for storing recordings, downloading and backing up critical files adds an extra layer of security.
- Why Download?: Cloud storage is convenient, but it’s essential to have local backups for essential recordings, especially those tied to legal, financial, or historical matters.
- Where to Store Backups: Save backups on external hard drives, secure local servers, or company archives. For extra safety, consider uploading copies to a secondary cloud storage platform.
- Set Backup Routines: Make it a habit to download and back up critical recordings immediately after meetings to prevent data loss or accidental deletion.
Having a backup ensures your essential recordings are protected, even if cloud access becomes an issue.
4. Monitor Storage Limits
Both OneDrive and SharePoint have storage limits, and hitting those limits can prevent future recordings from being saved.
- Check Storage Regularly: Periodically review how much storage space you’re using in OneDrive and SharePoint. You can find this information in the settings or admin panels.
- Delete Unnecessary Recordings: Clear out old or irrelevant recordings that are no longer needed. Focus on keeping only files that are valuable for reference, documentation, or compliance.
- Upgrade Storage Plans: If your organization frequently uses recordings, consider upgrading your storage plan to accommodate the increased usage without interruptions.
5. Integrate with Krisp for Better Recording Management
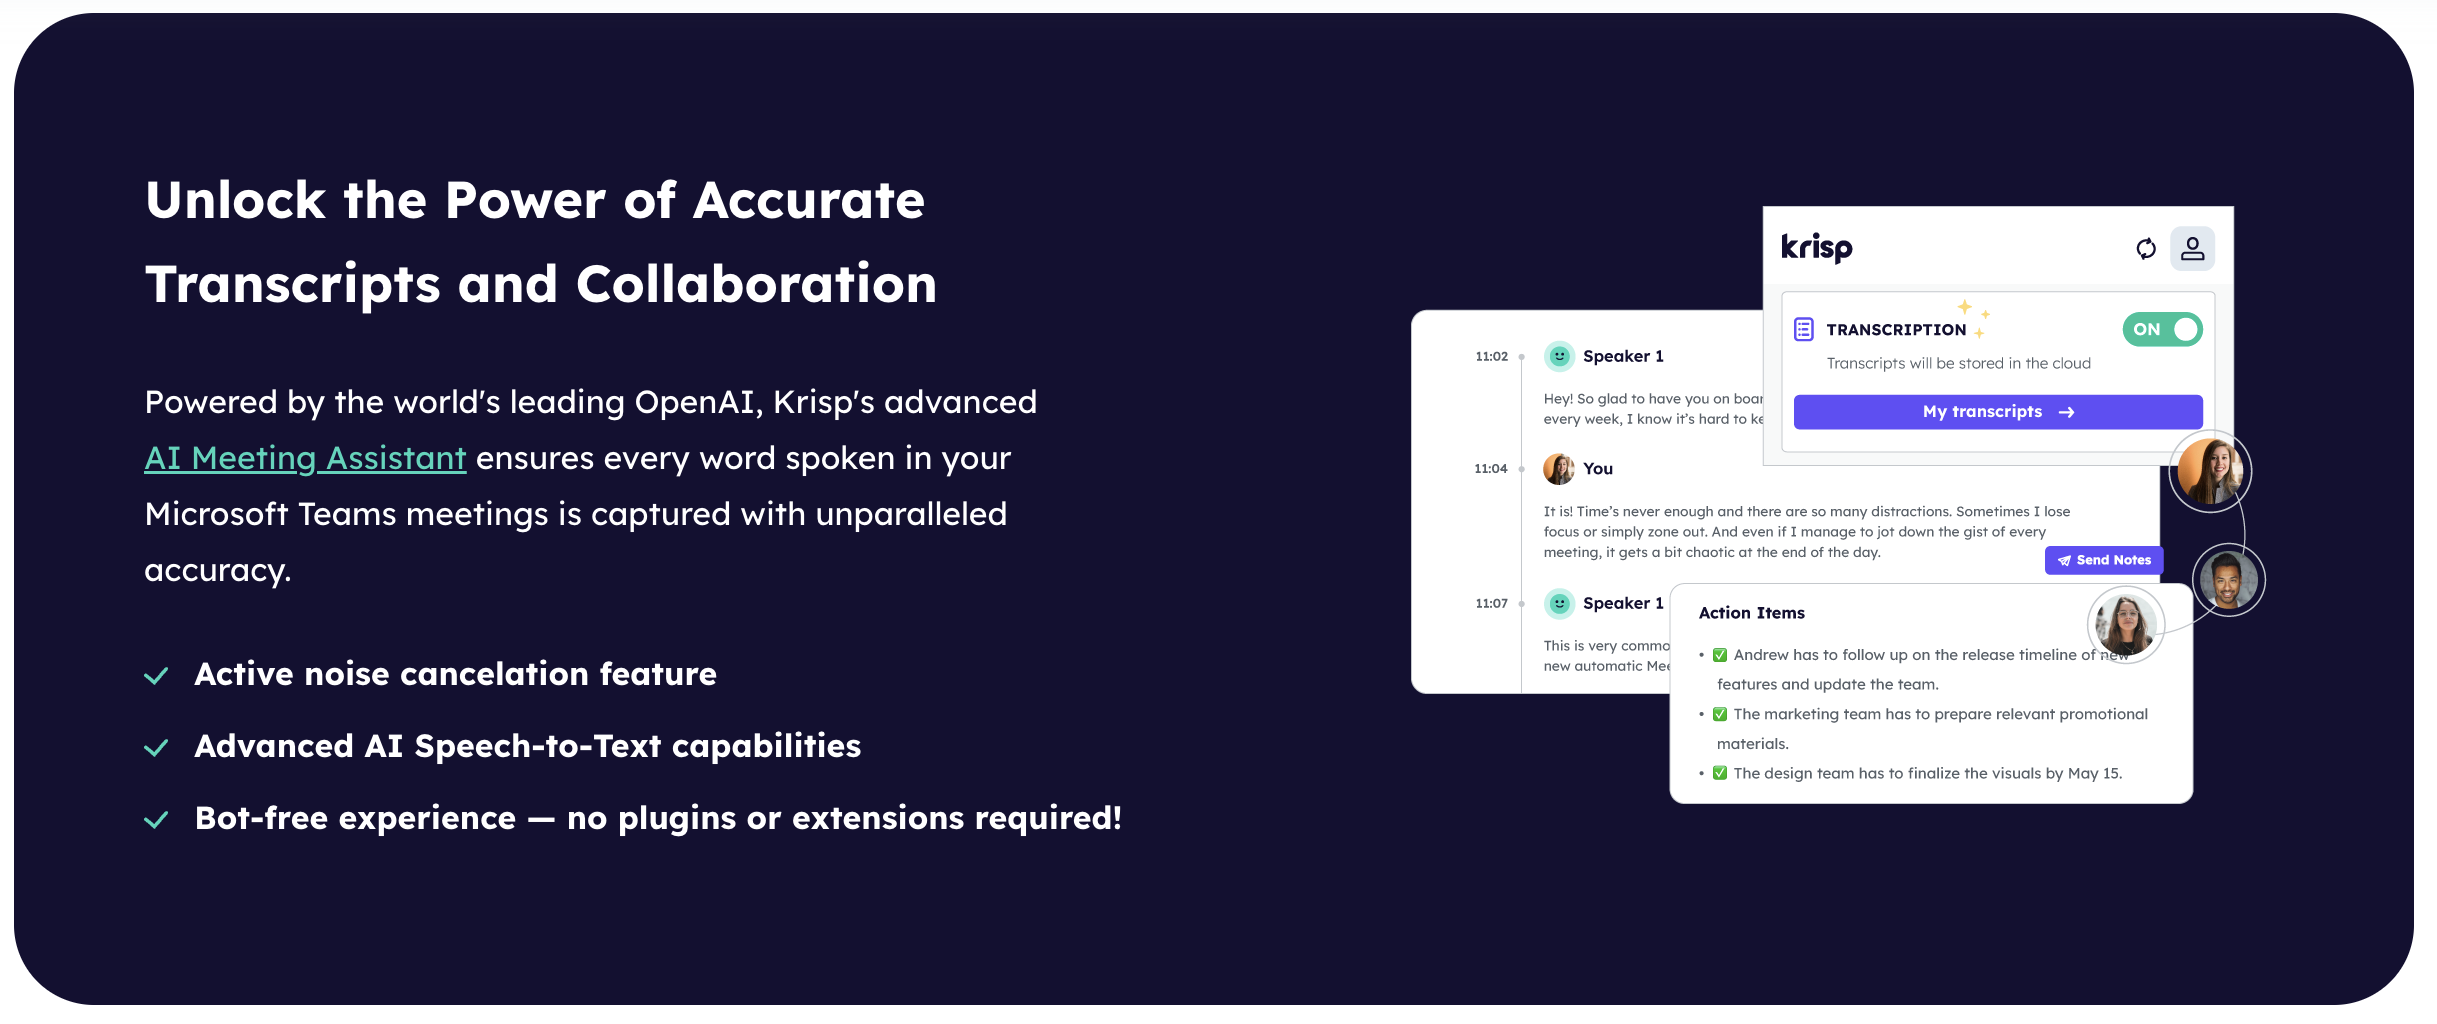
Integrating Microsoft Teams with Krisp can elevate how you manage your recordings by improving the quality of your audio and providing additional tools to make meetings more efficient.
- Improve Audio Quality: Krisp’s AI-powered noise cancellation ensures your meeting recordings are crystal clear, removing background noise and distractions. This makes recordings easier to understand and more professional for sharing with others.
- Utilize Meeting Summaries: Krisp’s AI note taker for Teams automatically captures and summarizes key points from Teams meetings, helping you quickly find and reference important moments in your recordings.
- Enhance Productivity: Combine Krisp with Teams to streamline your workflow. While Teams handles storage and sharing, Krisp provides tools for efficient meeting follow-ups, action items, and accurate meeting transcripts.
By integrating Krisp for your MS Teams recordings, you not only manage recordings more effectively but also ensure the content is polished, actionable, and easy to review. This combination is ideal for teams looking to maximize productivity and collaboration.
FAQ
• For OneDrive (Non-Channel Recordings): Use the Share option in OneDrive to control access, set expiration dates for links, or restrict downloads.


