Have you ever needed to record your Mac screen—maybe to create a tutorial, save a memorable moment from a video, or capture an important meeting? Knowing how to screen record on Mac can make tasks like these much easier, whether you’re working on a project or sharing helpful tips with someone.
With so many tools and methods available, figuring out the best option for your needs can be a little overwhelming. Should you stick to the built-in features, or explore third-party apps for advanced options?
In this guide, we’ll walk you through the most efficient and user-friendly ways to screen record on your Mac, helping you choose the right approach for every situation.
How To Screen Record on Mac with Built-In Tools
When it comes to making things simple and easy, Apple nails it every time. Your Mac comes with two handy tools—the Screenshot Toolbar and QuickTime Player—that let you record your screen without breaking a sweat. Whether you’re sharing a tutorial, saving a memorable video call, or showing off your skills, these built-in options have got you covered. Let’s break down how to use them.
With the Screenshot Toolbar
The Screenshot Toolbar is the easiest way to record your screen. Here’s how to use it:
1. Access the Toolbar: Press Command + Shift + 5 on your keyboard. This brings up the Screenshot Toolbar at the bottom of your screen.
2. Choose Your Recording Type:
-
- Select Record Entire Screen if you want to capture everything happening on your display.
- Choose Record Selected Portion to record a specific area. Drag the box to adjust the size of your recording.

3. Start Recording: Once you’ve selected your recording area, click the Record button.
4. Stop Recording: When you’re done, click the stop icon in the menu bar at the top of the screen or press Command + Control + Esc.
Your recording will automatically be saved to your desktop and ready to share or edit.
|
Pros
|
Cons
|
| Customizable Options: Record the full screen or a selected portion. |
Basic editing features: no ability to automatically note-take or summarize the recorded context when necessary. |
| Built-In Convenience: Comes pre-installed with macOS. |
Limited audio recording options (external microphone only). |
| Save or Share Instantly: Quickly save to a chosen location or share directly. |
Low audio quality: you can’t record meetings with great audio quality since it cannot filter out inbound noise or background noise. |
How to Screen Record on Mac Using QuickTime Player
QuickTime Player isn’t just for playing videos—it’s also a fantastic tool for screen recording. Here’s how you can use it:
1. Open QuickTime Player: You’ll find it in your Applications folder or by searching with Spotlight (Command + Space).
2. Start a New Recording:
-
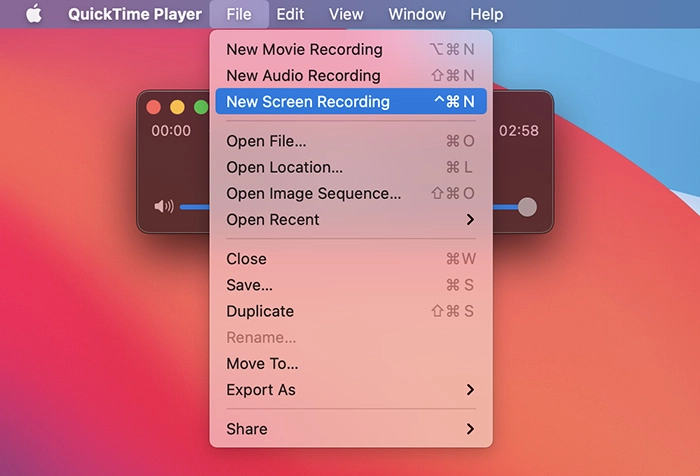
- Click File in the top menu bar and select New Screen Recording.
- This opens a small recording toolbar.

4. Adjust Your Settings:
-
- Click the down arrow next to the record button to choose your microphone if you want to include audio.
- Decide whether to record the full screen or drag to select a portion of your screen.
5. Begin Recording: Click the red record button. If prompted, click anywhere on the screen for a full-screen recording, or drag to record a specific area.
6. Finish Up: To stop recording, click the stop icon in the menu bar. Your recording will open in QuickTime Player, where you can preview, trim, and save it.
Now, let’s look at the pros and cons of recording a screen on Mac with the Screenshot Toolbar:
|
Pros
|
Cons
|
| Free and Pre-installed: No need to install additional software. |
No Built-in Annotation Tools: Lacks options for adding text, highlights, or shapes during recording. |
| Simple Interface: Easy to use with minimal setup required. |
Limited Recording Customization: Offers basic settings with limited control over video quality. |
| Ability to Record Audio: Can record from the internal or external microphone. |
System Audio Limitations: Direct recording of system audio requires third-party apps or additional configuration. |
How to Screen Record on Mac Using QuickTime Player
While built-in tools like the Screenshot Toolbar and QuickTime Player get the job done, sometimes you need a little extra. Third-party software steps in when you’re looking for advanced features, better audio control, or tools to simplify your workflow.
Here’s the perfect option to take your screen recordings to the next level.
Screen Record Video and Audio on Mac using Krisp
If you’re tired of juggling multiple apps during meetings, Krisp’s Screen Recording feature is here to make things simpler. Whether you’re a Free or Pro user, you can easily record your meetings directly from the Krisp app—no bots, no extra effort.
Let’s explore how you can use this feature to capture your meetings easily and revisit key points whenever you need to.
Step 1: Start Your Meeting
Once your meeting begins, open the Krisp app or Widget and click the Screen Recording button. Krisp will automatically cancel any background noise with its AI noise cancellation tool, so your audio stays clear.

Step 2: Select Your Recording Area
Choose between:
- Recording your entire desktop, or
- Focusing on a specific application window.
If you’re using macOS, you’ll need to permit Krisp to record your screen and audio the first time you use the feature.
Granting Screen Recording Permission on macOS
MacOS takes privacy seriously, so you will be prompted to enable Krisp’s screen recording access. Don’t worry—it’s quick and straightforward:
- When prompted, click Open System Settings.
- Toggle on the Screen Recording permission for Krisp.
Once done, you’re all set to record. For Windows users, no additional setup is needed!
Step 3: Record and Manage Your Meeting
Once permissions are sorted, hit Start Recording. Krisp will notify you in the app and widget that your recording is active.
Need a break? Use the Pause button to pause and resume recording anytime without interrupting the flow of your meeting.
Step 4: Access Your Recordings
After the meeting ends, your recordings will automatically appear on the Meetings page of your Krisp web account.
- Processing takes a few moments, so just reload the page to view your video.
- From there, you can review, download, or share your recordings.
What Makes Krisp’s Screen Recording Special?
With Krisp, you can:
- Record the entire screen or specific application windows: Perfect for detailed presentations or multitasking during meetings.
- Capture high-quality video and audio: Thanks to Krisp’s renowned noise cancellation, even the busiest environments won’t disrupt your recordings.
- Access and review recordings in one place: All your meeting recordings are available on your Krisp web account’s Meetings page.
How to Transcribe Your Screen Recordings
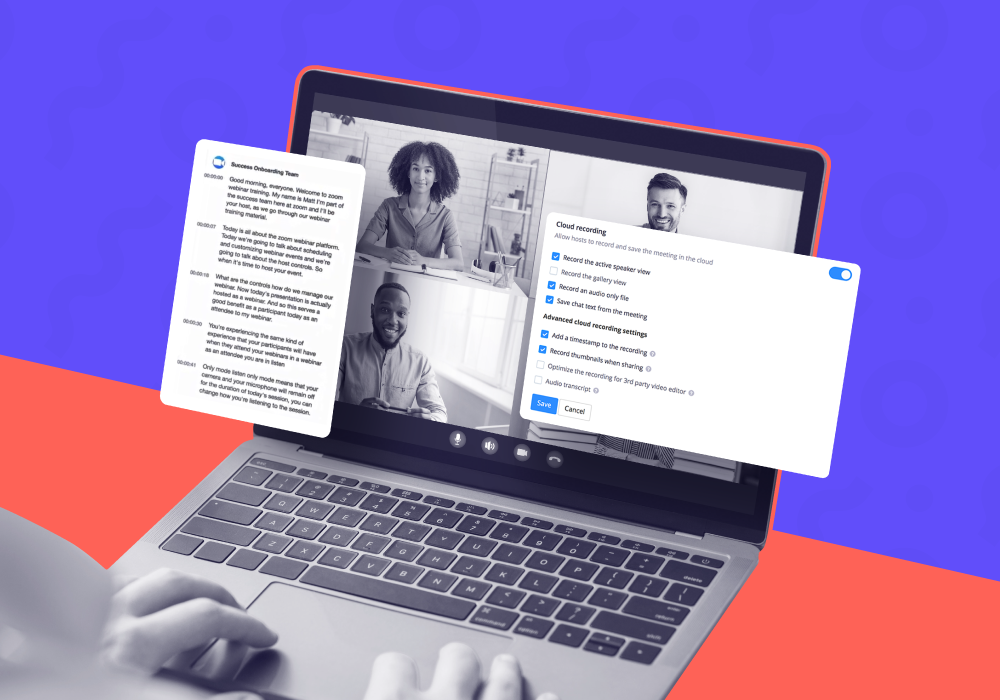
Ever wished for an easy way to turn your screen recordings into clear, shareable transcripts? With Krisp’s AI Meeting Assistant, you can make it happen. This feature lets you generate accurate transcriptions and detailed meeting notes, saving you time and helping you stay organized.
Why Use Krisp’s Transcription Feature?
Krisp’s meeting transcription tool works easily with your screen recordings, creating a clear, word-for-word transcript of everything discussed. Whether you need detailed notes, written content from your recordings, or a way to make your meetings accessible to your teammates, Krisp has you covered.
Here’s why it stands out:
- Accurate and Private: Krisp’s technology ensures reliable transcriptions while keeping your data secure. Everything happens directly on your device for maximum privacy.
- Real-Time and Convenient: It even works during live meetings, complete with punctuation, noise reduction, and a handy note-taking tool.
- More Than Just Transcriptions: Krisp can also summarize the entire meeting or interview and generate action items, making follow-up tasks a breeze.
How to Use Krisp’s Meeting Transcription Feature
Using Krisp’s transcription feature is straightforward, whether you’re setting it up before or during your meeting.
1. Set Up Krisp
-
- Open your communication app and select Krisp Microphone and Krisp Speaker as your audio devices.
- This ensures that what you say and what you hear will be captured for a complete meeting transcript.
2. Start Transcribing
-
- Once everything is set, activate the transcription feature through the Krisp app.
- You can enable it at the beginning of the meeting or turn it on while the meeting is in progress.
3. Pause or Resume Anytime
-
- Need a moment to stop the transcription? No problem. Just hit pause, and you can pick up where you left off when you’re ready.
Accessing and Editing Your Transcripts
After your meeting or recording session, all your transcripts are neatly stored on the My Meetings page in your Krisp account dashboard. From here, you can:
- Review: Go through the transcript to ensure everything is accurate.
- Edit: Add notes, highlight important points, or tweak the text as needed.
- Download: Save your transcript for offline use or archive it for future reference.
- Share: Easily distribute your transcripts with teammates for improved collaboration.
Krisp AI Note taker even allows you to summarize your transcripts and automatically generate action items, giving you a quick overview of what was discussed and the next steps.
Why This Matters
By integrating transcription into your screen recording workflow, you can:
- Stay Organized: Have all your meeting details in one place.
- Enhance Collaboration: Share polished, easy-to-read notes with your team.
- Save Time: Skip the manual note-taking and let Krisp do the work for you.
Comparing Built-In Tools vs. Third-Party Software For Screen Recording
| Feature |
Built-In Tools (Screenshot Toolbar, QuickTime) |
Third-Party Software (Krisp) |
| Ease of Use |
Simple and easy for basic recording tasks. |
User-friendly, with advanced options for flexibility. |
| Audio Quality |
Limited; may capture background noise. |
Superior, with noise cancellation (e.g., Krisp). |
| Editing Features |
Minimal editing options (e.g., trimming only). |
Advanced editing tools for cutting, enhancing, and organizing recordings. |
| Custom Recording Area |
Supports full screen or a selected portion. |
Full control over recording area, resolution, and settings. |
| Resolution Options |
Standard resolution (up to 1080p). |
High-quality resolution options, including 4K. |
| Performance |
Light on system resources but basic features. |
Can be heavier but offers advanced capabilities. |
| Additional Features |
None beyond basic recording and trimming. |
Includes noise cancellation, transcriptions, summaries, and more. |
| Best For |
Quick, basic recordings. |
Professional, high-quality recordings with additional tools. |
Best Practices for High-Quality Screen Recording
Creating high-quality screen recordings doesn’t have to be complicated. With a few simple tips, you can make sure your videos look clear, sound great, and keep your viewers engaged. Here are some best practices to help you nail it every time:
1. Clean Up Your Screen
Before you hit record, tidy up your desktop. Close any unnecessary apps, hide those extra browser tabs, and make sure your background is distraction-free. A cluttered screen can take the focus away from what you’re trying to show, and you want your audience to stay engaged with your content—not your notifications.
2. Use the Right Recording Area
Think about what you want your viewers to see. If you’re showing an app or a specific section, record only that part of the screen. Most tools, like the Screenshot Toolbar or QuickTime, let you choose between recording the entire screen or just a selected portion. Keeping things focused makes your video cleaner and easier to follow.
3. Adjust Your Settings for Quality
Take a minute to tweak your recording settings. Go for a resolution of at least 1080p so your video is sharp and clear. If you’re using third-party tools, check for options like higher frame rates (60 fps) for smoother motion—this is especially helpful if you’re recording games or fast-moving content.
4. Keep It Simple and Smooth
When recording, move your mouse and windows smoothly. Jerky movements or fast switching between tabs can make your video hard to watch. If you’re highlighting something, slow down and give your viewers time to see what’s happening.
5. Plan Before You Record
Have a rough idea of what you’re going to say or do before you start recording. You don’t need a full script, but planning out your steps will keep you from fumbling or having to redo sections. If you’re explaining something complex, think about breaking it into smaller parts.
6. Do a Quick Test Run
Run a quick test before recording the whole thing. Make sure everything works—your microphone, the screen area, and the quality. It’s a simple step that can save you from realizing too late that something isn’t right.
Key Takeaways
Screen recording on a Mac is simpler than you might think, and the best method depends entirely on what you need. Are you after crystal-clear, high-quality recordings, or is standard quality good enough? Whether you go with built-in tools like the Screenshot Toolbar and QuickTime Player or explore third-party options like Krisp, you can easily capture screen recordings—with or without audio.
Krisp takes things to the next level by combining noise-free audio with intelligent transcription tools. This not only boosts productivity but also ensures you never miss a single detail.
With Krisp, you can focus on creating great content while being confident that your audio will sound just as polished and professional as your visuals.
Frequently Asked Questions
How can I capture a screenshot on my Mac?
Press Shift + Command (⌘) + 3 to capture the entire screen or Shift + Command (⌘) + 4 to capture a selected portion.
What methods for screen recording on a MacBook Air with internal audio are available?
You can use QuickTime Player or third-party applications that support internal audio recording.
Do Mac screen recordings have sound?
By default, Mac screen recordings do not capture system audio. However, you can record external audio using a microphone or use software like Krisp to include internal audio.
Is There a Shortcut to Screen Record on Mac?
You can use a simple keyboard shortcut to start screen recording on a Mac. The default shortcut to screen record on Mac is Shift + Command (⌘) + 5, which opens the Screenshot Toolbar. From there, you can select your recording preferences and begin capturing your screen.