Zoom meetings enable remote communication to facilitate collaboration across different locations. As a result, they make your virtual interactions cost-effective, accessible, and effortless. So, learn how to set up a Zoom meeting.
Zoom’s features, including ease of use, screen sharing, recording, virtual backgrounds, and breakout rooms, enhance interactivity and engagement.
By integrating Zoom with an AI-powered meeting assistant, you can further boost the productivity, efficiency, and effectiveness of your virtual meetings. And smooth and professional virtual meetings are critical for businesses, educational institutions, and personal connections.
Have you ever found yourself tangled in the web of virtual meeting setups? Whether you’re a seasoned pro knowing how to set up a Zoom meeting and invite others or just dipping your toes into the digital waters, there are secrets to unlock.
As a popular video conferencing tool, Zoom lets you schedule a meeting on the website, desktop, or mobile app. After setting up your Zoom meeting, add the time, date, topic, and customize the privacy settings. And once scheduled, share the meeting invite link.
This article is your ticket to smooth sailing through the world of Zoom online gatherings, allowing you to unveil the specifics and nuances you need.
Understanding Video Conferencing Solution Zoom
The company has developed its cloud-based video conferencing platform that allows users to communicate through face-to-face video experiences in a single meeting across devices and locations worldwide.
Specifically, Zoom connects people through frictionless video, voice, chat, and content sharing. Moreover, Zoom’s easy-to-use interface offers a plethora of features, including Zoom cloud recording, real-time translation, and meeting summaries.
You can use Zoom meetings to interact with your business partners, for casual interactions with friends and family, or large-scale meetings such as conferences and professional seminars.
Zoom Key Features
Zoom comes with an array of features designed to streamline communication and enhance collaboration during business meetings, virtual events, webinars, online education sessions, virtual social gatherings, and professional networking.
Video Conferencing: Zoom’s high-definition video and audio let you communicate face-to-face so you can enjoy a sense of presence even in a remote Zoom meeting.
Screen Sharing: Zoom allows you to share presentations, documents, or applications in real time, facilitating collaboration and discussion among meeting participants.
Virtual Backgrounds: You can use various virtual backgrounds to add professionalism or creativity to your meetings.
Chat Functionality: Zoom’s instant messaging lets you communicate privately or publicly during meetings, facilitating real-time interaction.
Recording and Playback: You can record Zoom meetings locally or to the cloud for future reference or sharing. Thus, you can capture and access your valuable discussions whenever you’d like. Zoom Cloud Recording helps you avoid costly manual recording and storage management.
Polls and Q&A: Polls and Q&A sessions can engage meeting participants, solicit feedback, and foster engagement.
Whiteboarding: Zoom’s virtual whiteboarding tools enable you to collaboratively brainstorm ideas or illustrate concepts, enhancing creativity and clarity.
Integration: You can seamlessly integrate Zoom with tools like Google Calendar, Outlook, and Slack to streamline workflow and enhance productivity.
Security Features: Zoom offers robust encryption and password protection, ensuring the security and privacy of meetings and protecting sensitive information.
Breakout Rooms: Zoom lets you divide meeting participants into smaller groups through breakout rooms for more focused discussions or activities, promoting collaboration and idea sharing among teams.
How to Set Up a Zoom Meeting: Getting Started
Let’s go through a step-by-step guide on how you can open a Zoom account.
Step 1: Enter Your Email Address on the Zoom Website
Visiting the official Zoom, click the “Sign Up” button on the upper right side and enter your email address. Next, you’ll receive an email from Zoom.
Then, to create your Zoom account, enter your email address in the provided field. Importantly, ensure to use an active and accessible email address, as Zoom will send a verification email to this address.
Alternatively, you can sign up for Zoom using your Google or Facebook account, a process some people find much smoother.
Step 2: Verify Your Email
After receiving Zoom’s confirmation email, click “Activate Account.” If you can’t see the email in your inbox, check the spam folder.
Step 3: Complete Your Profile
After the email verification, you’ll be redirected to the Zoom website to complete your profile information. There, you’ll submit your name and a strong password. Then, click on the “Continue” button to set up your Zoom account preferences, such as your time zone and language.
Step 4: Invite Colleagues or Skip for Now
After setting up your account, Zoom may prompt you to invite your colleagues or friends. Specifically, you can invite them via their email addresses or skip the step by clicking “Skip for Now.” As a result, you’ll go straight to your Zoom dashboard.
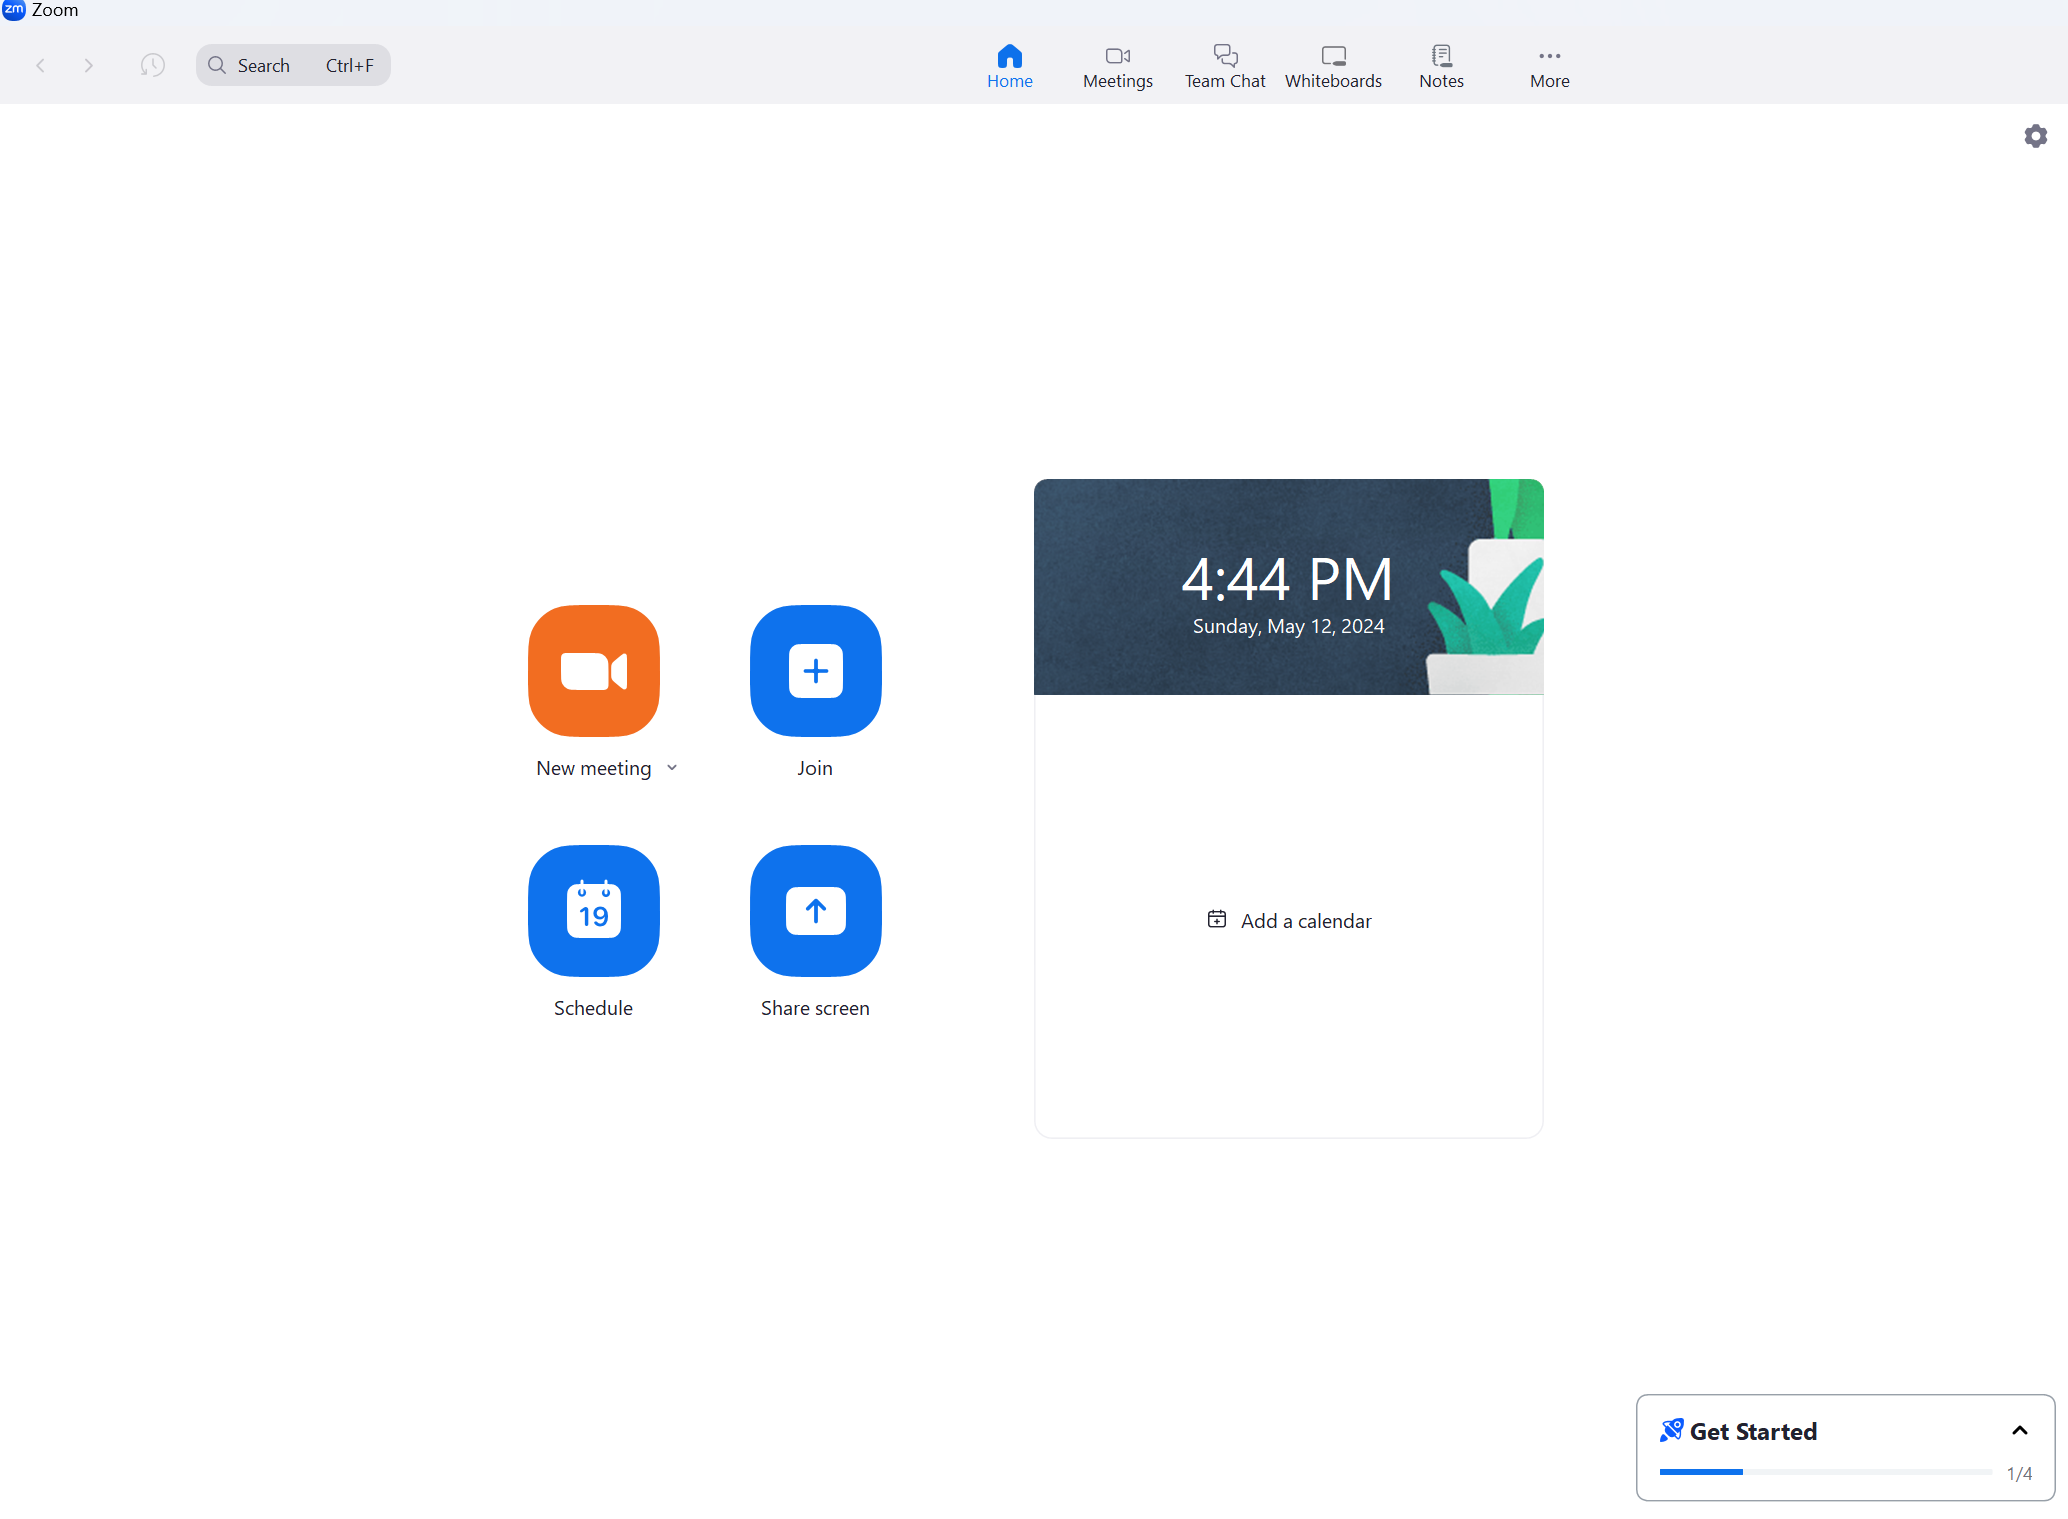
Step 5: Welcome to Your Zoom Dashboard
Now, you can access your Zoom account dashboard, a centralized hub, to host or join meetings. Here, administrators and account owners can access management and analytics tools to monitor and control their Zoom usage.
Moreover, the Zoom dashboard provides insights into meeting attendance, participant engagement, and overall account activity.
Now that you know how to create an account to start a meeting on Zoom, let’s see how you can set up a meeting on Zoom.
How to Set Up a Free Zoom Meeting
You’ve taken your first step toward figuring out how to set up a Zoom meeting by opening your Zoom account. And the guide below will help you learn how to set up a Zoom meeting and invite others.
Step 1: Log In to Your Zoom Account to Schedule a New Meeting
Once you’ve signed in to your account, schedule your first meeting. You can do this through the Zoom Web Portal, Client, extension, or plugin.
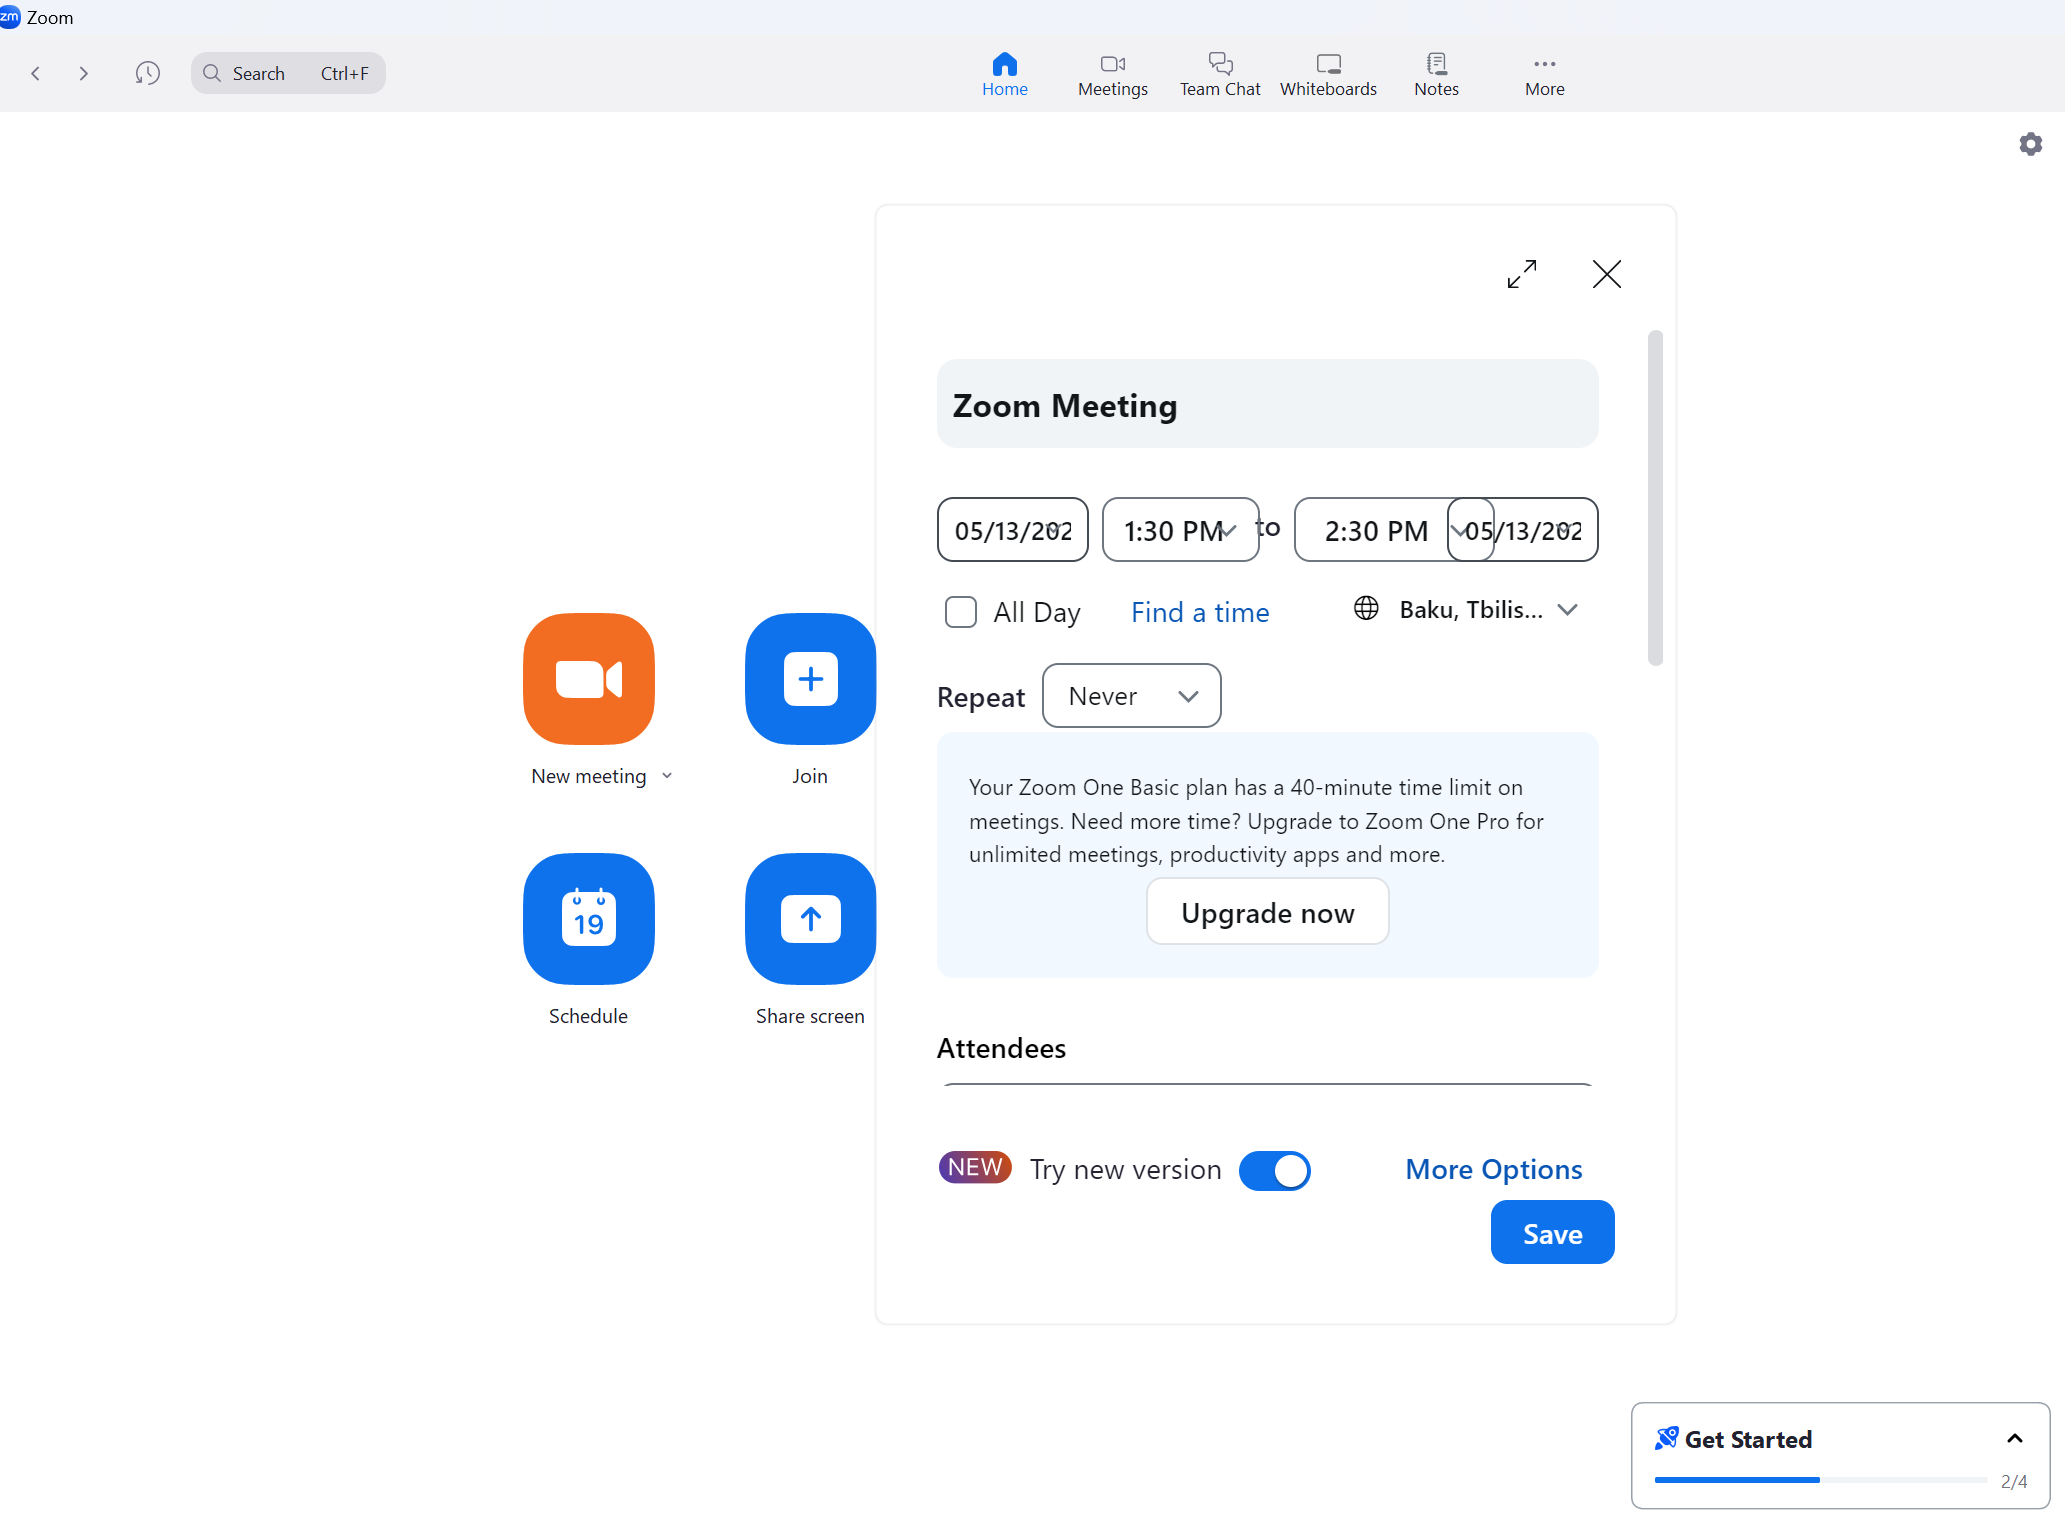
Click Meetings and Schedule a Meeting.
Choose the meeting date, time, and duration.
Select your preferred settings. For example, you can customize your meeting by enabling video, audio, and screen sharing.
Click Save.
After scheduling a meeting on Zoom, you’ll get a unique meeting link and ID. And how to set up a recurring Zoom meeting? Follow the same steps and add it as recurring.
Step 2: Start a Test Meeting
Join a test Zoom meeting to test your microphone and speakers before joining a Zoom meeting. How? Visit zoom.us/test and click “Join.”
Step 3: Invite Participants
Are you wondering, “How do I host a Zoom meeting and invite?” Well, once you’ve received your unique meeting link and ID, you can share it with others. Alternatively, you can click “Copy Invitation” and send the details to others. And you can also click “Invite” to send email invitations via Zoom.
Step 5: Choose Your Meeting Options
Before the meeting starts, choose the necessary options to enhance your virtual meeting experience. For instance, you can enable Waiting Rooms or turn on or off the ability for participants to join before the host.
The Zoom Waiting Room feature allows meeting hosts to control participants’ participation in a meeting. Specifically, meeting hosts can place participants attempting to join the meeting in a virtual waiting area until they admit them individually or all participants at once.
Step 6: Start Your Zoom Meeting
When the scheduled time arrives, open the Zoom app and click “Start” next to your scheduled meeting. Participants can join the meeting using the unique link or the meeting ID you provided.
Ensure you have your meeting transcription set in case you wish to have a written record of the conversations. Specifically, you can use an AI-powered meeting assistant like Krisp to automatically record, transcribe, and summarize online meetings with almost 100% accuracy.
Step 7: Manage Your Zoom Meeting
As a meeting host, you can use advanced options to manage the session effectively. And depending on your account, Advanced Options can allow you to mute participants, let them join the meeting at any time, share your screen, automatically record the meeting on the local computer, and manage breakout rooms for smaller group discussions.
For Advanced Options:
Sign in to the Zoom desktop client, the app that resides on your local computer.
Click your profile picture.
Click “Settings.”
Click the “Video” tab.
Click “Advanced.”
Additionally, you can blur the background in Zoom and integrate it with other applications. As a result, you can enhance your virtual communication privacy and professionalism and enjoy a polished appearance on your virtual calls.
Sign in to your Zoom account.
Open the Zoom Settings to click on your profile picture.
Pick “Background & Filters” from the list that opens.
Choose the “Blur” option.
You can join the meeting without downloading Zoom on a desktop, but you’ll enjoy limited functionality when joining from your browser. After the meeting, click “End Meeting” to close the session for all participants.
How to Schedule a Meeting for Someone Else
What if you need to schedule a meeting for someone else as the host and don’t have to participate in the Zoom meeting? Zoom’s scheduling privilege allows you to:
To schedule meetings on your behalf, assign or delegate a user or users associated with your account.
Schedule a meeting on behalf of a user or users who have assigned you a scheduling privilege. Users with a webinar license can also schedule webinars for you.
For scheduling privilege:
Sign in to the Zoom web portal.
Click Settings in the navigation menu.
Click the Meeting tab.
Locate Schedule Privilege under Other.
Click Add next to Assign scheduling privilege.
Enter a username or email address under Users.
How to Set Up a Zoom Meeting in Google Calendar
So, how to set up a Zoom meeting in Google Calendar?
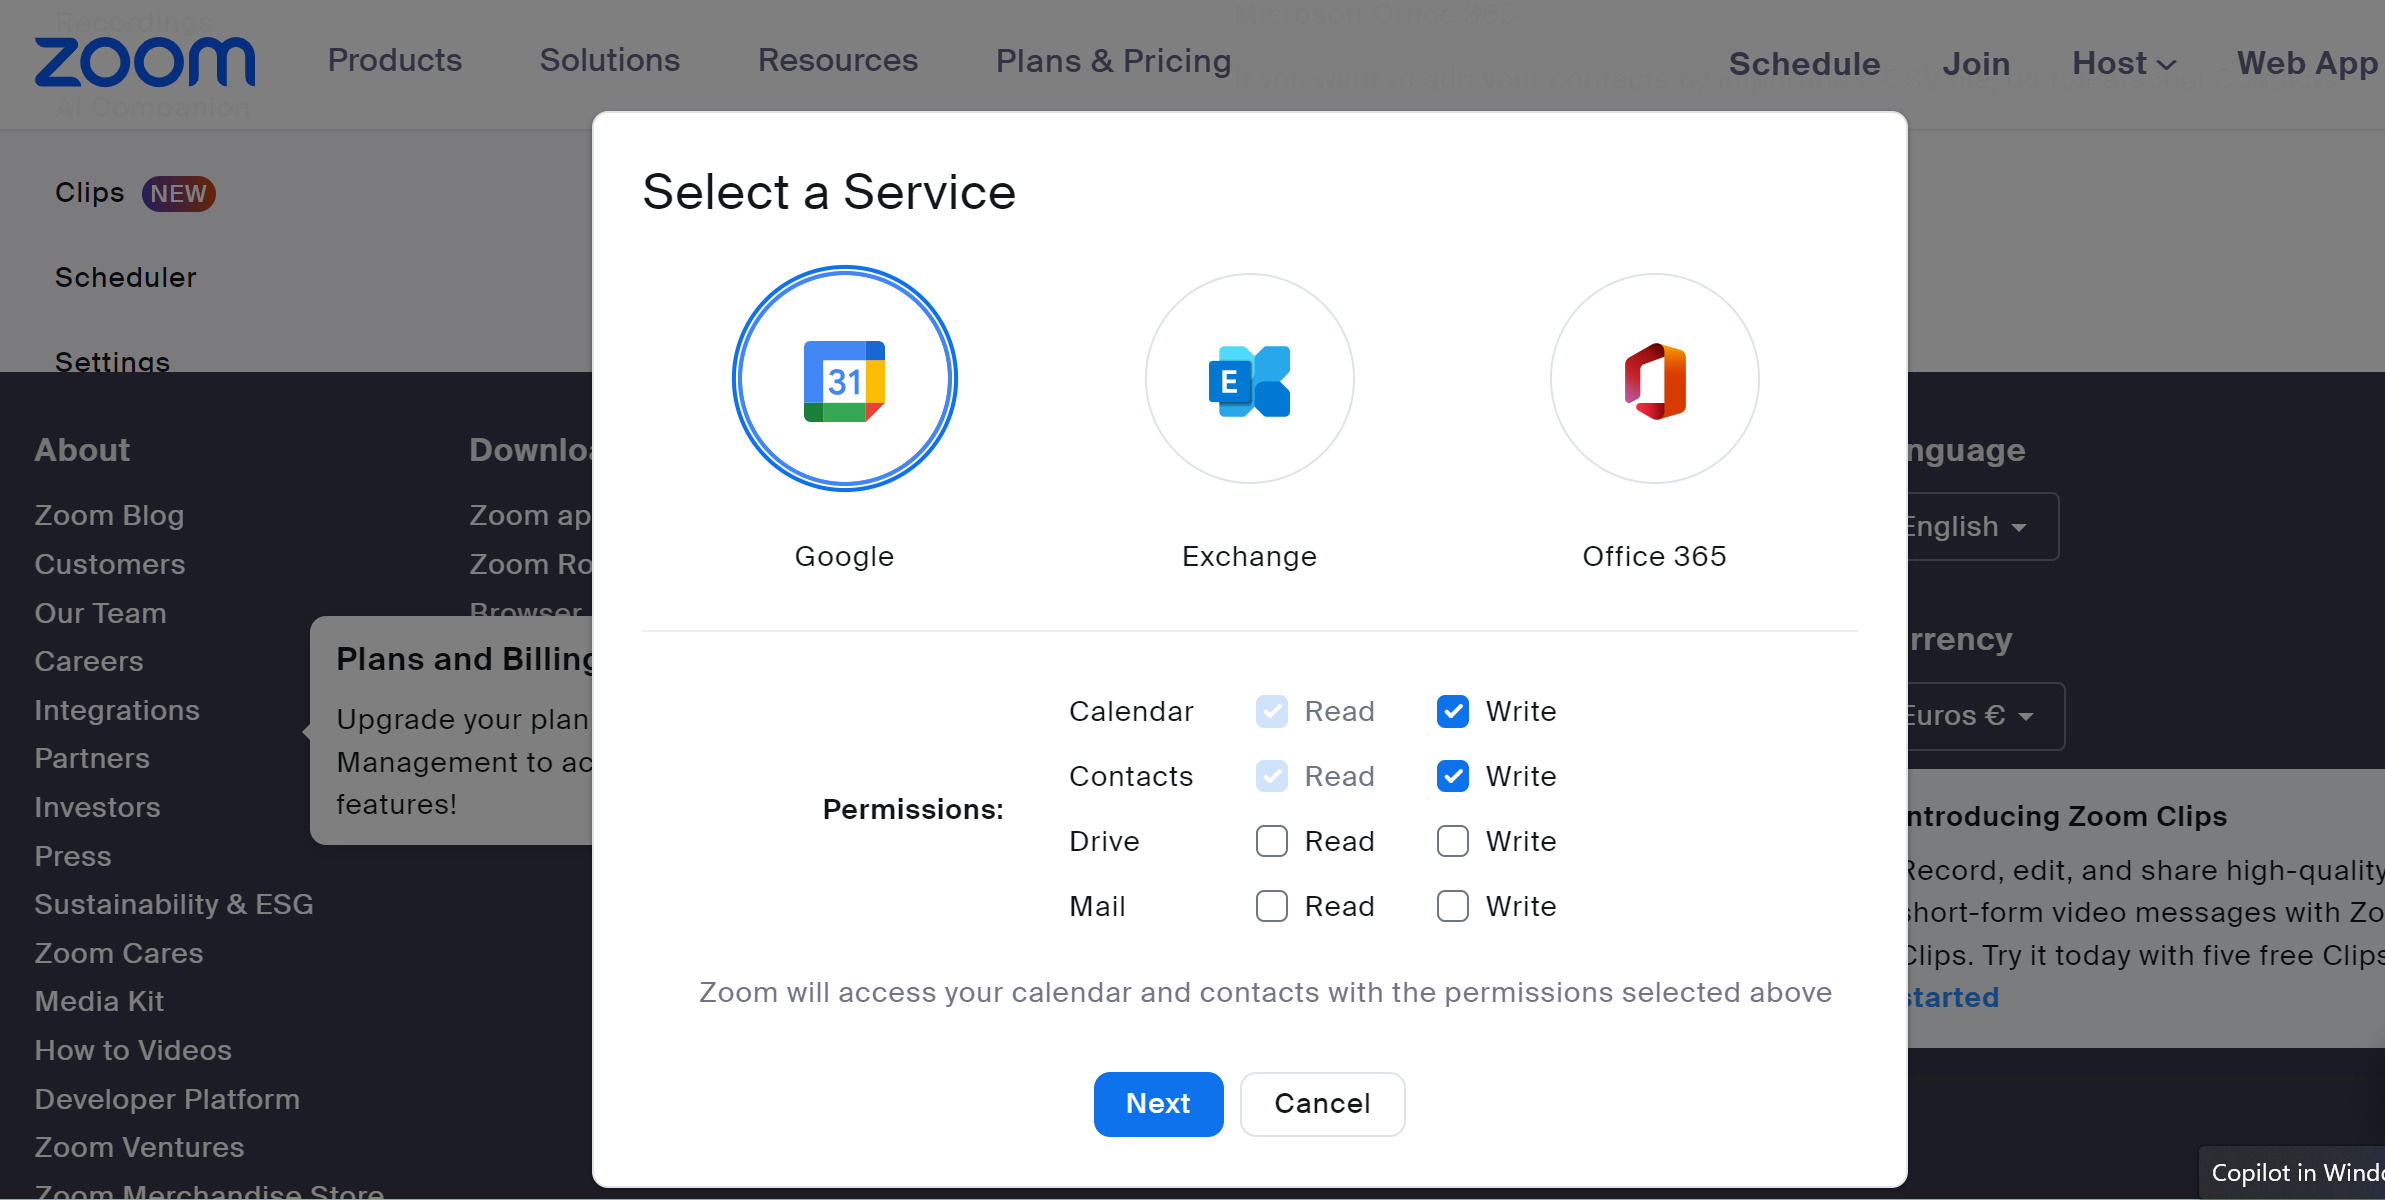
First, ensure the Zoom for G Suite add-on is installed. G Suite add-ons are customizable extensions of G Suite apps, including Gmail, Google Docs, and Google Sheets.
Click “Create” in Google Calendar for a new meeting.
Add the event details, such as the title, location, and guest list.
Next, click “Add conferencing,” followed by “Zoom Meeting.”
If prompted, sign into your Zoom account. The meeting link and dial-in information will automatically appear in the event details.
Adjust the specific meeting settings, invite participants by adding their emails, and click “Save.”
Then, send the invites.
Your Zoom meeting will be scheduled and visible in your Google Calendar.
Note that only changes to the topic, date, time, and time zone will synchronize with the meeting in the Zoom web portal and client or app. The other meeting details will only apply to the Google Calendar event.
How to Set Up a Zoom Meeting in Outlook
So, how can you set up a Zoom meeting in Outlook?
Install the Zoom Plugin or Add-in
First, install the Zoom plugin or add-in by downloading it from the Zoom website. You can get the Zoom plugin or add-in for the Outlook desktop app and the web.
For Outlook Desktop:
Go to the Zoom Download Center.
Download and install the “Zoom for Outlook” plugin.
For Outlook on the Web:
Go to the Microsoft AppSource.
Search for “Zoom for Outlook” and click “Get it now.”
Schedule a Meeting
After installing the add-in, schedule a Zoom meeting from Outlook.
For Outlook Desktop:
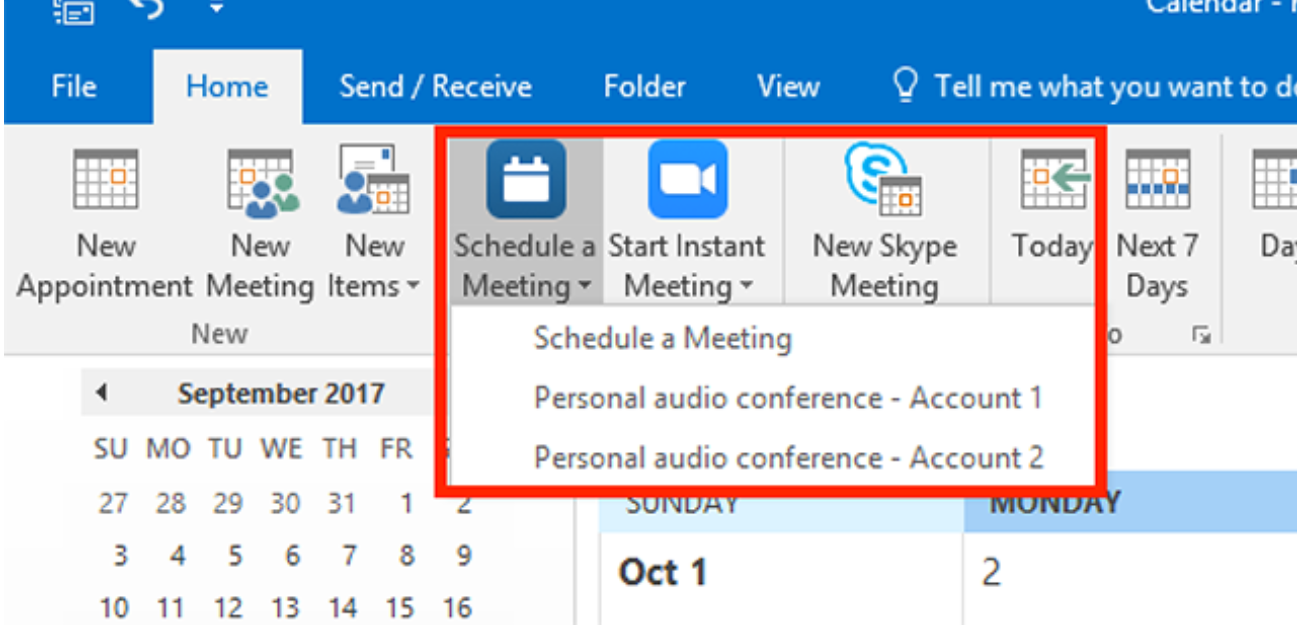
Open Outlook and go to your calendar.
Click on “New Meeting” or “Appointment.”
Find the “Zoom” button on the meeting tab and click “Add a Zoom Meeting.”
Sign in to your Zoom account.
For Outlook on the Web:
Go to your Outlook calendar.
Click on “New Event.”
Add the meeting details, including date, time, and attendees.
Click on the three dots, choose “Zoom,” and then “Add a Zoom Meeting.”
Configure Meeting Settings
When the Zoom meeting settings window opens:
Adjust the necessary settings. For example, enable a waiting room or password protection.
Set up video, audio, and permission options as needed.
Finalize and Send Invitations
After you’ve set up your meeting:
The Zoom meeting information, such as the meeting link and dial-in numbers, will automatically appear in the Outlook meeting invitation.
Review the meeting details and add additional notes or attachments.
Click “Send” to invite attendees.
Manage the Meeting
After you’ve scheduled your meeting, start managing it right from your Outlook calendar:
Open the calendar event and click on the Zoom link to start the meeting.
Next, open the event in Outlook and edit the meeting settings or reschedule the meeting.
Ensure you’re using the latest versions of Zoom and Outlook so they can be compatible and secure. Moreover, check your Zoom account settings for additional configurations that can be set by default for all meetings.
How to Join a Zoom Meeting
After finding the answer to “How to set up a Zoom meeting?” let’s discuss how you can join a Zoom meeting as a participant and not the host.
Step 1: Check the Meeting Invitation
You should have an invitation to join a Zoom meeting with the necessary details, such as the meeting link, ID, and password. Specifically, you may receive the invitation via email, calendar invite, or instant message.
Step 2: Open Zoom and Click on “Join a Meeting”
The Zoom desktop app or mobile app can help you join the meeting. Alternatively, you can use your web browser. Once Zoom opens, click the “Join a Meeting” button on the main page or the app’s navigation menu.
Step 3: Enter the Meeting ID or Personal Link Name
Enter the Meeting ID or Personal Link Name found in the meeting invitation you received. If there is a password, you’ll be prompted to enter it as well.
Step 4: Customize Your Display Name
You can customize your display name after entering the meeting ID and password. This name will be visible to other participants during the meeting. Importantly, make sure your display name is appropriate for the context of the meeting.
Step 5: Choose Audio Connection
Select your audio connection. Namely, you can join using computer audio, which utilizes your computer’s microphone and speakers, or join by phone if you prefer using a telephone to dial in.
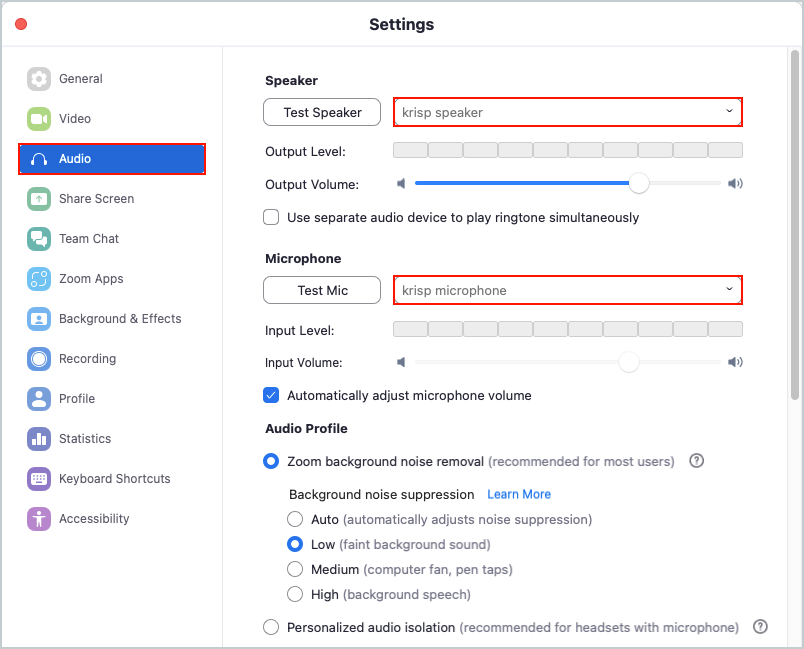
If you’re using an AI meeting note taker like Krisp, switch the microphone and speaker to Krisp. This way, Krisp seamlessly integrates with your Zoom account for smoother transcriptions and note-taking.
Step 6: Join the Meeting
Have you entered all the required information? If yes, click the “Join” button to be directed to the virtual meeting room to interact with other participants and the host. If the host has the waiting room activated, you’ll wait until the host manually allows you into the meeting.
You can exit the meeting by clicking “Leave Meeting,” located at the bottom right corner of the Zoom window and confirming your choice.
How to Take Your Zoom Meeting to the Next Level with Krisp
Knowing how to set up a Zoom meeting isn’t enough: AI meeting assistant Krisp can help you make your Zoom interactions more productive. How? Krisp offers:
Meeting Notes and Summary
Krisp generates comprehensive meeting summaries by condensing essential points, action items, and decisions into digestible notes. Thanks to a clear roadmap for follow-ups and next steps, you can enjoy enhanced collaboration, efficiency, and productivity.
Additionally, you can invite individuals who didn’t attend the meeting to contribute and add value to post-call notes through editing or commenting. Moreover, you can group related topics in meeting summaries and eliminate repetitions to boost productivity in your after-call actions.
Meeting Transcription
Krisp transcribes meetings and calls in real time to keep accurate records of your conversations. Importantly, Krisp effortlessly generates transcripts in Spanish, French, German, Portuguese, and 91 other languages. Once recorded, Krisp will process the rest by letting you know when your transcript is ready to view and collaborate.
Your AI-based meeting notes template helps you take notes more intelligently and effortlessly, thus making note-taking automated and more productive. Later, you can revisit crucial meeting discussions, recall action items, and clarify missed points. And this feature is precious for individuals with disabilities, such as hearing impairments.
Latest Call Summary
Krisp’s Call Summary helps you track call performance and get an overview of your meeting after it ends. Namely, the Latest Call Summary report lets you know how long meetings usually last, how much time you spent speaking, and how much noise Krisp canceled during the meeting.
To get your Call Summary report, select Krisp Microphone in the communication application and have your call last at least five minutes. The report will appear after the call ends. If you don’t want to see the report, disable it from Krisp Preferences.
Noise Cancellation
Krisp eliminates background noises, voices, and echoes from online meetings. Specifically, its Zoom noise-cancellation feature removes background distractions to provide crystal-clear audio for meeting participants and foster better communication and engagement.
This is particularly beneficial when joining meetings from noisy environments, as it ensures that your voice is heard loud and clear.
Meeting Recording
Krisp automatically records meetings across all communication apps. As a result, you can enjoy AI meeting summaries of the critical meeting discussions. Krisp’s Recording is available across hundreds of voice and communication apps. Find the Recording button in the Krisp app interface after updating the app to the Pro plan.
Krisp Recording and Krisp Meeting Transcriptions eliminate the chaos of scattered note-taking by making your notes accessible and organized.
Talk Time
Krisp’s Talk Time displays the exact amount of time a meeting participant speaks to help participants monitor their engagement and know when it’s time to let others speak. This is perfect for creating collaborative and inclusive meetings.
According to TechReport, the video conferencing market is projected to make up $22.26 billionby 2032. So, make sure to get equipped with the right meeting assistant to enhance Zoom usage by automating scheduling, transcribing meetings, facilitating follow-ups, providing real-time language translation, and summarizing key discussion points as Zoom’s popularity grows.
Zoom enables individuals and organizations to stay in touch and collaborate from anywhere in the world through Internet access. As a popular virtual communication tool for social gatherings and online education, Zoom easily connects people through its user-friendly interface and features such as Polls and Q&As, recording, and Playback.
To take your Zoom meetings to the next level and ensure a seamless and productive experience, use an AI-powered meeting assistant like Krisp for noise cancellation and meeting transcription. Specifically, Krisp easily integrates with Zoom to make your virtual communication highly productive and effective.
FAQ on How to Set Up a Zoom Meeting
How to Set Up a Zoom Meeting in Advance?
To set up a Zoom meeting in advance:
Open the Zoom app and click “Schedule.”
Enter meeting details, such as topic, date, time, and duration.
Choose your meeting ID, personal or automatically generated.
Set a password.
Configure video and audio settings and advanced options, such as enabling a waiting room or allowing participants to join before the host.
Select your preferred calendar, e.g., Google or Outlook, to add the meeting.
Save the settings.
Send out calendar invites with the Zoom link included to participants.
How to Set Up a Zoom Meeting for Someone Else?
You need to be assigned as a scheduler in their Zoom account. In Zoom:
Select “Schedule.”
Input the meeting details, such as date, time, and duration.
Pick “Advanced Options.”
Select the person under “Schedule For.”
Save the settings.
Send invites from their calendar.
How Do I Schedule a Zoom Meeting for Beginners?
In the Zoom app:
Click “Schedule.”
Enter your meeting details, such as date, time, and duration.
Set up security features like a passcode.
Choose your video and audio preferences.
Pick a calendar like Google or Outlook to add to the meeting.
Save and send invites to participants.
How Do I Start a Quick Zoom Meeting?
In the Zoom app:
Click “New Meeting.”
Enable your video if desired by toggling the video icon
Click “Start a Meeting.”
Once in the meeting, invite participants by clicking “Participants” and then “Invite” to share the meeting link or ID.