Can you do a podcast with Zoom? Yes! And there’s never been an easier time to start.
You don’t need to be a recording expert or have a professional studio. You can record and produce a great-sounding podcast in your own home, with just a few pieces of equipment.
One of the easiest ways to record a podcast interview is to use Zoom. While this software was designed for video conferencing, it also has several features that make it great for podcasting. Whether you are recording a solo podcast, an interview, or a group discussion, Zoom makes it very simple.
In this article, we’ll show you the steps to using Zoom to record your podcast—including a special tip to ensure your audio quality is crystal clear.
The Benefits of Using Zoom to Record Your Podcast
What are some of the perks of using Zoom as a podcast recording tool? Here are some of the main advantages.
- Physical distance is no longer a barrier. You’ll be able to interview guests who live anywhere in the world.
- You won’t have to worry about Covid restrictions. You can interview as many people as you want without risk of infection.
- It’s simple to use. Your podcast guest doesn’t need to have a Zoom account or download any software. All you need to do is send the link, press record, and talk.
- Video helps you communicate better during the interview. Since you’ll be able to see your podcast guest on video, you’ll get a better interview because you can read their body language and expressions. Then, you can separate out the audio files to use for the podcast. Some podcasters even choose to upload the video to YouTube—just make sure your podcast guest is okay with this first.
7 Simple Steps to Recording a Podcast on Zoom
Recording a podcast on Zoom is super easy. Here are the steps you’ll need to take:
Step One: Install Zoom
The first step is to download the Zoom app onto your laptop or other device. Visit the Zoom website to create your account. You can download the software and use it for free, and you’ll have the option of upgrading to a paid account.
How much does Zoom cost? Well, there’s a basic tier that allows you to use the app free of charge. With the Basic account, you’ll only be able to make calls for up to 40 minutes. So, if you plan on recording a longer podcast, you may want to consider opting for the paid version. The Pro plan allows you to have meetings that last 24 hours, which is much more than you’ll need for any podcast. It costs $14.99 per month.
Here’s an important update: Zoom used to allow one-to-one meetings (two total participants) to last for up to 30 hours on free accounts—but on July 15, 2022, Zoom changed this so that one-to-one meetings on free accounts now end automatically after 40 minutes. So, if your podcast interview is going to be longer than 40 minutes, upgrade to a paid account.
Step Two: Set Up Your Microphone and Headphones
Zoom can run using the microphone and speakers that are built right into your device. However, while it’s possible to record a podcast with just your device’s default microphone, you will probably want to invest in a higher-quality microphone.
No one listens to a podcast because it has superior sound quality, but if your sound quality is terrible, it will make people stop listening. It would be a shame to put a lot of thought and effort into your podcast content, only to record it with a poor-quality microphone. There are plenty of great podcasting microphones available for under $50, so it’s definitely worth the investment.
Here’s a helpful list of affordable, high-quality podcasting microphones. Be sure to choose one that has a pop filter, which will help eliminate the harsh “p” and “b” sounds you’ll make when speaking into the mic.
To change your microphone in the Zoom settings, click the arrow beside the “Mute” button when you are in a meeting. You’ll see a drop-down menu with all the microphones available listed under “Select a Microphone.” Just click on the microphone you want to use and switch your audio input.
You’ll also want to wear headphones while recording your podcast on Zoom so that your guest doesn’t hear an echo as their voice comes through your speakers and is picked up by your microphone.
Step Three: Eliminate Background Noise
No one wants to listen to a podcast with a lot of annoying sounds going on in the background. Before you hit “record,” you’ll want to make sure that your recording environment is as quiet as possible. Here are some important things to remember before you begin:
- Turn off your air conditioning, fan, space heater or any other noisy, humming appliances.
- Remove any noisy kids, roommates, dogs or cats from the area. Hang a “Do Not Disturb” sign on the door to let others know not to interrupt you.
- Close the windows and doors to avoid noise from the outdoors, such as wind, traffic, birds, sirens, etc.
- Avoid rustling papers or moving items around your desk while you are recording.
- Install noise-cancelling software. A noise-cancelling app such as Krisp will identify background noise using an algorithm and filter it out. You’ll be left with only the clear sound of your voice.
[demo-new]
Get Krisp for Free
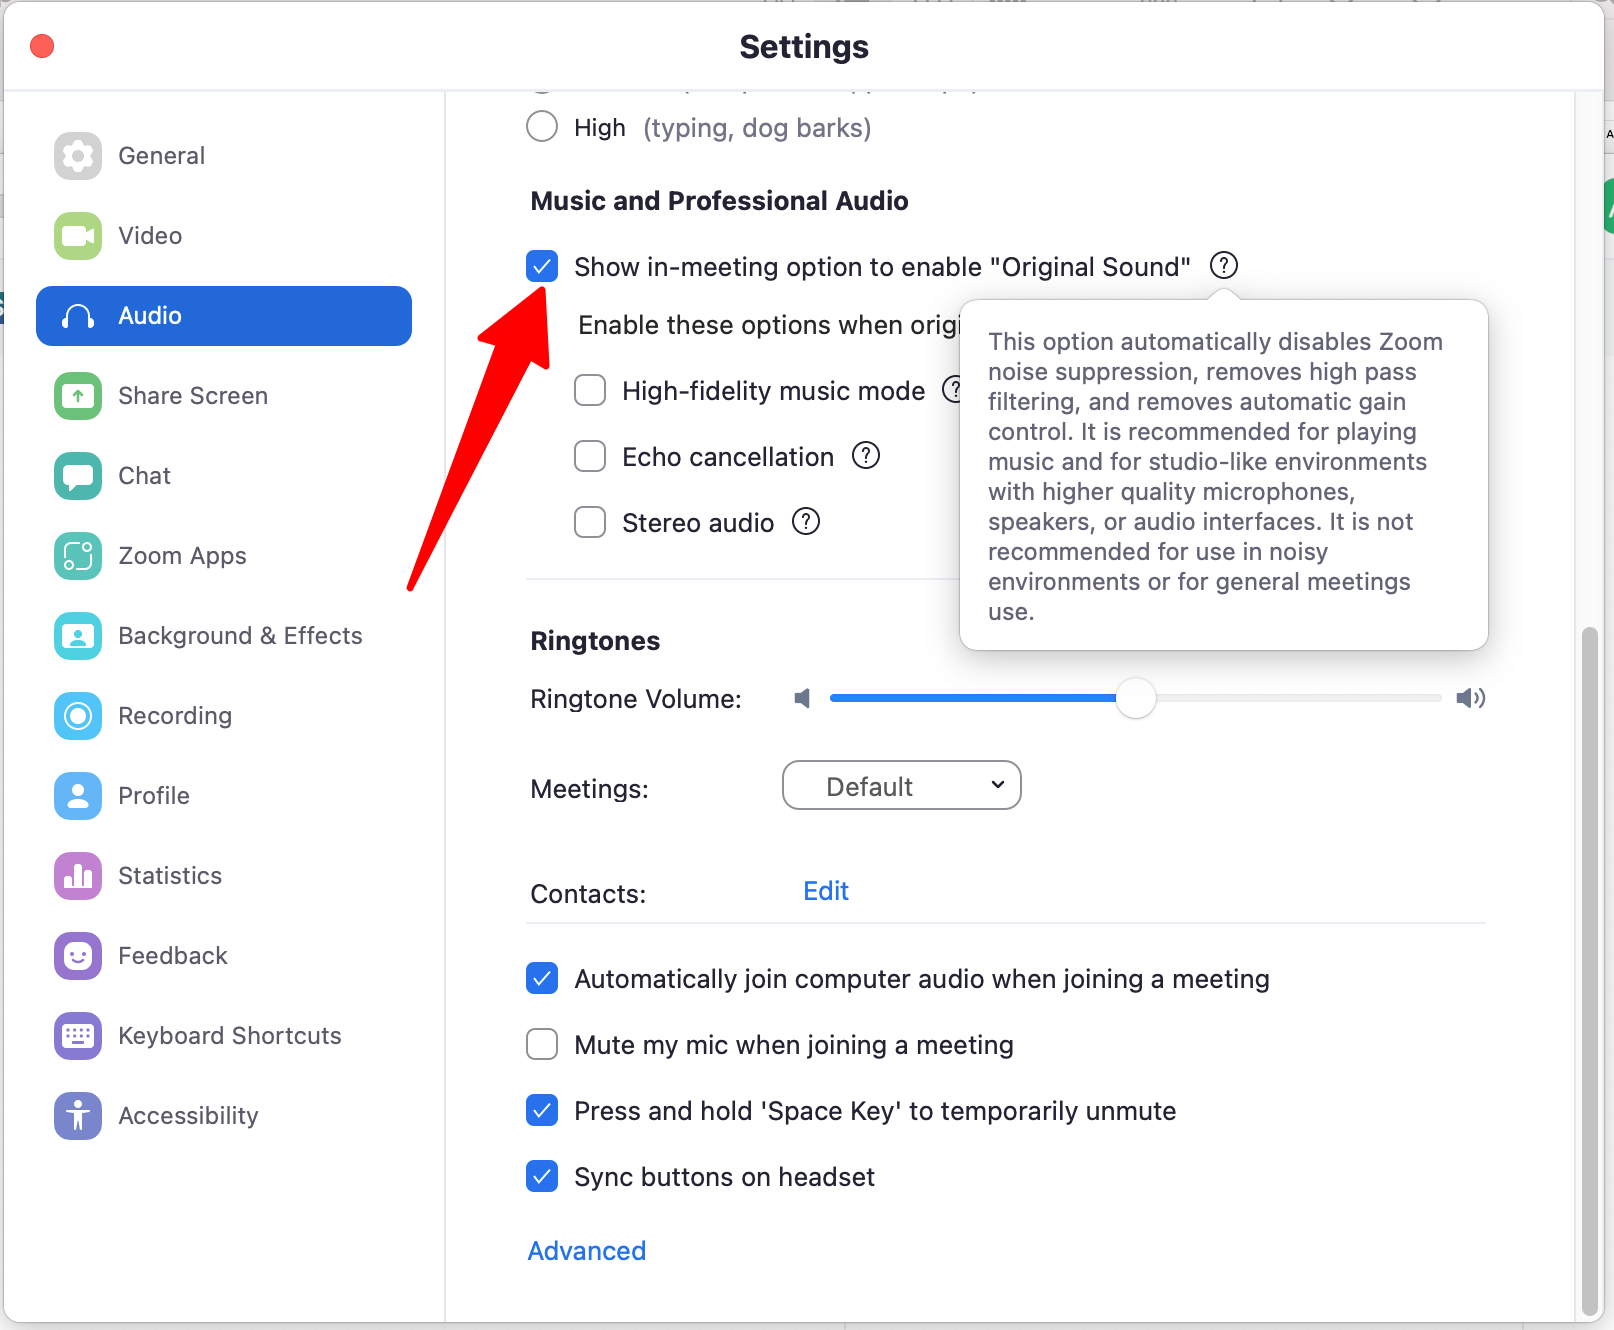
Bonus tip: Turn on “Original Sound” in Zoom. By default, Zoom turns on its in-built noise cancellation technology that masks background noise during your calls. However, when you are using a high-quality microphone and your own high-quality noise-cancellation app like Krisp—you do not need Zoom’s noise-cancellation feature. In that case, it’s best to turn it off by turning on “Original Sound.” That way, you get the best audio quality possible.
To do this, open up Zoom and click on the settings gear icon. Select “Audio” and scroll down to “Music and Professional Audio.” Click the checkbox next to “Show in-meeting option to enable ‘Original Sound.’” Uncheck the box next to “Echo cancellation.” You won’t need that because Krisp does the echo cancellation for you.
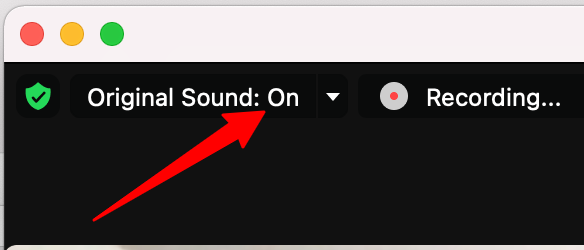
Now, the next time you start recording a Zoom meeting for your podcast, turn ON the “Original Sound” located in the upper left corner of your Zoom screen.
Step Four: Set Up Each Speaker as a Separate Audio Track
Did you know that you can record separate audio files for each speaker? This is a smart thing to do and makes it a lot easier to edit your podcast afterward.
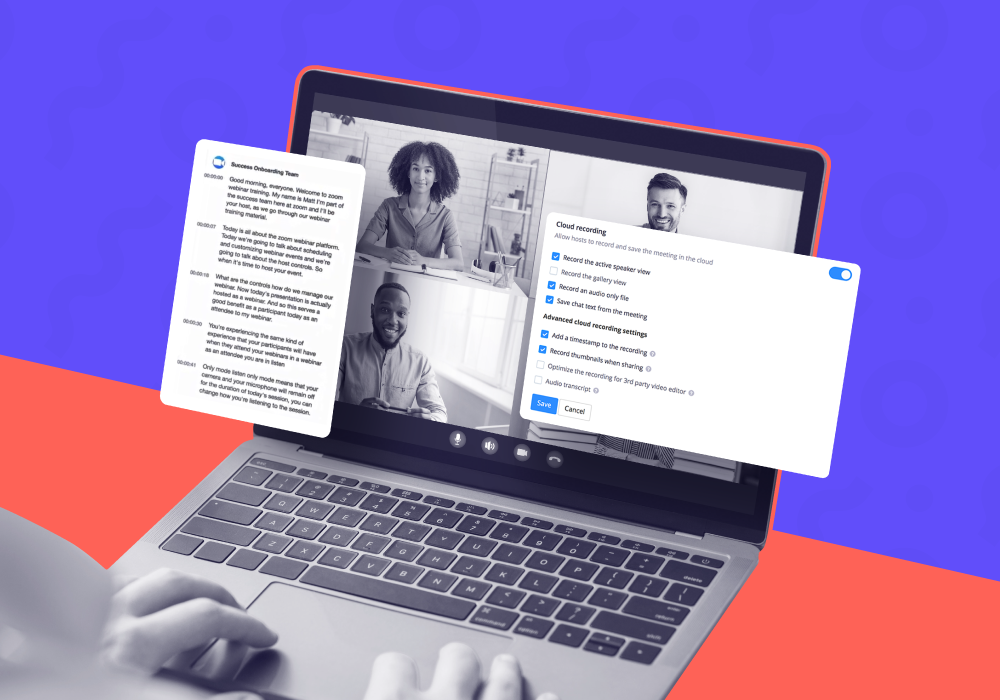
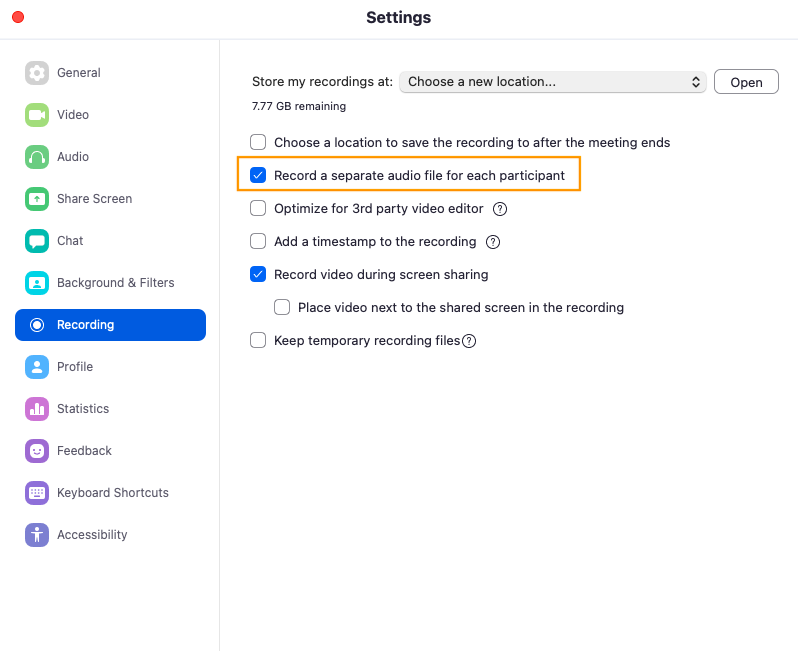
Go to your Zoom settings and click on the “Recording” settings. Then, select the option called “Record a separate audio file for each participant.”
Once the call finishes, you’ll have a folder that contains the three standard files: the joint audio, the video, and the chat transcript. You’ll also get an additional folder called “Audio Record” with a separate M4A file for each speaker.
Step Five: Brief Your Guest Before You Begin
It’s a good idea to give your guest a quick rundown on how to use Zoom and what to expect, especially if they have never done this before. Before you start the podcast recording, you can give them some tips on how to use Zoom.
You should also give them an idea of how long the interview will be and a rough overview of the topics you’ll be asking them about. Allow for a bit of extra time so they can get their microphone and headphones set up, and you can test the settings.
The good news is that your guest will not have to download Zoom themselves to do the interview. They can simply click on the link and enter the call with you from their own browser. They also do not need to install Krisp themselves either because Krisp already does two-way noise cancelling, ensuring both your audio and your guest’s audio are crystal clear.
Step Six: Record The Call with Zoom
Now that you and your guest are ready, let the conversation begin!
When it comes to actually recording the podcast on Zoom, it’s quite simple. Here are the steps to follow:
- Click on the “New Meeting” button to start your call.
- Click on the “Invite” button at the bottom of the screen in the meeting.
- Choose “Copy Invitation” and copy the ID and passcode for the meeting.
- Paste the link and passcode into an email or message and share it with your guest.
- When your guest joins the call, click “Manage Participants” on the bar at the bottom of the screen.
- You should see a list of all participants. Make sure all microphones are working and everyone’s voices are coming through crisp and clear.
- Click “Record” and turn ON “Original Sound” to start recording the podcast episode.
- When you’re done, click on “End” and then “End Meeting for All.”
Step Seven: Edit the Audio File
When you record an interview on Zoom, you will get two different file type versions. There will be an M4A audio file, which you can drop straight into your audio editor. This type of file can be used with software such as Audition, Audacity or Alitu. You’ll also have an MP4 video file, which can be edited and uploaded to YouTube or social media.
If you have recorded separate tracks for each speaker, you’ll have one M4A audio file for each speaker. The file name will include the name of the person, so it’s easy to identify which is which.
You can edit the podcast in your audio editor software to add an intro and outro, cut out parts of the interview, and add music, sound effects, and more. Audacity is free software, so it’s a great option if you’re on a tight budget.
Bonus Tip: If you’re interested in obtaining transcripts for your Zoom podcasts, take a look at this article to discover how you can transcribe them for free using Krisp’s AI Meeting Assistant feature.
Get Started on Your Zoom Podcast
Don’t let technology intimidate you from making your Zoom podcast idea a reality. Producing something that sounds great is a lot easier than you think! Try using Zoom to record your podcast interview so you can get your ideas out into the world. You can also check out our list of other voice recording software worth trying.
And remember, when recording a podcast, audio quality is crucial. Install noise-cancelling app Krisp (it’s free to try!) to ensure background noise doesn’t ruin your recording.