From one meeting to the next, Zoom has become a cornerstone of our daily work. With 300 million daily active users as of 2024, it’s safe to say that we all spend a large portion of our days in virtual meetings. And at this point, we need to be Zoom pros to keep up.
But what if you need to come back to the meeting later or share it with someone who couldn’t attend? Maybe you want to send the recording to your guests, or maybe you plan to reuse it as valuable content. Knowing how to record your Zoom meetings is key to getting the most out of them.
In this guide, we’ll show you how to record Zoom meetings step by step so you can stay organized and make your meetings work for you!
How to Record a Zoom Meeting as a Host from the Desktop
Recording a Zoom meeting as the host is straightforward when using the desktop app. Just follow these steps:
1. Enable Local or Cloud Storage
Before you start recording, make sure to enable either Local or Cloud Storage in your Zoom settings:
- Open the Zoom desktop app and sign in.
- Click your profile picture in the top right corner and select Settings.
- In the settings menu, go to the Recording tab.
- Toggle the switch for Local Recording or Cloud Recording to enable it.
2. Start or Join a Meeting as the Host
Open the Zoom desktop app, sign in with your account, and either schedule a meeting or start one immediately. You must be the host to access the recording feature.
3. Click on the Record Button
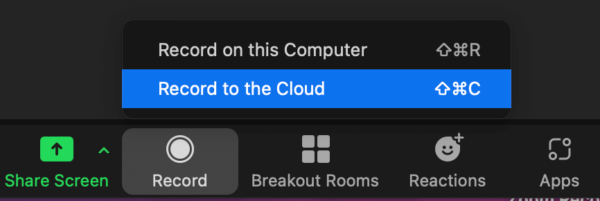
Once the meeting starts, you’ll see a toolbar at the bottom of your screen. Click the Record button. Depending on your Zoom account settings, you may see two options:
- Record on this Computer: Saves the recording locally to your computer.
- Record to the Cloud: Stores the recording in your Zoom cloud storage (available for paid accounts).

4. Manage Your Recording During the Meeting
After starting the recording, a small indicator will appear to notify all participants that the session is being recorded. You can:
- Pause the recording by clicking Pause on the toolbar.
- Stop the recording by clicking Stop when you’re done.

5. End the Meeting and Save the Recording
If you choose to record locally, the file will process and save automatically once the meeting ends. By default, the recording will be saved in a folder labeled “Zoom” on your computer. For cloud recordings, you’ll receive an email with a link to access the file.
6. Access Your Recordings
- For local recordings, go to the “Zoom” folder in your documents or downloads folder (depending on your settings).
- For cloud recordings, log in to your Zoom account on a browser, navigate to the Recordings tab, and download or share the file from there.
Pro Tip
Make sure all participants are aware you’re recording the meeting. This isn’t just a courtesy—it might also be legally required, depending on where you’re located.
How to Record Zoom Meetings on the Phone
Recording a Zoom meeting from the mobile app is slightly different from the desktop version, and it’s available only for users with a paid Zoom subscription. Here’s how to do it:
How to Record Zoom Meetings on iPhone
To record a Zoom meeting on your iPhone, you’ll need to be the host or have recording permissions from the host. Here’s what to do:
1. Join or Host the Meeting: Open the Zoom app, and either start or join the meeting.
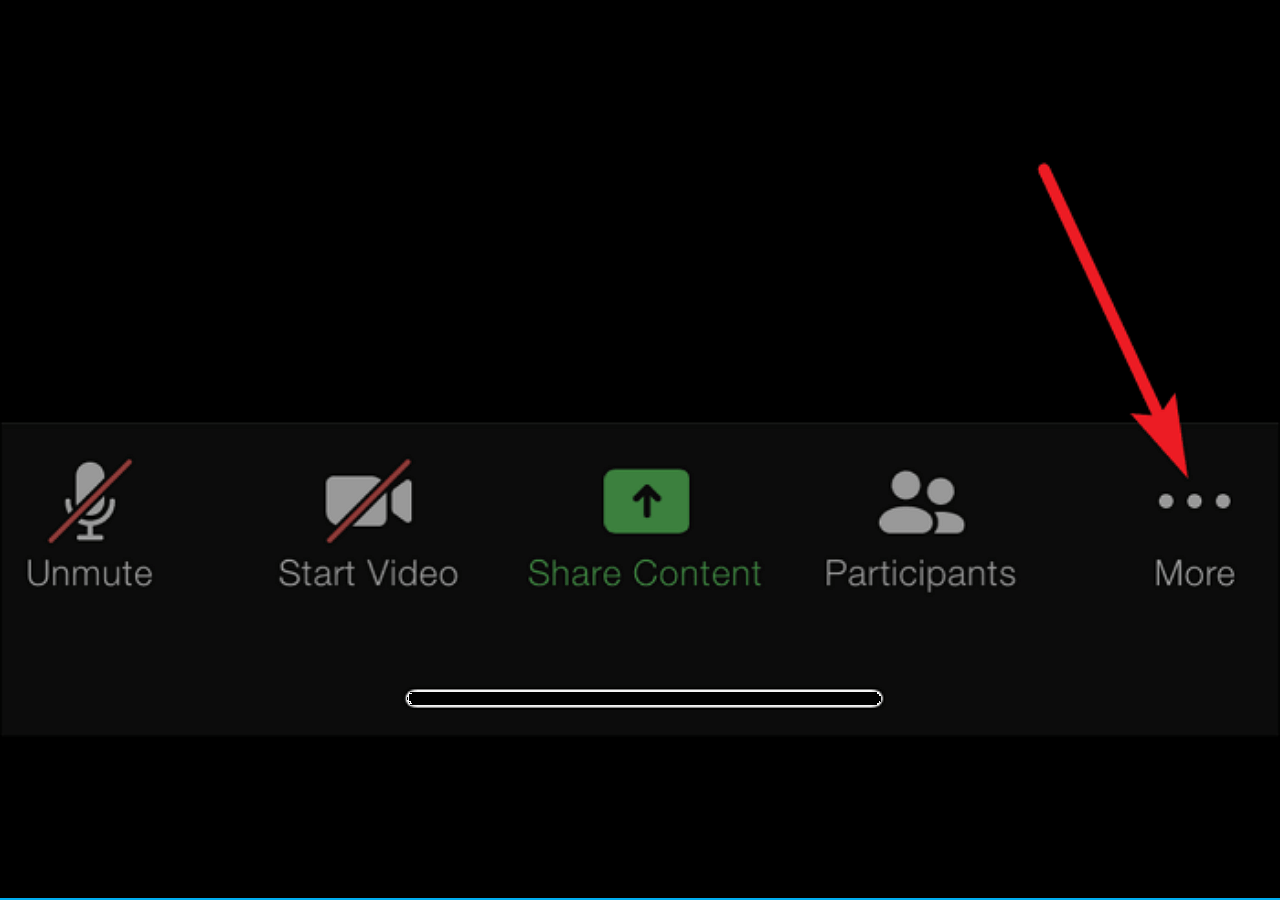
2. Start Recording: Once in the meeting, tap More (three dots) in the bottom-right corner of the screen, then select Record to the Cloud.

3. Stop Recording: When the meeting ends, the recording will automatically upload to Zoom’s cloud storage. You’ll get an email with a link to your recording, which you can share or download.
Note: Cloud recording is only available to Zoom Pro users or higher.
How to Record Zoom Meetings on Android
To record a Zoom meeting on your Android device, you must be the host or have the host’s permission. Follow these steps:
1. Start or Join the Meeting: Open the Zoom app on your Android and join or host the meeting.
2. Initiate Recording: Tap the More (three dots) icon at the bottom-right of your screen, and select Record to the Cloud.
3. End Recording: Once the meeting ends, your recording will automatically upload to the cloud. You’ll receive a link via email to access and share the recording.
Pro Tip
If you frequently record meetings on mobile, ensure you have enough cloud storage available. You can check your storage usage in your Zoom account settings.
How to Record a Zoom Meeting as a Participant
Request Recording Permission from the Host
During the meeting, ask the host to grant you recording permissions. The host can do this by clicking Participants in the toolbar, selecting your name, and clicking Allow Record.
Once permission is granted, the recording process is the same for hosts. You can start, pause, and stop the recording using the on-screen controls, and the recording will be saved locally to your computer.
What If the Host Doesn’t Grant Permission?
If the host denies recording permission, you won’t be able to use Zoom’s recording feature. In this case, consider the following alternatives:
- Ask the Host to Record the Meeting: Request the host record the session and share the recording with you afterward.
- Use Third-Party Tools: If permitted and appropriate, you can use screen recording software to capture the meeting. Be mindful of privacy and legal considerations before doing this.
Pro Tip
Always inform the host about your intention to record and obtain their consent. Recording without permission might violate Zoom’s terms of service or applicable privacy laws.
How to Record a Zoom Meeting on a Laptop or PC as a Participant Without Permission
Recording a Zoom meeting without the host’s permission requires third-party screen recording software. Remember that this should only be done with the host’s knowledge and consent to comply with privacy laws and Zoom’s terms of service.
Here’s how you can do it:
- Choose a Screen Recording Tool
Popular tools include OBS Studio, Camtasia, and the built-in screen recorder in Windows or macOS. - Set Up the Recording Software
Open the screen recorder and select the area of your screen to capture. Configure audio settings to record both system and microphone audio. - Start the Recording Before Joining the Meeting
Launch the screen recorder, start recording, and then join the Zoom meeting. This ensures you capture the session from the beginning. - Save and Edit the Recording
Once the meeting ends, stop the recording. The file will be saved to your specified location and ready for playback or editing.
How Do I Record a Zoom Meeting on Windows 10?
Recording a Zoom meeting on Windows 10 can be done through Zoom’s built-in recording feature (if you have permission) or using third-party software.
Using Zoom’s Built-in Recording
As a Host or With Permission: Follow the standard steps to request permission or start a recording as the host. The recording will be saved locally or to the cloud, depending on your choice.
Using Windows’ Built-in Game Bar
1. Press Win + G to open the Game Bar.
2. Select the recording area and click Start Recording.
3. End the recording when the meeting finishes, and the video will be saved in the default “Captures” folder.
Using Third-Party Tools
For more control over your recording, use software like OBS Studio or Camtasia. Set up the tool to record your screen and audio, then start recording before the meeting begins.
How to Record a Zoom Meeting on Mac
Mac users can record a Zoom meeting with Zoom’s built-in recording feature or third-party tools.
Using Zoom’s Built-in Recording
If you’re the host or have permission, simply click Record during the meeting, and Zoom will save the recording to your designated location (cloud or local).
Using macOS Screen Recording (QuickTime Player)
1. Open QuickTime Player and select File > New Screen Recording.
2. Click the dropdown menu next to the record button to enable microphone audio.
3. Start the recording and then join your Zoom meeting.
4. Stop the recording when the meeting ends.
Using Third-Party Apps
Apps like ScreenFlow or OBS Studio offer more advanced recording features. Set up the app, select the recording area, and capture your meeting.
Tip for Mac Users: Ensure your Mac’s privacy settings allow screen recording under System Preferences > Security & Privacy > Privacy > Screen Recording to avoid issues during setup.
How to Record a Zoom Meeting on iPad
If you don’t have access to Zoom’s built-in recording feature, you can use the iPad’s screen recording option. Here’s how:
1. Enable Screen Recording
Go to Settings > Control Center, find Screen Recording, and tap the + icon to add it to your Control Center.
2. Open the Control Center
Return to your Home screen and swipe down (or up, depending on your iPad model) to access the Control Center.
3. Prepare to Record
Locate the Record button and press and hold it to see additional options.
4. Activate Microphone Audio
Tap the Microphone button to include audio in your recording.
5. Choose a Save Location
Select where you’d like the recording to be saved on your device.
6. Start Recording
Tap Start Recording and wait for the three-second countdown before it begins capturing your screen.
How to Record a Zoom Meeting on Chromebook
Recording a Zoom meeting on a Chromebook can be done using the built-in screen recording feature. Here’s how:
1. Activate Screen Record
- Press Shift + Ctrl + Show Windows simultaneously to open the menu.
- Select Screen Record from the options.
2. Choose Recording Area
- Decide whether to record your entire screen, a specific portion, or just a browser window.
3. Start Recording
- Join the Zoom meeting and start the recording.
Once finished, the recording will save automatically to the “Downloads” folder. Ensure you inform the host and participants before recording.
How to Record Zoom Meetings with Cloud Recording (For Pro Users)
If you’re a Zoom Pro user, you can use Cloud Recording to save and store your Zoom meetings easily. This feature allows you to record your meeting directly on Zoom’s cloud rather than save it locally on your device. Once the meeting ends, the recording automatically uploads to the cloud, and you’ll receive an email with a link to access it.
Cloud recordings are convenient for easy sharing and access from any device, making them perfect for storing important meetings without worrying about taking up space on your local storage. Keep in mind, though, that cloud storage is limited depending on your Zoom plan, so it’s worth managing your recordings to stay within your storage limits.
How to Screen Record on Zoom with Audio
To screen record on Zoom with audio, you can use the built-in recording feature if you’re the host or have permission. Just click the Record button during the meeting. For audio, make sure your microphone is unmuted. If you’re using a third-party screen recorder, enable audio capture and select the system audio option before starting the recording. This way, the video and audio from the meeting will be recorded.
Alternative to Record Zoom Meetings in HD quality
If you’re looking for an alternative to record Zoom meetings in HD quality, Krisp is a powerful solution that takes your meeting experience to the next level. Krisp lets you record your meetings across any app, not just Zoom. Krisp’s Zoom meeting recording, Teams recording and Google Meet recroding features ensure seamless recording.
Additionally, Krisp’s Zoom Transcription, Google Meet Transcription, and Teams Transcription features provide automatic transcriptions, making it easy to keep track of discussions and action items.
Key Features of Krisp:
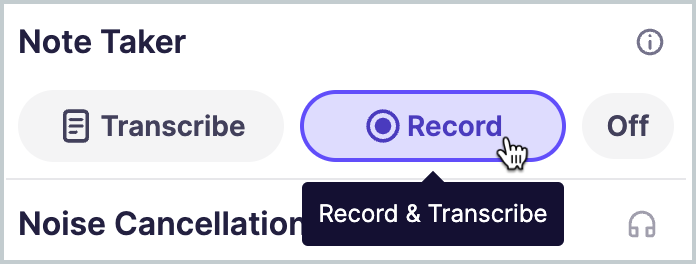
- HD Quality Recordings: Krisp enhances your meetings by capturing clear audio and video, while its AI-powered noise cancellation ensures a distraction-free recording, improving overall sound quality.
- AI-Powered Transcriptions: Enjoy 96% accurate AI transcriptions, including unlimited transcriptions, with the free plan.

- Synchronized Playback: Review your meeting recordings with synchronized playback alongside AI-generated transcriptions for easy reference.
- No Plugins or Extensions Needed: Krisp works effortlessly with any conferencing app—no need to worry about complicated setups.
- AI Note-Taker and Meeting Summary: Krisp’s AI meeting note taker automatically summarizes meetings, assigns tasks, and generates action items with deadlines, simplifying follow-up work
- Flexible Access and Sharing: You can easily download and share your recordings with others, as well as access ready-to-use templates for sharing meeting summaries and action items with teammates.
- Automated Integration: Krisp integrates with your calendar, automating the recording, note-taking, and sharing process for more efficiency.
Where Do Recorded Zoom Meetings Go?
Exploring how to record a Zoom meeting has its intricacies one of which is the question as to where the Zoom recordings go afterward. Local recordings are saved to the host’s device in a ” Zoom ” folder by default. Cloud recordings are saved to the Zoom Cloud and can be accessed, shared, or downloaded via a link whenever you want.
How to Share a Zoom Recording
The ability to share the context of the meeting is one of the key reasons why people want to record meetings. Thus, the shareability of meeting recordings matters to every participant of the meeting, especially the hosts.
To share a Zoom recording, follow these steps:
- Locate the recorded meeting on your device or in the Zoom Cloud.
- If it’s a local recording, you can share the file directly. If it’s a cloud recording, you can share the link provided by Zoom.
- Share the recording via email, messaging apps, or by posting the link on a website or social media platform.
Final Words
Recording a Zoom meeting can be straightforward, provided you know the steps and ensure you have the right tools at your disposal.
By following the guidelines above and utilizing Krisp, you can capture high-quality recordings of your meetings, complete with clear audio, transcripts, and notes.
This not only makes it easier for everyone to stay on the same page but also enhances the overall productivity of your team or organization. For more insights and tips on maximizing your virtual meetings, visit Krisp’s blog.
Frequently Asked Questions


