Poor Zoom audio quality is often the most neglected aspect of a video call. But at the same time, it’s one of the most detrimental factors, causing miscommunication among team members.
If you use Zoom to record webinars, events, or just audio, the quality of the sound will make the difference between an average recording and a professional one. And you won’t even need a recording studio.
To fix audio quality in all situations, there’s some straightforward things you can do:
- Record from a quiet environment.
- Choose the best Internet provider.
- Fix your Internet connection and make sure you’re the only one using the Wi-Fi during the call.
- Only record using your phone if the audio quality is better than the one from your laptop.
- Don’t use a speakerphone.
- Close any apps or software you’re not using so it won’t slow down your device.
Next, we’ll go over some ways to improve Zoom audio quality you might have not considered yet:
Get an external mic
While a high-quality microphone is generally recommended, remember that any microphone is better than the one integrated within your laptop. So as long as you know the basics of audio recording and you’re not getting the one with the poorest reviews, you should be good to go.
A dedicated microphone provides the fidelity and extra settings that will make your investment worth it. You’ll sound better, have more control over the mouth to mic distance, and get to use extra accessories that sharpen up your sound.
A pop filter screen, for instance, removes all “B” and “P” popping sounds that damage the Zoom audio recording quality. The options for a filter screen are varied but they all do a similar job.
Here’s a brief list of affordable mics that will make for more than decent recordings:
- Samson Q2U Recording and Podcasting Pack – for beginners
- Shure SM58-LC Cardioid Dynamic Vocal Microphone – if you also need to record vocals
- SUDOTACK PC Condenser Mic – if this is your first mic
- TONOR USB Microphone Kit – a full kit so you don’t have to worry about anything
- Majority RS1 Directional Condenser USB Microphone – a portable option if you’re on the go or often change your setting
- MAONO AU-PM421 Professional – USB microphone with an integrated mute button
Set up your recording right from the start
Under Zoom’s Recording Settings you’ll find a couple of options that ensure your final file is up to par with your needs. Besides optimizing the video for a third-party editor or adding timestamps to the recording, you’re also interested in the Record a separate audio file for each participant who speaks setting.
This feature gives you two separate audio files at the end of a call. This makes it easier for you to edit the audio of an interview or meeting. More benefits? You’re making sure that transitions from one speaker to another are smooth and you’re avoiding having two or more people speaking over each other.
Test your mic prior to a virtual conference
Head over to the Audio section in Zoom’s Settings for a quick audio test. The options allow you to adjust the volume of your speaker and microphone so the final audio is leveled. Turn off the Automatically adjust microphone volume setting if you want to retain your own output and input level. As for the levels, just make sure you’re not hitting red — this could be too loud for listeners.
You can use this test to see how your voice sounds with different mics and decide on the best option for each call. To get a realistic understanding of how you sound, record a test call using Zoom. I used to make the mistake of “trial recording” through a different app that didn’t offer the exact same setting and quality as Zoom. So the final recording was slightly different with words fading every now and then or being completely unintelligible.
Go through the audio and mic test before every call or recording to ensure no settings have changed. Doing this 10-15 minutes before the call lets you troubleshoot any equipment or software issues on time.
Note on audio recording: For podcasts or interviews where you’ll have just 2-5 people speaking, do a soundcheck with everyone before the start. This allows you to work on maintaining balanced audio levels so you won’t have one person speaking much louder than the others on the final audio file.
Disable the automatic volume adjustments
If you leave this feature on, surrounding sounds and people talking around you will get picked up easier. So if you’re recording alongside a co-host or guest, Zoom could attribute what they’re saying to you and assume you’re speaking softer than usual.
Turning this off also lets you fix a problem I commonly experience with other tools that don’t allow you to disable the automatic adjustments: your voice fading in and out, particularly at the start and end of a sentence.
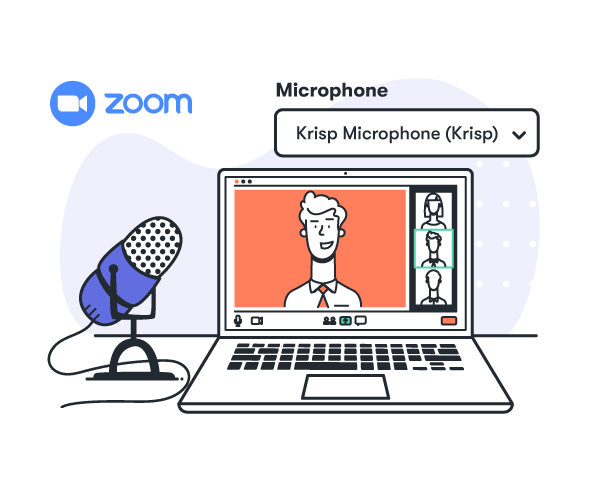
Use a noise-cancelling app like Krisp to block background sounds
Laptop fans, random furniture items creaking, dogs barking in the neighborhood… All of these are sounds that compromise your Zoom audio quality. To mimic a professional recording or meeting setup, turn Krisp on to automatically cancel all background noises.
Krisp also removes echoes and maintains the HD quality of your voice in case you want to record your Zoom calls.
[new-demo]
Extra tip: Using ambient sounds? Avoid background music as much as possible during podcast, meeting, or conference recordings. If they help set the mood, keep these on a low volume setting so they don’t overlap with the speakers. Send your final recordings to a couple of friends to ask them if the background sound is too loud.
Disable Zoom’s audio processing option
Zoom has an integrated noise reduction feature. But there are two reasons why you might consider disabling the feature:
1. You want to record high-fidelity music for an online concert, art class, music lesson, or fitness session.
The High-fidelity music mode instantly disables echo cancellation and post-processing, removes audio compression, and increases the audio codec quality. For this mode, Zoom recommends using an ethernet connection. This is a best practice you can keep throughout any meeting call or audio recording for improved quality of both video and sound.
2. You simply don’t want to risk having choppy audio.
Zoom’s noise-cancellation feature isn’t perfect. Depending on the setting you opt for, the tool could remove some louder or softer words, leaving the final file with missing words or full sentences.
You can find both of these options under your Music and Professional Audio Settings:
You don’t have to give up on noise cancellation though. Use a dedicated solution like Krisp which integrates with any video conferencing or audio recording tool that lets you change the audio input.
Turn on the Stereo audio feature for more realistic sounds
Sharing stereo audio in Zoom provides an immersive listening experience for your listeners with accurate levels and audio timing. This is a good approach if you want to share detailed songs where listeners can easily deduce the location/direction of a sound. Not to mention that the sound can reach both ears at the same time as the audio is evenly distributed.
From the same Music and Professional Audio Settings, enable the Stereo audio option to send audio in stereo during meetings or webinars.
You also want to let attendees choose whether they want stereo audio or not. Head over to your general account Settings and the In Meeting (Advanced) options. Enable Allow users to select stereo audio in their client settings:
Note: If you’re using a DAW to share sound, have both the Turn on Original Sound and Share sound – Stereo (High-fidelity) on.
Learn all the ways in which you can mute yourself or your guests
Sometimes improving the Zoom sound quality is as simple as muting a participant when they’re not speaking.
This ensures that any background noises on their end won’t distract or chop up the audio of the current speaker. It prevents people from interrupting someone without getting approval to ask a question and allows event attendees to watch a presentation from a busy room.
As general best practices for muting Zoom calls and maintaining high-quality audio :
- Always start your meetings with all participants on mute.
- Display some audio tips and policies before the start of a recording or event.
- Delegate at least one moderator to take care of muting/unmuting as well as deciding when it’s ok for someone to jump into the conversation.
- Don’t forget you can turn on Krisp and let it block the noises on both your and your participants’ ends.
We’ve prepared an extensive guide to all of the hidden ways in which you can mute audio during a Zoom call.
Only need the audio recording?
Disable the video path to increase bandwidth speed. While I recommend having your video on at all times to establish a face-to-face connection with the other call participants, video can slow down Zoom’s performance and affect the quality of your audio.
As a compromise, start the meeting with the video on to introduce the participants and make the first point of contact. Then, turn off the video and keep recording the Zoom audio independently.
For more ideas on improving your Zoom calls, have a look over our 14 pro Zoom tips and start holding perfect meetings.