Recording audio on your Mac is a great way to keep meeting recordings, make quick notes, create slideshow presentations, or share ideas via email. Wondering “How to record audio on Mac?” or “How to record audio on a MacBook Pro?” No worries. You’re at the right place.
Whether you’re a podcaster, musician, or someone interested in recording your online discussions, read this tutorial to make your audio recording easy and efficient.
Here, you’ll learn how to screen record on Mac with audio using tools like QuickTime, Voice Memos, GarageBand, and an AI Meeting Assistant offering productive virtual meeting recording. Moreover, you’ll learn how to screen record on Mac and record MP3 on your Apple device.
How to Record Audio on Mac Using QuickTime

Are you interested in how to record audio on Mac in one of the simplest ways? Use QuickTime Player. It comes pre-installed on all Macs. Compared to Voice Memos, QuickTime gives you more control over where to save your recording and makes it easier to share it.
QuickTime Player allows users to make audio-only recordings. This app offers several key features, such as Video Playback, which plays video smoothly, and Screen Recording, which captures the entire screen or a selected portion.
So, how to screen record with audio on Mac using QuickTime? Here are the steps:
- Open QuickTime Player by going to the “Applications” folder.
- Start a New Audio Recording by going to the menu bar, clicking “File,” and selecting “New Audio Recording.”
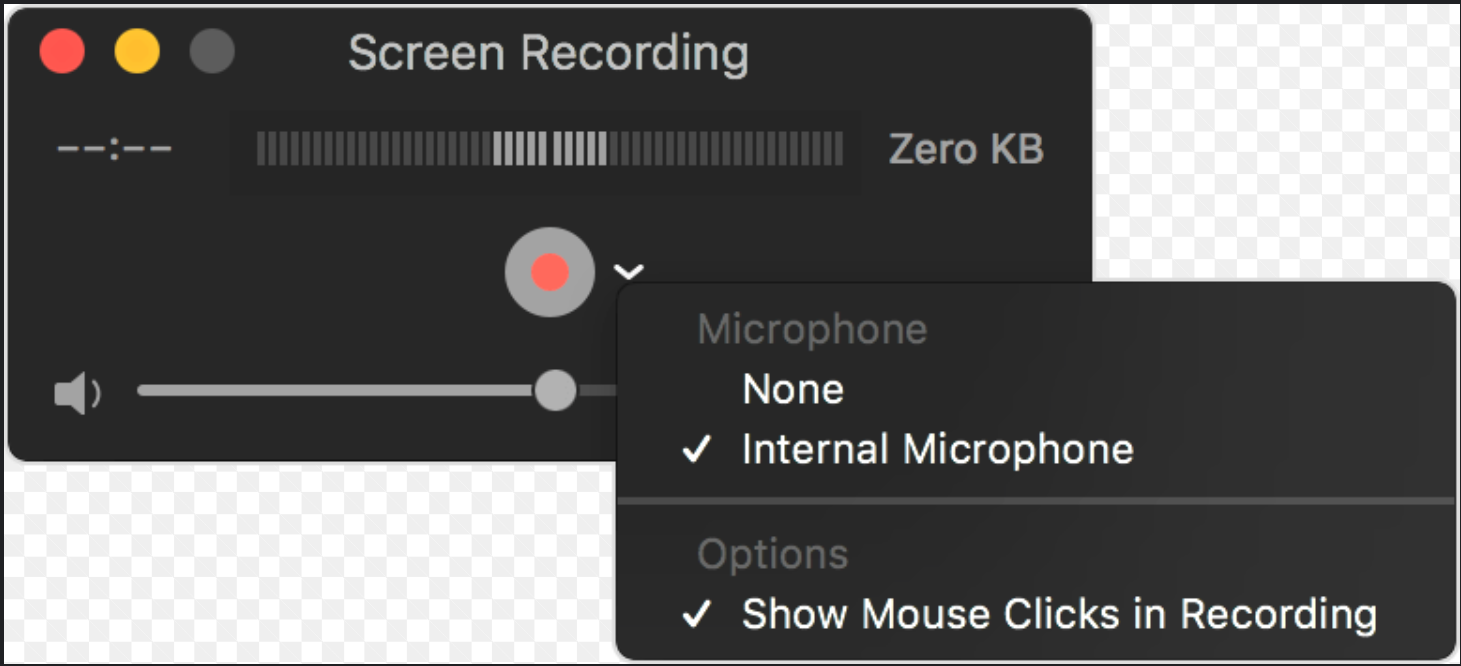
- Find the “Options” Pop-up Menu and the Record Button by opening the Audio Recording window to choose recording options:
- Adjust Settings by tapping the small arrow near the record button. Select your Microphone and Quality settings. Remember that maximum-quality recordings come in uncompressed files that require ample storage space.
- Customize the Volume Control to hear the audio being recorded.
- Start Recording by clicking the red button.
- To Pause Recording, option-click the “Record” button.
- Click the Stop Button when finished. You can also use the Touch Bar.
- Save the Recorded File in “File”> “Save.” Next, name your file and pick a location to save it in different resolutions and formats.
- After You’ve Saved Your Recording, you create clips by trimming or splitting the recording or combining its parts. Moreover, you can rearrange or enrich them with other audio clips.
- Share the Recording using the “Share” button or by going to “File”> “Share.” Specifically, you can use email, AirDrop, or upload the recording to a platform like YouTube.
How to Record Audio on Mac Using Voice Memos

Voice Memos is a built-in app that allows you to record from your Mac. You’ll need to use the built-in microphone, a supported headset, or an external mic to start recording.
Voice Memos offers various useful features, such as organizational options for labeling and saving recordings by folders. Additionally, the app allows access to recording across all Apple devices with the help of iCloud Sync. Also,
Here are the steps:
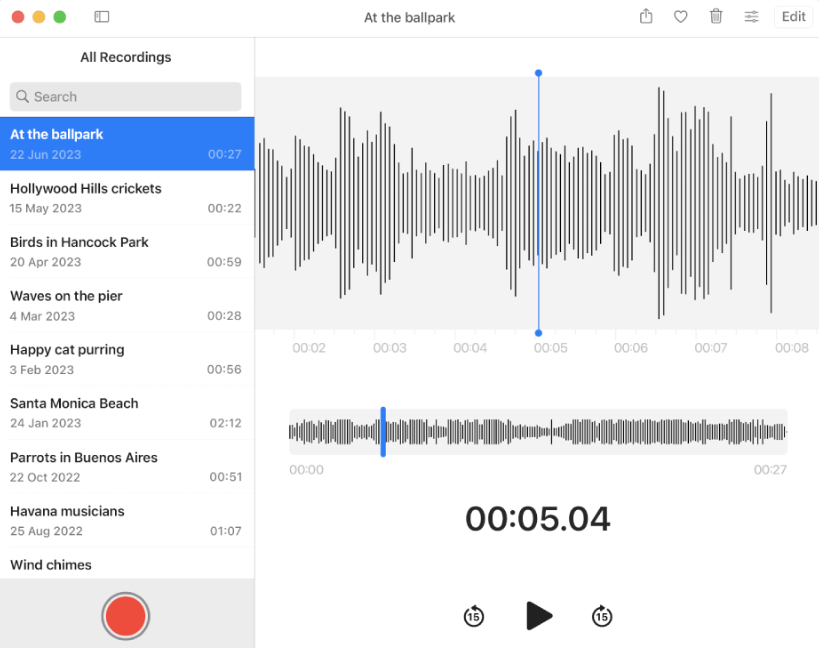
- Open Voice Memos by visiting your “Applications” folder or launching it from Spotlight.
- Start Recording using the red button or the Touch Bar.
- To Pause the Recording, click “Pause” and the “Resume” button to continue recording.
- Click “Done” in the lower-right corner when the recording ends.
- Edit the Recording by trimming or renaming it if needed.
- Find Your Recording Saved automatically in the app. It’ll have the location name selected in the “Settings.” Otherwise, you can find your recording saved as “New Recording.”
- Listen to Your Recordings on any Apple device by signing in with the same Apple ID.
- Share the Recording using the “Share” button or going to “File”> “Share.” You can choose one of these methods: email, messages, or AirDrop.
How to Record Audio on Mac Using GarageBand

GarageBand, an Apple digital audio workstation, is another answer to the question “How to record audio on Mac?” This pre-installed music recording app is available on all new Macs. You can also download GarageBand for older Macs. Only, your device must meet the necessary operating system requirements, such as macOS Monterey or later.
GarageBand lets you create professional-quality music tracks and podcasts. Specifically, this app offers various online solutions and effects, such as Smart Guitar and Smart Bas, and sounds like thunderstorms or running water.
Here are the steps:
- Open GarageBand by launching it from your “Applications” folder.
- Create a New Project by visiting “New Project” and then “Empty Project.”
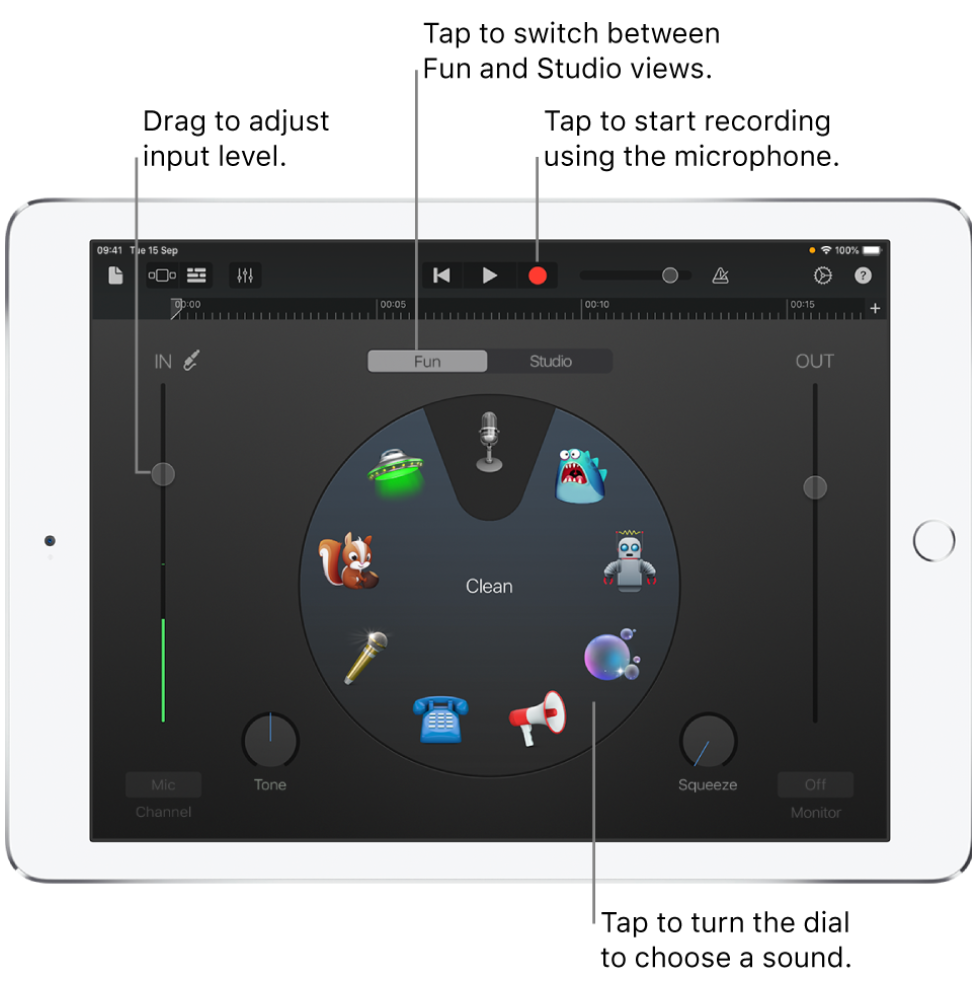
- Add a Track by clicking the “+” button for a new track.
- Choose “Audio” to record vocals and Instruments.
- Set Input by picking your microphone as the input source.
- Enable Monitoring by clicking the monitoring button (speaker icon) to hear yourself.
- Start Recording by using the red button.
- Save Your Recording by clicking the “Stop” button.
- Export Your Recording by going to “Share”> “Export Song to Disk.”
- Choose a Format by picking the desired file format, such as MP3 or AAC.
- Share the Recording by choosing a method, such as email, messages, or AirDrop, or by uploading it to a platform like SoundCloud.
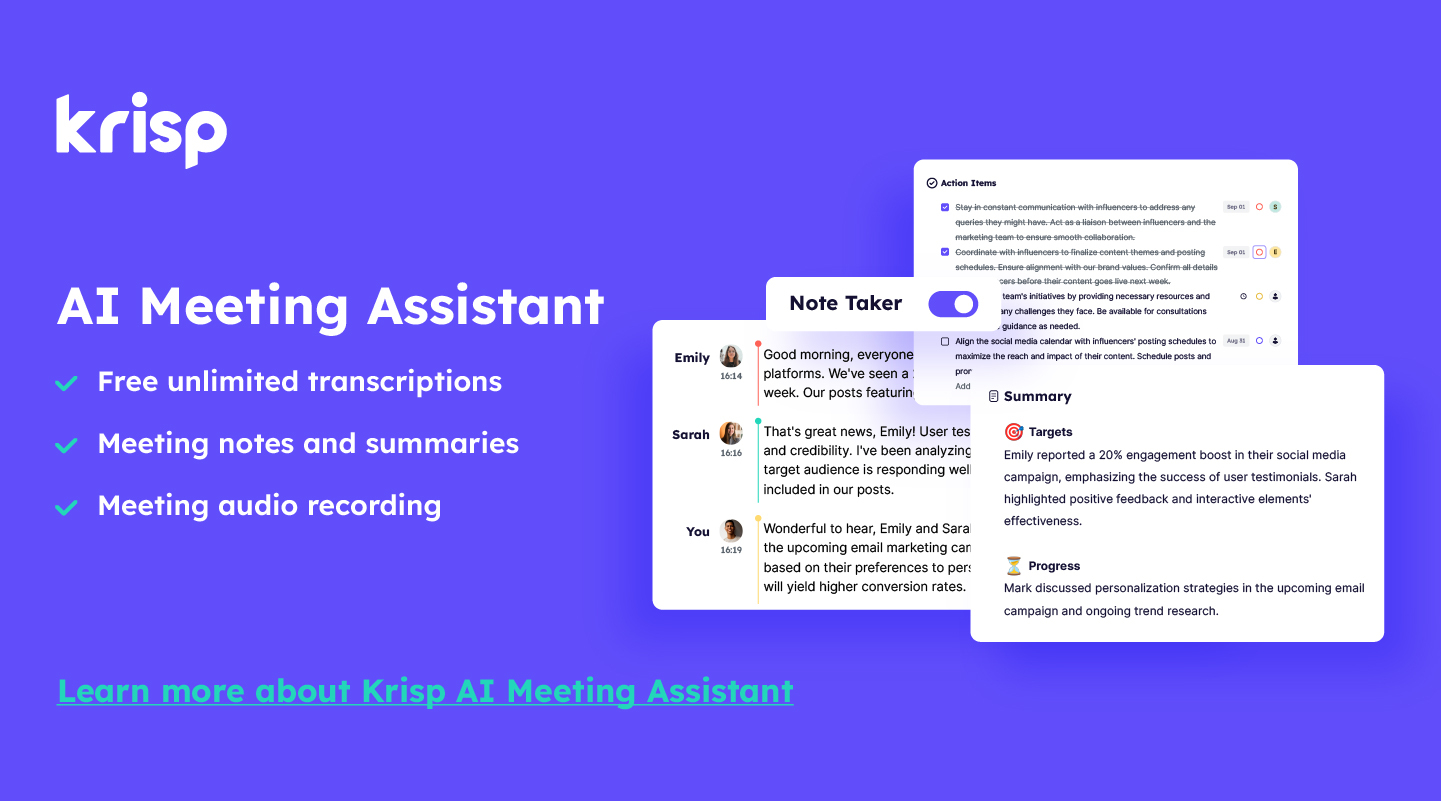
How to Record Audio on Mac with Krisp to Enhance Quality?

AI Meeting Assistant Krisp is one of the best answers to the question “How to record audio on Mac? This Meeting Recording App works with any virtual conferencing app, including Zoom and Google Meet.
Designed with productivity and efficiency in mind, Krisp offers a bot-free or bot-assisted experience. This AI Meeting Assistant helps you capture every detail without fail and maintain exceptionally accurate, compliant meeting records.
Krisp works with all audio hardware configurations and applications that support digital voice communication. Windows, Mac, Linux, iOS, and Android. Moreover, Krisp can be compiled for special-purpose embedded systems. These systems represent a mix of computer hardware and software often used in real-time operating environments.
Krisp’s software development kit (SDK) easily integrates into web applications. SDK combines real-time, AI-driven technologies to make speech clearer in real-time communication apps, including virtual conferencing apps.
Krisp features include:
- Automatic, Streamlined Audio Recording featuring best-in-class audio quality
- Real-time AI Noise Cancellation to eliminate background noise during recordings
- Real-time, Unlimited, Multilingual Meeting Transcriptions with 96% accuracy
- AI Meeting Notes & Summary to capture the critical parts of online discussions
How to Record Audio on Mac Using Krisp
If you’re seeking answers to “How to record screen and audio on Mac?” or “How to record audio on Mac without background noise,” follow these steps:
- Open a Krisp account. You can create a Krisp account if you don’t have one. Or sign in to your Krisp account if you already have it.
- After Signing Up, you’ll appear on the “Install” page.
- Install Krisp by downloading the app from its official website. Ensure you have Mac Admin or Standard user rights or Windows Admin rights. Then click “Install” on Mac.
- Set Krisp as Your Microphone by opening it and picking Krisp as your input device in the app you’re using to record. Ensure you use Krisp Microphone and Krisp Speaker in your communication app to capture the meeting in your transcript and recording comprehensively.
- Start Recording your audio, filtering out the background noise, voice, and echo to boost productivity and engagement, eliminate meeting fatigue, and improve collaboration.
- Find Your Recording Saved in the Cloud. Krips makes them encrypted, safe, and secure.
- Access Your Recordings After the Meeting by visiting “My Meetings” on your account dashboard. The storage space for recordings is 3 GB.
- Quickly Revisit and Review key recording moments for better understanding and action.
- Download Your Recording from the “My Meetings” page.
- Share The Recording easily to enhance inclusive and informed team discussions.
Advantages of Recording Audio on Apple Devices with Krisp
Did you know the value of the video conference market is projected to be worth $30 billion by 2032? It’s vital to learn how to screen record on Mac with audio. Moreover, it’s critical to know how to record audio with excellent quality. That’s where Krisp steps in to offer more than one benefit:
Krisp Enhances Audio Quality by Removing Background Noise
As the leading Meeting Assistant in Productivity Voice AI, Krisp enhances digital voice communication through audio cleansing, noise cancellation, call transcription, and summarization. Thus, Krisp solves one of the most common videoconferencing problems.
Krisp Recording Offers Full Privacy
This AI Meeting Recorder offers PII redaction, secure upload to the private cloud, and encryption in transit and at rest. Moreover, Krisp is General Data Protection Regulation (GDPR) compliant and System and Organization Controls 2 (SOC-2) certified.
Krisp Recording Unlocks Higher Productivity and Efficiency
Processing over 75 billion minutes of voice conversations every month and elevating the quality of recordings in real time, Krisp helps businesses deliver better outcomes. No need to soundproof rooms with costly high-end professional soundproofing, such as acoustic panels,
Krisp Transforms Meeting Recordings
Still wondering how to record audio on Mac with Krisp? This Meeting Assistant turns your recordings into more accessible and actionable resources to enhance communication, boost collaboration, and improve productivity.
Krisp Recording Helps Individuals with Hearing Problems
People who are hard of hearing or have hearing loss might use lip reading when participating in online discussions. However, lip reading is challenging, and the audio quality is poor online. Thankfully, Krisp eliminates background distractions and records with transcriptions.
Krisp Helps Singers Record Clean Vocals
Krisp uses advanced algorithms to record clean vocals by removing background noise and unwanted sounds. Thus, by isolating the vocal frequencies, Krisp provides a more professional and polished sound to allow singers’ voices to stand out.
Krisp Recording Doesn’t Distract Attendees
This AI Meeting Assistant records online discussions using your computer’s microphone and speakers without adding a bot. So, learning how to record audio on Mac with Krisp helps attract participants.
Krisp Records Online Meetings Easier Than You Think
This desktop app comes with a widget in the toolbar. The latter quickly edits microphone and speaker settings and lets you view and join upcoming meetings.
Krisp Makes Recording Review Effortless
This Online Meeting Recording app allows you to play back conversations after the call ends, identify the conversation participants, and search the text transcribed.
Krisp Recording Boosts Quality of Life
This AI Meeting Assistant records online discussions, including human resources interviews and board meetings, with crystal-clear audio and detailed transcriptions. Thus, Krisp preserves critical discussions, allowing easy review of missed content without extensive note-taking.
Krisp Recording Saves Time and Cuts Costs
Krisp records meetings with crystal-clear audio, enabling you to organize meetings, including cross-border ones, with greater flexibility. So, no need to worry about preserving key details during face-to-face meetings. Moreover, knowing how to record audio on Mac with Krisp helps you share recorded information and collaborate efficiently.
Krips Recording Eliminates Information Fatigue
Those involved with a lot of documentation, such as healthcare professionals and hiring managers, can record their online discussions or interviews for future reference. Moreover, they can keep discussion notes and summaries while saving time on note-taking.
Recording MP3 on Apple Devices

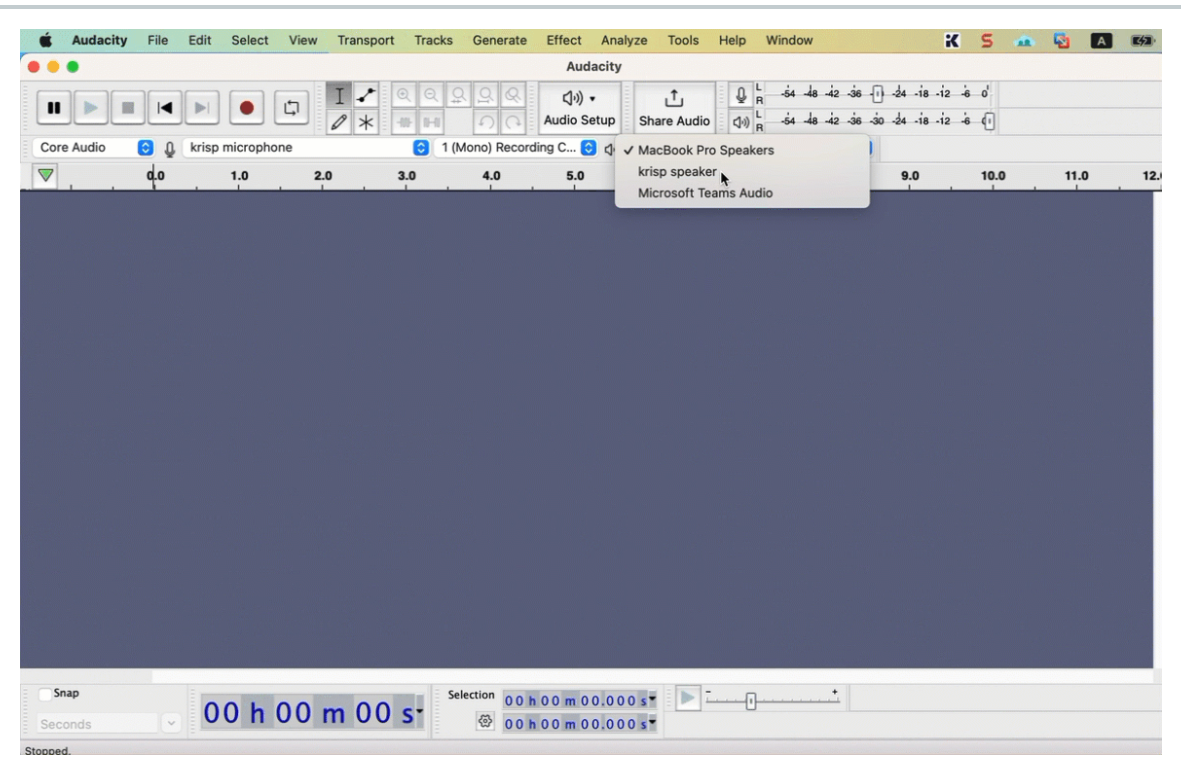
How to record audio on Mac in MP3? Consider Audacity:
- Download Audacity: Install it from the Audacity website.
- Set Up Audacity: Open Audacity and select your input device from the drop-down menu.
- Record: Use the red button to record. When you’re done, click stop.
- Export as MP3: Go to “File” > “Export” > “Export as MP3.”
GarageBand is another option to record MP3 on a Mac:
- Open GarageBand: Start a new project.
- Add Track: Select “Audio” to add a new track.
- Record: Press the red record button and perform.
- Export: Go to “Share”> “Export Song to Disk,” select “MP3 format”, and “Save.”
Bonus Tip: Krisp best answers the question, “How to record on Mac in MP3 format?” Specifically, Krisp operates with recording software like GarageBand or Audacity to enhance MP3 recording. As a result, you’ll enjoy high-quality and noise-free audio in MP3 format.
Recording Your Desktop with Audio on Apple Devices?

How to record audio on Mac while using your desktop? QuickTime or third-party software like OBS Studio makes screen recording with audio easy.
1.QuickTime Player:
- Open QuickTime Player and go to “New Screen Recording.”
- Click the options menu to select your microphone.
- Start recording and speak into your mic to capture desktop audio with the screen recording.
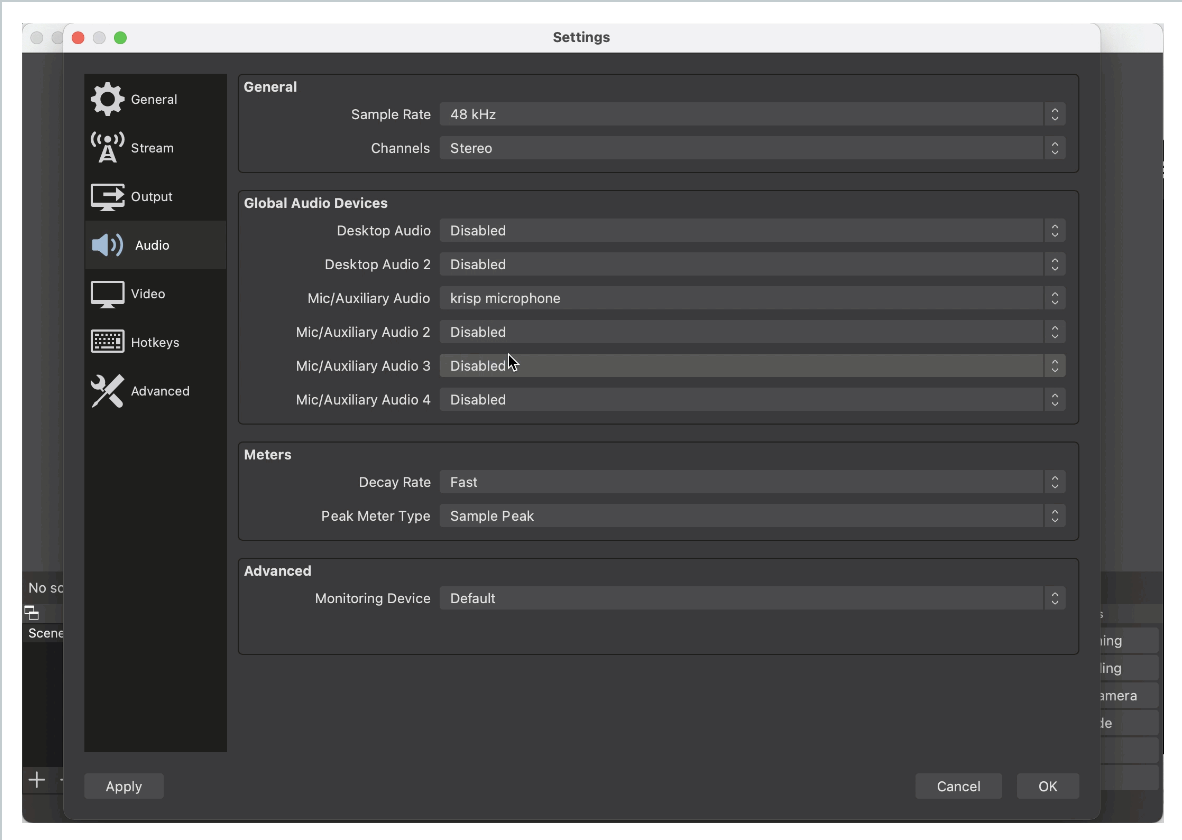
2. OBS Studio:
- Download and install OBS Studio.
- Set up a new scene with display capture and audio input.
- Start recording to capture both video and audio.
Bonus Tip: Krisp best answers the question, “How to record your desktop with audio?” Precisely, follow Mac productivity hacks to use Krisp with QuickTime Player and OBS Studio to enhance audio quality:
- Download and install
- In QuickTime, go to “File”> “New Audio Recording,” click the arrow near the record button, and select Krisp as your microphone.
- In OBS, go to “Settings”> “Audio,” and select Krisp as your microphone input.
- Start recording while Krisp filters background noise.
Key Takeaways
Knowing how to record audio on Mac is straightforward with tools like QuickTime, Voice Memos, GarageBand, and Audacity. Whether you’re capturing internal audio, recording music, or creating voice memos, these methods enable flexible audio recording and sharing.
Moreover, you can further enhance recording quality by utilizing AI Meeting Assistant Krisp. This AI meeting recorder records online interactions noise-free and with the highest quality. Learning how to screen record audio on Mac with Krisp helps enhance productivity, collaboration, and efficiency.
Frequently Asked Questions
- Install a virtual audio device to route internal audio.
- Set Output to the virtual audio device by going to “System Preferences”> “Sound” and selecting the device as the audio output.
- Open Recording Software: Use QuickTime, Audacity, or GarageBand.
- Set Input to the virtual audio device by selecting it as the input source in the recording software.
- Start recording to capture internal audio.