Ever been in a Google Meet session where important details were flying fast, and you wished you could hit rewind to catch everything? Whether it’s a team meeting, a client presentation, or a virtual class, recording your Google Meet sessions ensures you don’t miss a thing.
It’s not just about convenience—it’s about staying on top of your game, saving time on note-taking, and having a reliable record to revisit later. In this guide, we’ll walk you through how to record a Google Meet, making the process straightforward and stress-free. Plus, we’ll show you how to use an AI meeting assistant to record and supercharge your productivity at the same time.
How To Record a Google Meet Meeting
Before we get into the steps, it’s important to check whether your Google Workspace account supports recording. Not all plans include this feature, so you’ll want to confirm before moving forward.
Before Learning How to Record a Meeting in Google Mee
Does Your Google Workspace Support Recording?
Here’s how you can find out:
1. Open your browser and visit admin.google.com.
2. Login with your admin email and password (note: it won’t end in @gmail.com).
3. If you can’t remember your password, click “Reset” to recover it.
Who Can Record Google Meet Sessions?
A recording is available with these Google Workspace plans:
- Workspace Individual Subscribers
- Google One subscribers with 2 TB or more of storage
- Business Standard and Business Plus
- Education Plus and the Teaching and Learning Upgrade
- Enterprise editions
Also, make sure your admin has enabled recording in the settings. Just keep in mind it can take up to 24 hours for the feature to activate.
Starting Your Recording
1. Join the Meeting: Access Google Meet and either start or join a session.
2. Open the Activities Panel: Click the “Activities” button at the bottom-right corner of the screen.
3. Select “Recording”: In the menu, choose Recording and follow the prompt to pick your preferred language for meeting captions. Note that captions may take a few hours to appear in the recording file if you view them through Google Drive.

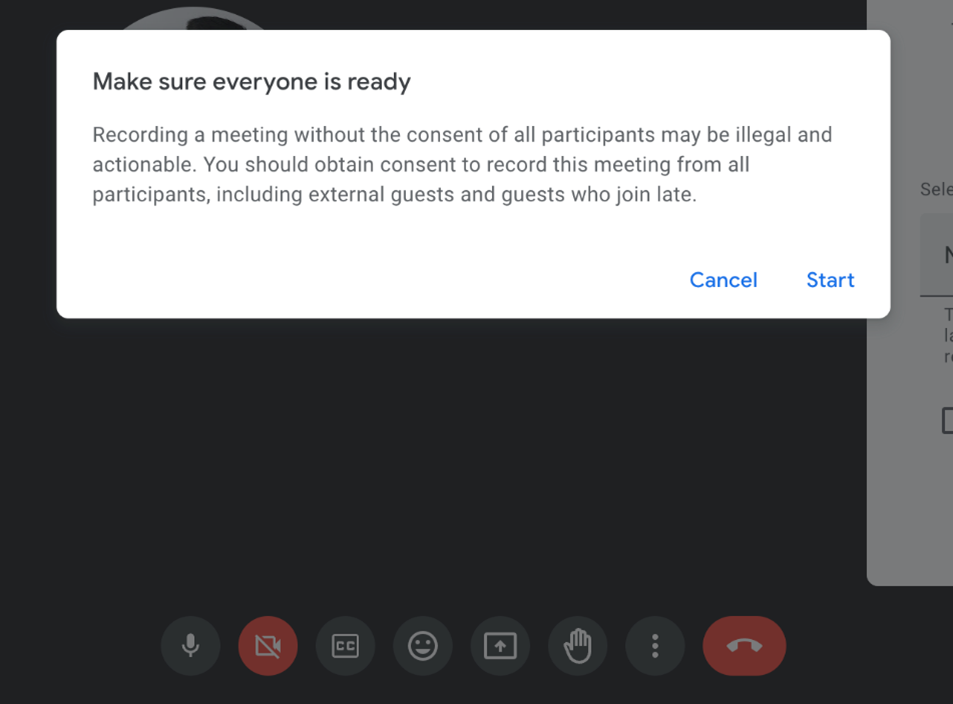
4. Initiate Recording: After selecting your options, click the three dots in the bottom-right corner and choose Start Recording. Google Meet will notify all participants that the recording has begun.
5. Recording Duration: Meetings can be recorded for up to 8 hours. After that, the recording will automatically stop.
Stopping Your Recording
When it’s time to wrap up the recording:
1. End the Recording Manually: Go to the Activities panel, select Recording, and then click Stop Recording.
2. Automatic Stop Options: If the meeting ends or all participants leave, the recording will stop automatically.
Once the recording is stopped, the meeting organizer will receive an email with a link to the recording.
Accessing and Sharing Your Recording
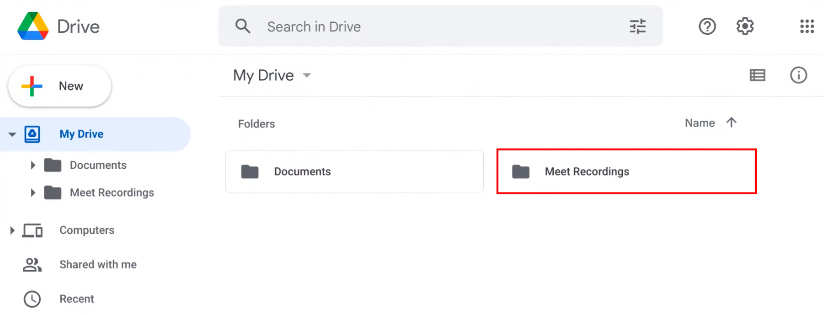
1. Find the Recording: Recordings are saved in the meeting organizer’s Google Drive under the Meet Recordings folder. To locate it, open Google Drive and check the left-hand menu.

2. Download the File: Click the three-dot menu next to the recording and choose Download to save it to your computer.
3. Share the Recording: To share the file, click Share, enter the recipients’ email addresses, and click Done.
How to Record a Google Meet On Any Device
Recording your Google Meet sessions allows you to revisit important discussions or share them with those who couldn’t attend. Whether you’re using a computer or a mobile device, here’s how you can capture your meetings seamlessly.
How to Record a Google Meet on Windows and Mac
1. Start or Join the Meeting: Access Google Meet through your browser on Windows or Mac and either create or join a meeting.
2. Open the Activities Panel: Look for the Activities button in the bottom-right corner of the screen and click on it.
3. Select “Recording”: From the menu, choose Recording. If captions are needed, select your preferred language.
4. Start the Recording: Confirm by clicking Start Recording. Participants will be notified that the session is being recorded.
5. Duration: Google Meet allows recording for up to 8 hours. After this, the recording will stop automatically.
Stopping the Recording:
- When the meeting ends or if you want to stop earlier, go back to the Activities panel, click Recording, and select Stop Recording.
- Alternatively, the recording stops automatically when all participants leave the meeting.
Accessing the Recording:
- The recording will be saved to the organizer’s Google Drive in the Meet Recordings folder.
- You can download it by clicking the three dots next to the file in Google Drive and selecting Download.
How to Record a Google Meet on iPhone and Android
Recording Google Meet sessions can be a game-changer for capturing important discussions, team meetings, or lectures. If you’re using an iPhone or Android device, here’s how you can easily record your Google Meet sessions.
Using the Google Meet App
1. Open Google Meet: Launch the app and join or start a meeting.
2. Access the Recording Feature: Tap the three-dot menu (More Options) in the bottom right corner.
3. Start Recording: Select “Start Recording.” A notification will appear, informing participants that the meeting is being recorded.
4. Stop Recording: Tap the three-dot menu again and select “Stop Recording” when the meeting ends or when you no longer need to record.
5. Save the Recording: The recording is automatically saved to the meeting organizer’s Google Drive under the “Meet Recordings” folder.
Using Screen Recording on Your Device (Alternative Method)
If your account doesn’t support built-in recording or you don’t have the required permissions, you can use your device’s screen recording feature:
For iPhone:
1. Enable Screen Recording: Go to Settings > Control Center > Customize Controls, and add “Screen Recording.”
2. Start Recording: Open Control Center and tap the “Record” button. Then, join the Google Meet session.
3. Stop Recording: Open the Control Center and tap the red recording indicator to stop.
4. Save the Recording: The video will be saved to your Photos app.
For Android:
1. Enable Screen Recording: Check if your device has a built-in screen recorder. This is usually found in the Quick Settings menu (swipe down from the top of the screen).
2. Start Recording: Open Quick Settings, tap “Screen Recorder,” and then join the Google Meet session.
3. Stop Recording: Tap the stop button in the notification panel.
4. Save the Recording: The video will be saved to your Gallery or Files app.
How to Record Google Meet in Better Quality with a Third-Party Tool
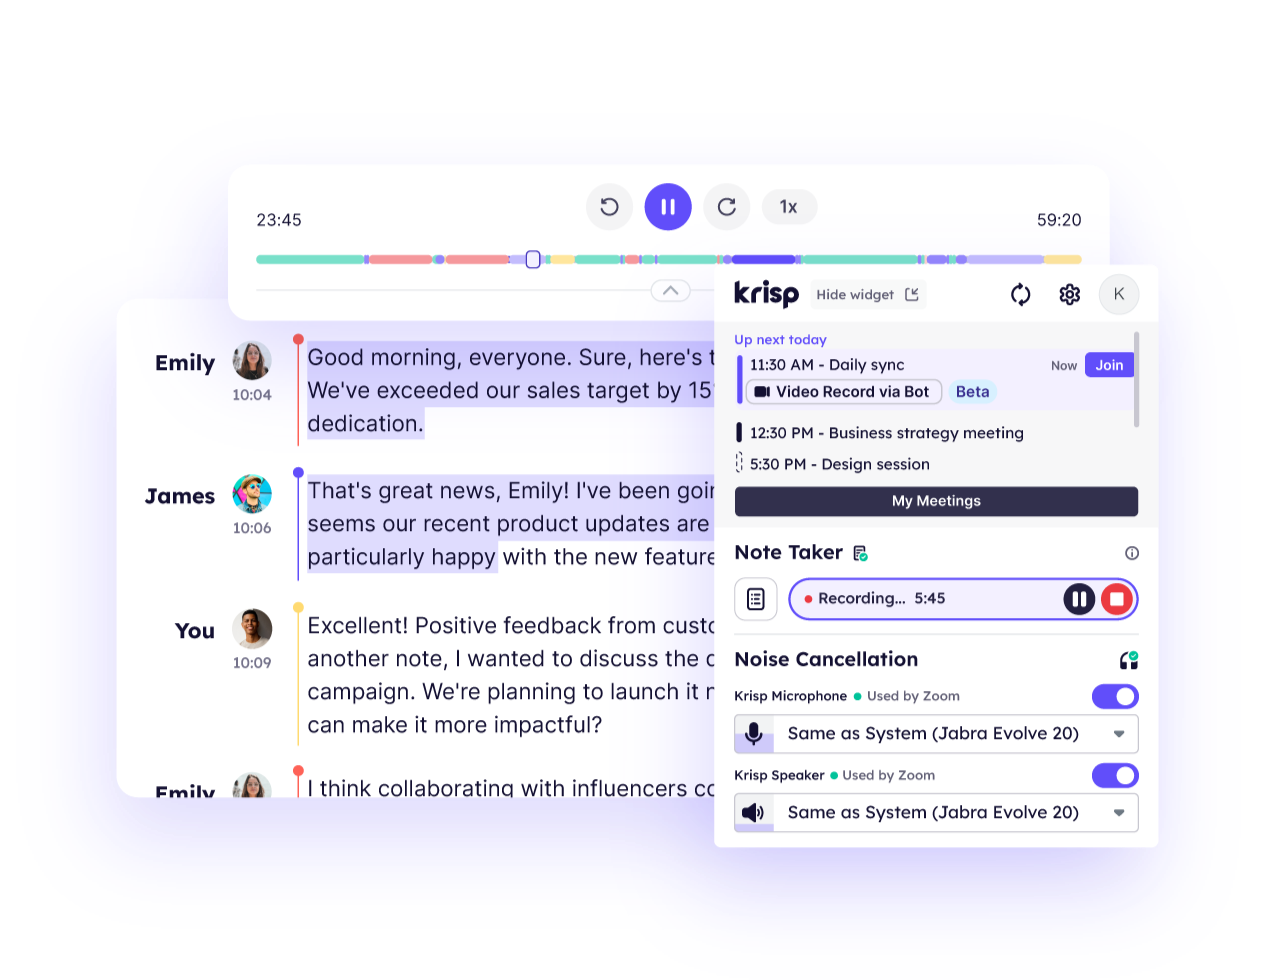
If you’re looking to record your Google Meet sessions with better audio quality, Krisp is a fantastic tool to help you do just that. Krisp is known for its AI-powered noise cancellation, but it also offers a range of features that can make your Google Meet recordings sharper, clearer, and more productive. Here’s how to use Krisp for your Google Meet recordings, and why it’s a great option.
How to Record Google Meet with Krisp
1. Download Krisp: First, you’ll need to download and install Krisp on your computer. It’s available for both Windows and Mac, and the setup is quick and easy.
2. Connect Krisp to Google Meet: Once Krisp is installed, open Google Meet and start or join your meeting as usual.
3. Enable Krisp: In Google Meet, click the three dots in the bottom-right corner, go to Settings, and under Audio, select Krisp as your microphone and speaker. This will ensure that Krisp’s noise-cancellation technology is applied during your meeting.
4. Start Recording: You can now start recording your Google Meet session using Google Meet’s native recording feature or any other third-party recording tool that integrates with Krisp. Your audio will be enhanced by Krisp’s noise cancellation during the entire meeting.
5. Stop and Access Your Recording: After the meeting, you can stop the recording. The recording will be saved to your Google Drive, and it will have the enhanced, clear audio that Krisp provides.

Why Krisp Makes Your Recording Better
- AI-Powered Noise Cancellation: One of the standout features of Krisp is its ability to eliminate background noise in real time. Whether it’s the hum of an air conditioner, keyboard clicks, or loud conversations in the background, Krisp removes all of it. This results in clear, distraction-free recordings that are much easier to follow.
- Automatic Transcription: Krisp can automatically transcribe your meeting, saving you time from having to manually take notes. The transcription is accurate and easy to reference later, making it a great tool for follow-up discussions or for people who couldn’t attend the meeting.
- Action Items and Summaries: Krisp goes one step further by providing summaries and action items from your meetings. It helps you and your team stay on track and ensures that no important details are overlooked.
- Custom Vocabulary: Krisp lets you add custom vocabulary, which is particularly useful if your meeting involves industry-specific terms or jargon. This feature ensures that your transcriptions are more accurate.
- Bot-Free Recording and Note-Taking: Krisp eliminates the need for bots or other tools to handle recording and note-taking.
How to Save a Transcription with Your Google Meet Recording
Google Meet has a feature called “Take Notes for Me,” which automatically generates meeting notes for you. However, this feature may not be available to everyone. If you’re looking for a more powerful solution, Krisp offers an AI feature that can enhance your Google Meet experience, helping you focus on what matters most during your meetings.
Here’s how you can record Google Meet videos and download a transcript for your meeting:
1. Record Your Google Meet Meeting
Start by following the usual steps to begin recording your Google Meet session. Click on the three dots in the bottom right corner and select “Start Recording.” Let your participants know that the session is being recorded for later reference.
2. Use Krisp to Enhance Audio Quality
While Krisp doesn’t directly provide transcription, it plays a key role in enhancing the quality of your Google Meet recording. By filtering out background noise and ensuring crystal-clear audio, Krisp makes it easier for transcription tools to process the meeting accurately.
3. Review and Share Your Recording
Once your meeting recording is complete, you’ll find it saved in your Google Drive under the “Meet Recordings” folder. The clearer the audio, the more reliable any transcription service or manual review will be. You can download the video file and share it with your team for future reference.
How to Record a Google Meet Meeting Without Permission
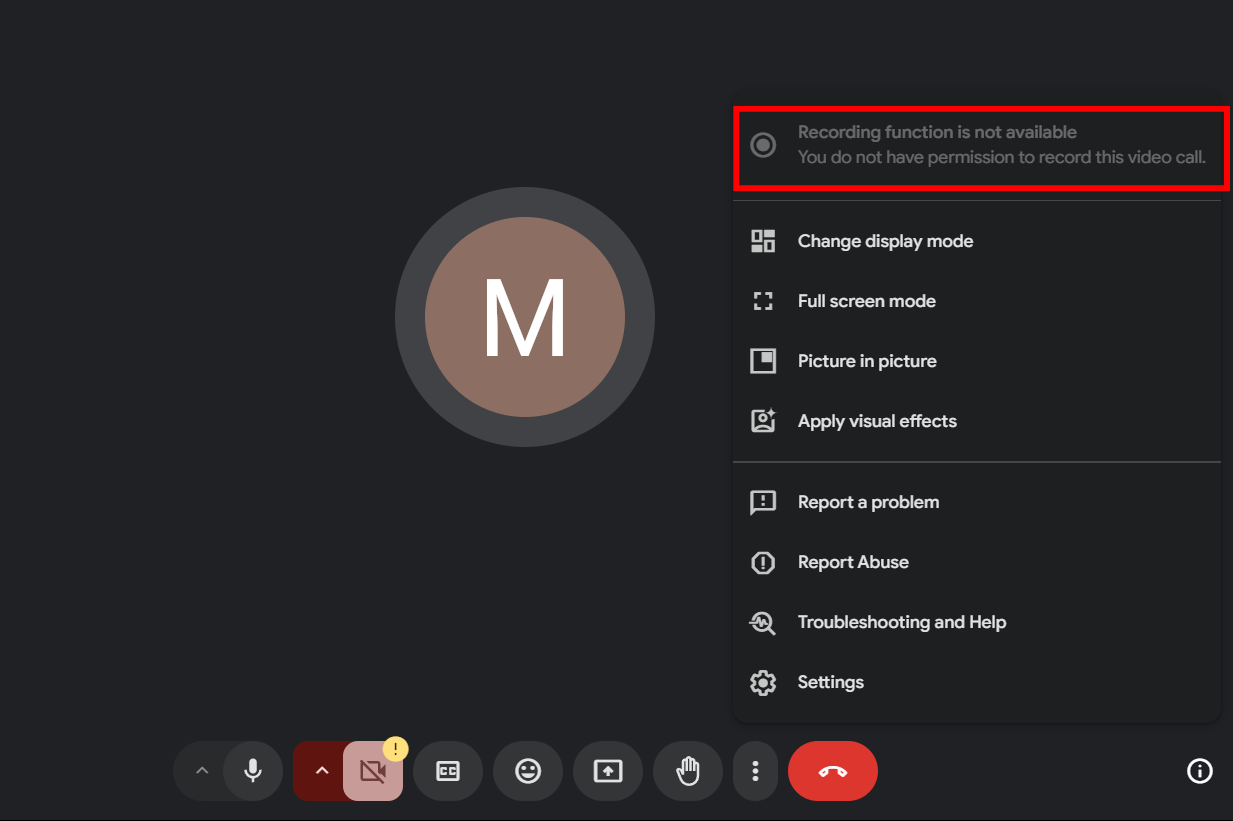
Sometimes, you might find yourself in a situation where you want to record a Google Meet meeting, but you don’t have the necessary permissions to do so. Typically, only the meeting organizer or those with specific admin rights can record meetings on Google Meet. However, if you don’t have permission to record directly within Google Meet, there are still a few ways you can record the meeting. Let’s look at some options.
1. Use Screen Recording Software
One of the simplest ways to record a Google Meet meeting without needing any special permissions is by using screen recording software. There are plenty of free or affordable screen recording tools that you can use, such as:
- OBS Studio
- Camtasia
- ScreenFlow
- Loom
These tools let you record everything that’s happening on your screen, including audio. All you need to do is start the recording before the meeting begins and stop it when the meeting ends. Just make sure you inform the meeting participants that you’re recording to avoid privacy issues.
How to use it:
- Download and install a screen recording tool of your choice.
- Open the tool and select the screen area you want to record (usually, the entire screen or just the browser window where Google Meet is open).
- Start the recording before the meeting starts.
- When the meeting ends, stop the recording, and save the file to your computer.
2. Ask the Meeting Organizer
If you really need a recording but don’t have permission, the most straightforward solution is to ask the meeting organizer if they can start the recording for you. In some cases, the organizer may be willing to grant you access to the recording afterward, or even start the recording at your request.
3. Record with Google Meet via Admin Account (If Applicable)
If you are an admin or have administrative access to Google Workspace, you can enable recording permissions for others in your organization. You would need to adjust the settings in the Google Admin console to allow recording, which can then be done by the meeting organizer.
A Few Things to Remember
When recording a meeting without permission, always be mindful of privacy and legal considerations. It’s a good practice to inform participants that you’re recording, as some locations and organizations may have rules around recording conversations. Transparency and respect for others’ privacy are key!
Recording a Google Meet meeting without permission might require some extra steps, but it’s totally doable with the right tools. Whether you’re using screen recording software or a third-party tool, you can still capture important details without needing to rely on Google Meet’s built-in recording feature.
Troubleshooting: Why Google Meet Recording Isn’t Showing Up
It can be really frustrating when you’ve recorded a Google Meet meeting, but the recording doesn’t show up where you expect it to. Don’t worry; this issue is more common than you might think, and there are several possible reasons why it happens. Let’s walk through some troubleshooting steps to help you get your recording to show up.
1. Check Your Google Drive
Google Meet recordings are automatically saved to the Google Drive of the meeting organizer. So, the first place to check is your Google Drive, specifically the “Meet Recordings” folder. If you don’t see the folder, try searching for the recording by name in your Google Drive search bar. It might be there, just filed under a different name.
Tip: If you’re using a work or school account, make sure you’re logged in with the correct account that was used to organize the meeting.
2. Wait for the Recording to Process
After a meeting ends, it can take some time for Google Meet to process and save the recording. Usually, this process takes a few minutes to an hour, but it can sometimes take a bit longer, depending on factors like the length of the meeting and system load.
If the recording isn’t showing up immediately, give it some time. Google Meet will send an email to the meeting organizer when the recording is ready.
3. Check for Recording Permissions
Only the meeting organizer or someone with specific admin privileges can record a meeting on Google Meet. If you didn’t have permission to record, the meeting may not have been recorded in the first place. Check with the meeting organizer to ensure they started the recording.
If you’re the organizer and you didn’t start the recording, you won’t be able to access it. In that case, reach out to Google Workspace support to check if there were any issues on their end.

4. Look for Any Admin Settings or Restrictions
In some cases, your organization’s admin settings might affect whether recordings are saved or accessible. If you’re using a Google Workspace account, it’s worth checking with your admin to see if there are any restrictions in place that could be blocking the recording from being saved.
5. Clear Cache or Use Incognito Mode
Sometimes, issues with seeing the recording can be caused by browser cache problems. Try clearing your browser’s cache or using incognito/private browsing mode to see if that solves the issue. This can help bypass any stored data that’s interfering with your Google Drive view.
6. Try Google Meet Support
If you’ve gone through all the steps and still can’t find your recording, it might be time to contact Google Meet support. They can provide further assistance and help determine if there was a technical issue with the recording.
Why Should You Record Your Google Meet Sessions?
With remote work becoming more common, knowing how to record a Google Meet session is essential for smooth virtual collaboration, learning, and personal communication.
Google Meet’s recording feature lets you capture audio, video, and presentations all in one place, making it super easy to revisit discussions or share them with others who couldn’t attend.
Whether you’re leading a team, teaching a class, or just want to preserve memories of personal conversations, understanding how to record a Google Meet session can be a game-changer.
You can record your Google Meet calls directly from your desktop, use Google Meet extensions, or even turn to recording software like Microsoft Teams and Zoom for the job.
If you want an even better experience, you can also use an AI meeting assistant like Krisp to record meetings with ease and without relying on Google Meet’s built-in features.
Conclusion
Recording your Google Meet sessions can make life so much easier. Whether it’s a work meeting, a class, or a presentation, having a recording means you don’t have to worry about missing anything important. Google Meet’s built-in recording feature gets the job done, but adding tools like Krisp can really take things up a notch.
Next time you’re in a meeting, just hit record and focus on what’s happening. The details will be there for you whenever you need them!


