Ever sat through a meeting and got super distracted by participants tuning in or adjusting their tech? Or a webinar where anyone could jump in with a question and halt the host’s presentation?
With Zoom meetings having, on average, 7 participants these days, it can surely get noisy! Thus, muting and unmuting participants in a meeting is the solution to keeping unwanted noises at bay.
Knowing how to mute Zoom can play a huge role in maintaining sharp Zoom audio in case you’re recording a meeting, and ensuring all participants can hear the speaker correctly.
In Zoom, there are dozens of ways of doing this to ensure the muting options are suited to their specific needs. But when can you mute Zoom, and when should you? Let’s have a look!
When Can You Mute Zoom?
Knowing when to mute yourself on Zoom can make or break a virtual meeting. Whether you’re dealing with background noise, multitasking, or simply not needing to speak, here’s your guide to mastering the mute button on Zoom.
Background Noise
Background noise can be a major distraction in virtual meetings. That’s especially true when the latter is a skip level meeting or other important team meeting. Whether it’s construction outside or a pet’s unexpected vocal performance, muting yourself can prevent these noises from disrupting the meeting flow. If you find yourself in a noisy environment, it’s courteous to mute your microphone to ensure everyone can hear clearly.
Multitasking
Sometimes, you may need to attend a meeting while juggling other tasks. In these situations, muting yourself can help you stay focused on your work without disrupting the meeting. It’s a simple way to ensure that your background activities don’t interfere with the discussion.
Listening-Only Webinars
In webinars where you’re only expected to listen, knowing how to mute Zoom from your side can prevent accidental interruptions. This is particularly useful in large meetings where multiple participants could cause chaos if everyone unmuted themselves at once.
Organizing Large Calls
In larger meetings, muting participants can help maintain order. This is especially true in public meetings where participants may speak out of turn. By muting participants until they’re ready to speak, hosts can prevent interruptions and keep the discussion on track.
Avoiding Disruptive Participants
Finally, muting disruptive participants can prevent their behavior from derailing the meeting. This is important in maintaining a productive and respectful meeting environment at all costs.
Knowing when to mute yourself on Zoom is key to a successful virtual meeting. Whether it’s avoiding background noise, multitasking, or managing disruptive participants, mastering the mute button on Zoom can help you stay focused and engaged.
Here’s a run through how to mute Zoom meeting participants as a host and when to give them the freedom to do so at their own will:
How to Mute Zoom Audio on a PC or Mac: Steps for Participants & Hosts
To mute yourself, both as a participant and as a host (works the same way):
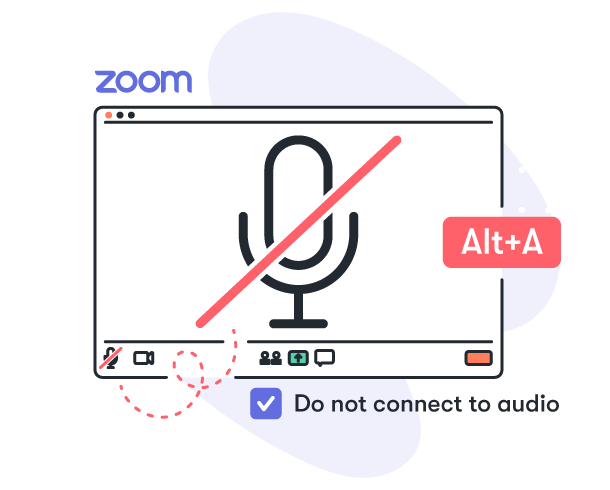
Head over to the meeting’s toolbar, click the Mute button on Zoom [the microphone icon,]and then Unmute to turn your mic back on:
You can also use the Alt+A keyboard shortcut to mute and subsequently unmute your mic. And if you’re wondering how to mute Zoom on Mac, use the shortcut command + shift + A to mute and unmute Zoom.
If you joined a call via your phone, dial *6 to set your phone on mute your phone. Dial *6 again to unmute yourself.
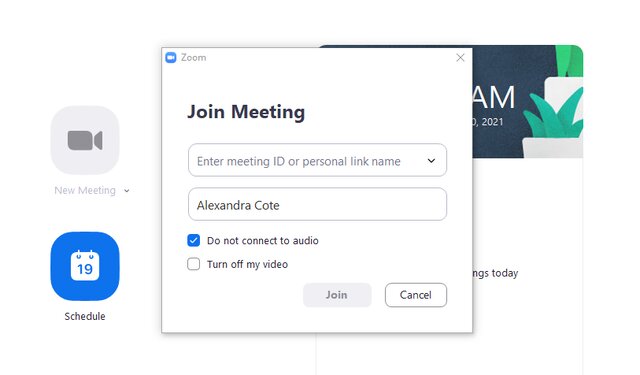
You can automatically start on mute when you join a specific meeting by selecting Do not connect to audio before the start of the meeting:
If you’re wondering how to make sure you are muted on Zoom at all times you start Zoom meetings,
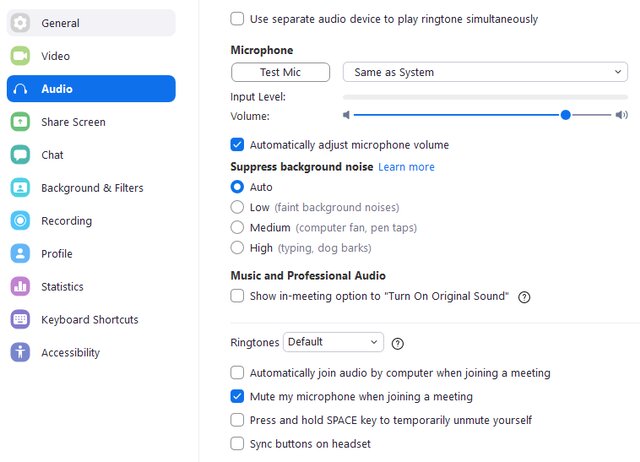
head to Settings, Audio,
select Always mute microphone when joining a meeting:
Note: If you’re already on Mute, hold the spacebar to temporarily unmute Zoom yourself when you want to give quick feedback or ask a question. This quick hack ensures you won’t leave your mic on after you’re done.
Muting Yourself While Keeping the Computer’s Audio On
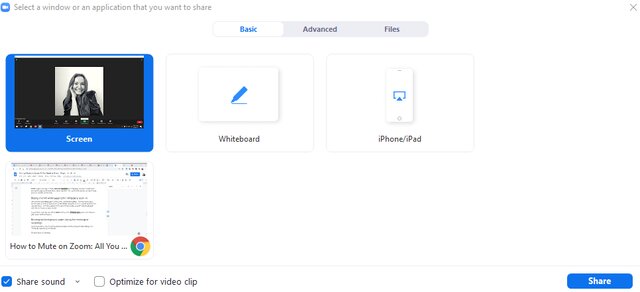
To get this to work, set yourself on Mute and mark the Share sound option when starting your screen-sharing session:
Now guests will see your screen and hear the audio on your own computer even if you’re on mute.
How to Mute Participants in Zoom
Here we’ll explore the steps to how to mute Zoom participants in your meeting. It’s important to note that only the host or co-host has the ability to mute other participants.
Sign in to your account,
On the left sidebar, click Settings.
Scroll down until you find the “Mute all participants when they join a meeting” option and switch it on.
How to Mute Participants in Zoom During a Call
To mute Zoom for participants in an ongoing meeting or a call:
Click ‘Participants’ on the bottom toolbar, and a sidebar will open on the right-hand side,
Click the Zoom mute icon(microphone icon) next to the name of the participant(s) you want to mute.
How to Mute All Participants in Zoom
Webinars. Presentations. Conferences. Co-working sessions. Team meetings.
All of these events have a host who’s not exactly going to enjoy the occasional interruption.
Got too much noise on one channel?
As a host, you can handpick a specific participant either because they’re disturbing the Zoom call or because they might simply prefer to stay on mute but don’t know how to mute Zoom on their side. Thus, you politely ask them to accept their suggestion to be muted. Go to the list of participants [in the toolbar,] and you should be able to mute/unmute individuals manually:
From the same screen, you can choose to Mute All participants. Make sure you don’t leave the Allow Participants to Unmute Themselves option on if you don’t want people to jump in during your presentation.
Remember you can always change this setting at any point during the Zoom meeting. So if you’re taking questions at the end of a webinar, head over to the three settings dots on the right side of the Mute All option. Select Ask All to Unmute to send a message to every participant when it’s ok to unmute themselves.
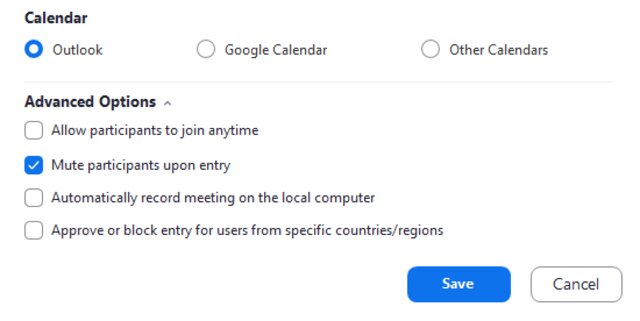
You can also have everyone start the meeting on mute. When scheduling a meeting, select Mute participants upon entry from the Advanced Options:
Example: If you’re hosting a webinar, you might want everyone on mute throughout the session but still let them unmute their audio later when they have a question.
Getting Consent to Mute a Zoom Meeting Participant
For obvious legal and ethical reasons, Zoom hosts can’t unmute a participant if the latter hasn’t given their consent. This is why the first option to unmute someone is to Ask All to Unmute and send the pop-up request:
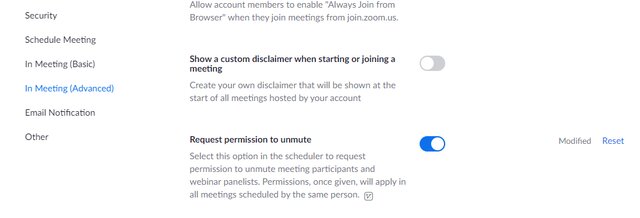
An alternative is to go to your In Meeting (Advanced) settings and turn on the Request permission to unmute option.
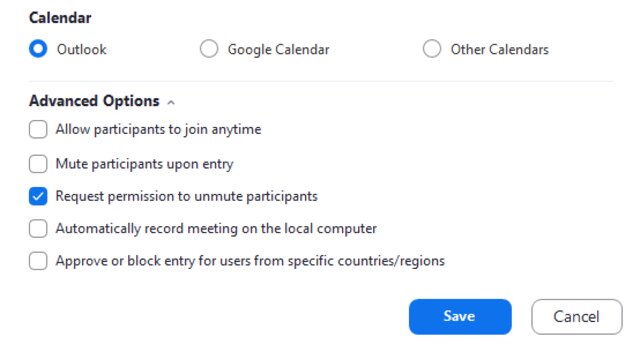
Now, the option will appear every time you want to schedule a meeting:
With this in place, when a host wants to unmute someone, the participant will receive a message prompting them to allow the host to unmute at any time.
Tip: Paid plans allow you to group participants and establish this request only for specific groups. This lets you send the pop-up consent request only to people you’ve selected beforehand.
Once a participant has allowed the host to unmute them, they won’t be asked this a second time. So, for every meeting scheduled by the same host that got the initial approval, the participant can have their microphone unmuted when needed.
What if a participant wants to revoke consent for this?
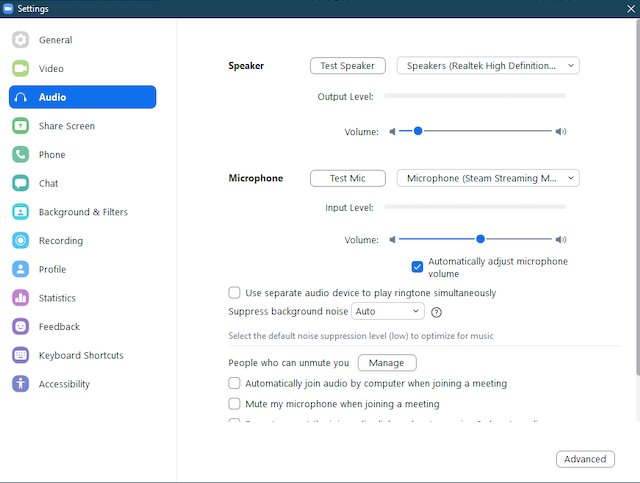
They can go to the Audio settings and manage/remove the hosts that received approval from the ‘People who can unmute you’ section.
How to Block Background Noises During Virtual Meetings
It’s tedious to keep muting/unmuting yourself when background noises start disturbing the meeting.
Zoom does have a noise suppression option that lowers background sounds like keyboard typing or dogs barking. Go to your Settings, select Audio, and scroll to the Suppress background noise section to make your selection:
The problem is that these four levels of the Zoom noise cancellation feature don’t block out all types of noises simultaneously.
For instance, even if you opt for the Auto setting, it only applies moderate background noise reduction so the chance for some sounds to go unnoticed is high. Your best bet would be to go for the High level but this will take up a lot of CPU power.
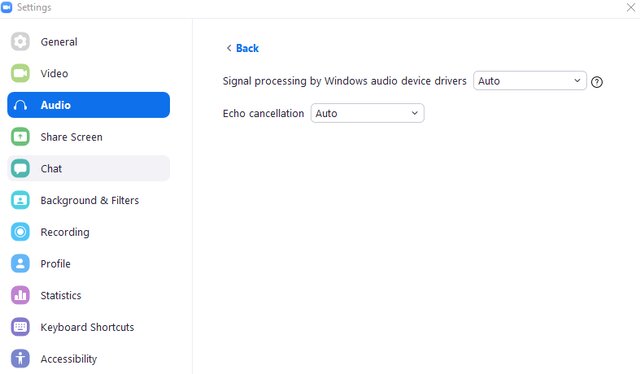
The same situation applies to the levels for echo cancellation under the Advanced audio settings:
So if you’re tired of pausing your recordings because of construction work going on around your house or you simply don’t want noise to disrupt an important conversation, try Krispinstead.
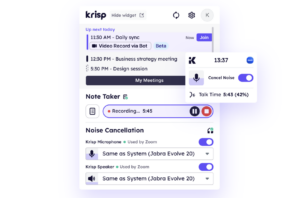
The app automatically removes all background noises and echoes so your team won’t get distracted or misunderstand what you’re saying. If you’re a podcast host or YouTuber, you can record studio-like interviews through the built-in HD voice feature.
No extra equipment is required — you only need Krisp’s AI meeting assistant that brings automatic meeting recording feature to your virtual calls.
This will instantly solve the “everybody-go-on-mute” problem. No need for anyone to Mute themselves on Zoom when they use Krisp.
The best part is that Krisp removes the background noises on both ends of a meeting. So if you’re hosting a webinar and taking questions, you won’t have to worry about not understanding the attendee because their fan is on. Krisp will clear up the background noises on their end too. All this with minimal CPU usage if you turn on the low power mode.
Here’s how to connect Zoom to Krisp in less than one minute:
Keep in mind you can connect this noise-cancelling app to any other video conferencing or recording tool that accepts the Krisp as the audio input.
Final Words on How to Mute Zoom During Meetings
As a general rule, remember it’s best to have your participants start the meeting on mute. This prevents the meeting from starting when they’re not ready or still caught up with talking to their family.
Keep a general list of best practices to share with participants or display as your virtual background. Make it a rule for your team members or event attendees to mute themselves whenever they’re not speaking. Also, decide how a participant can get the host’s attention. They could virtually raise their hand, leave a message in the chat box, or directly unmute themselves.
Another super common situation is for speakers to forget they’re on mute. A host’s first instinct should be to tell the speaker that the other participants can’t hear them. Only resort to asking them to unmute via a pop-up if they missed your first cue.
And don’t worry too much about background noises. Turn on Krisp and let it do its job so you can focus on your call instead and rest assured that your audio will be of top quality.
Don’t forget to read our full list of Zoom tips you can use to host and record the most importnat meetings or events!
How to Mute Someone on Zoom Without Being the Host?
It’s actually impossible to mute someone as a participant without being the host. You need to be a co-host, ask the host privately, or raise a hand to ask to mute certain participants.
In a Zoom meeting, will I be notified when the Host unmutes me?
Zoom 5.0.3 prohibits your host from unmuting you without your permission. You will receive a notification that says, “The host would like you to unmute.” Then you can choose to stay muted or to unmute.