Apple released the M1 processor in November 2020. Since the hardware itself shares similarities with iPhone processors (both being arm-based, and having a neural engine), some software components also started to support MacBooks. One of those software components is Apple’s CoreML. CoreML is a framework that allows you to do ML/AI model inference on CPU, GPU, or ANE. Running inference on the GPU or the ANE is not as straightforward as running it on the CPU, but those differences are out of the scope of this article. In this article, we will go through all the necessary steps needed for integrating a simple CoreML model into a C/C++-based app or SDK.
Generating a CoreML model
Usually, neural network model training is implemented in Python using frameworks such as Tensorflow or PyTorch. CoreML uses its own custom model formats, as of right now there are two: .mlmodel and .mlpackage. From their documentation, it looks like they are going to move forward with the .mlpackage and slowly drop support for the .mlmodel, so I suggest generating a .mlpackage if you are just starting. CoreML model generation is done via coremltools, an open-source Python package written by Apple. After generating a .mlpackage or a .mlmodel we can move on to the integration phase. In this article as an example we will use a dummy model that has 1 input and 1 output. Both are multidimensional arrays with float32 data types.
Integration
CoreML models need to be compiled first, to be used by the CoreML interface. The extension for a compiled model is .mlmodelc. Compilation can be done in two ways.
- By dragging and dropping your CoreML model to your Xcode project. This will add your model as a source file to your project. Xcode will automatically call coreml compiler for your model.
- By calling coreml compiler explicitly using the command line:
mkdir output
xcrun coremlc compile YourModel.mlmodel output.
Both are essentially the same, with the difference being that the first approach is convenient if you are working on an iOS or a MacOS application. Since our use case is that we are working in a C/C++-based software we will go with the second approach.
Now in order to use the CoreML API for model loading and inference we again have two options. We can either use the API directly or the indirect approach by which I mean to use the CoreML compiler-generated classes that will do the heavy lifting for us. Since the indirect approach is much more developer friendly we will explore that approach in this article.
So to generate the classes we can either drag and drop the model to an Xcode project as we did for model compilation or call the CoreML compiler explicitly:
- mkdir wrappers
- xcrun coremlc generate YourModel.mlmodel wrappers
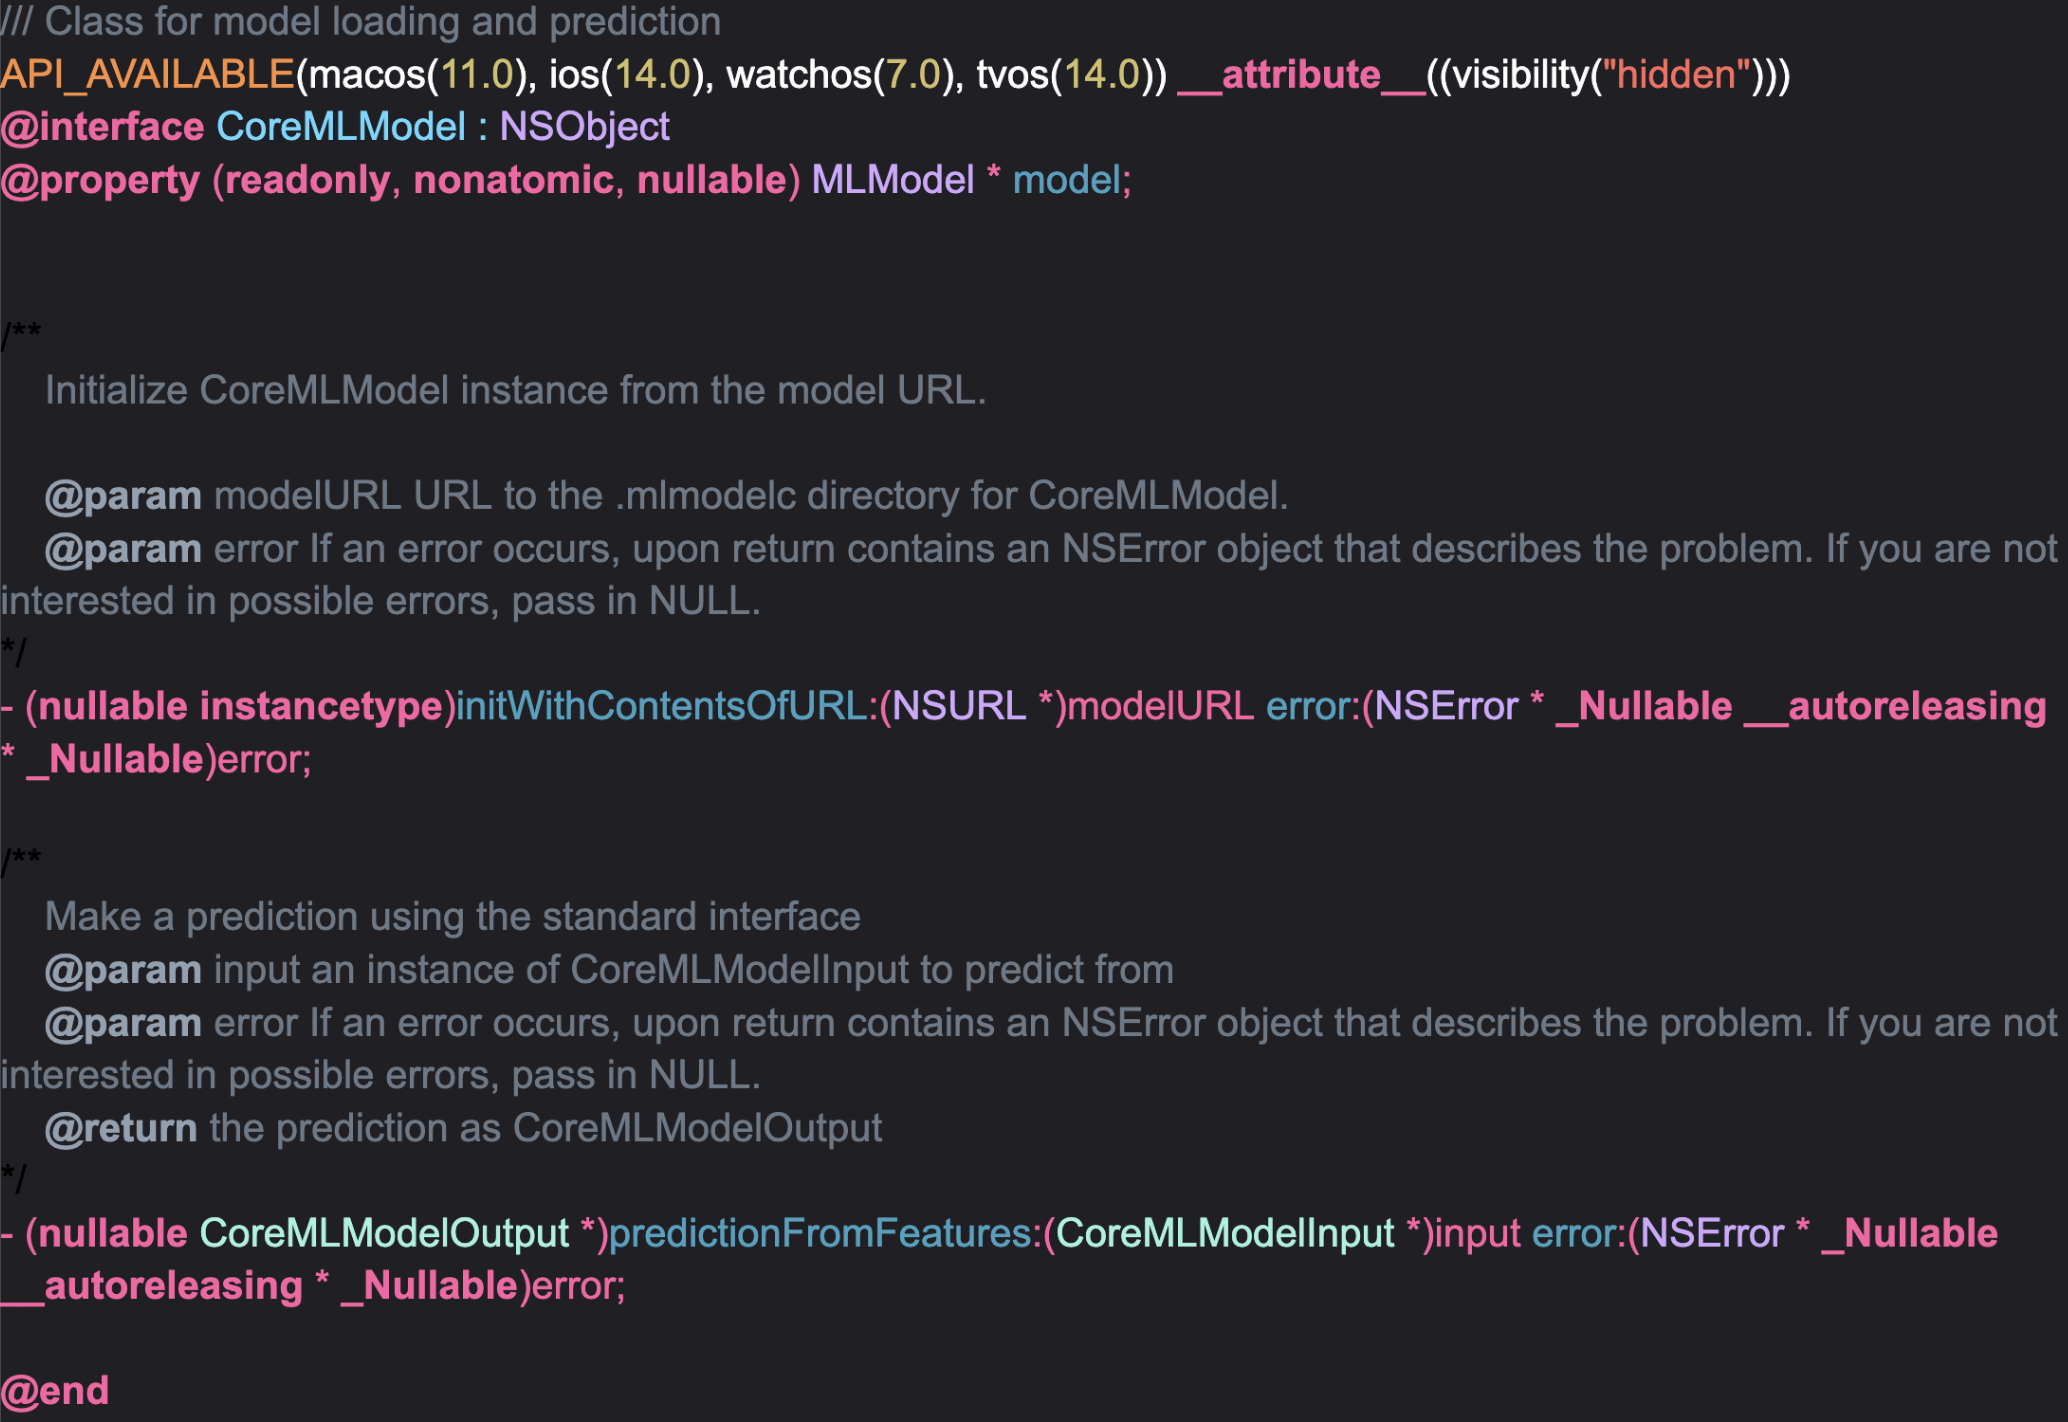
The compiler will generate 3 classes one for model input, one for model output, and one for models that are going to be written in either Objective-C or Swift. The language can be chosen via a compiler option –language. The names of the classes depend on the .mlmodel (or .mlpackage) file name. In our case, filename is CoreMLModel.mlmodel
- CoreMLModelInput
- CoreMLModelOutput
- CoreMLModel
And they have this structure.

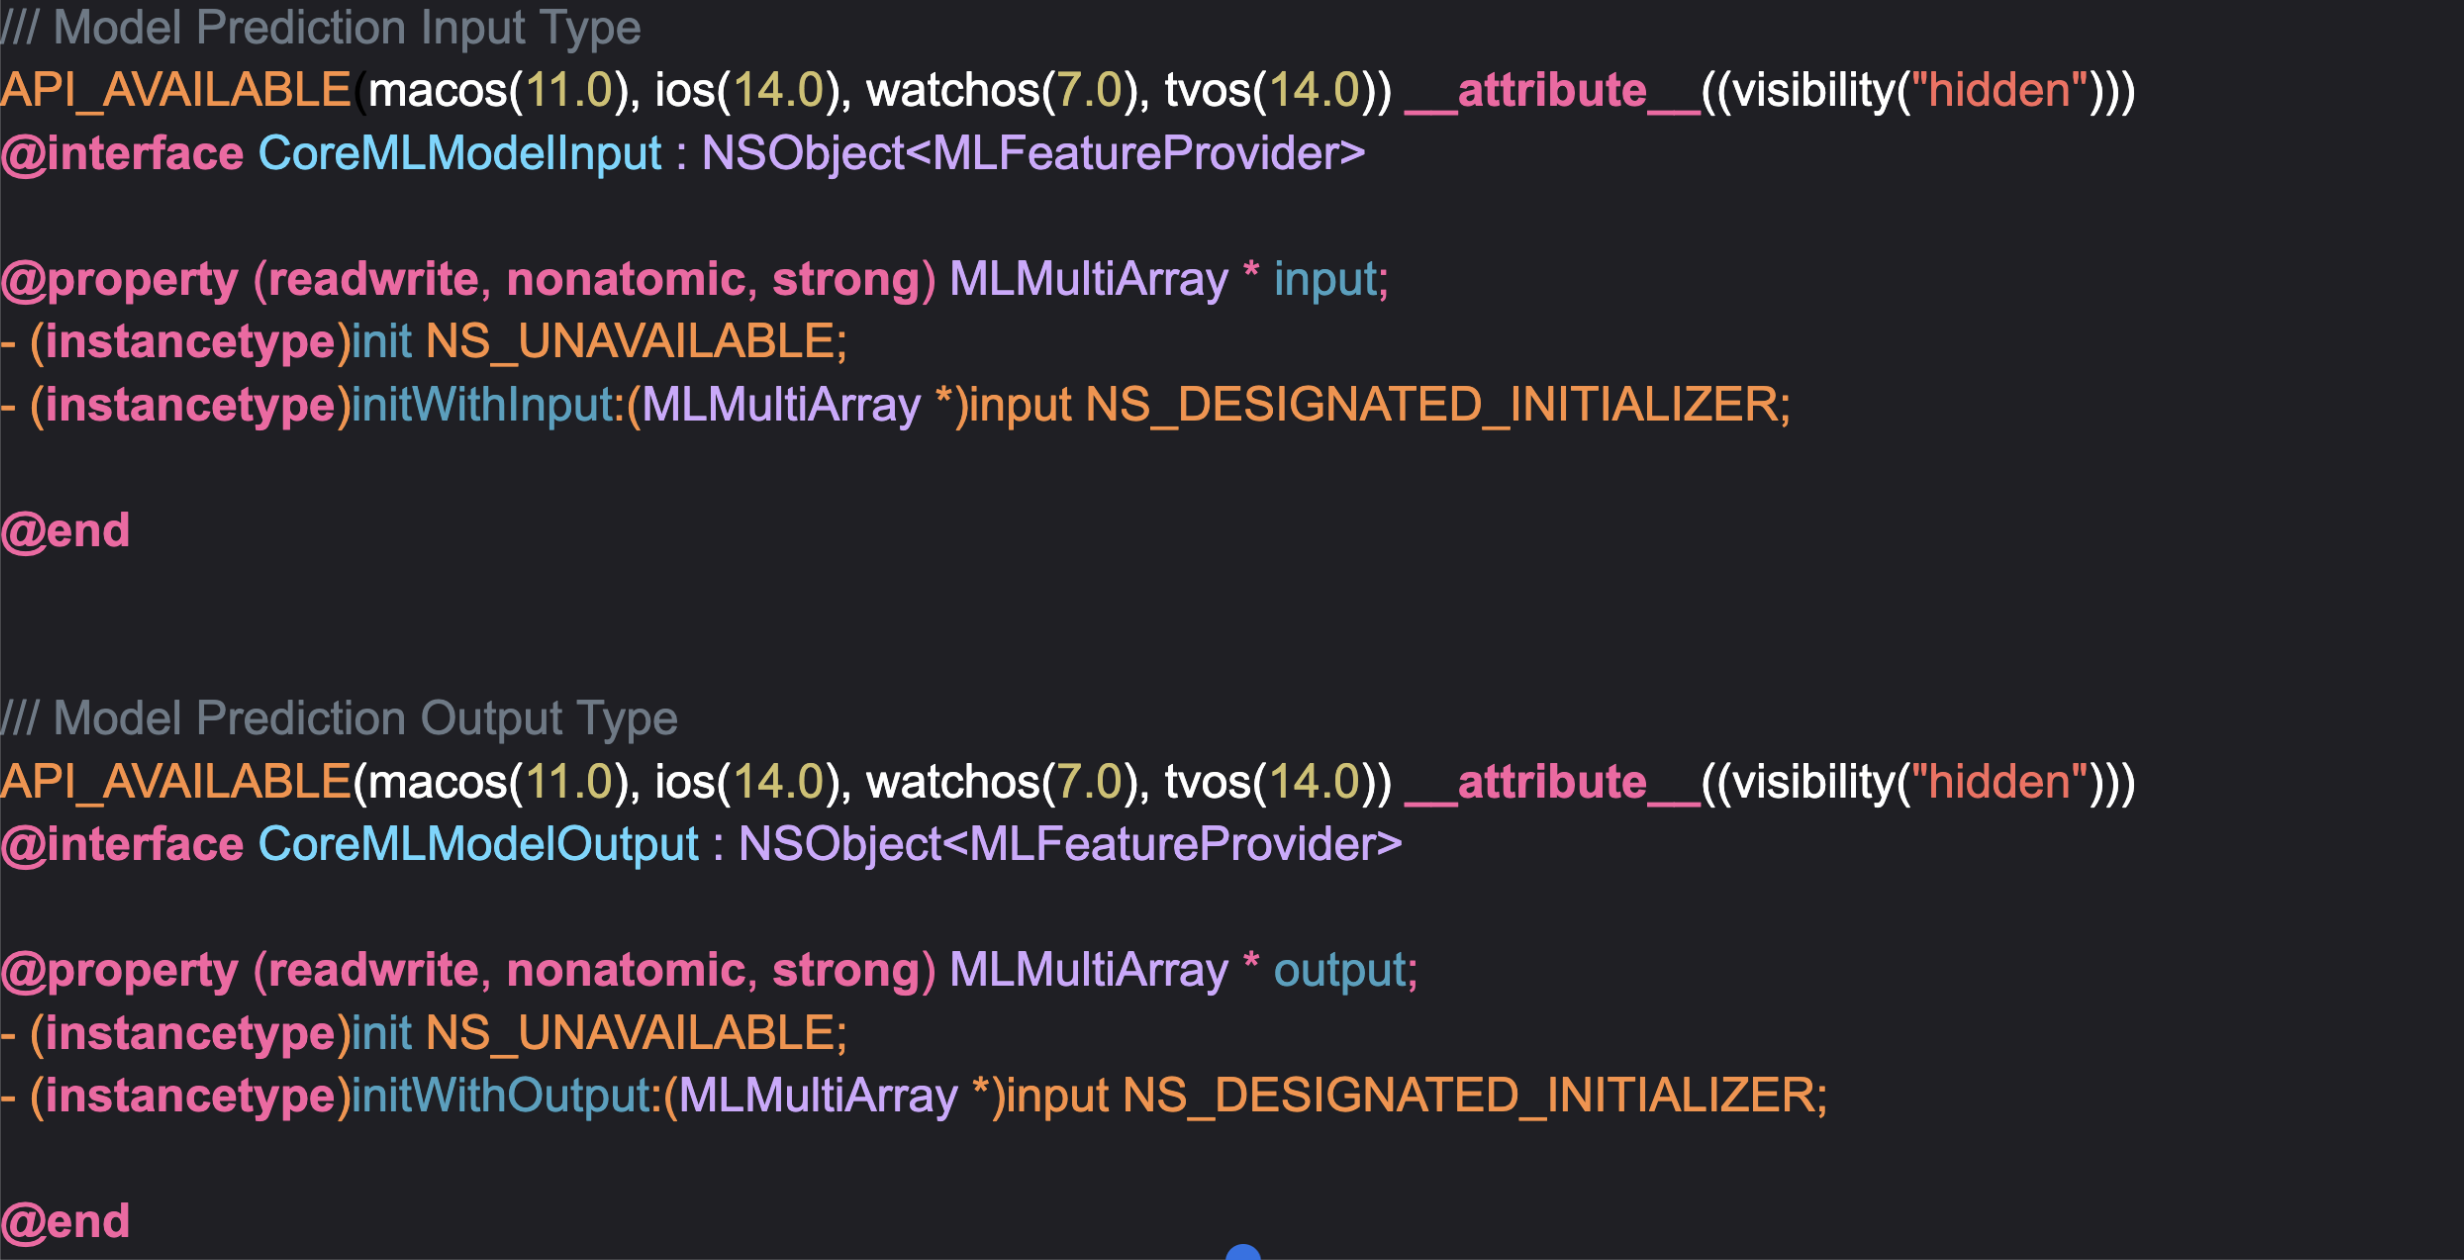
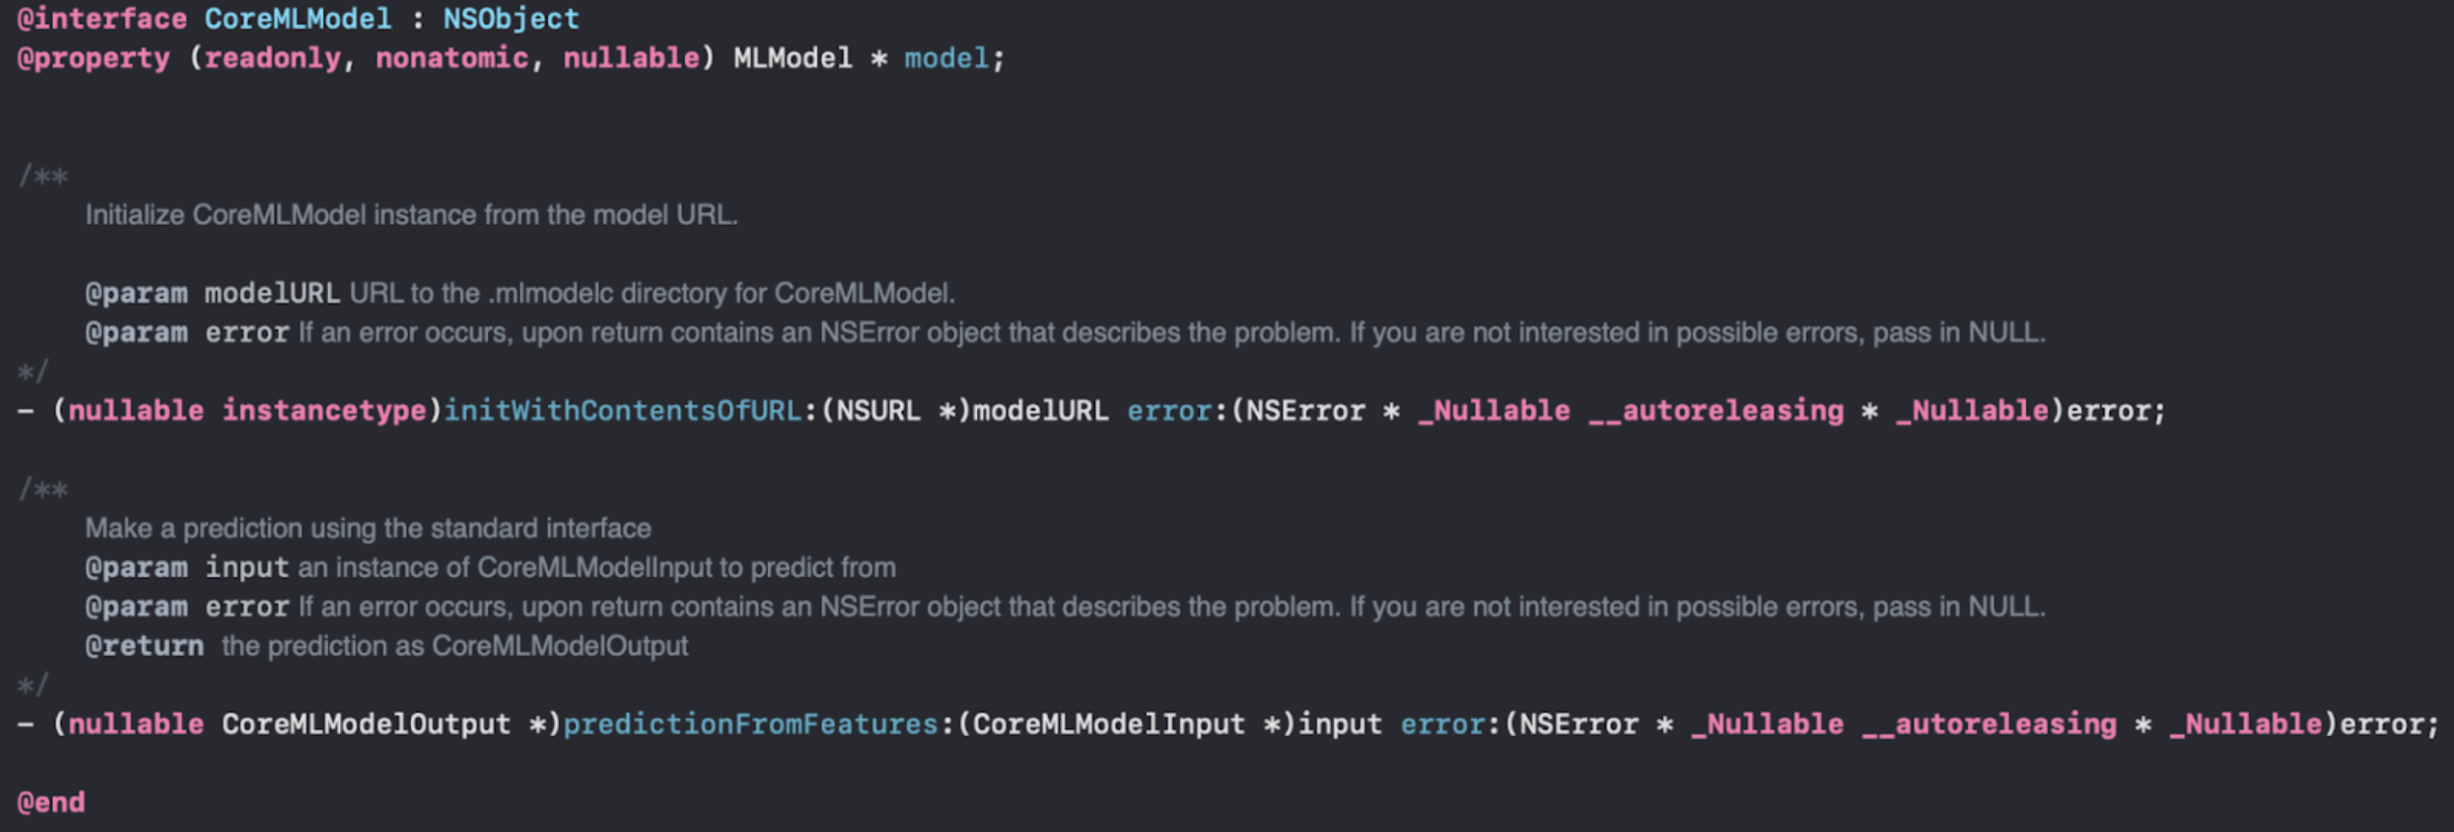
Input/Output models usually will have a property for each model input. The biggest class is the model one. Here we are just showing two methods one for loading and one for inference, but the actual class has many methods each suited for a different use case. The model URL argument in method initWithContentsOfURL is the path to our compiled model.
Objective-C++
So far we have looked at the features of using Xcode and the CoreML framework. The languages that the CoreML compilers support are Objective-C and Swift. Since we are trying to integrate CoreML into a C/C++ codebase a little bit of hacking is needed, and the name of our hack is Objective-C++.
Objective-C++ is a language that allows you to mix C++ and Objective-C in your source code. We can just define methods and mix the two languages as much as we want, but it will not be maintainable code. Instead, what we will do is write a class in C++ and use it as a bridge for calling our wrapper methods.
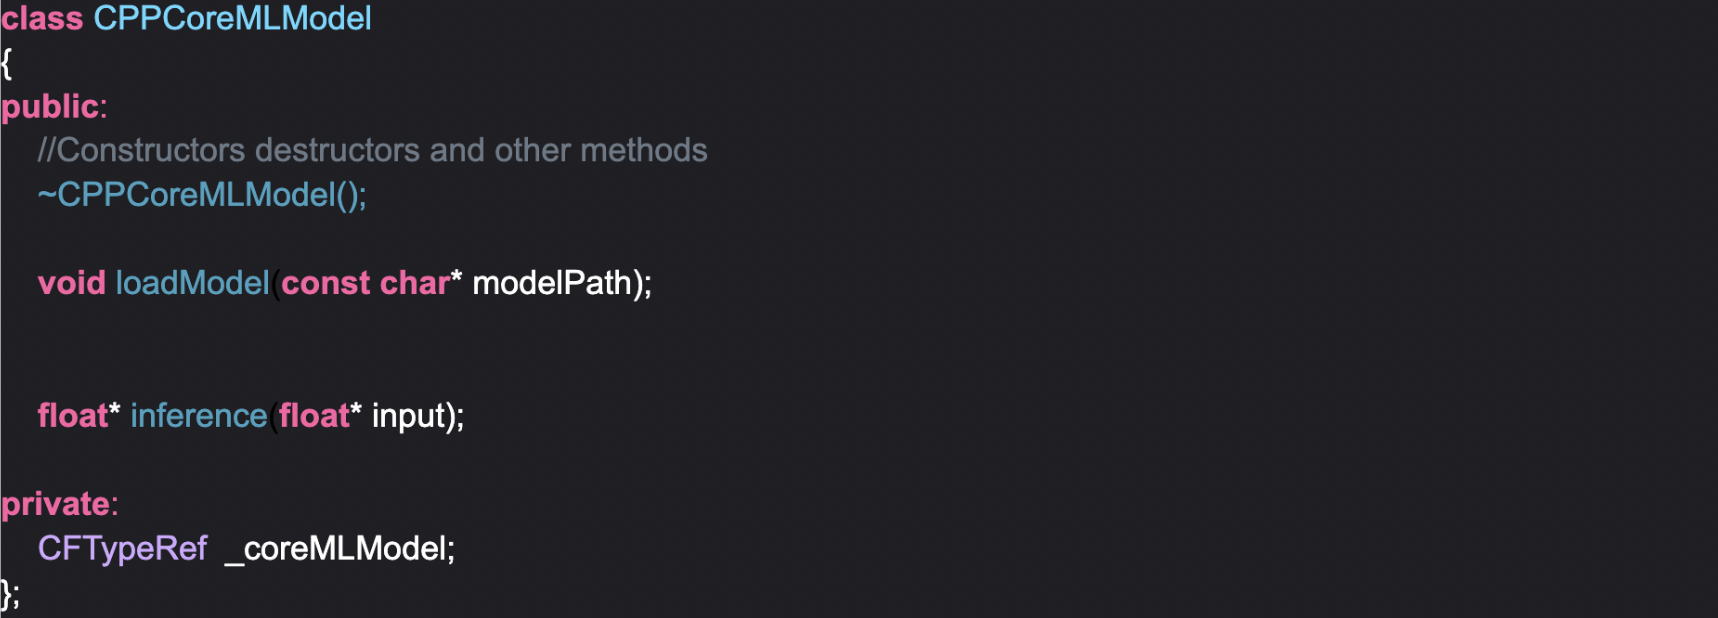
CFTypeRef is just a typedef of const void*, the lifetime of the object pointed by CFTypeRef is managed manually by CoreFoundation API. To initialize the _coreMLModel object you should write something like this.

As we know all Objective-C objects are maintained by the Objective-C runtime by their reference count(controlled with retain and release methods), what we are doing here with CFBridgingRetain is casting the CoreMLModel object to a CoreFoundation object so we can control its lifetime. At the point of casting the reference count is one, in order to decrement the reference count of a Core Foundation object and destroy it we need to call CFRelease on it. In this case, we will do it in our class’s destructor.

Inference
Moving onto model inference. In this example, our models’ input and output are both multidimensional float32 arrays. That is why CPPCoreMLModel takes in a float* and outputs a float*. If your case is different, you can extend it pretty easily, by adding more buffers, encapsulating them in a data structure, etc. Now in order to execute inference you have to wrap your preprocessed buffer with one of the CoreMLs input types. The most common of those is MLMultiArray. MLMutliArray is a multidimensional array that holds elements of type MLMultiArrayDataType. We can initialize a MultiArrayDataType with our buffer by using the initWithDataPointer initializer.

Besides the input shape initWithDataPointer also takes in the strides of your buffer, which can be calculated using your input shape and the layout of your buffer.
After creating the necessary CoreML inputs you can create an instance of the CoreML compiler-generated CoreMLModelInput class. Usually, the generated class will have an initializer that will take model inputs as arguments. In our case, it will be something like this.

After inference, we can just return the data pointer of our output. Keep in mind that the output buffer is owned by the MLMultiArray object.
Summary
Using Objective-C++ to run inference using CoreML is not the only way. The files generated by the CoreML compiler are also available in Swift. So the other route is to write some other bridging mechanism in Swift that will link our C/C++ codebase with CoreML. This solution however is easy to implement since all we have to do is change some files extension from c/cpp to .mm and give it to clang. Mixing swift here will also require the Swift compiler to be brought into our build pipeline. I highly recommend reading clangs documentation on ARC for memory management. It has saved a lot of time that I would have otherwise spent on debugging memory leaks.
Try next-level audio and voice technologies
Krisp licenses its SDKs to embed directly into applications and devices. Learn more about Krisp’s SDKs and begin your evaluation today.

This article was written by Sero Mirzakhanyan, MSc in Computer Science, Software Engineer at Krisp.