Ever recorded a podcast, an important meeting, or even a personal voice memo only to discover the audio is filled with distracting background noise, echoes, or static? It’s a scenario most of us have faced at some point, and it can feel like your hard work is wasted. But here’s the good news: knowing how to clean up audio can save the day and make your recordings sound crisp, professional, and easy to understand.
Whether you’re dealing with the hum of an air conditioner in the background, street noise sneaking into a home recording, or voices that sound distant and unclear, there are tools and techniques to fix it.
Let us walk you through everything you need to know about how to clean up audio, no matter your skill level or budget.
What is Audio Clean Up?
Audio cleanup is about giving your recordings a polished, professional sound by addressing any imperfections. Unwanted noises can distract listeners and take away from the clarity of your message. That’s where audio cleanup comes in—helping you refine your recordings so they’re crisp, clean, and enjoyable to hear.
The process usually involves reducing background noise, fixing distortion, smoothing out echoes or reverb, and repairing any glitches that may have crept into your audio. The goal? To make your recording sound as natural and clear as possible, without any obvious adjustments. This means balancing the improvements so that you remove distractions without over-editing or introducing new issues, like strange artifacts that can draw attention to the edits.
With effective audio cleanup, you can:
- Remove background noise: Get rid of constant distractions like hisses, hums, or ambient sounds from busy environments.
- Eliminate background voices: Suppress unwanted chatter or overlapping speech from your surroundings.
- Reduce room echoes: Minimize reverberation caused by recording in enclosed spaces.
- Remove acoustic echoes: Eliminate echoes from any environment, such as large, open rooms or outdoor spaces.
How to Clean Audio Recordings
Audio recordings often pick up all sorts of unwanted sounds. There are different types and colors of noises. Some are steady noises like hisses, hums, or the hum of an air conditioner, and then there are sudden ones, like a barking dog or a slammed door. On top of that, background voices or echoes from large or empty rooms can make recordings feel messed up and hard to listen to.
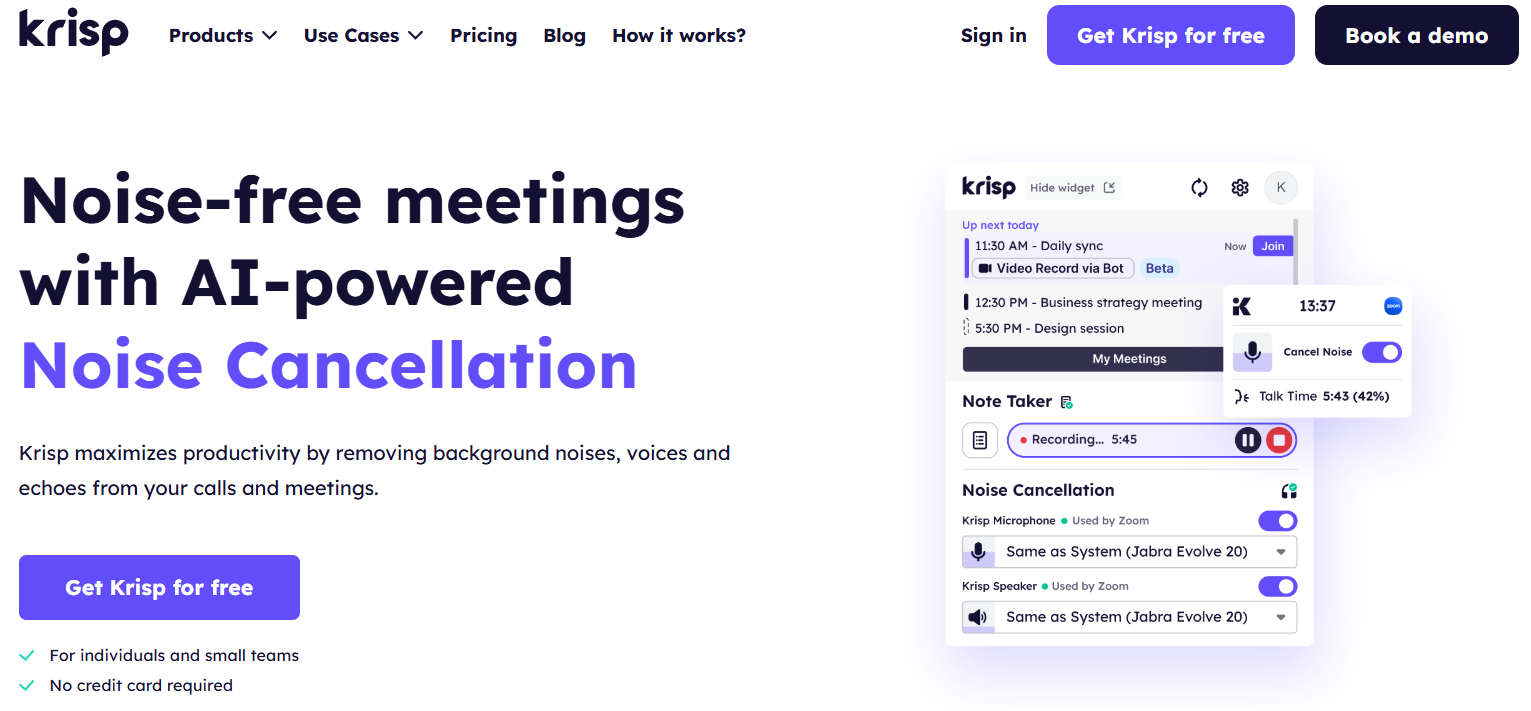
If you’re wondering how to get rid of white noise in audio, Krisp’s noise cancellation feature has you covered. It takes care of all these distractions during meeting recordings on platforms like Zoom, Microsoft Teams, and more. It can handle everything from steady background sounds to unexpected interruptions, as well as room and acoustic echoes, leaving your recordings clean and clear.
Krisp works as a desktop app for Mac and Windows computers. Once installed, it acts like a virtual piece of audio equipment, though it’s entirely software. You simply turn it on during your meetings, and it works in the background to clean up the audio.
How Does Background Noise Removal Sound?
Let’s see how Krisp’s noise cancellation tool works, this demo shows how the feature works on different types of noises whether it is steady or sudden, whether it is white noise or pink noise.
Did you notice how background noise was eliminated without even affecting the person’s voice?
How To Clean Audio Recording With Krisp
If you’ve seen how Krisp’s noise cancellation works and are excited to give it a try, here’s a step-by-step guide to installing and using Krisp:
1. Download and Install Krisp
- Head to Krisp’s website and download the app for your operating system (Mac or Windows).
- Once the download is complete, open the installer and follow the prompts to install the app on your computer.
- After installation, launch Krisp and sign up for an account if you’re new, or log in if you already have one.
2. Set Krisp as Your Audio Device
- Krisp works by acting as a virtual microphone and speaker. To use it, you’ll need to select Krisp as your input and output device in your preferred meeting platform.
- Open the settings of your meeting app (Zoom, Microsoft Teams, Google Meet, etc.) and go to the audio settings.
- For the microphone, choose “Krisp Microphone.”
- For the speaker, choose “Krisp Speaker” to filter out noise coming from other participants (optional).
3. Enable Noise Cancellation
- Once Krisp is running, you’ll see its interface. Here, you can turn noise cancellation on or off with a single click.
- Switch on the “Remove Noise” toggle under the Microphone section to clean up your outgoing audio. If you selected Krisp as your speaker, turn on “Remove Noise” under the Speaker section to filter incoming sounds as well.
4. Start Your Meeting or Recording
- Open your meeting or recording software and begin as usual. Krisp will automatically filter out steady noises like hisses or hums, sudden sounds like a barking dog, and echoes, all in real time.
- Whether you’re recording a podcast, hosting a meeting, or giving a presentation, your audio will be crisp, clear, and professional.
5. Test and Adjust Settings if Needed
- Before jumping into a live session, it’s a good idea to test your audio. Most meeting platforms have a “test call” or “preview” option where you can hear how your voice sounds.
- If you notice anything unusual, check that Krisp is correctly selected as your input/output device and that noise cancellation is enabled.
6. Enjoy Clean Audio
- Once everything is set up, Krisp works quietly in the background. There’s no need for manual adjustments—just focus on your meeting or recording while Krisp takes care of the rest!
Best Background Noise Removal Apps For Cleaning Up Audio
Background noise can be a real disruptor, whether you’re recording podcasts, participating in meetings, or editing video content. Thankfully, there are powerful apps that remove unwanted noise and make your audio crystal-clear. Here’s a friendly guide to some top options, including key features, pricing, compatibility, and pros and cons.
1. Krisp
Krisp is an AI-powered noise cancellation app that filters out background noise in real time. It’s perfect for online calls, meetings, and content creation, offering professional-grade sound clarity.

Pricing:
- Free: $0 (forever free) – 60 minutes of daily noise cancellation, limited meeting history, and 2 AI summaries daily.
- Pro: $8/month (billed yearly) – Unlimited noise cancellation, transcription, meeting history, and more.
- Business: $15/month (billed yearly) – Everything in Pro, plus 30GB storage, SSO, priority support, and integrations.
Compatibility:
Works with tools like Zoom, Microsoft Teams, Google Meet, and more.
Pros:
- Real-time noise removal
- Free plan with generous features
- Easy setup and seamless integration
Cons:
- Daily limits on free noise cancellation
- Advanced features are limited to higher plans
2. Final Cut Pro
Final Cut Pro is a professional video editing software with built-in tools for cleaning up audio. While it’s primarily used for video editing, its audio editing capabilities are great for removing background noise.

Pricing:
- One-time purchase: $299.99 USD
Compatibility:
Mac only
Pros:
- Professional-grade editing tools
- Built-in noise reduction features
- Excellent integration with the Apple ecosystem
Cons:
- High upfront cost
- Limited to macOS
3. Adobe Audition
Adobe Audition is a powerful audio editing software designed for professionals. It features advanced noise reduction and restoration tools that can clean up even the messiest audio recordings.

Pricing:
- $20.99 USD/month (single app subscription)
- Included in Adobe Creative Cloud plans
Compatibility:
Windows and macOS
Pros:
- Industry-standard noise removal tools
- Comprehensive audio editing features
- Regular updates and support
Cons:
- The steep learning curve for beginners
- Subscription-based pricing
4. Logic Pro
Logic Pro is Apple’s high-end audio editing software, customized for music production and podcast editing. It offers advanced noise-cancellation tools, making it a great choice for cleaning up audio in creative projects.

Pricing:
- One-time purchase: $199.99 USD
Compatibility:
Mac only
Pros:
- Robust audio editing capabilities
- Excellent for music and podcast creators
- One-time payment model
Cons:
- Mac-exclusive
- Not ideal for users looking for simpler tools
Best Practices for Cleaning Up Audio Recordings
Cleaning up audio recordings doesn’t have to be a daunting task! With a little know-how and some smart practices, you can turn messy audio into a professional, polished masterpiece. Whether you’re a beginner or a pro, here are some best practices to follow for clean, crisp recordings.
1. Start with a Clean Recording
The best way to make cleanup easier is to minimize problems during recording.
- Choose the Right Space: Opt for a quiet, enclosed room to avoid echoes and background noise.
- Position Your Microphone Correctly: Keep it at a steady distance from your mouth to avoid distortion or faint audio.
- Limit Background Noise: Turn off fans, air conditioners, or other steady sound sources.
2. Use Noise Reduction Sparingly
While noise removal tools are powerful, overusing them can make your audio sound unnatural.
- Focus on removing only the most distracting elements, like steady hums or loud interruptions.
- Test different settings to balance noise reduction with voice clarity.
3. Eliminate Echoes with EQ or Reverb Reduction
If your recording has an annoying echo, try these fixes:
- Use an equalizer (EQ) to lower the frequencies causing the echo.
- Apply light reverb reduction, but avoid making the audio sound flat.
4. Repair Distortion Carefully
Distorted audio can happen when levels are too high.
- Use clipping repair tools in software like Adobe Audition or iZotope RX.
- Reduce gain or use a “de-clip” feature to smooth out harsh peaks.
5. Edit Out Unnecessary Sounds
Sometimes a quick manual trim can save the day.
- Remove coughs, sneezes, or any other obvious distractions from the timeline.
- Use fade-ins and fade-outs to create smooth transitions between edits.
6. Pay Attention to Volume Levels
Consistency is key!
- Make sure the volume is steady throughout the recording so listeners don’t have to adjust their speakers constantly.
- Use compression tools to even out volume spikes and dips.
7. Always Test Before Finalizing
Once you’ve cleaned up the audio, give it a test listen.
- Play it back on different devices (headphones, speakers, and even your phone) to catch any remaining issues.
- Get feedback from a friend or colleague to see how it sounds to a fresh set of ears.
Common Mistakes to Avoid When Cleaning Up Audio
Cleaning up audio can make a difference, but it’s easy to slip into a few pitfalls. To help you avoid frustration and get the best results, here are some common mistakes to watch out for when working on your recordings.
1. Overusing Noise Reduction
It’s tempting to crank up the noise reduction to eliminate every unwanted sound, but this can backfire.
- What happens: Overuse can make your audio sound robotic or unnatural.
- What to do instead: Apply noise reduction in small increments and test as you go to strike the right balance between clarity and naturalness.
2. Ignoring the Original Recording Setup
Poor recording conditions make cleanup harder and can limit your results.
- What happens: Trying to fix excessive echoes or overwhelming background noise is much harder than preventing them upfront.
- What to do instead: Record in a quiet, controlled space with proper microphone positioning to minimize issues before they start.
3. Removing Too Much Silence
Cutting out all pauses to make your recording feel tighter can make it sound rushed and unnatural.
- What happens: The conversation or narrative may lose its flow.
- What to do instead: Keep natural pauses intact to maintain a conversational or professional rhythm.
4. Skipping EQ Adjustments
Neglecting equalization (EQ) can result in audio that lacks clarity or warmth.
- What happens: Voices may sound muffled, flat, or overly sharp.
- What to do instead: Use EQ to enhance vocal frequencies (typically 100 Hz to 300 Hz for warmth and 2 kHz to 5 kHz for clarity).
5. Overcompressing Audio
Compression helps balance volume levels, but overdoing it can strip your audio of its dynamics.
- What happens: The recording sounds lifeless and unnatural.
- What to do instead: Apply light compression and adjust the threshold and ratio carefully to maintain a natural dynamic range.
6. Forgetting to Save Backups
It’s easy to get carried away while editing, but not saving your original file can lead to regret if something goes wrong.
- What happens: You can’t revert changes or recover accidentally deleted sections.
- What to do instead: Always keep a copy of the unedited file and save progress regularly.
7. Ignoring Playback on Multiple Devices
What sounds great on your studio headphones might sound less impressive on other devices.
- What happens: Your cleaned-up audio may not translate well to speakers, earbuds, or phones.
- What to do instead: Test your audio on various playback devices to ensure consistency.
8. Trying to Fix Everything at Once
Audio cleanup can involve multiple steps, and trying to do it all in one go can be overwhelming.
- What happens: You may miss important details or make unnecessary adjustments.
- What to do instead: Break the process into manageable stages, like noise reduction, EQ, and volume balancing, focusing on one aspect at a time.
Conclusion
Cleaning up your audio isn’t just about improving the quality of your audio; it’s about ensuring your message is delivered clearly and professionally. Whether you’re polishing up a podcast, improving meeting recordings, or rescuing a treasured voice memo, the right tools and techniques can turn messy audio into something exceptional.
From minimizing background noise with powerful apps like Krisp to following best practices like proper recording setup and careful editing, cleaning up your audio is within everyone’s reach, regardless of skill level or budget.


