Knowing how to check AirPod battery life is essential to avoid running out of charge during important moments, like a crucial call or while enjoying your favorite music. Regularly checking the battery helps you stay prepared and ensures your AirPods are always ready to use.
It’s important to keep an eye on your AirPods battery to avoid any unexpected interruptions. By learning how to check AirPod battery levels on different devices like iPhone, iPad, Mac, and Apple Watch, you can manage your usage better and make sure your AirPods are always charged and ready when you need them.
How to Check AirPods Battery on iPhone or iPad?
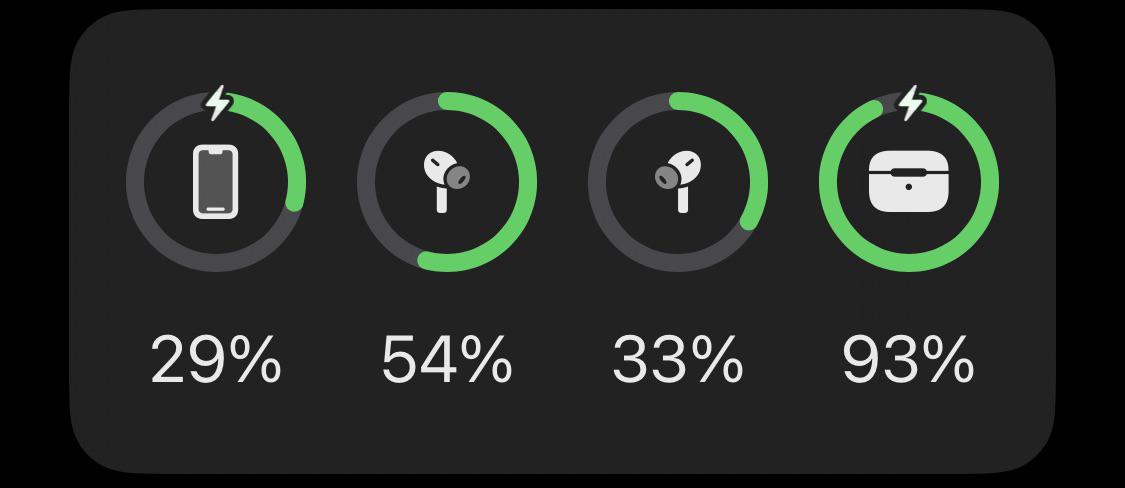
One of the easiest ways to check your AirPods battery on an iPhone or iPad is by using the iOS Batteries widget. This widget allows you to quickly see the battery percentage of your AirPods and other connected devices.
Add the Batteries Widget
- Swipe right on your home screen to open the “Today View.”
- Scroll to the bottom and tap “Edit.”
- Find the “Batteries” widget in the list, tap the green “+” next to it, and then tap “Done.”
Check the Battery Percentage
- After adding the widget, you’ll see the battery levels of your iPhone, AirPods, and any other connected devices right on your “Today View.”
- Whenever your AirPods are connected to your iPhone or iPad, the widget will display their battery percentage.
Another way to check your AirPods battery is directly through the Bluetooth settings on your iPhone or iPad. This method is particularly useful if you want a quick glance without adding the widget.
Open Bluetooth Settings
- Go to your iPhone or iPad’s “Settings” app.
- Tap on “Bluetooth” to open the Bluetooth settings.
View AirPods Battery Level
- Under “My Devices,” find your AirPods in the list of connected devices.
- Next to the AirPods name, you’ll see a small battery icon indicating the battery level. For a more detailed percentage, tap on the “i” next to your AirPods’ name, and it will show you the exact battery percentage for both the AirPods and the charging case.
How to Check AirPods Battery on Mac?
There are two main methods to check your AirPods battery level on a Mac. You can quickly check through the Bluetooth menu in the menu bar or access the battery status via the System Information tool. Each method offers a convenient way to monitor your AirPods’ battery life. Let’s explore these methods step-by-step.
Checking Battery Levels via the Bluetooth Menu
- Ensure your AirPods are paired and connected to your Mac. If they’re not already connected, open the AirPods case near your Mac, and click on the Bluetooth icon in the menu bar. Select your AirPods from the list to connect them.
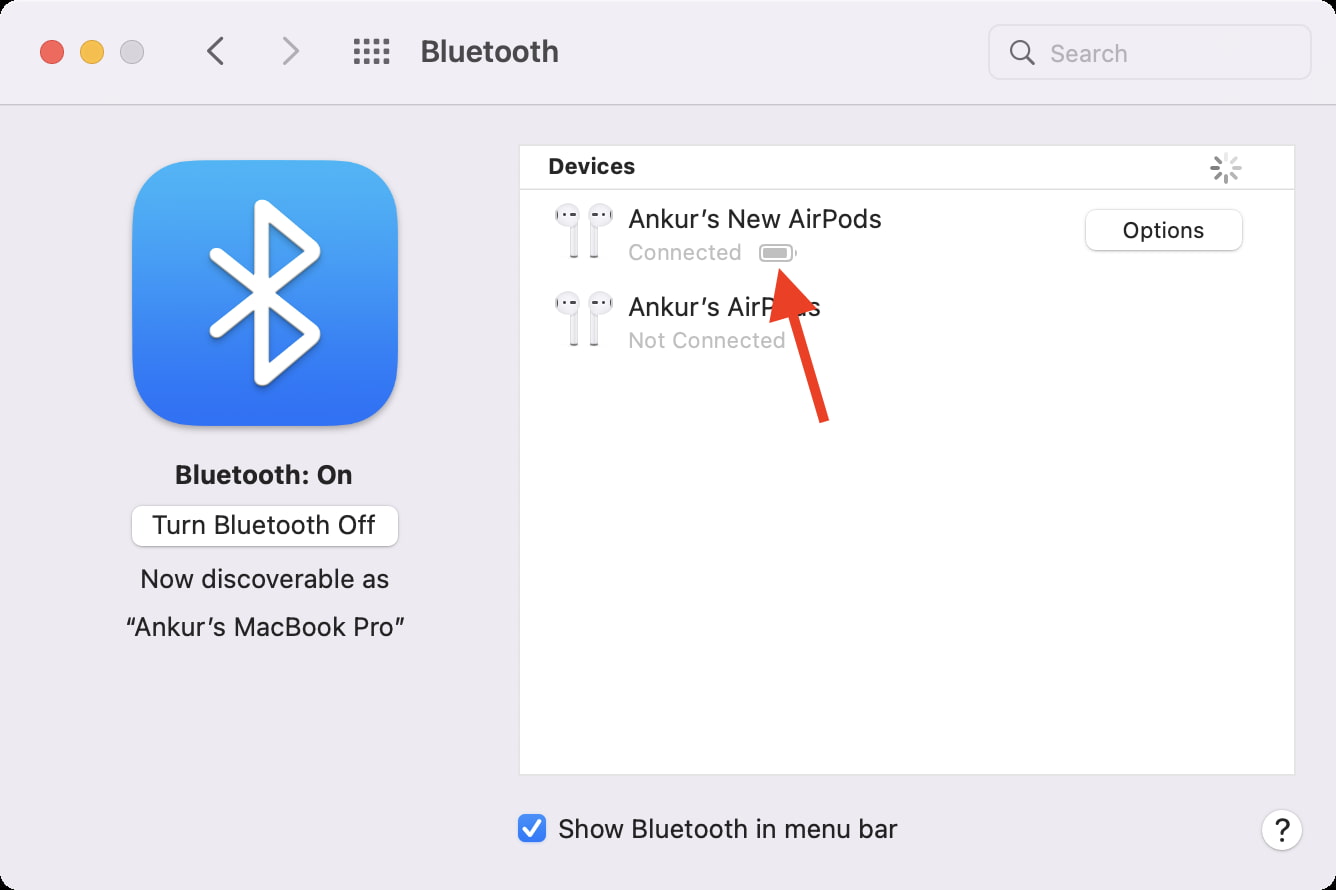
- Locate the Bluetooth icon in the menu bar at the top right of your screen. If you don’t see the Bluetooth icon, you can enable it by going to System Preferences > Bluetooth and checking “Show Bluetooth in the menu bar.”
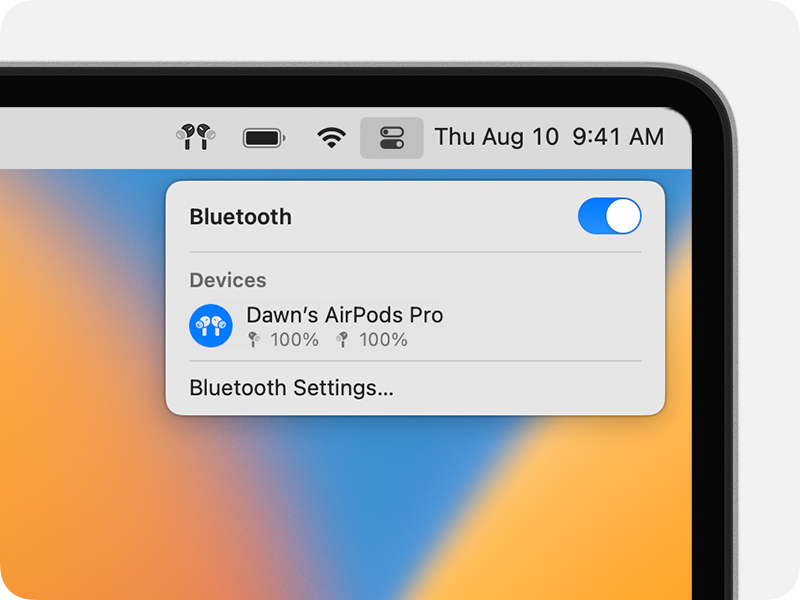
- Click on the Bluetooth icon in the menu bar. A dropdown menu will appear, showing all your connected devices.
- Find your AirPods in the list, and you’ll see the battery levels displayed next to their name. This will show the battery percentage for both the AirPods and the charging case.
Checking Battery Levels via System Information
- Click on the Apple logo in the top left corner of your screen and select About This Mac. Then click System Report.
- In the System Information window, select Bluetooth from the sidebar. Find your AirPods in the list of devices, and you’ll see the current battery levels for each AirPod and the charging case.
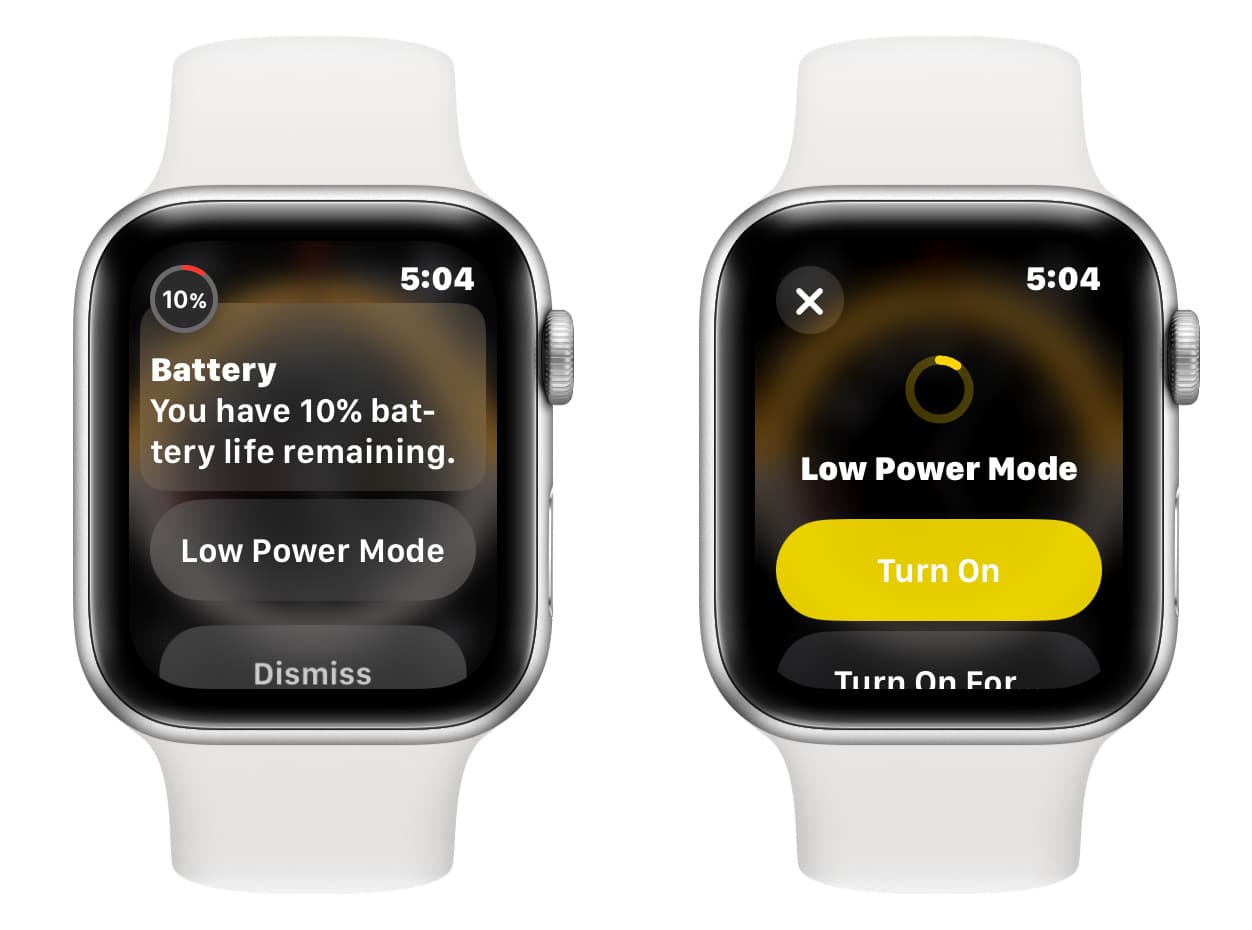
How to Check AirPods Battery on Apple Watch
Your Apple Watch offers a convenient way to monitor your AirPods battery life, making it easy to keep track of their charge without needing your iPhone or Mac.
Add the Battery Widget to Your Watch Face
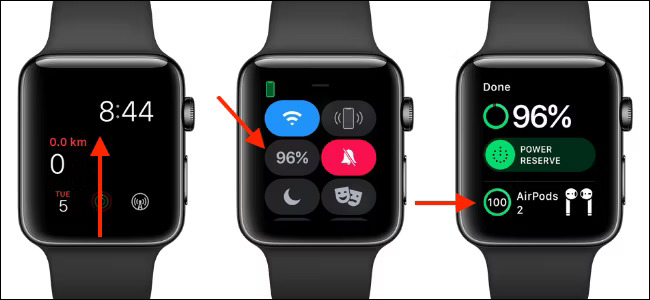
- Press and hold the watch face on your Apple Watch.
- Tap “Edit” to customize your watch face.
- Swipe left or right to find a watch face that supports complications, then tap a complication area.
- Scroll through the list and select “Batteries” to add the Battery widget.
- Once added, the Battery widget will display the battery levels of your Apple Watch, AirPods, and any other connected devices.
Check the Battery Level
- When your AirPods are connected to your Apple Watch, the Battery widget will show the remaining battery percentage for both the left and right AirPods, as well as the charging case. Setting Up Notifications for Low Battery Levels
Setting Up Notifications for Low Battery Levels
- Open the Watch app on your iPhone.
- Go to “My Watch” > “Notifications.”
- Scroll down and find “Battery” or “Batteries” and ensure that notifications are turned on.
- When your AirPods’ battery drops to a low level, you will receive a notification on your Apple Watch, prompting you to charge them. This feature is particularly useful for avoiding sudden battery depletion during important tasks.
How to Check AirPods Battery Without a Connected Device?
Even if you don’t have your iPhone, iPad, Mac, or Apple Watch handy, you can still check your AirPods battery status by using the LED light indicator on the charging case. This method is quick and easy, providing a basic idea of how much charge is left in your AirPods and the charging case.
Locate the LED Light
- On the standard charging case, the LED light is located inside the case, between the spaces for the AirPods.
- On the wireless charging case, the LED light is on the front of the case.
Check the LED Light with AirPods Inside the Case
- Open the lid of the charging case with your AirPods inside.
- The LED light will indicate the status of the AirPods’ battery.
Check the LED Light with AirPods Removed from the Case
- If your AirPods are not in the case, the LED light indicates the battery level of the charging case itself.
Interpreting Different LED Colors
- The LED light changes color to reflect the current battery status, and understanding these colors can help you gauge how much battery life is remaining.
By understanding how to use the LED light indicator on your AirPods charging case, you can quickly check the battery status without needing to connect to any device. This simple method ensures you always have a rough idea of your AirPods’ battery levels, even when you’re on the go.
How to Optimize AirPods Battery Life?
Maximizing the battery life of your AirPods ensures uninterrupted listening and helps extend the lifespan of your device. By following these practical tips, you can optimize your AirPods’ battery life, reduce the frequency of charging, and maintain their health over time. Additionally, using software like Krisp can enhance your experience while being mindful of battery usage.
Tip #1: Adjust Settings to Save Battery
- Keeping your AirPods at a moderate volume helps reduce battery drain. High volumes use more power, so turning it down can make your AirPods last longer.
- Automatic Ear Detection is handy but uses extra battery. To disable it, go to Settings > Bluetooth, tap the “i” next to your AirPods, and toggle off “Automatic Ear Detection.”
- Noise cancellation uses more power. If you have AirPods Pro, switching to Transparency mode can extend battery life.
Tip #2: Use One AirPod at a Time
- For calls or audio that doesn’t need stereo sound, use one AirPod at a time. The other AirPod can charge in the case, effectively doubling your listening time.
- If using one AirPod, turn on mono audio to ensure you hear all the sound in one ear. Go to Settings > Accessibility > Audio/Visual, then toggle “Mono Audio.”
Tip #3: Enhance Battery Life with Krisp
If you’re experiencing issues with AirPods noise cancellation not working properly, such as active noise cancellation (ANC) not fully blocking out background sounds, there are a few steps you can take:
- Make sure your AirPods are correctly seated in your ears. This helps the ANC function effectively.
- Sometimes, a simple update can resolve performance issues.
- Restarting your device can often fix minor glitches.
- Dirt or debris can block the microphones used for ANC, so regular cleaning might help improve performance.
However, while AirPods’ ANC is good at reducing background noise, it might not completely eliminate distracting voices during calls or meetings. This is where Krisp comes in.
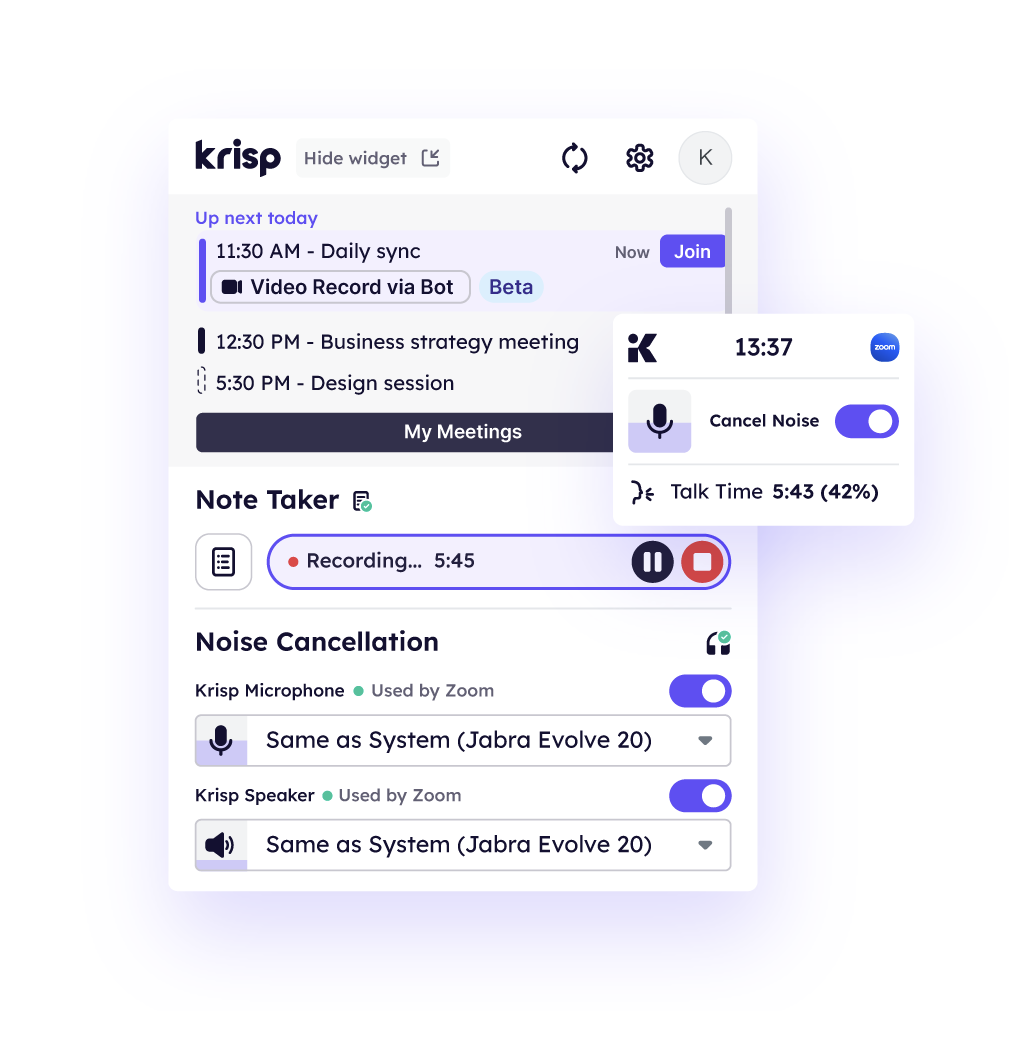
Krisp is an AI-powered noise cancellation app that goes beyond traditional ANC by focusing on eliminating background voices and other noises during calls. Unlike AirPods, which primarily reduce ambient noise for the wearer, Krisp improves the audio quality for everyone on the call.
- Advanced Noise Cancellation: Krisp uses advanced software to intelligently distinguish and eliminate unwanted sounds, ensuring clear communication without distractions.
- Enhanced Call Quality: Krisp actively filters out background noise from both ends of a conversation, so only clean, clear audio is transmitted and received.
By using Krisp, you can enhance the performance of your AirPods during calls, ensuring crystal-clear communication even in noisy environments. This not only improves the quality of your calls but also allows you to use less power-intensive settings on your AirPods, helping to conserve battery life.
Tip #4: Charge Smartly to Protect Battery Health
- The AirPods case manages its own charging, but it’s best not to leave it connected to power for long after it’s fully charged. This helps prevent unnecessary battery strain.
- If your AirPods are paired with an iPhone running iOS 14 or later, the system learns your charging habits and slows down charging when needed to reduce battery aging. This feature is on by default and helps extend overall battery life.
These easy-to-follow tips can help you make the most of your AirPods battery, while ensuring they last longer and perform better over time.
FAQ
-Swipe right on your home screen to open the “Today View.”
-Scroll to the bottom and tap “Edit.”
-Find the “Batteries” widget in the list, tap the green “+” next to it, and then tap “Done.”
-Once added, the widget will display the battery levels of your iPhone, AirPods, and other connected devices whenever your AirPods are connected.
-Make sure your AirPods are properly connected to your device.
-Go to Settings > Bluetooth and make sure your AirPods are listed as “Connected.”
-Sometimes, a simple restart can resolve the issue.
-Ensure that your device and AirPods have the latest firmware updates.
-When you open the lid with the AirPods inside, the LED light on the case will turn green, indicating that they are fully charged.
– The battery widget on your iPhone, iPad, or Apple Watch will show a full battery icon or 100% next to your AirPods when they are fully charged.