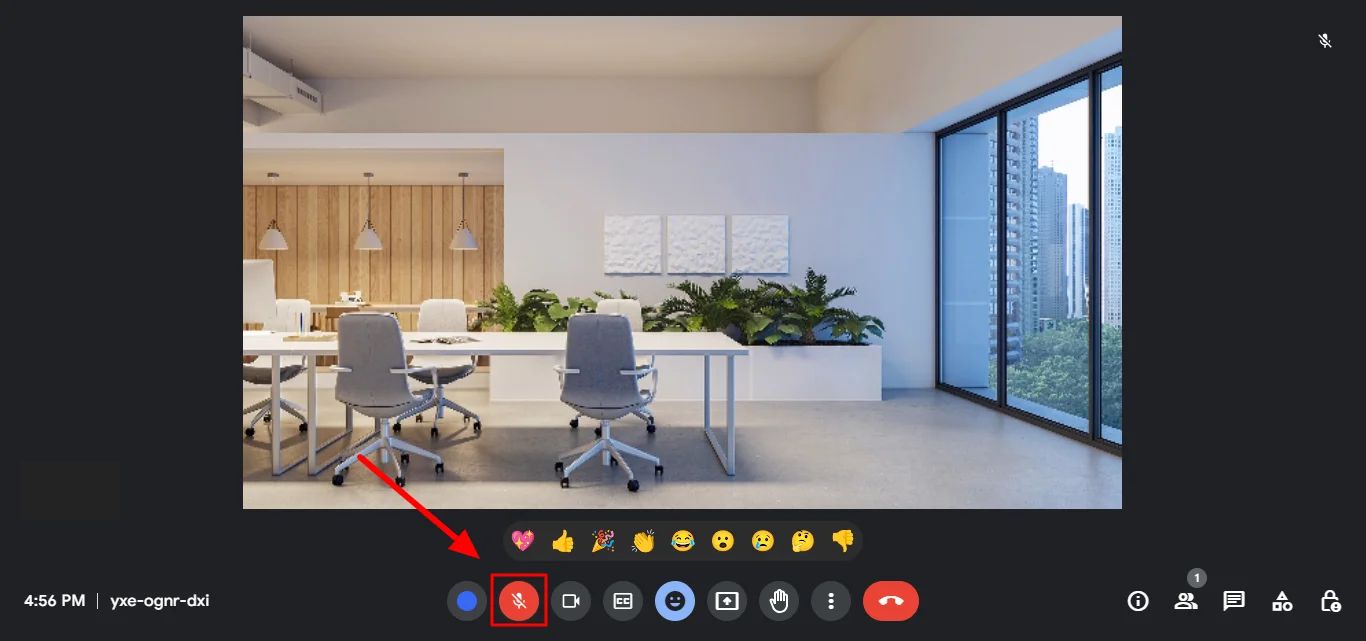
Multiple potential causes of the Google Meet microphone not working on your computer exist. For this reason, we have prepared a quick and informative guide on how to enable microphone. This way, you can have smooth and interactive virtual interactions.
Why is Your Microphone Not Working on Google Meet?
In this part, we’ll quickly list some potential reasons why your microphone might not be working on Google meet. There are a few common reasons for that, and most of them are fairly simple to troubleshoot. So stay tuned till the end for more in-depth and practical advice.
Your Microphone is Off
Believe it or not, the most frequent reason is that the microphone is muted. Before diving into other fixes, click the microphone icon at the bottom of the meeting window to check if it’s muted. If you see a red line through the icon, your mic is off—just click it to unmute.
Browser Permissions Are Incomplete
If your mic is still not working, your browser might not have the necessary permissions enabled. Go to your browser’s settings and ensure microphone access is allowed for Google Meet. You can usually find this by clicking the lock icon near the URL bar and adjusting site permissions.
There are Hardware Glitches
Sometimes, the problem lies with your device’s hardware. If you’re using an external microphone, make sure it’s properly plugged in and not damaged. For built-in mics, ensure nothing is physically blocking it (like dust or debris). You can also test the microphone with another app to prevent hardware failure.
Other Apps are Hijacking Your Mic
Other programs on your device, such as voice recorders or video calling apps, might be using the microphone, preventing Google Meet from accessing it. Open your task manager or system settings to check for any other apps using the mic and close them.
So, now that we have briefly gone over the Google Meet microphone not working issues, let’s get into the intricate details.
Checking Microphone Settings Before and During the Meeting
Before joining a Google Meet call, it is crucial to check your Google Meet microphone settings. By default, you might get the following permission requests, which you can allow to enable the microphone.
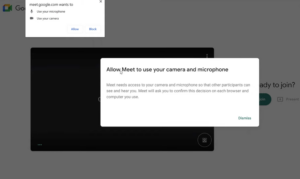
Alternatively, on the Google Meet “Ready to Join?” screen, click the settings gear and navigate to the “Audio” tab. Make sure the correct microphone is selected and not muted. If it is your microphone not working on Google Meet, try toggling it off and back on.
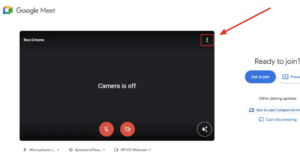
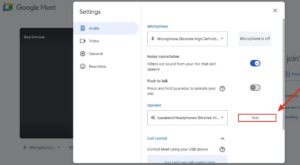
During the meeting, you can adjust the mic by clicking on the microphone icon at the bottom of the screen. If it has a red slash, the mic is muted—click it to unmute and let others hear you.
Also, ensure that Companion mode isn’t enabled, as it disables the microphone and speaker. Here’s how you join a meeting with the Companion mode, which enables you to be part of hybrid meetings where your mic doesn’t need to be on:
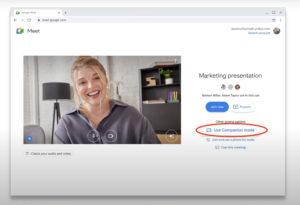
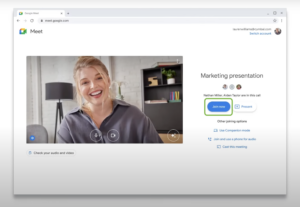
To avoid this during meetings, simply click/tap the join button below the screen.
Running a Google Meet test by checking the microphone input levels will confirm that your mic works before the meeting.
How to Enable Microphone for Google Meet
If Google Meet audio is not working, it could be because the app lacks the required permissions.
Check Your Google Meet Microphone Settings
When using Google Meet for the first time, your browser or device will prompt you to grant microphone access. On a desktop, check for this permission prompt near the URL bar or manually allow it in your browser’s settings. If you accidentally missed or blocked the prompt, you can manually change the settings:
- Click on the padlock icon next to the website address in the URL bar,
- Find “Microphone” in the drop-down list,
- Set the option to “Allow” from the dropdown menu.
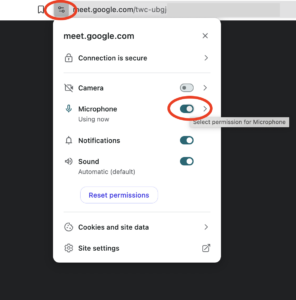
On mobile, open your phone’s app permissions and ensure Google Meet has microphone access. Sometimes, toggling the permission off and back on can resolve the issue. Keeping Google Meet updated and checking your device’s volume also ensures smooth audio.
Check Your External Microphone Connectivity
If your microphone isn’t working on Google Meet, even though the settings seem fine, the issue could be with your hardware.
For USB microphones or headsets, make sure the cable is firmly connected to your computer. Unplug it and reconnect it securely to ensure it’s properly set up.
If you’re using your computer’s built-in mic, check that nothing is blocking it—these are usually tiny holes near the webcam. This might also help if your Google Meet camera is not working.
Additionally, review the cables for any damage. A worn-out or faulty cable can cause connectivity problems, so if it looks frayed, consider replacing it. After double-checking the physical connections, make sure your mic is in the correct port, then try a quick Google Meet test to see if the microphone works.
But wait, there are more ways to get your mic working.
Turn Off the VPN for Smoother Audio
Using a VPN can sometimes interfere with audio quality during Google Meet calls.

VPNs route your internet traffic through an additional server, which may delay the audio or video. If your Google Meet audio is not working as expected, try temporarily disabling your VPN and reconnecting to your meeting. This can resolve delays or glitches.
If disabling the VPN improves your connection, avoid using it for future Google Meet calls.
Close Unnecessary Apps to Free Up Bandwidth
Another common cause of poor audio or Google Meet microphone not working is having too many apps or browser tabs open, which can hog your device’s resources. Here’s what you can do:
- Close non-essential tabs in your browser,
- Quit any unused applications running in the background,
- Shrink your Google Meet window if you’re multitasking, helping to optimize performance.
These troubleshooting steps should cover the most common issues with a non-functioning microphone in Google Meet. Usually, it’s just a matter of correcting a setting, but replacement might be necessary if hardware is the culprit, like a broken mic or cable. Hopefully, these tips will get your microphone working again quickly and smoothly.
More Ways to Fix Your Google Meet Mic
Additionally, if your microphone is not working on Google Meet, it could be linked to poor network performance. To improve your connection:
- Run an Internet speed test to guarantee enough bandwidth and low latency. Consistent speed is crucial for high-quality video calls.
- Switch to a wired Ethernet connection if possible, which is often more stable than Wi-Fi.
- Use a 5 GHz Wi-Fi network instead of the more crowded 2.4 GHz band, which can help with better audio and video quality.
- Disable Quality of Service (QoS) temporarily if your network equipment prioritizes traffic types, as Google Meet already handles its own traffic prioritization.
Best Practices for Optimizing Audio in Virtual Meetings
Achieving clear and uninterrupted audio during virtual meetings is essential for effective communication. Whether you’re hosting or attending, a few practical steps can significantly improve your audio quality, ensuring everyone hears you clearly. Below are a couple of the best practices to follow to ensure a smooth Google Meet experience.
Use External Audio Devices
Investing in quality audio equipment is a good idea to improve your Google Meet experience. USB or Bluetooth headsets often provide clearer sound than built-in microphones, especially in noisy environments. Always ensure your external microphone is connected correctly, and double-check that it’s selected as the default input device in both Google Meet and your system’s audio settings.
Limit Background Noise and Echo
Echo and noise are part of our modern lives unless you take calls from the countryside where noise has no place. But if you’re part of a big city, you generally cannot avoid noisy environments, whether at home, the office, or at a cafe.
So How to Avoid Background Noise?
Of course, you can avoid background noise by using noise-canceling headphones, fixing any Google Meet microphone settings issues, and muting yourself when you’re not speaking. However, such measures can create uncertainty during important meetings and instability in your audio output. Thus, Krisp might be of interest to you.
This AI-powered tool is designed to eliminate background noise with unmatched precision, even in the busiest environments. Whether you’re taking calls from a noisy cafe, office, or home with family activity in the background, Krisp ensures that only your voice is heard, delivering crystal-clear sound.
Unlike other noise-canceling solutions, Krisp’s bi-directional noise removal means you won’t just mute the noise around you—Krisp also filters out distractions from the other side of the call, ensuring smooth communication for everyone involved. Have a look at the demo below:
With its easy setup, all you need to do is select Krisp as your microphone in Google Meet or any other conferencing tool, and you’re ready to go—no additional hardware required. Plus, it processes audio locally on your device, keeping your conversations private and secure.
So, if you’re looking for seamless, professional communication, Krisp offers an invaluable solution for tackling modern noise challenges.
Wrapping it Up
In most cases, when your Google Meet microphone not working is an issue, it’s due to simple problems like muted settings, permission restrictions, or minor hardware glitches.
Thankfully, these problems are often accessible to troubleshoot and resolve with a few quick adjustments. Whether it’s checking your browser permissions, reconfiguring settings, or addressing network performance, there are plenty of solutions to get your microphone working smoothly.
Trying advanced fixes like turning off VPNs, contacting your IT Admin, closing unnecessary apps, or even resetting Google Meet can often do the trick for more stubborn issues. A replacement may be necessary if the problem lies with faulty hardware, like a damaged microphone or cable.
By following these troubleshooting steps, you’ll be back to enjoying seamless, uninterrupted conversations on Google Meet in no time!
Frequently Asked Questions
Only the host can mute participants. During the meeting, as a host, cliwithoutck the “People” icon at the bottom right, select the participant you want to mute, and click the microphone icon next to their name. Keep in mind participants can unmute themselves.
To unmute yourself in Google Meet, simply click the microphone icon located at the bottom of the screen. If there is a red line through the icon, it means you are muted. Clicking it again will unmute you. Please note that only the individual users can unmute themselves; hosts cannot unmute participants.
In Google Meet, the microphone icon is at the bottom center of the meeting window, next to the camera and hang-up icons.


