High-quality audio is crucial for anyone involved in live streaming, podcasting, or video creation. Whether you’re a gamer, educator, or content creator, ensuring your audience hears you clearly without distracting background noise is a must. OBS Studio, a popular open-source software for video recording and live streaming, offers powerful built-in tools to help you achieve just that.
In this step-by-step guide, we’ll walk you through how to use OBS noise suppression to enhance your audio quality, providing you with all the tips and tricks you need to sound professional in every recording and stream.
Removing Background Noise in OBS
Step 1: Open OBS Studio
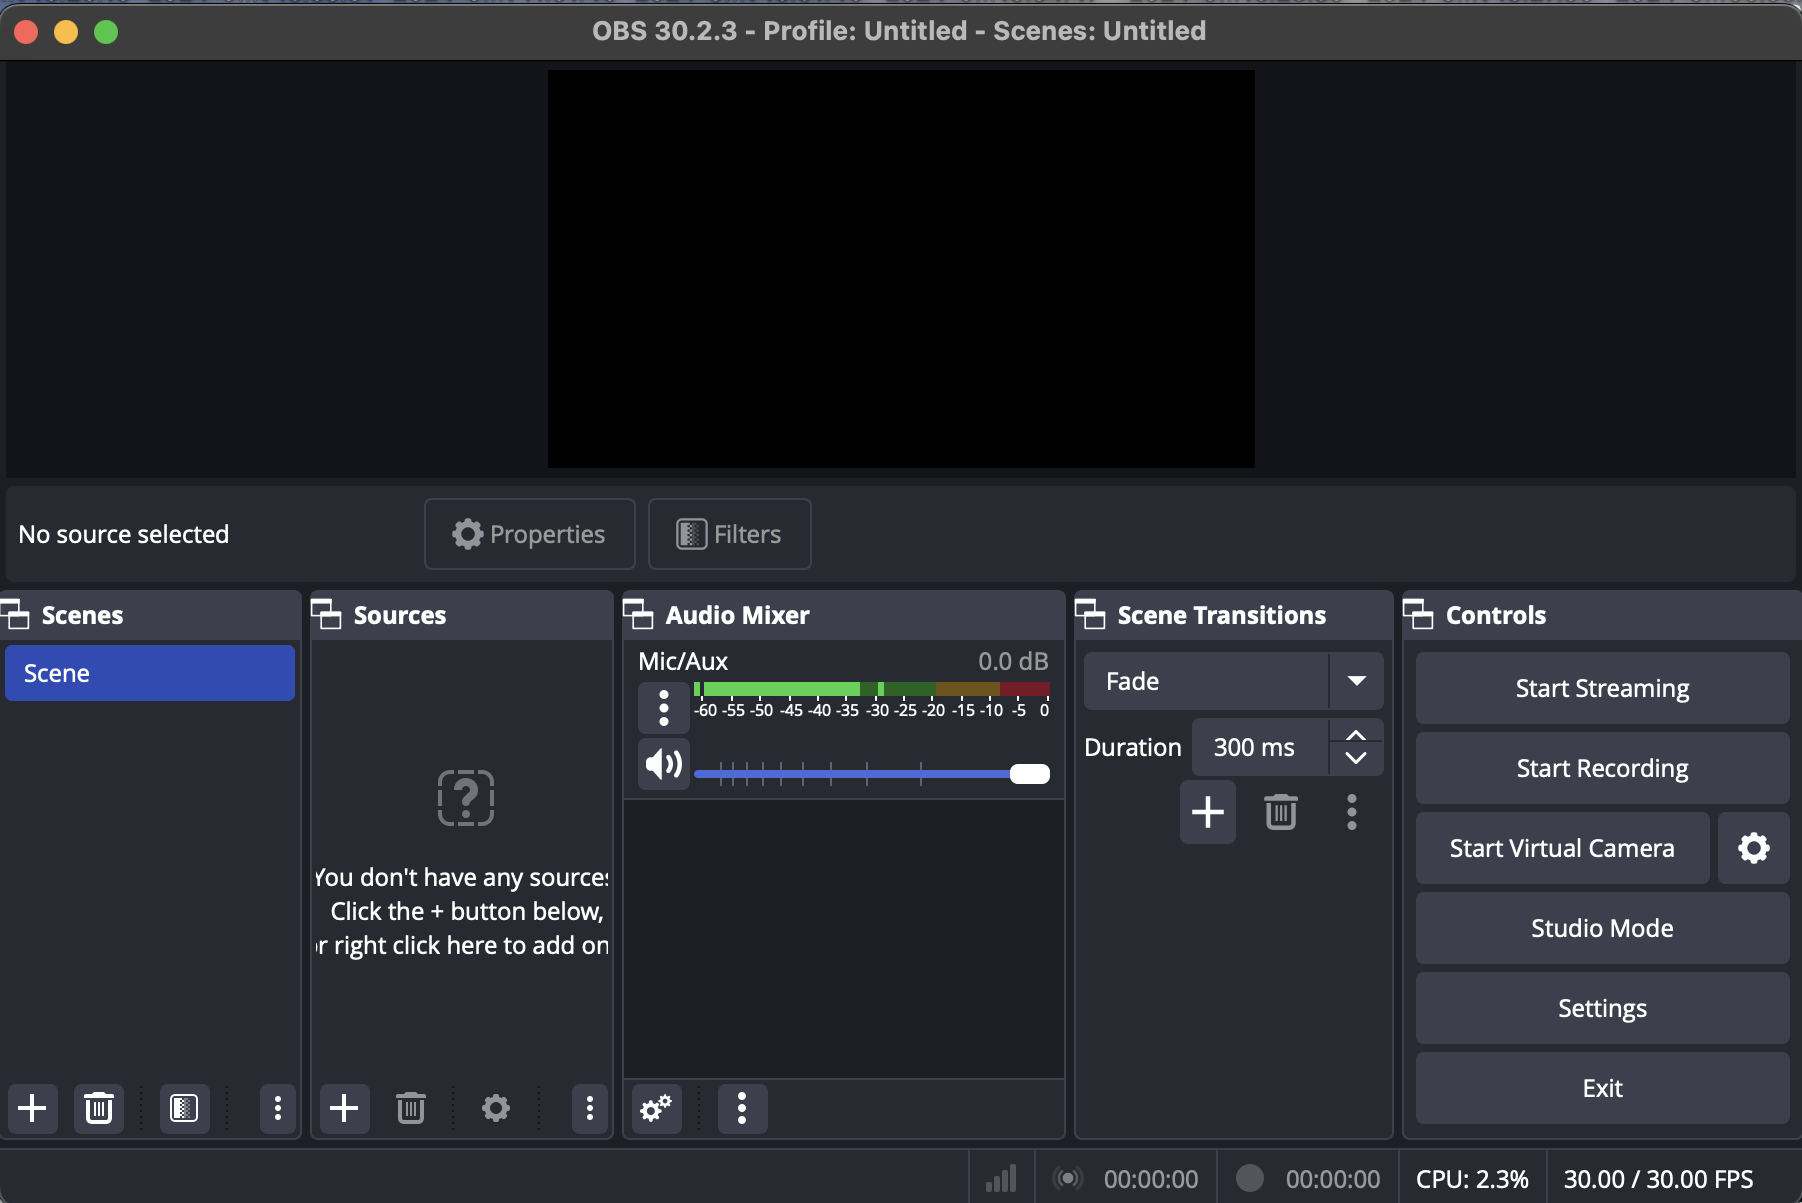
To get started, launch OBS Studio on your computer. If you don’t have it installed yet, you can download it from the official OBS website. Once opened, you should see the main interface with various sections like Scenes, Sources, Audio Mixer, and Controls.
Step 2: Select the Audio Input Source
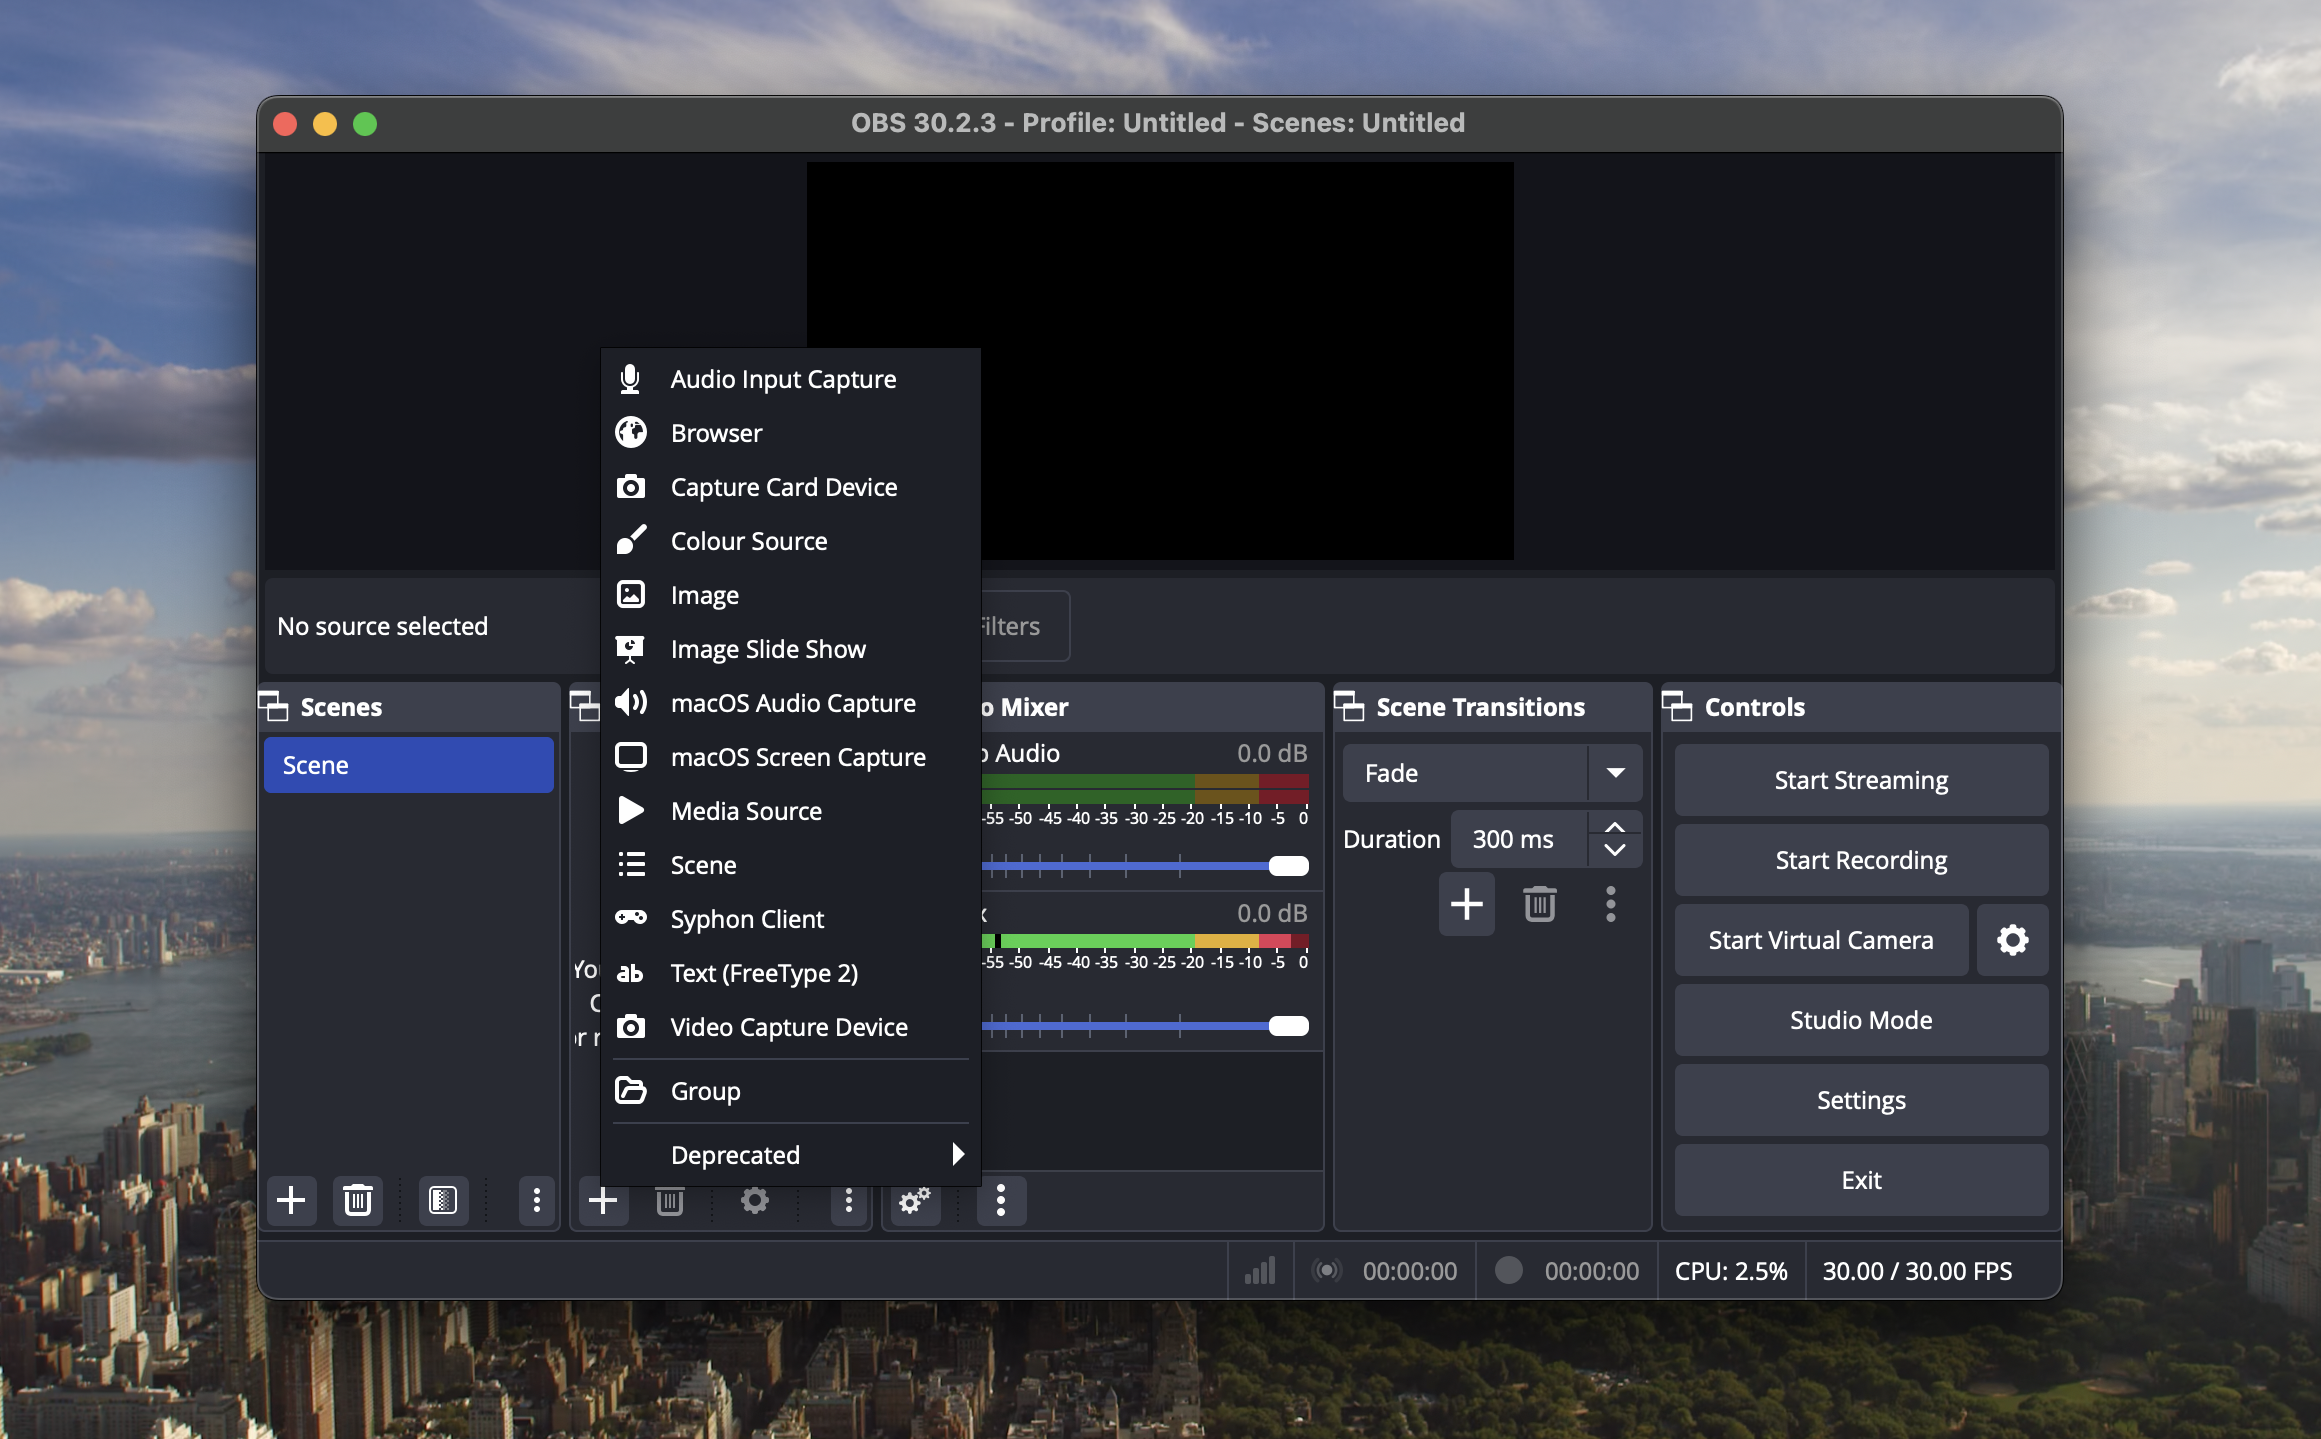
In OBS Studio, your microphone or audio input source is where you’ll apply the noise suppression. First, identify the audio input source you want to enhance. In the Audio Mixer section, find your microphone or audio input source. If you haven’t already added it, click on the + button in the Sources section, select Audio Input Capture, and choose your microphone from the list.
Step 3: Apply the OBS Noise Suppression Filter

With your audio input source selected, it’s time to apply the noise suppression filter:
- In the Audio Mixer section, click the gear icon (⚙️) next to your microphone or audio input source.
- From the dropdown menu, select Filters.
- In the Filters window, click the + button at the bottom left and choose Noise Suppression from the list.
- You’ll see options for the type of noise suppression: RNNoise (higher quality) and Speex (more customizable).
- Choose the one that best suits your needs. RNNoise is generally recommended for most users due to its AI-based suppression, but you can experiment with both to see which works best for your environment.
- Adjust the suppression level if using Speex, or simply leave it at the default setting for RNNoise.
Step 4: Test Your Audio Settings
After applying the noise suppression filter, it’s crucial to test your audio to ensure it effectively reduces background noise without affecting your voice quality:
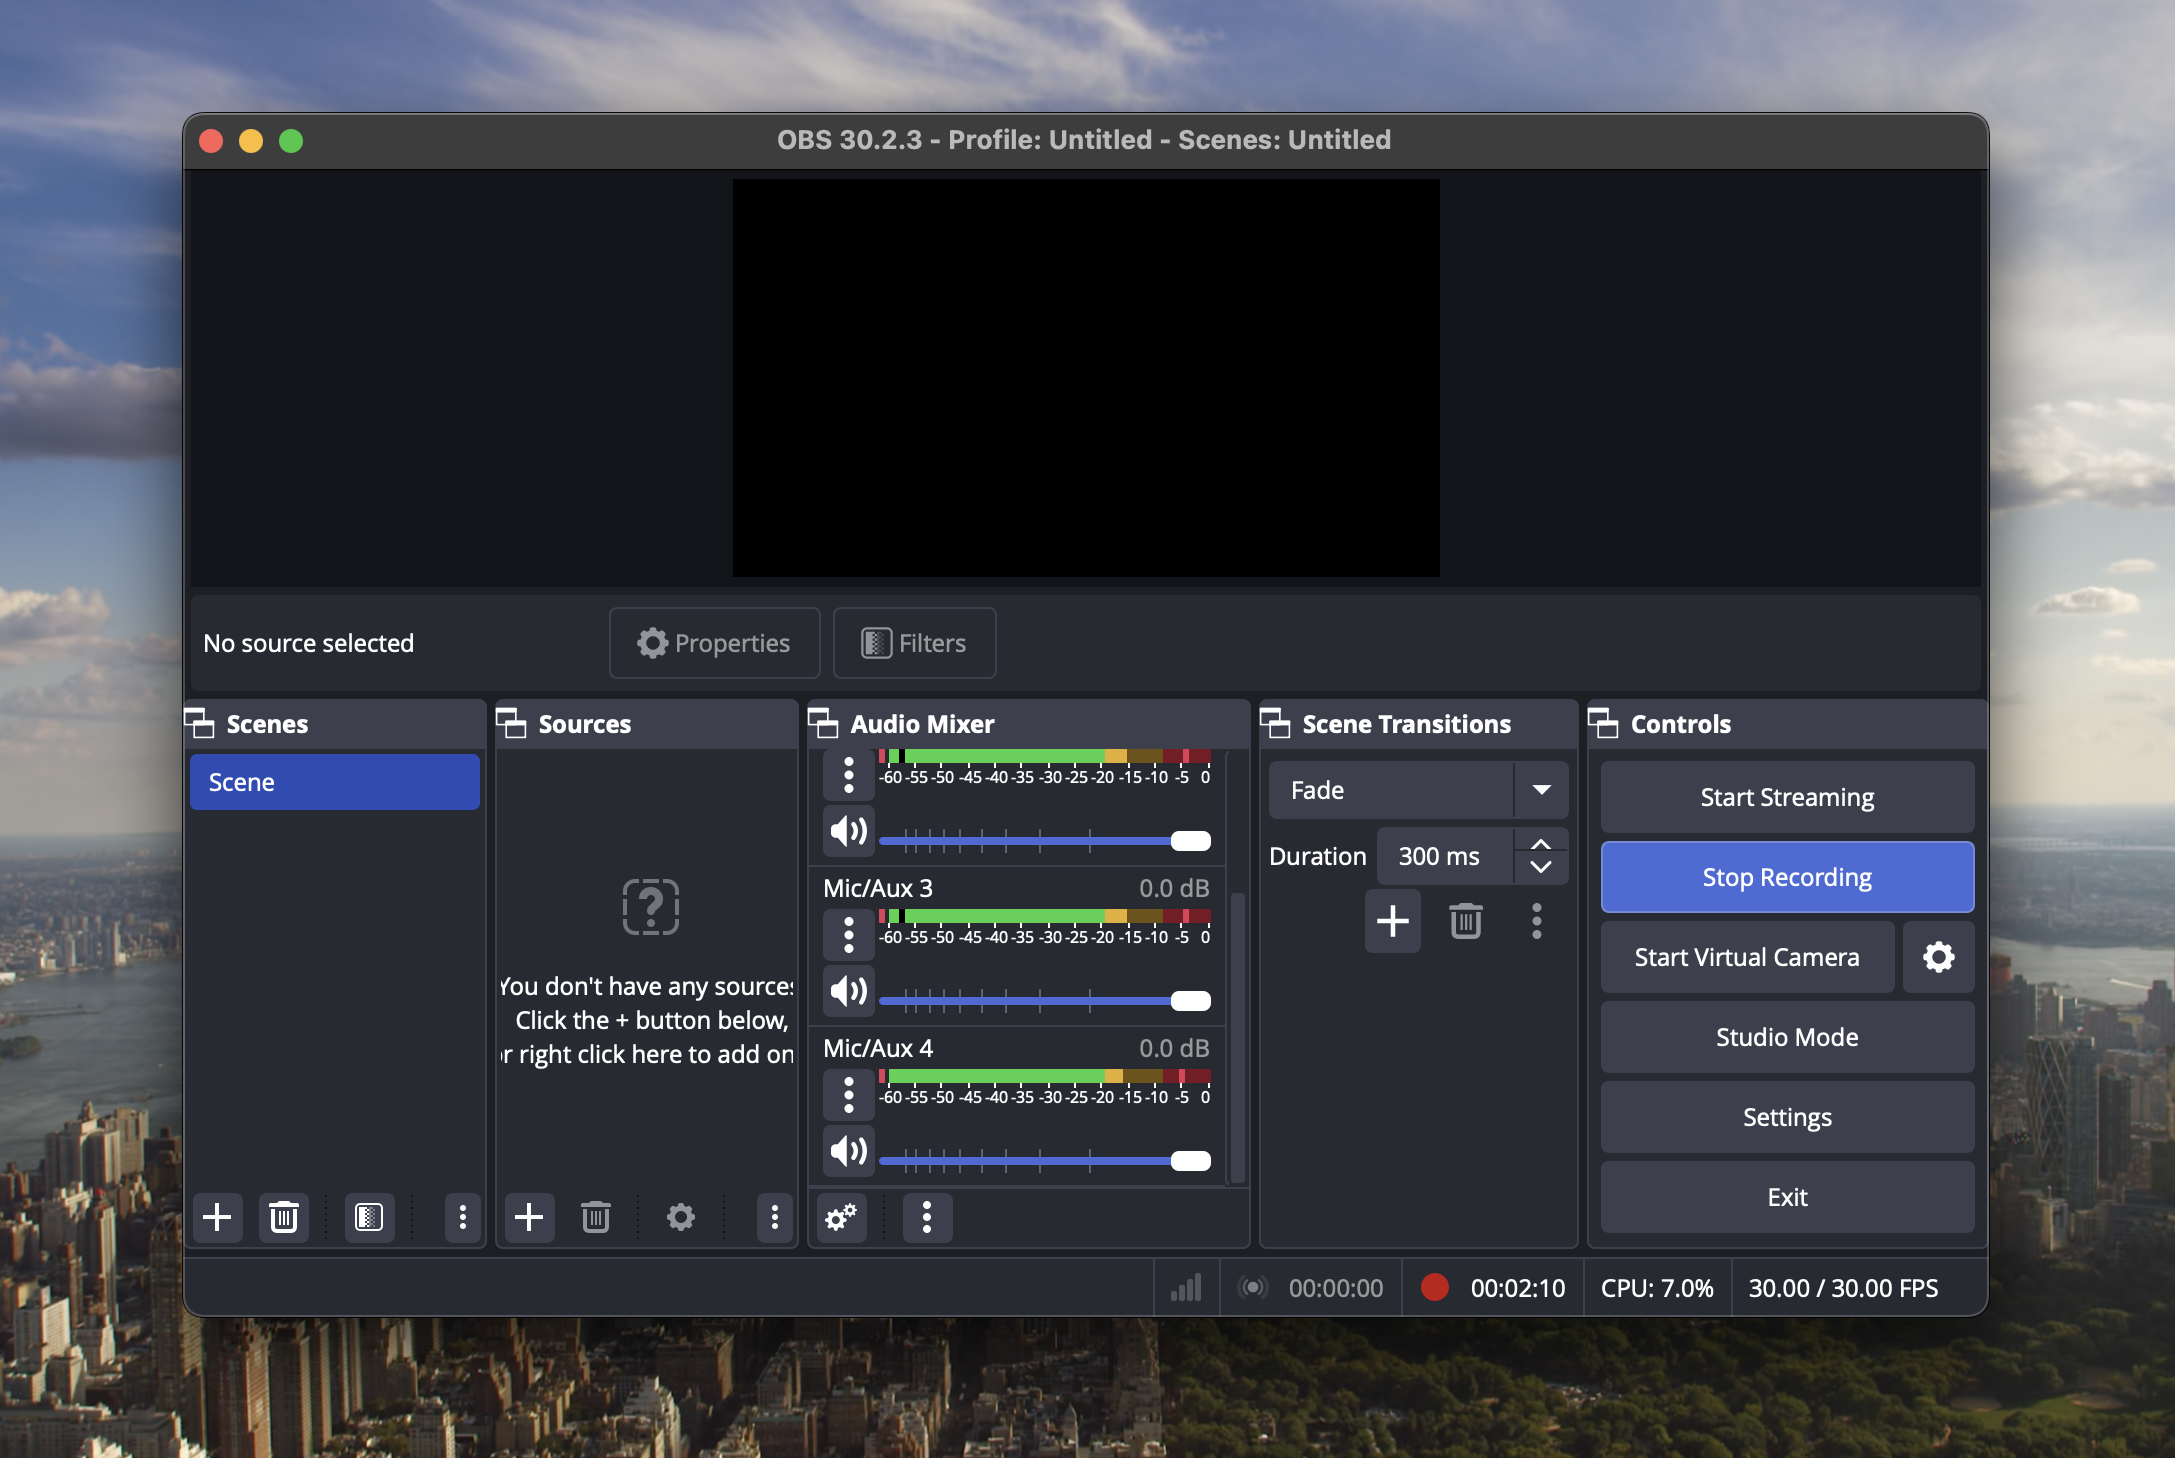
- In OBS, go to Controls and click Start Recording.
- Record a short clip while speaking into the microphone. Ensure you’re in the typical environment where you’ll be streaming or recording to test how the filter performs under normal conditions.
- Stop the recording and playback the clip to evaluate the audio quality. Listen for any residual background noise or any distortions in your voice.
If the audio is clear and free from unwanted noise, you’ve successfully configured the noise suppression. If not, consider using easy built-in tools to remove the background noise.
Step 5: Noise Suppression with Krisp
If you’re looking for an easy way to elevate your audio quality without getting into complex settings, OBS Studio has integrated a powerful noise-canceling tool called Krisp. Krisp uses AI to filter out background noise, making it an excellent option for those who want a quick and easy solution to improve their audio.
Download Krisp:
Start by downloading the Krisp app from the official website. The installation wizard will guide you through the setup process.
Install Krisp:

Follow the step-by-step instructions provided by the installation wizard to get Krisp up and running on your system.
Set Krisp as Your Microphone:
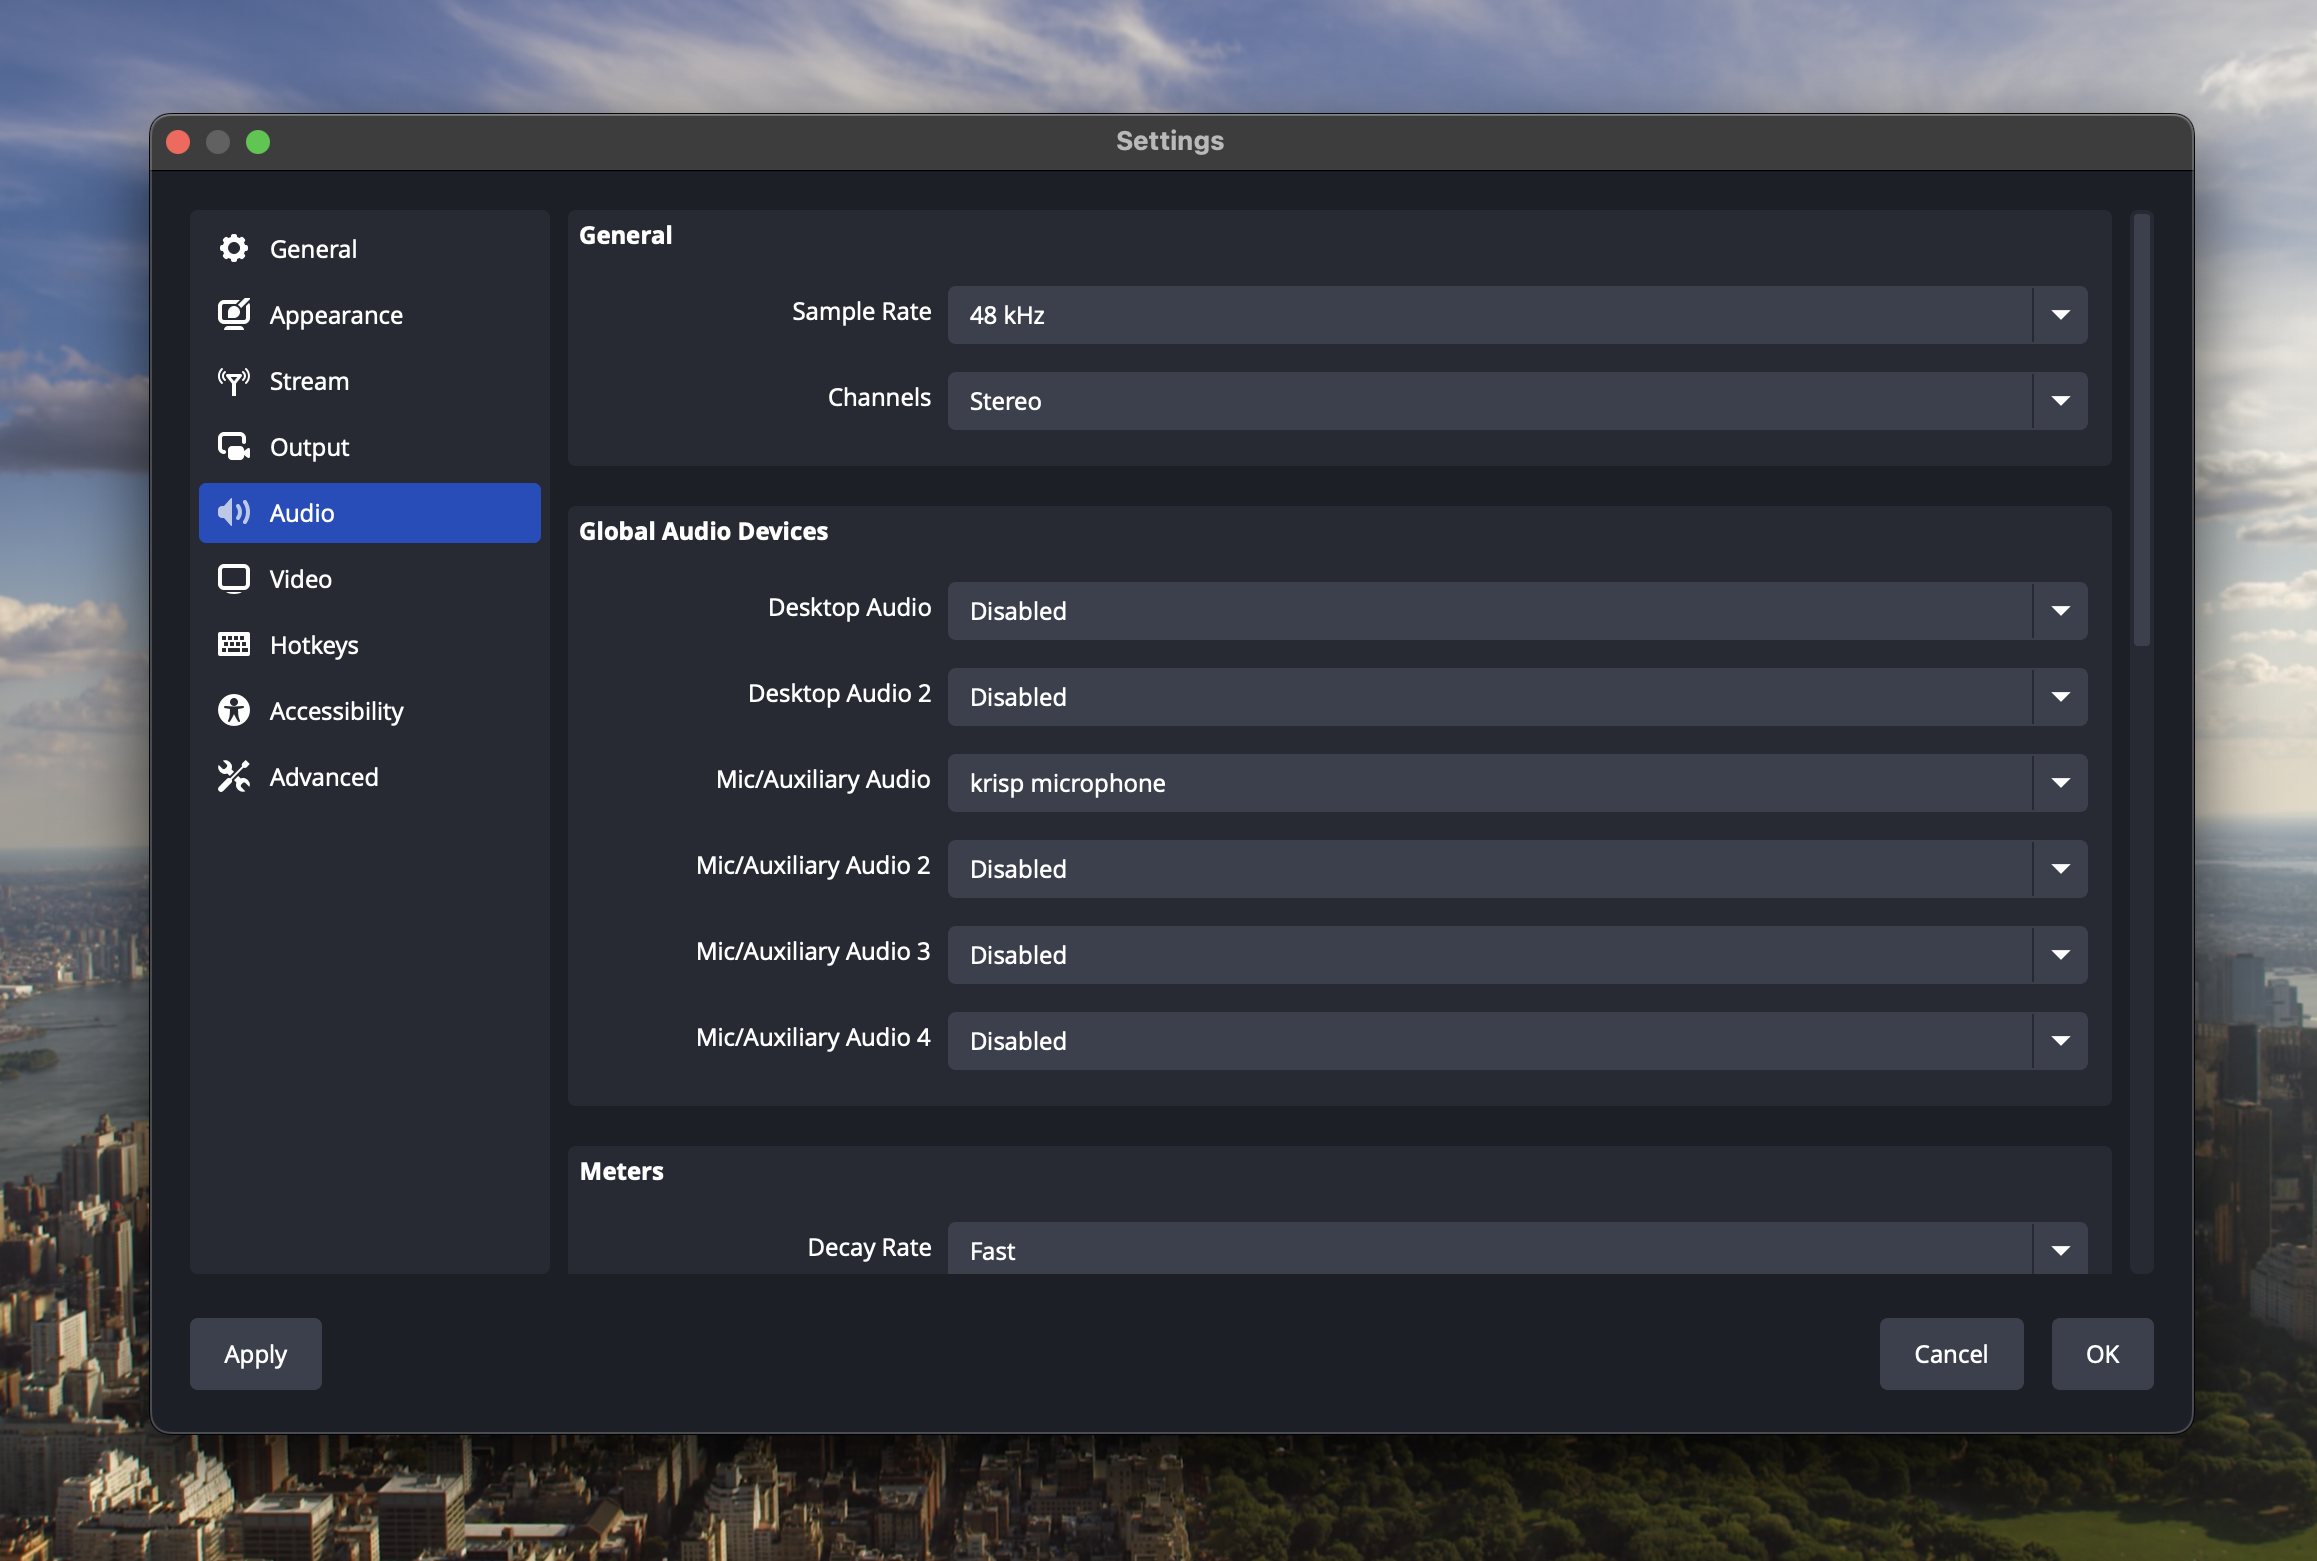
In the Audio settings, locate the Mic/Auxiliary Audio dropdown menu and change it to Krisp Microphone (Krisp).
Start Recording or Streaming:
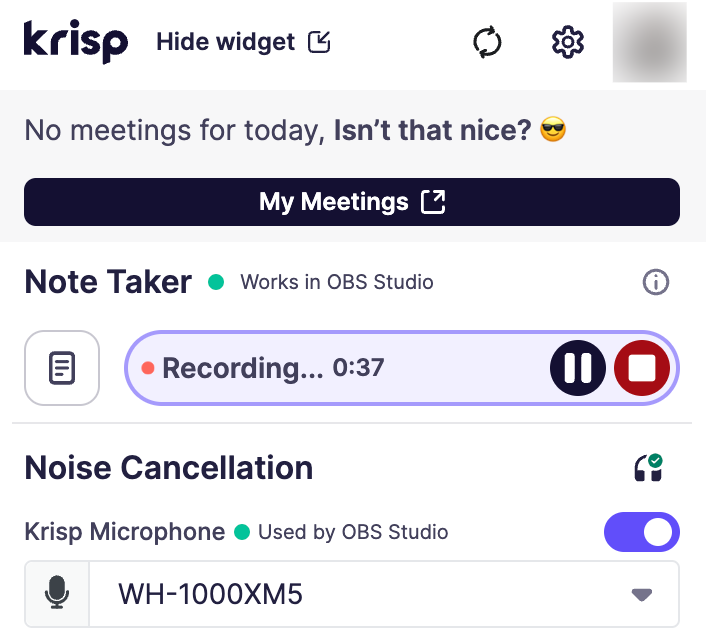
That’s it! You’re now ready to start recording or streaming with OBS Studio, letting Krisp work its magic to remove background noise and deliver crystal-clear audio.
By integrating Krisp with OBS Studio, you can enjoy a noise-free recording or streaming experience without the need for additional filters or expensive microphones. Give Krisp a try in your next session and experience the difference in audio quality.
10 Tips for Fixing Distorted Audio After Applying Noise Suppression
When applying noise suppression in OBS Studio, you might encounter some challenges. Distorted audio is a frequent problem when noise suppression is too aggressive, leading to a muffled or unnatural sound. Below are common issues that users face and troubleshooting tips to help you maintain optimal audio quality.
Tip 1: Adjust the Suppression Level
Lower the noise suppression level in OBS Studio to strike a balance between reducing background noise and preserving the natural tone of your voice. Start with a moderate level and gradually adjust as needed.
Tip 2: Reduce Environmental Factors
If possible, minimize background noise at the source by recording in a quieter environment or using soundproofing techniques. This can reduce the load on the noise suppression filter and improve audio quality.
Tip 3: Fine-Tune Microphone Settings
Check your microphone’s settings to ensure it’s capturing your voice correctly. Adjust the gain, position the microphone closer, or experiment with different angles to reduce the need for heavy noise suppression.
Tip 4: Use a Pop Filter
A pop filter can help reduce plosive sounds and other unwanted noises that might be causing distortion. This simple tool can improve the clarity of your audio before any software processing is applied.
Tip 5: Monitor Audio Levels
Keep an eye on your audio levels in OBS Studio. If your microphone input is too loud, it can cause clipping and distortion. Adjust the levels to stay within a healthy range.
Tip 6: Experiment with Different Filters
OBS Studio offers various audio filters, such as Noise Gate and Compressor. Experiment with these filters to find a combination that works well with your noise suppression settings, improving overall audio quality.
Tip 7: Use External Hardware
If possible, consider using an external audio interface or a high-quality microphone with built-in noise-canceling features. This can significantly reduce the need for aggressive software-based noise suppression.
Tip 8: Test in a Controlled Environment
Conduct your audio tests in a controlled environment to better understand how the noise suppression filter affects your sound. This will help you fine-tune your settings more accurately.
Tip 9: Regularly Update OBS Studio
Ensure that you’re using the latest version of OBS Studio. Software updates often include improvements and bug fixes that could enhance the performance of noise suppression and other filters.
Tip 10: Consider Using built-in tools
If the built-in OBS filter isn’t providing the smooth results you’re looking for, consider using Krisp. Krisp is an AI-powered noise-canceling tool that can work alongside OBS Studio, offering more advanced noise suppression capabilities without the need for heavy configuration.
Next Steps
Achieving crystal-clear audio in OBS Studio can sometimes be a challenge, especially when dealing with unwanted background noise. However, by carefully adjusting your noise suppression settings, fine-tuning your microphone setup, and considering the environment in which you record, you can significantly improve your sound quality. The ten tips provided in this guide offer practical solutions to common issues, helping you strike the right balance between noise reduction and voice clarity.
Happy streaming!


