Are you searching for a Zoom Whiteboard tutorial to enhance your virtual meetings? You’re at the right place. Whether you’re leading a project, brainstorming, or teaching, the Zoom Whiteboard feature is a powerful tool for collaboration.
From “What is Whiteboard on Zoom?” to how to use this feature, fix common issues to enhancing your experience with the Krisp AI Meeting Assistant, we’ll get you covered everything in this guide.
What Is Zoom Whiteboard?

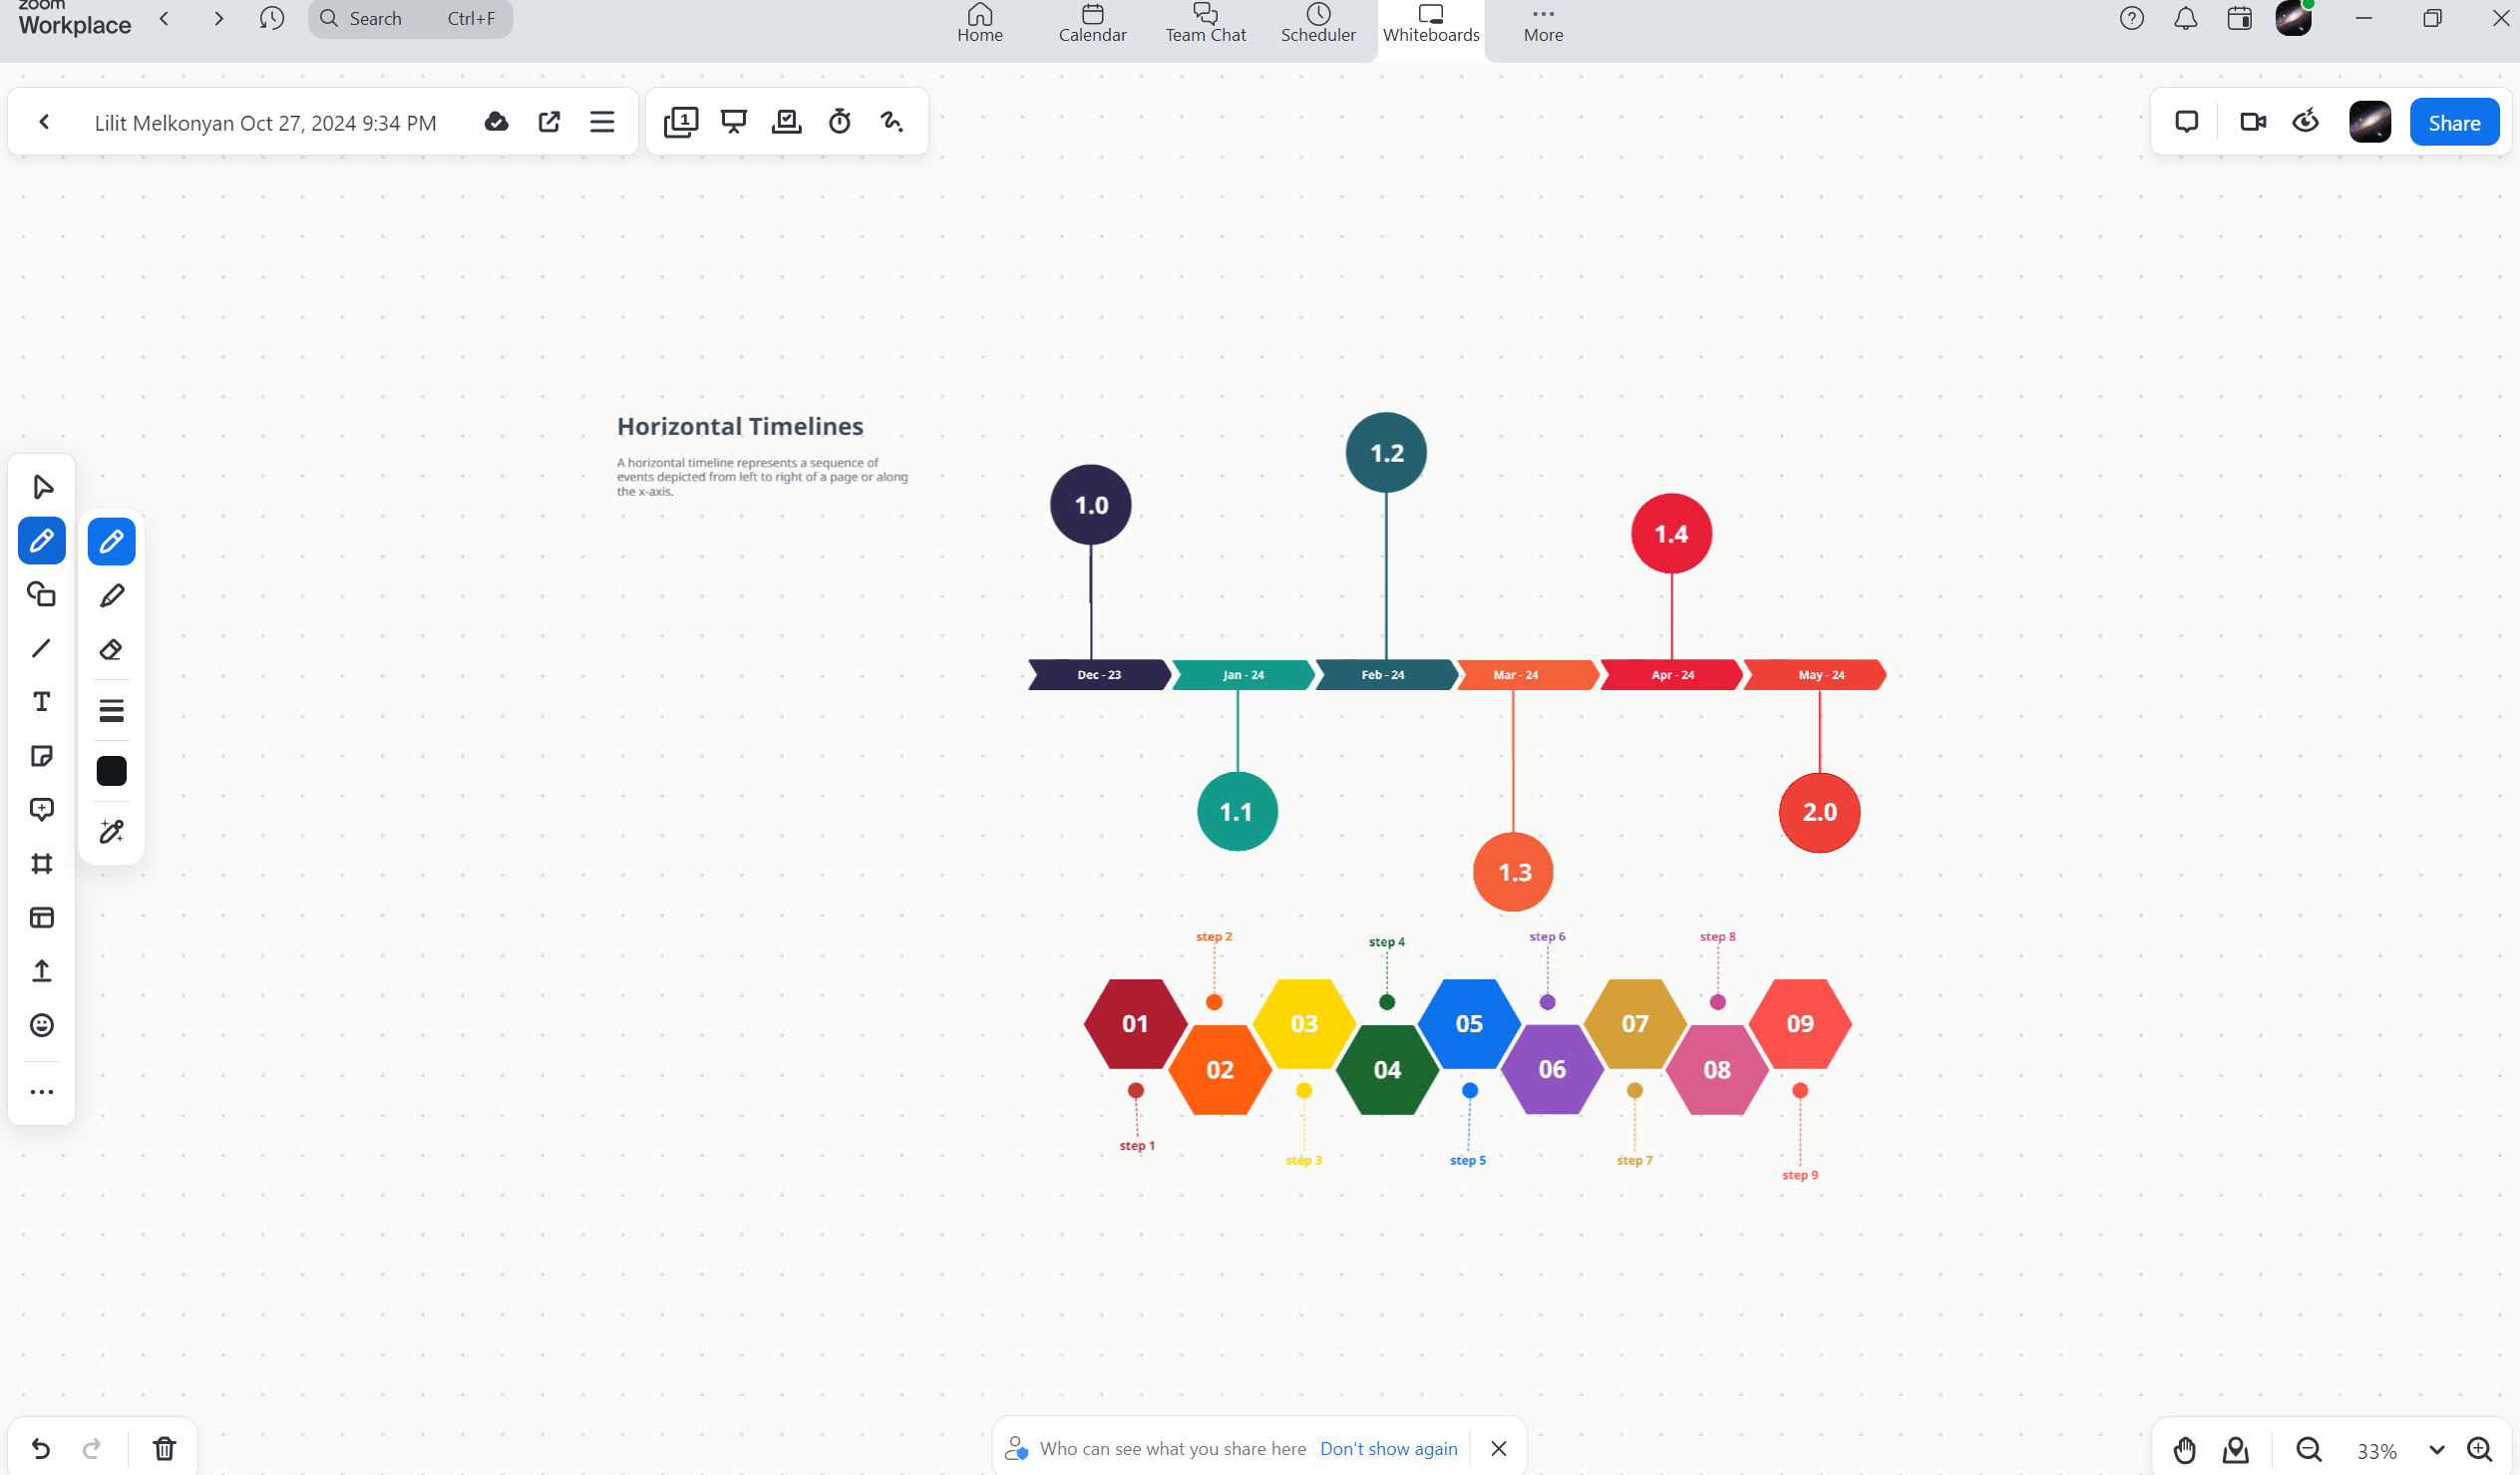
The Zoom Whiteboard feature is an interactive digital canvas that offers tools like drawing, text, and shapes. Here, you can draw, annotate, and collaborate in real time. Compared, it functions similarly to a physical Whiteboard but with enhanced digital capabilities.
That’s why this feature is ideal for brainstorming, diagramming, and problem-solving in remote or hybrid meetings.
You may wonder, “Did Zoom get rid of Whiteboard?” No, it didn’t. The 2024 Whiteboard on Zoom introduces new features, a cleaner interface, and better integration with Zoom channels and meetings.
Specifically, this new Zoom Whiteboard lets you collaborate during meetings. Besides, you can save and use your Whiteboard content outside of meetings.
Thus, this versatile feature is excellent for interactive teaching, project planning, or team brainstorming sessions.
Finally, you may ask, “Is Whiteboard in Zoom free?” Yes, it’s free for all users. Both free and paid users can access core features like drawing tools, text, shapes, and sticky notes.
However, certain advanced features, such as larger cloud storage for saving multiple Whiteboards or using them in Zoom Rooms, may require a paid Zoom plan.
However, free users can access essential Whiteboard tools, including pens, highlighters, and shapes to illustrate ideas.
What Version of Zoom Has Whiteboard: Prerequisites
Are you wondering, “Did Zoom get rid of the Whiteboard?” No, it didn’t. Zoom has only enhanced and expanded its functionality for 2024. Specifically, the Whiteboard is available on both the free and paid versions of Zoom․
The Whiteboard is now more intuitive and robust. It supports real-time collaboration during meetings. And you can access it as a standalone feature from Zoom’s primary interface for continuous collaboration outside of meetings.
Using the Zoom Whiteboard starts with meeting a few prerequisites․ Here they are:
- Get a Basic, Pro, Business, Education, or Enterprise account. You can find account types on the Account Profile page (zoom.us/signin#/login) in the Zoom web portal.
- Install a Zoom desktop client with a Global minimum version or higher for Windows, macOS, or Linux.
- Have a Global minimum version or higher Zoom mobile app for Android or iOS users.
- Zoom Progressive Web App (PWA) that enables seamless video conferencing for Chrome OS users.
Ensure you’re using the updated version of Zoom to access the Whiteboard features. As for updates, check them in Zoom’s settings.
Now, let’s uncover how to use the Zoom Whiteboard.
How to Set Up Zoom Whiteboard

You might be wondering, “How do I enable Whiteboard on Zoom?” Right? Using Zoom Whiteboard starts with Zoom setup.
To set up the Zoom Whiteboard:
- Download Zoom: Get the Zoom desktop client at zoom.us/download to use the Whiteboard.
- Update Zoom: Get the latest version of Zoom by clicking your profile icon and selecting “Check for Updates.”
- Enable Whiteboard: In a meeting, click “Share Screen,” then choose Whiteboard from the options to share it with participants.
- Admin Settings: If you’re an admin, go to the Zoom Web Portal and navigate to Settings > In Meeting (Basic). Then, enable the Whiteboard feature for all users. As a result, all participants can collaborate on a shared Whiteboard during the meeting.
How to Use Whiteboard on Zoom

To use the Zoom Whiteboard effectively in meetings, follow these steps:
- Start a Meeting: Click “Share Screen” at the bottom of your Zoom window. Next, select “Whiteboard” to open a blank canvas.
- Use Drawing Tools: Access the toolbar to use tools like:
- Pen/Draw Tool for freehand drawing
- Text Tool to add text
- Shapes Tool for creating diagrams
- Eraser Tool to remove specific marks
- Sticky Notes for highlighting ideas
- Collaborate: By default, all participants can annotate. But you can manage permissions through the “Security” menu.
- Navigate Pages: Add or switch between Whiteboard pages as needed.
- Zoom: Adjust zoom to focus on details or view the entire board. As a result, you can enjoy effective collaboration and real-time interaction during meetings.
How to Use Whiteboard in Zoom as a Participant
Are you interested in using Whiteboard Zoom as a participant? Well, you can contribute to a Zoom Whiteboard when the host shares it. To do so:
- Click “View Options” at the top of your Zoom window.
Select “Annotate” from the dropdown menu. This opens a toolbar with drawing, text, and shape tools to add content in real time.
This feature is ideal for interactive sessions like team meetings, brainstorming, or classroom activities. Why? Because multiple participants need to share ideas visually.
How to Add a Whiteboard to a Zoom Channel

You can add a Whiteboard to a Zoom channel to continue collaborating even after a meeting ends. To do this:
- Navigate to the “Chat” tab on the top
- Select the desired channel
- Click the “Whiteboard” icon at the top. You’ll see a new collaborative Whiteboard to access and edit anytime.
As a result, you can use this feature for long-term projects and team planning. It helps you keep ongoing discussions organized for continuous collaboration.
How to Draw on Zoom Whiteboard

Can everyone write on Zoom Whiteboard? To let meeting participants draw on it:
- Allow Annotations: As a host, click the “Security” button during the meeting.
- Enable Drawing: Under “Allow participants to,” check the box for “Annotate” on “Shared Content.” As a result, everyone can access the Whiteboard tools to draw, add text, and collaborate freely.
This feature is perfect for group brainstorming or interactive sessions where you want everyone to contribute.
Zoom Whiteboard Templates

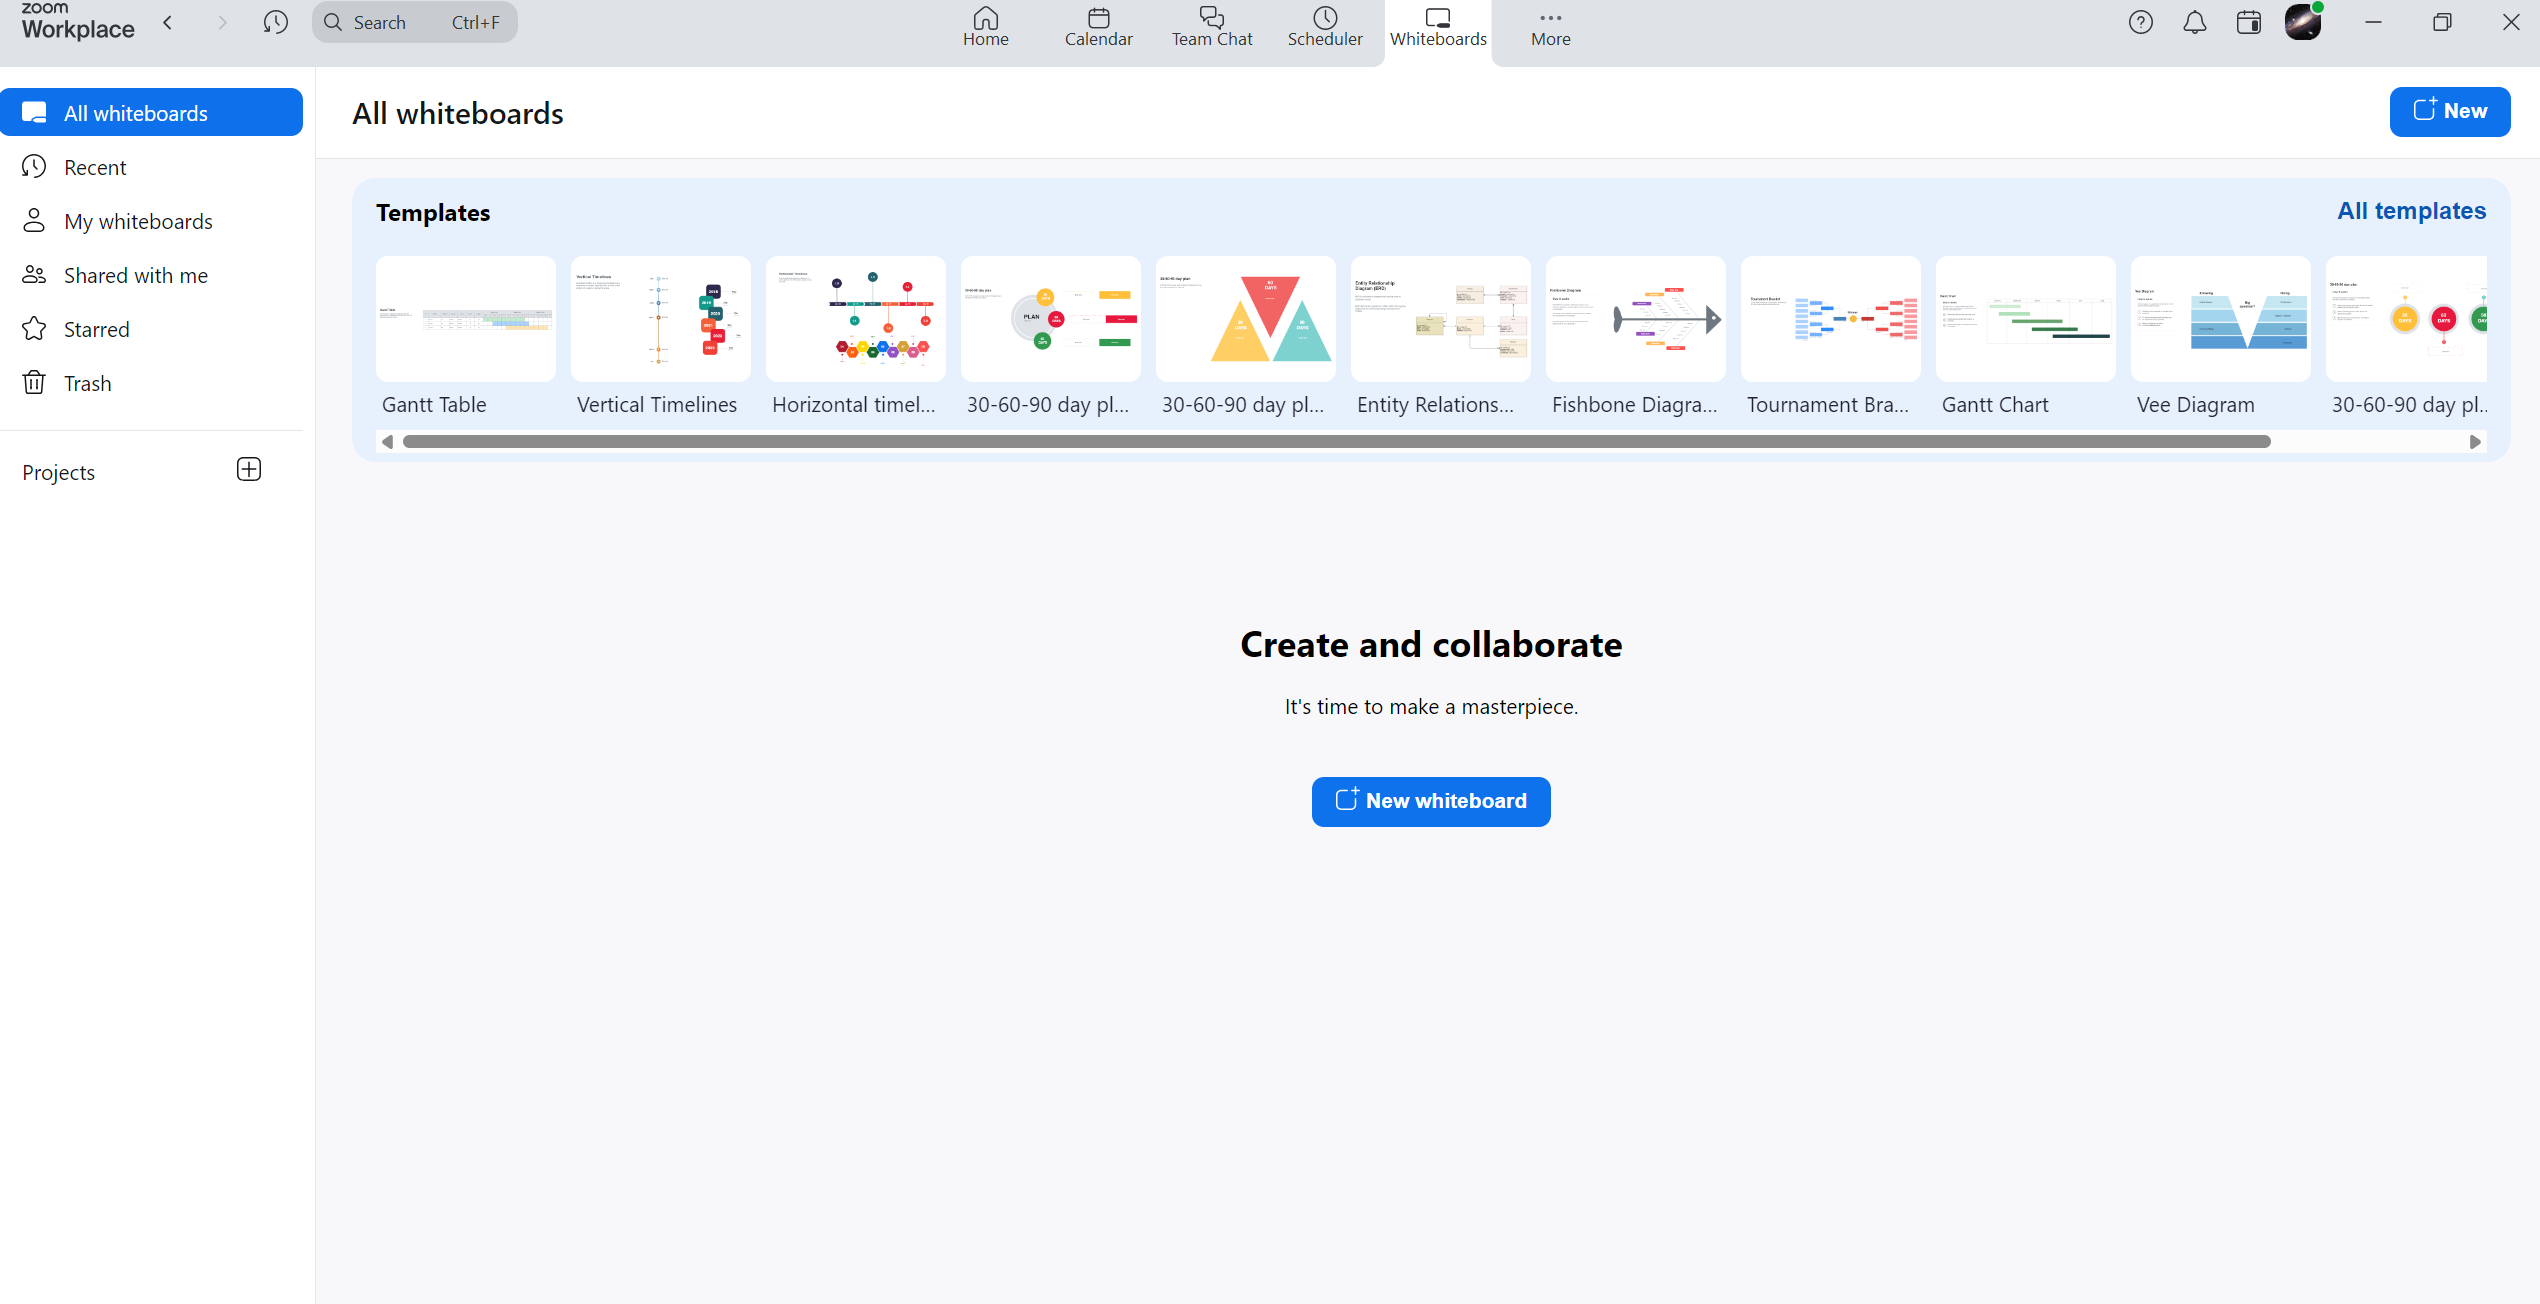
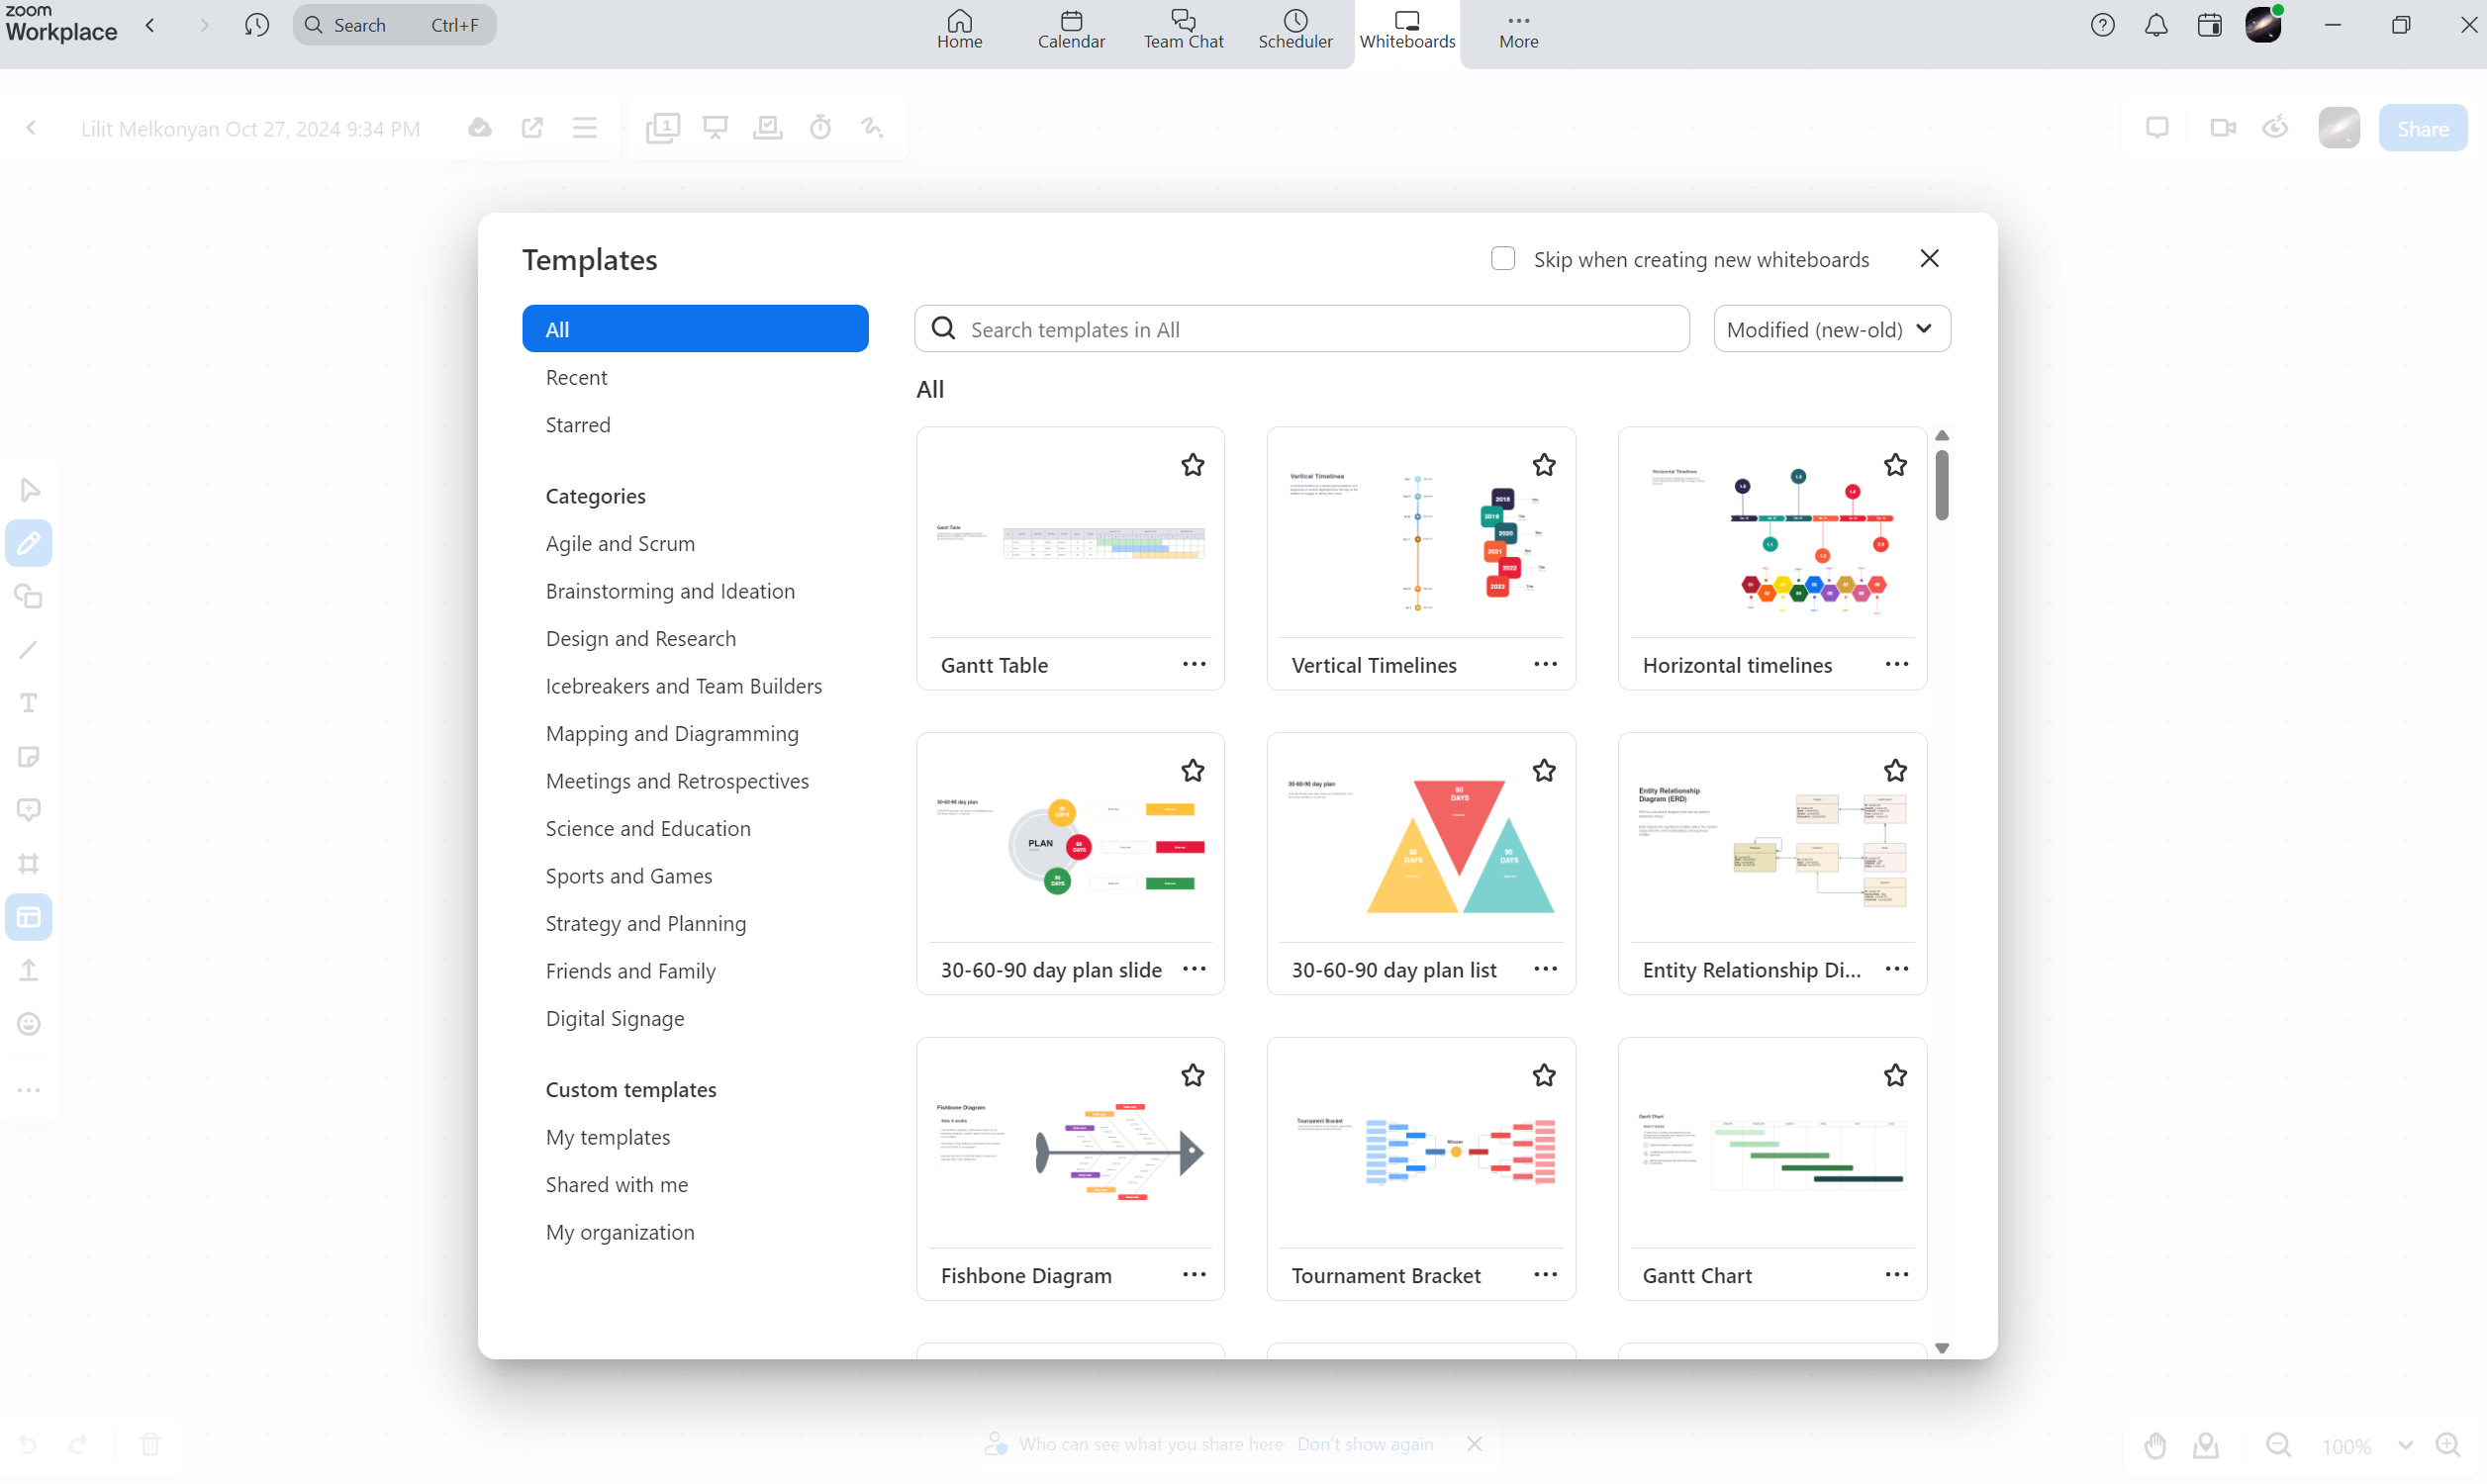
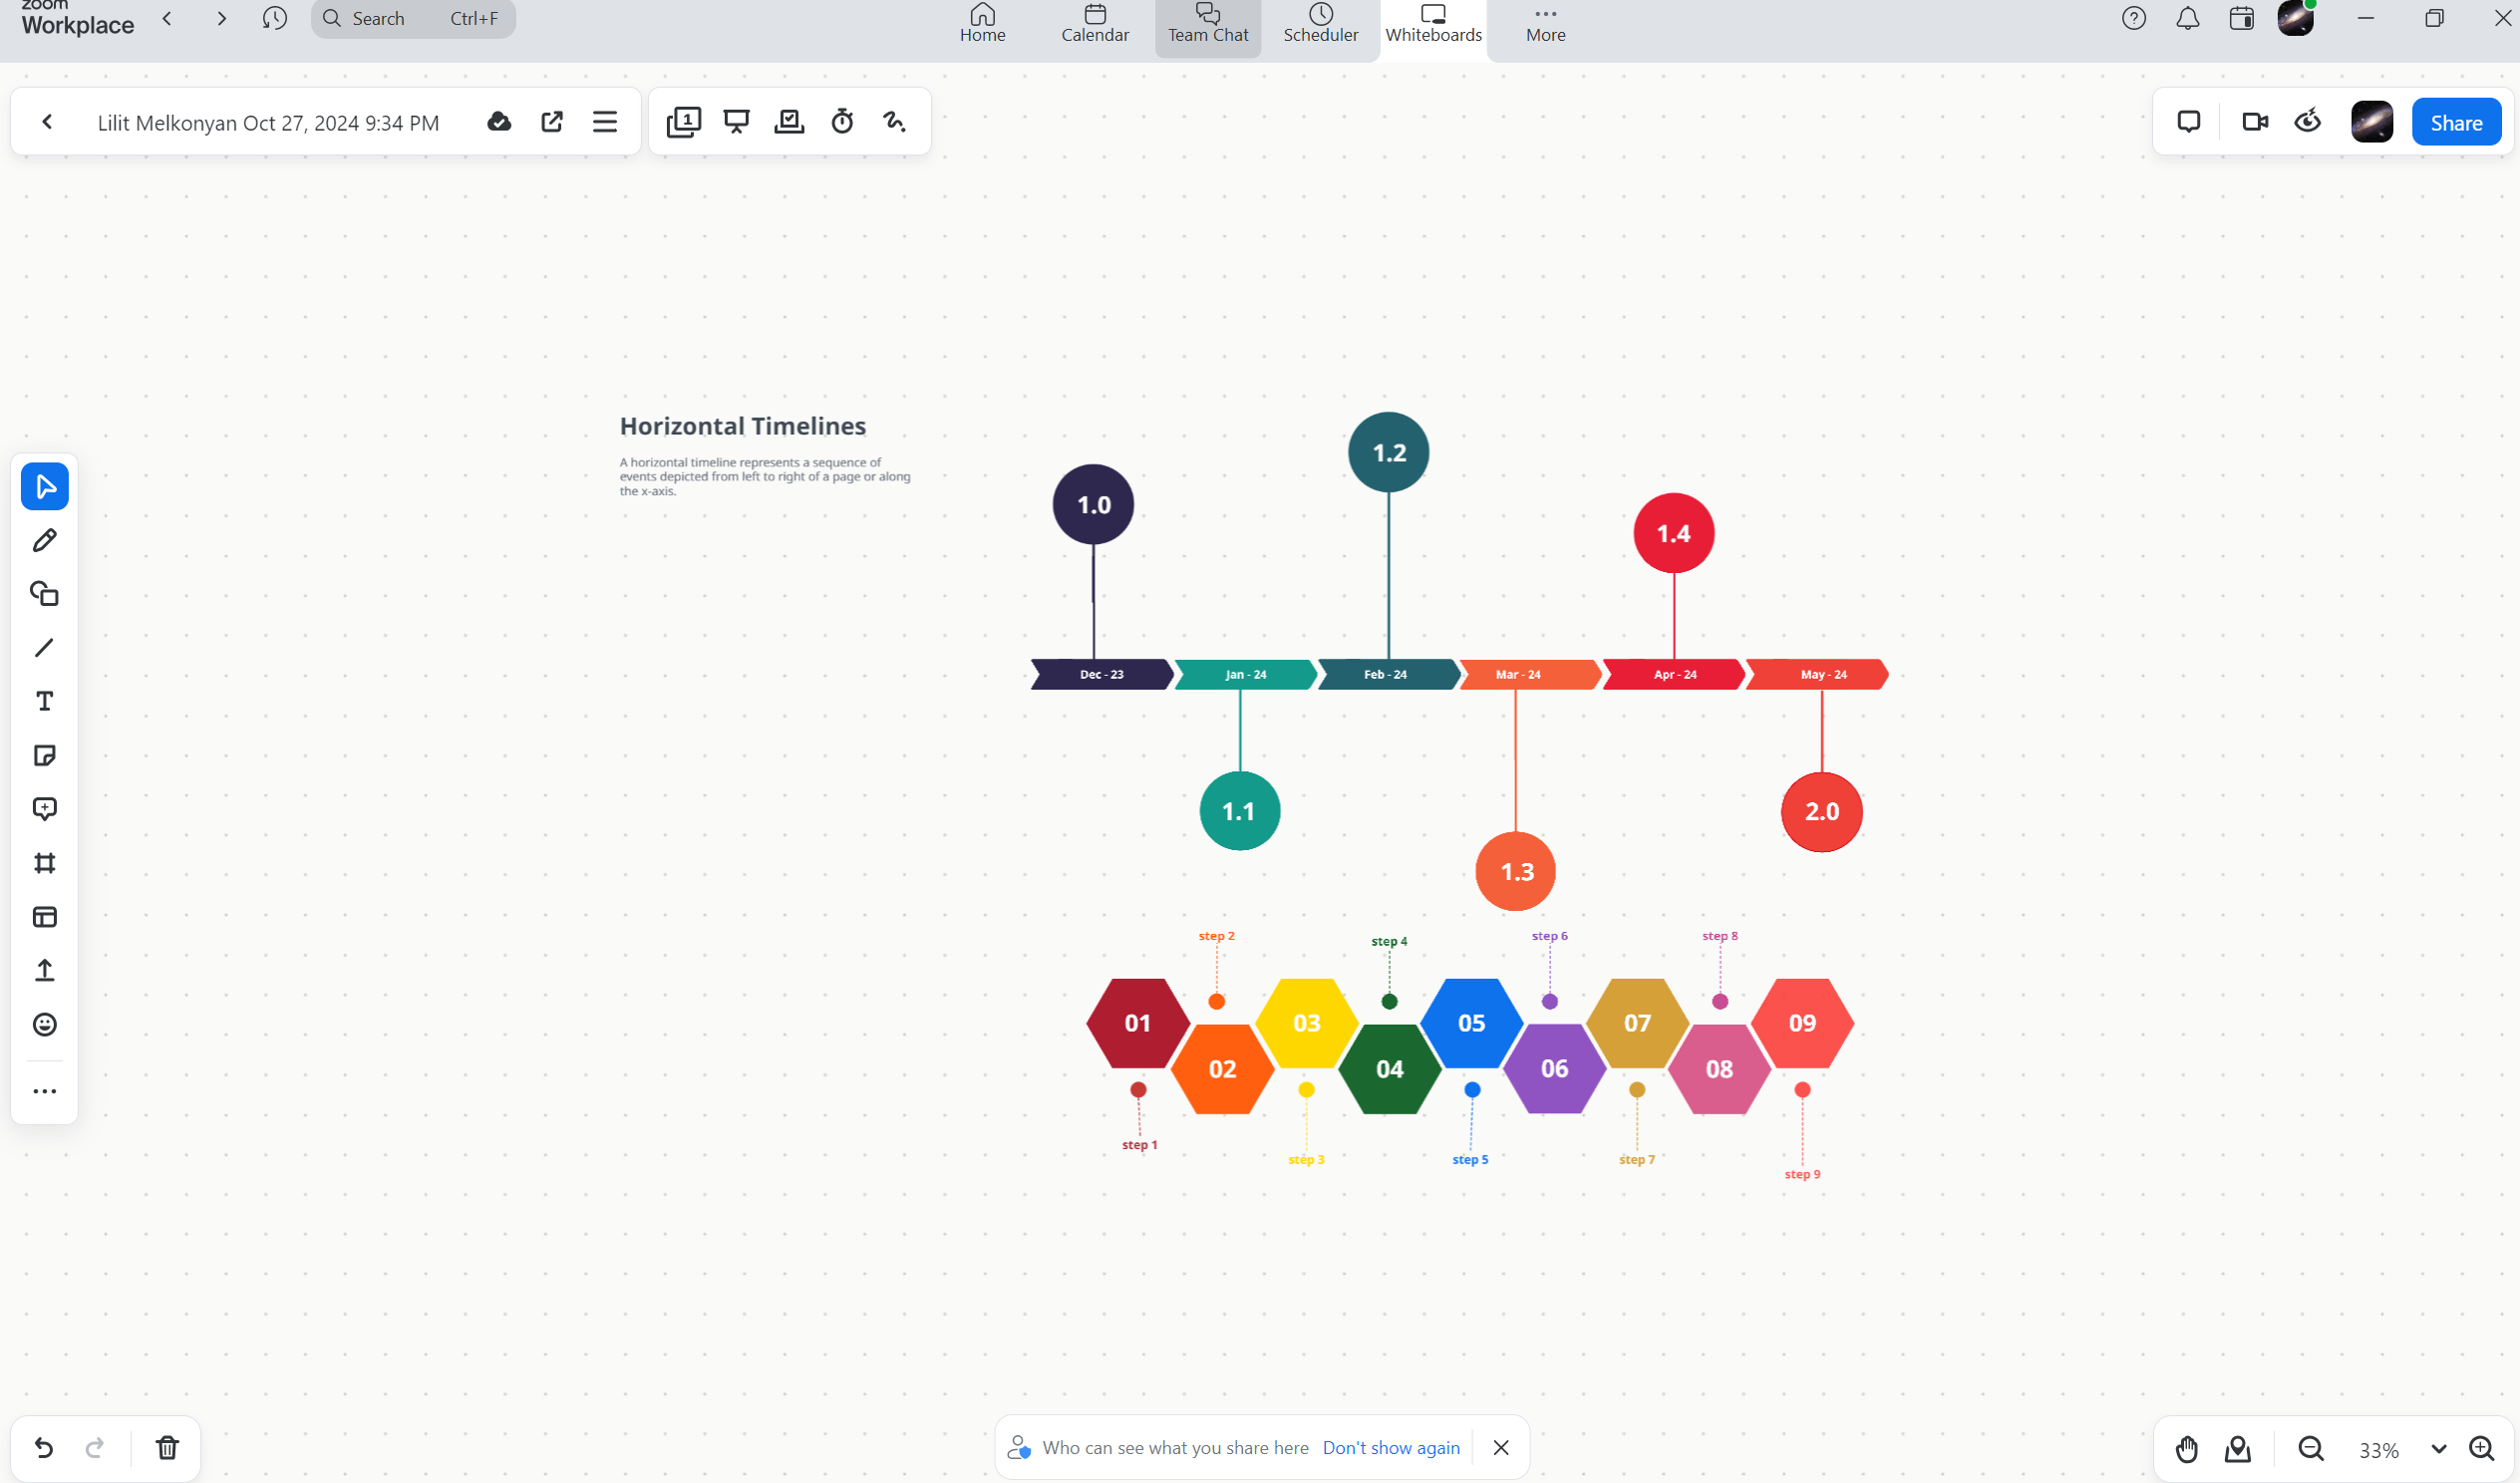
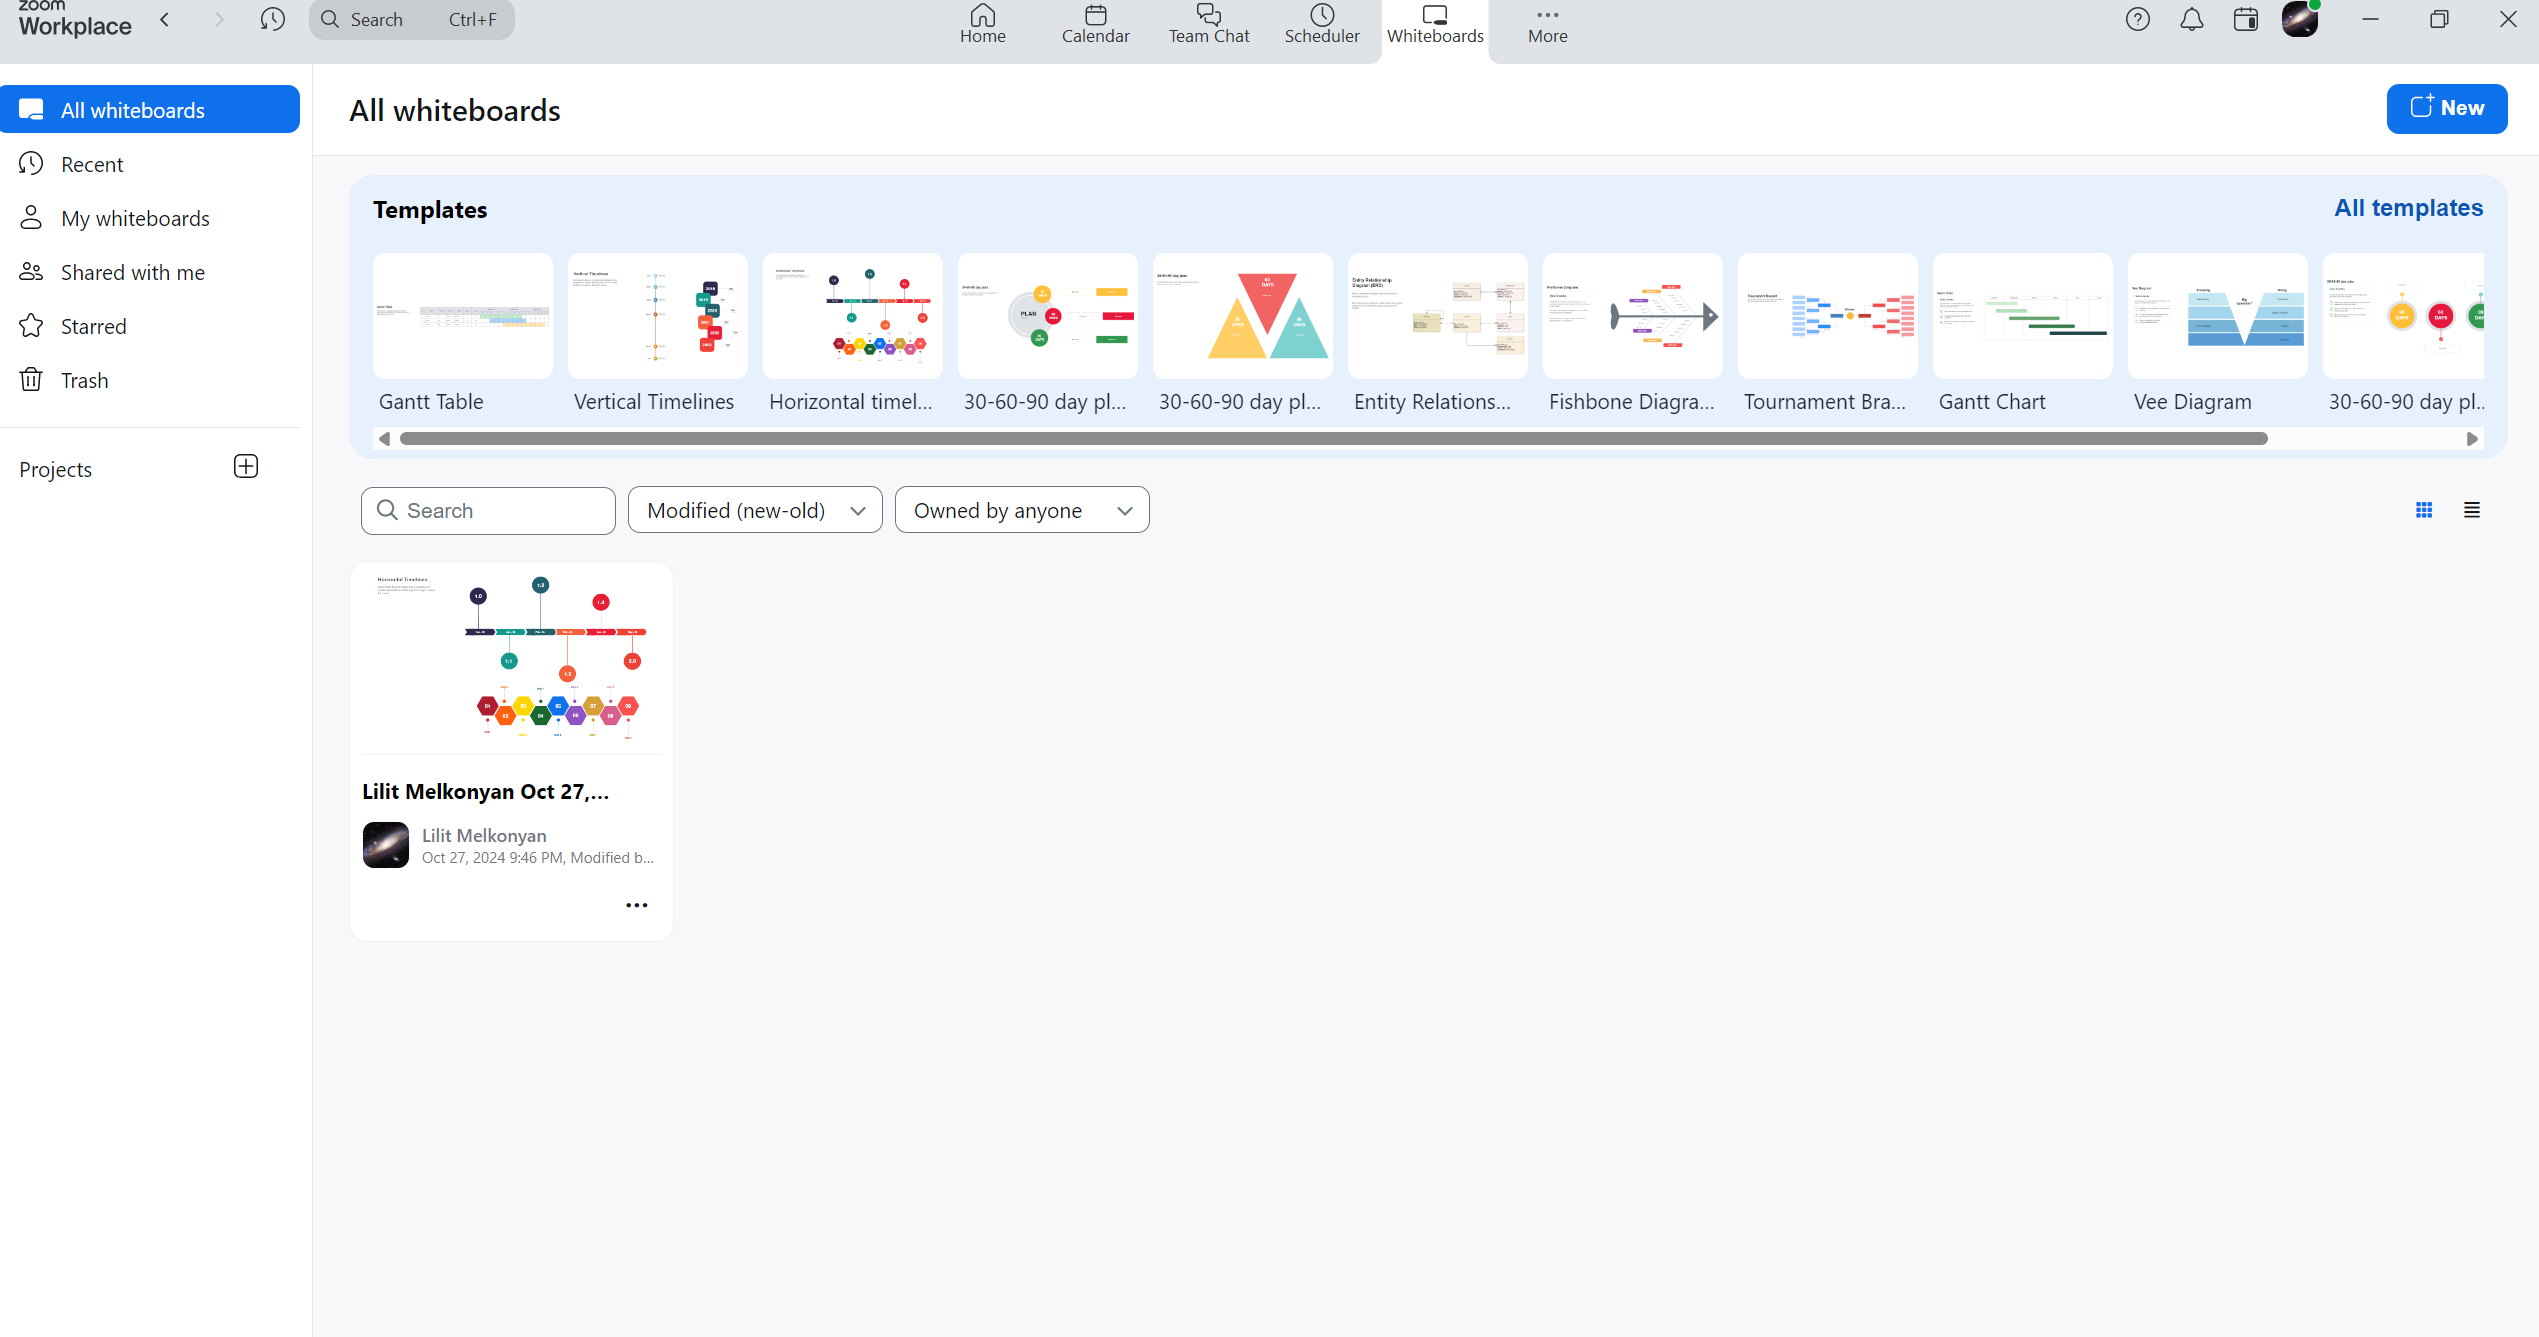
The new Zoom Whiteboard offers built-in templates to streamline collaboration. It provides structure for various tasks, such as project planning, idea mapping, and brainstorming.
These templates, as pre-structured canvases, help speed up the process. As a result, they ensure that meetings remain focused and organized.
To use Zoom Whiteboard templates:
- Start a new session by clicking the “Whiteboards” button on the in-meeting controls.
- Choose a template that suits your needs (e.g., project management or team collaboration)
- Customize it by adding, deleting, or editing elements.
Templates are beneficial for reducing setup time and guiding participants throughout the meeting.
How to Upload PDF to the Whiteboard
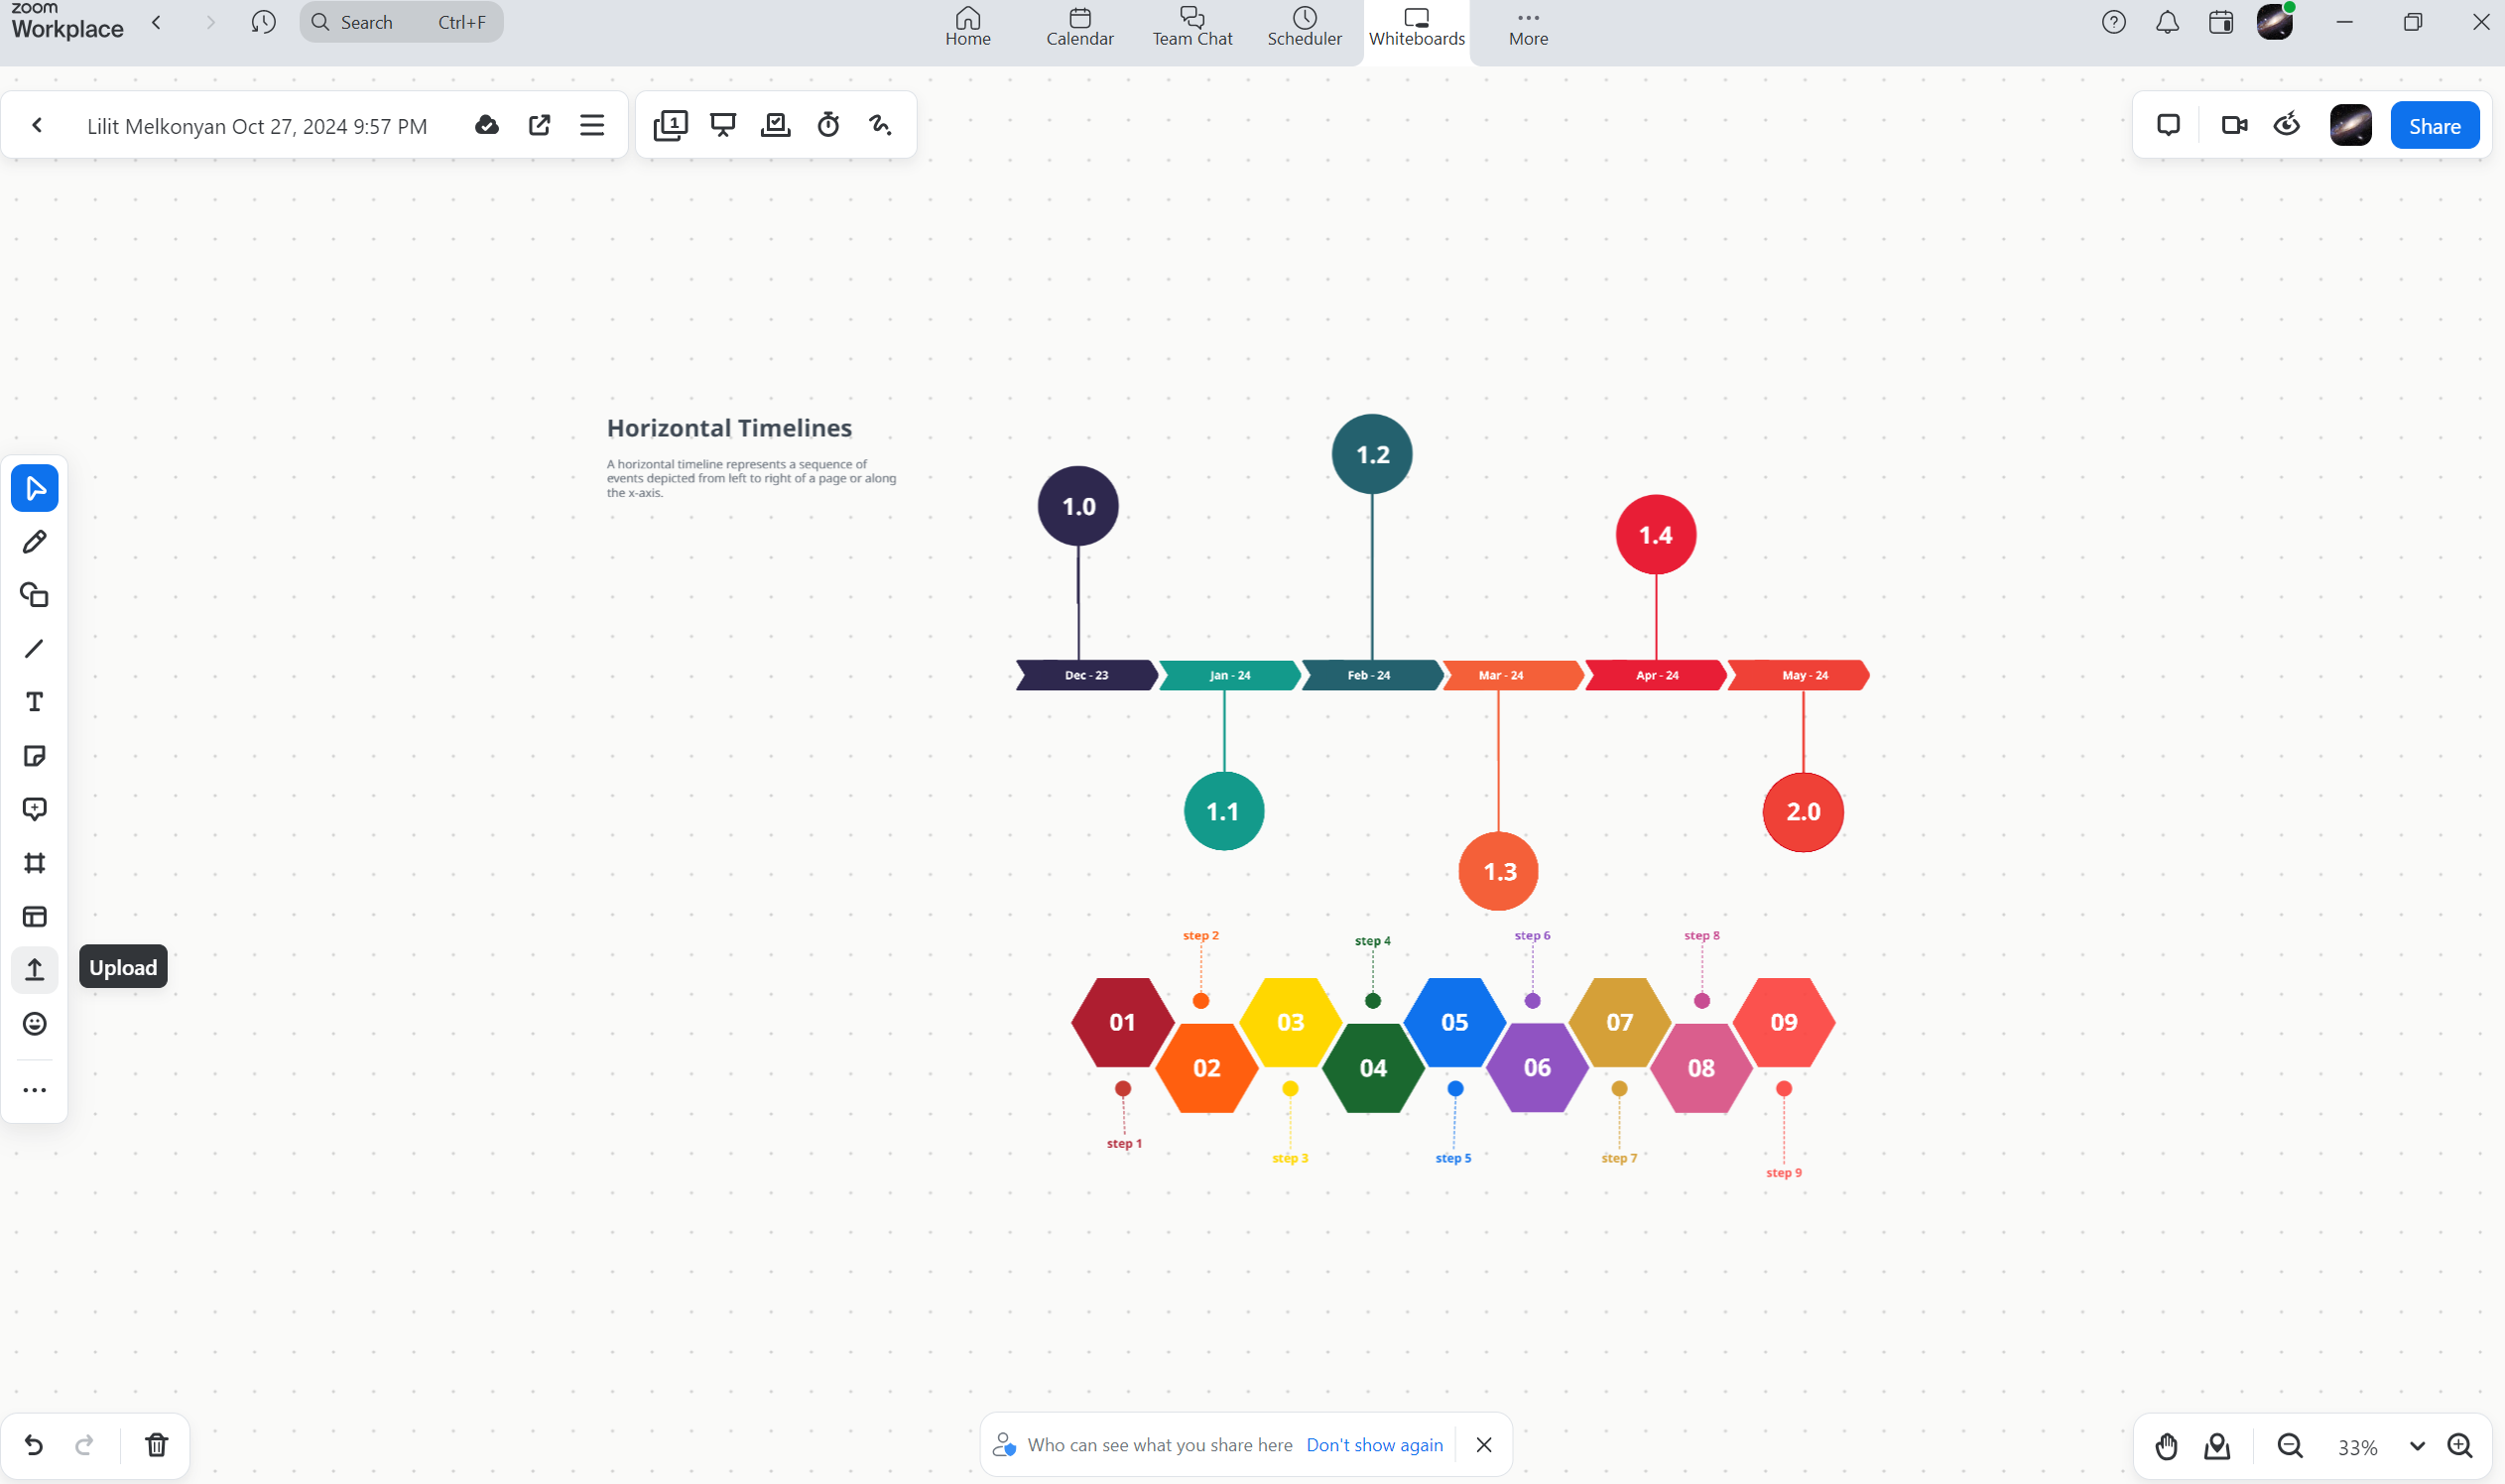
To annotate a PDF during your Zoom meeting:
- Start a Whiteboard session by clicking “Share Screen” and selecting “Whiteboard.”
- Use the “Insert” feature in the toolbar to upload a PDF file from your computer.
- Uploaded, the PDF will appear on the Whiteboard, allowing all participants to annotate it in real time.
This feature is handy for reviewing documents, contracts, or lesson materials. It enables collaborative and interactive editing during the meeting.
How to Save Whiteboard in Zoom

To save your Zoom Whiteboard for future reference:
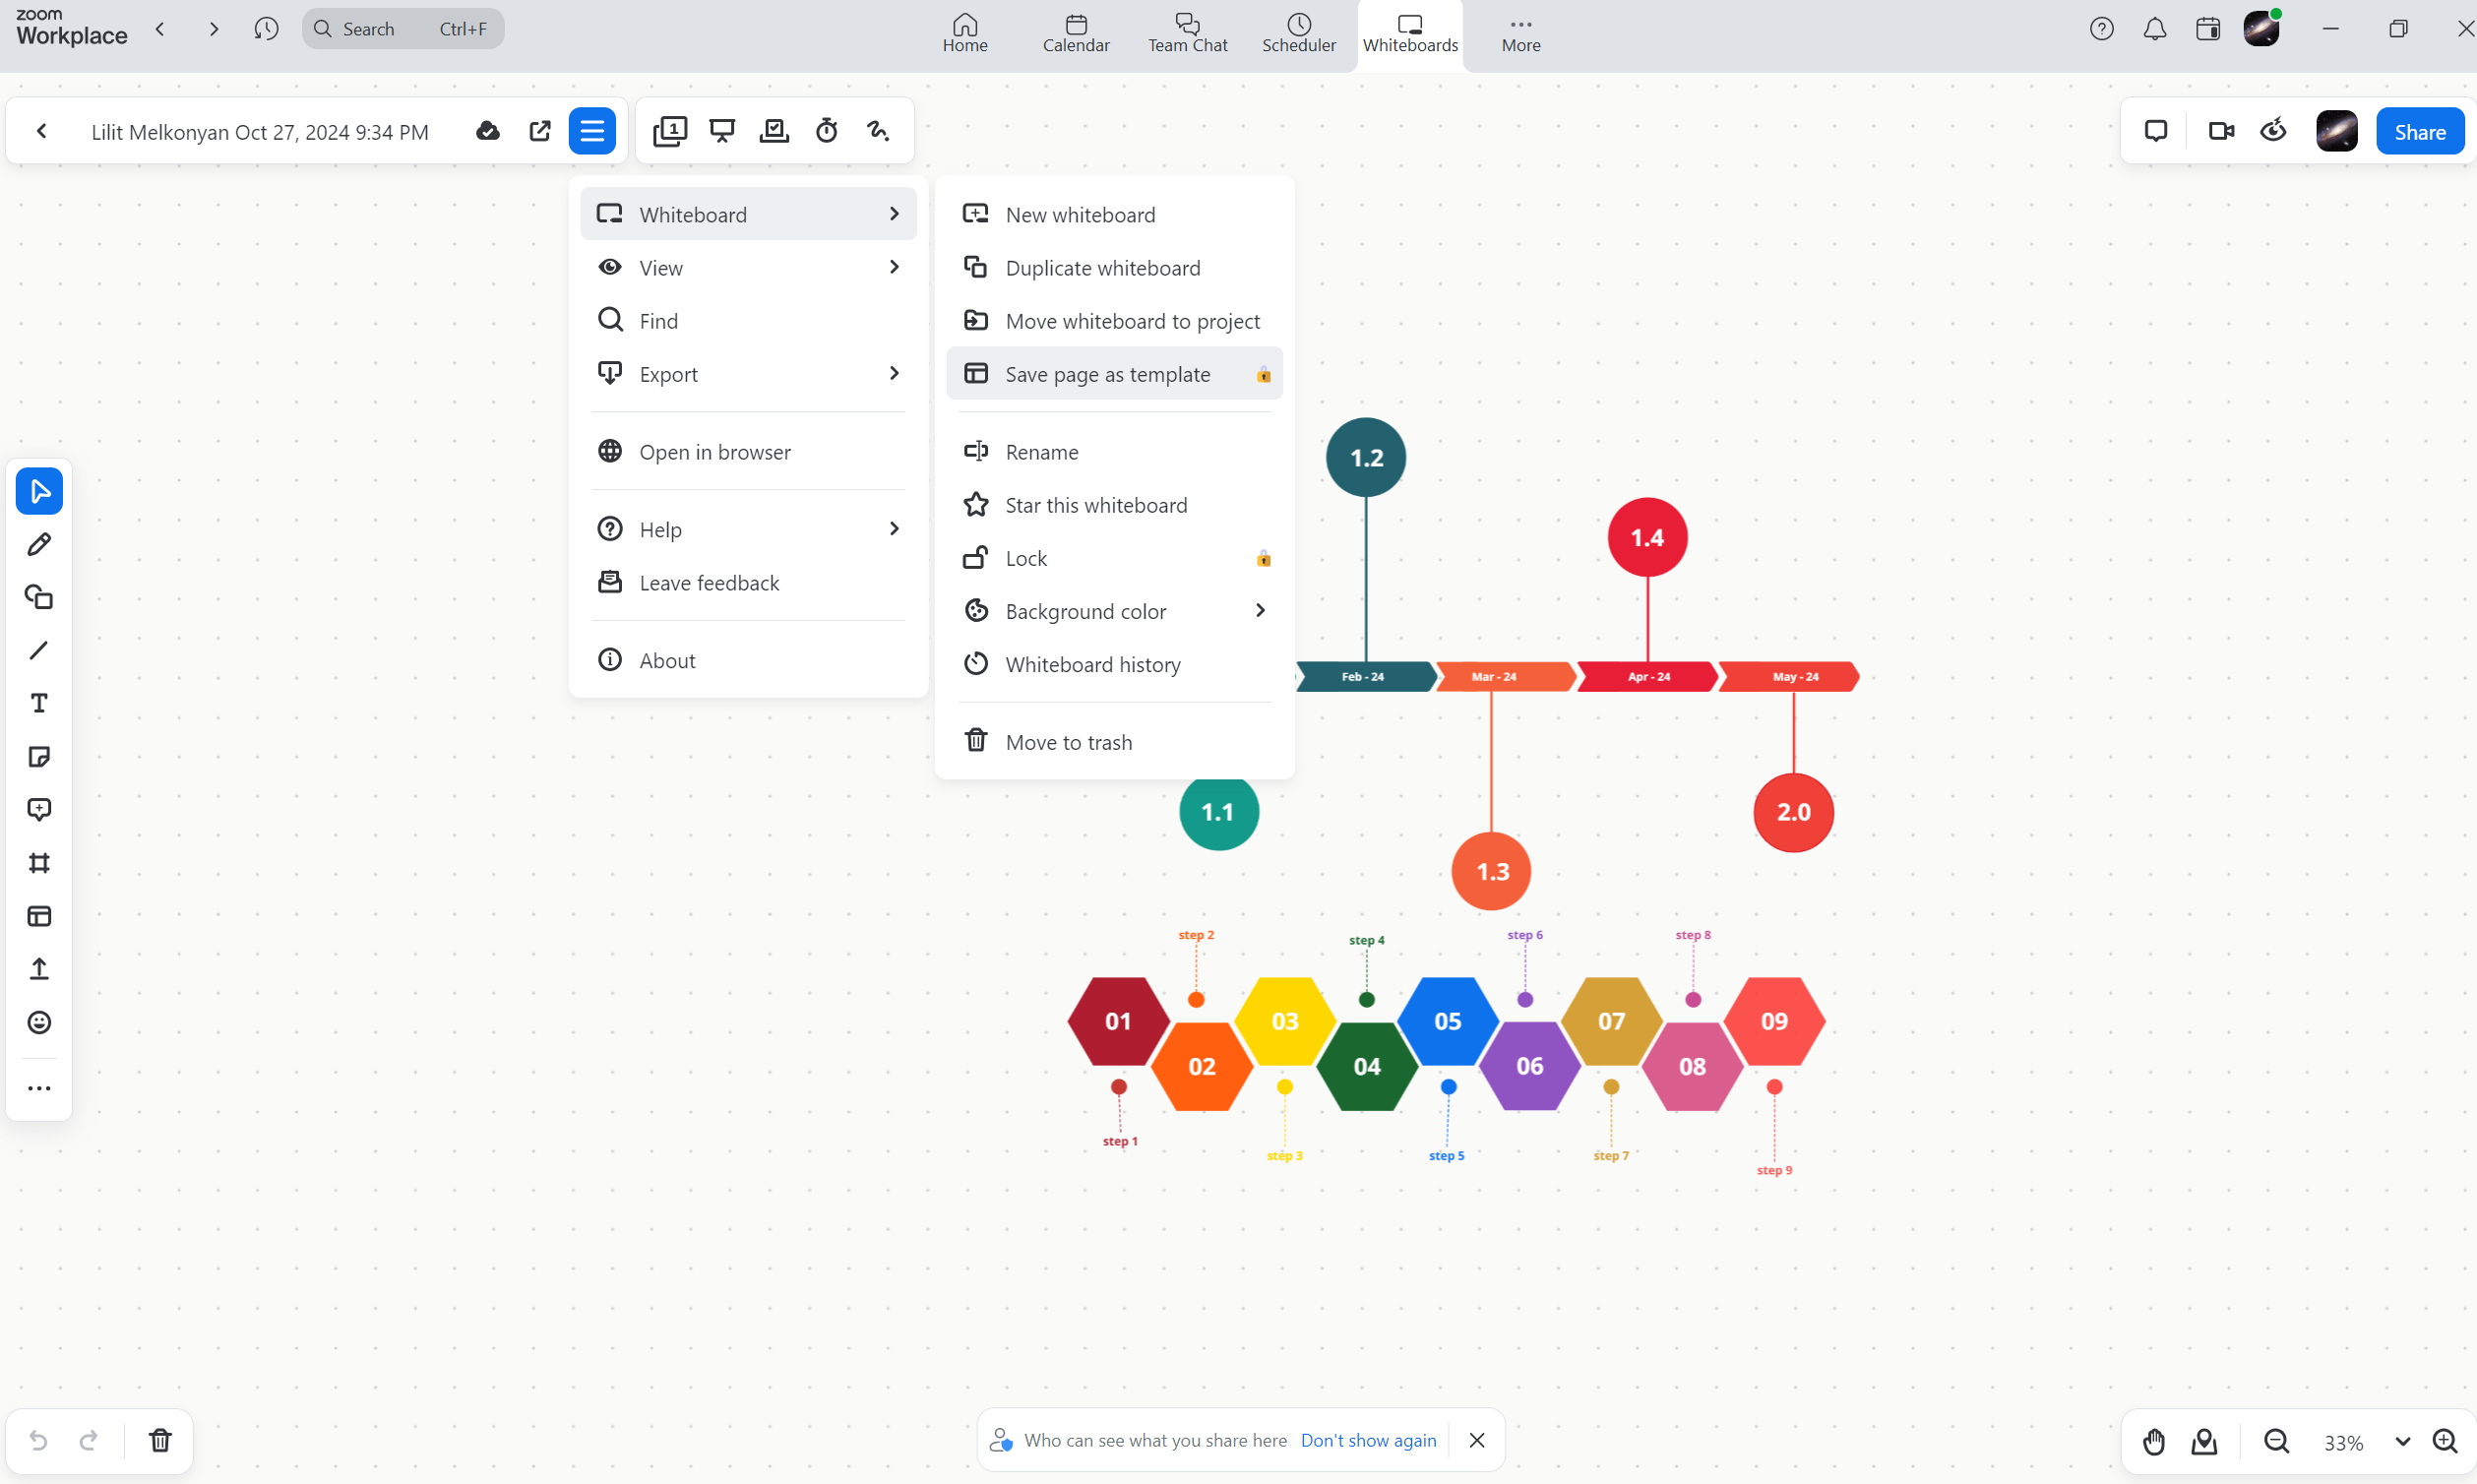
- Click the Save button in the Whiteboard toolbar.
- Save it in either PDF or PNG format, and the file will automatically download to your computer. You can access it later as well.
- You can save the Whiteboard to the cloud using a paid version of Zoom. This makes it easier to access and share your content across devices.
This feature enables meeting participants to revisit the Whiteboard content after the meeting ends.
How to Share Whiteboard in Zoom
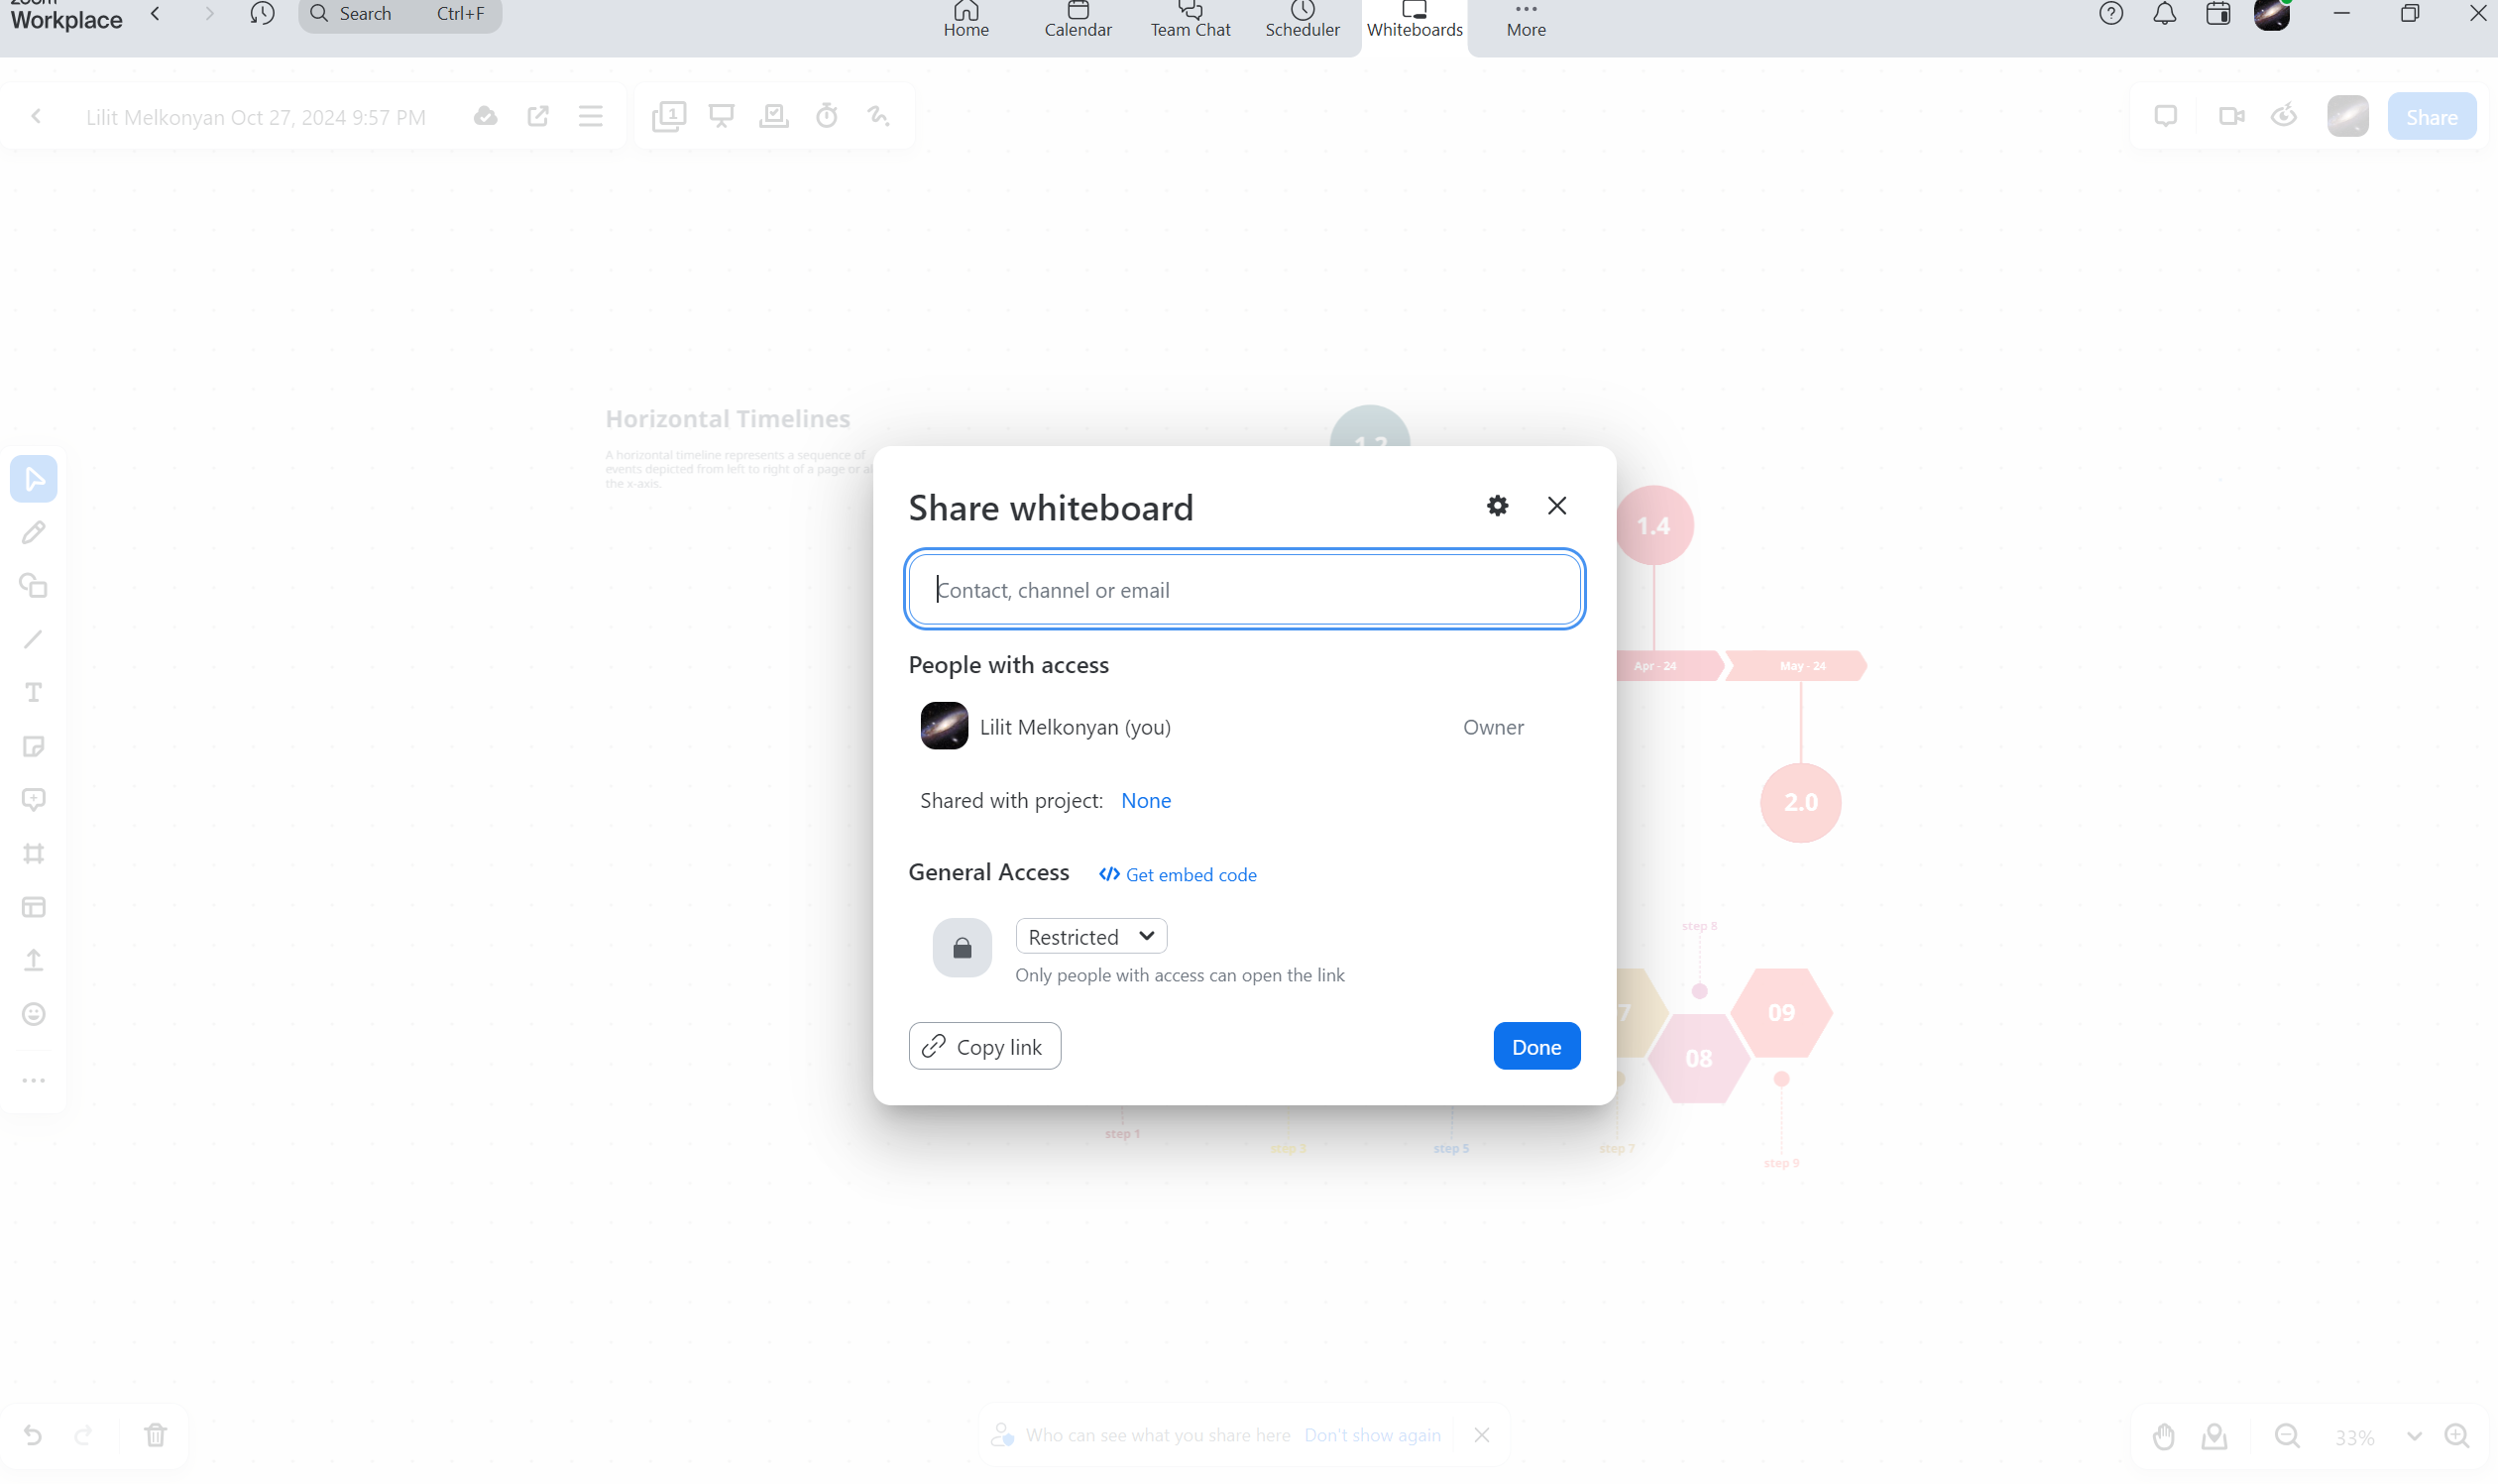
To share your saved Whiteboard:
During the Meeting: Click the “Chat” button on Zoom. Then, upload the saved Whiteboard file into the chat for participants to download.
- After the Meeting: You can email the Whiteboard file. Or you can upload it to a shared folder (e.g., Google Drive or Dropbox) and share the link with your team.
Troubleshooting Common Issues
What if you’re facing some common issues? And how to solve them? For example, one of the most common questions users are interested in is, “Why doesn’t my Zoom have Whiteboard?”
Well, ensure you have the latest version of Zoom installed. Because if you’re using an older version, the Whiteboard feature may not be visible.
Moreover, why isn’t the Whiteboard showing on Zoom? It could be because of settings restrictions. So, check if your admin has disabled the Whiteboard in Zoom’s settings. If so, enable it from the Settings > In Meeting (Basic) section.
Finally, you may ask, “How do I retrieve my Zoom Whiteboard? Simply open the Whiteboards tab in the Zoom app or navigate to the specific Zoom channel where it was saved.
How Krisp Enhances Your Zoom Experience
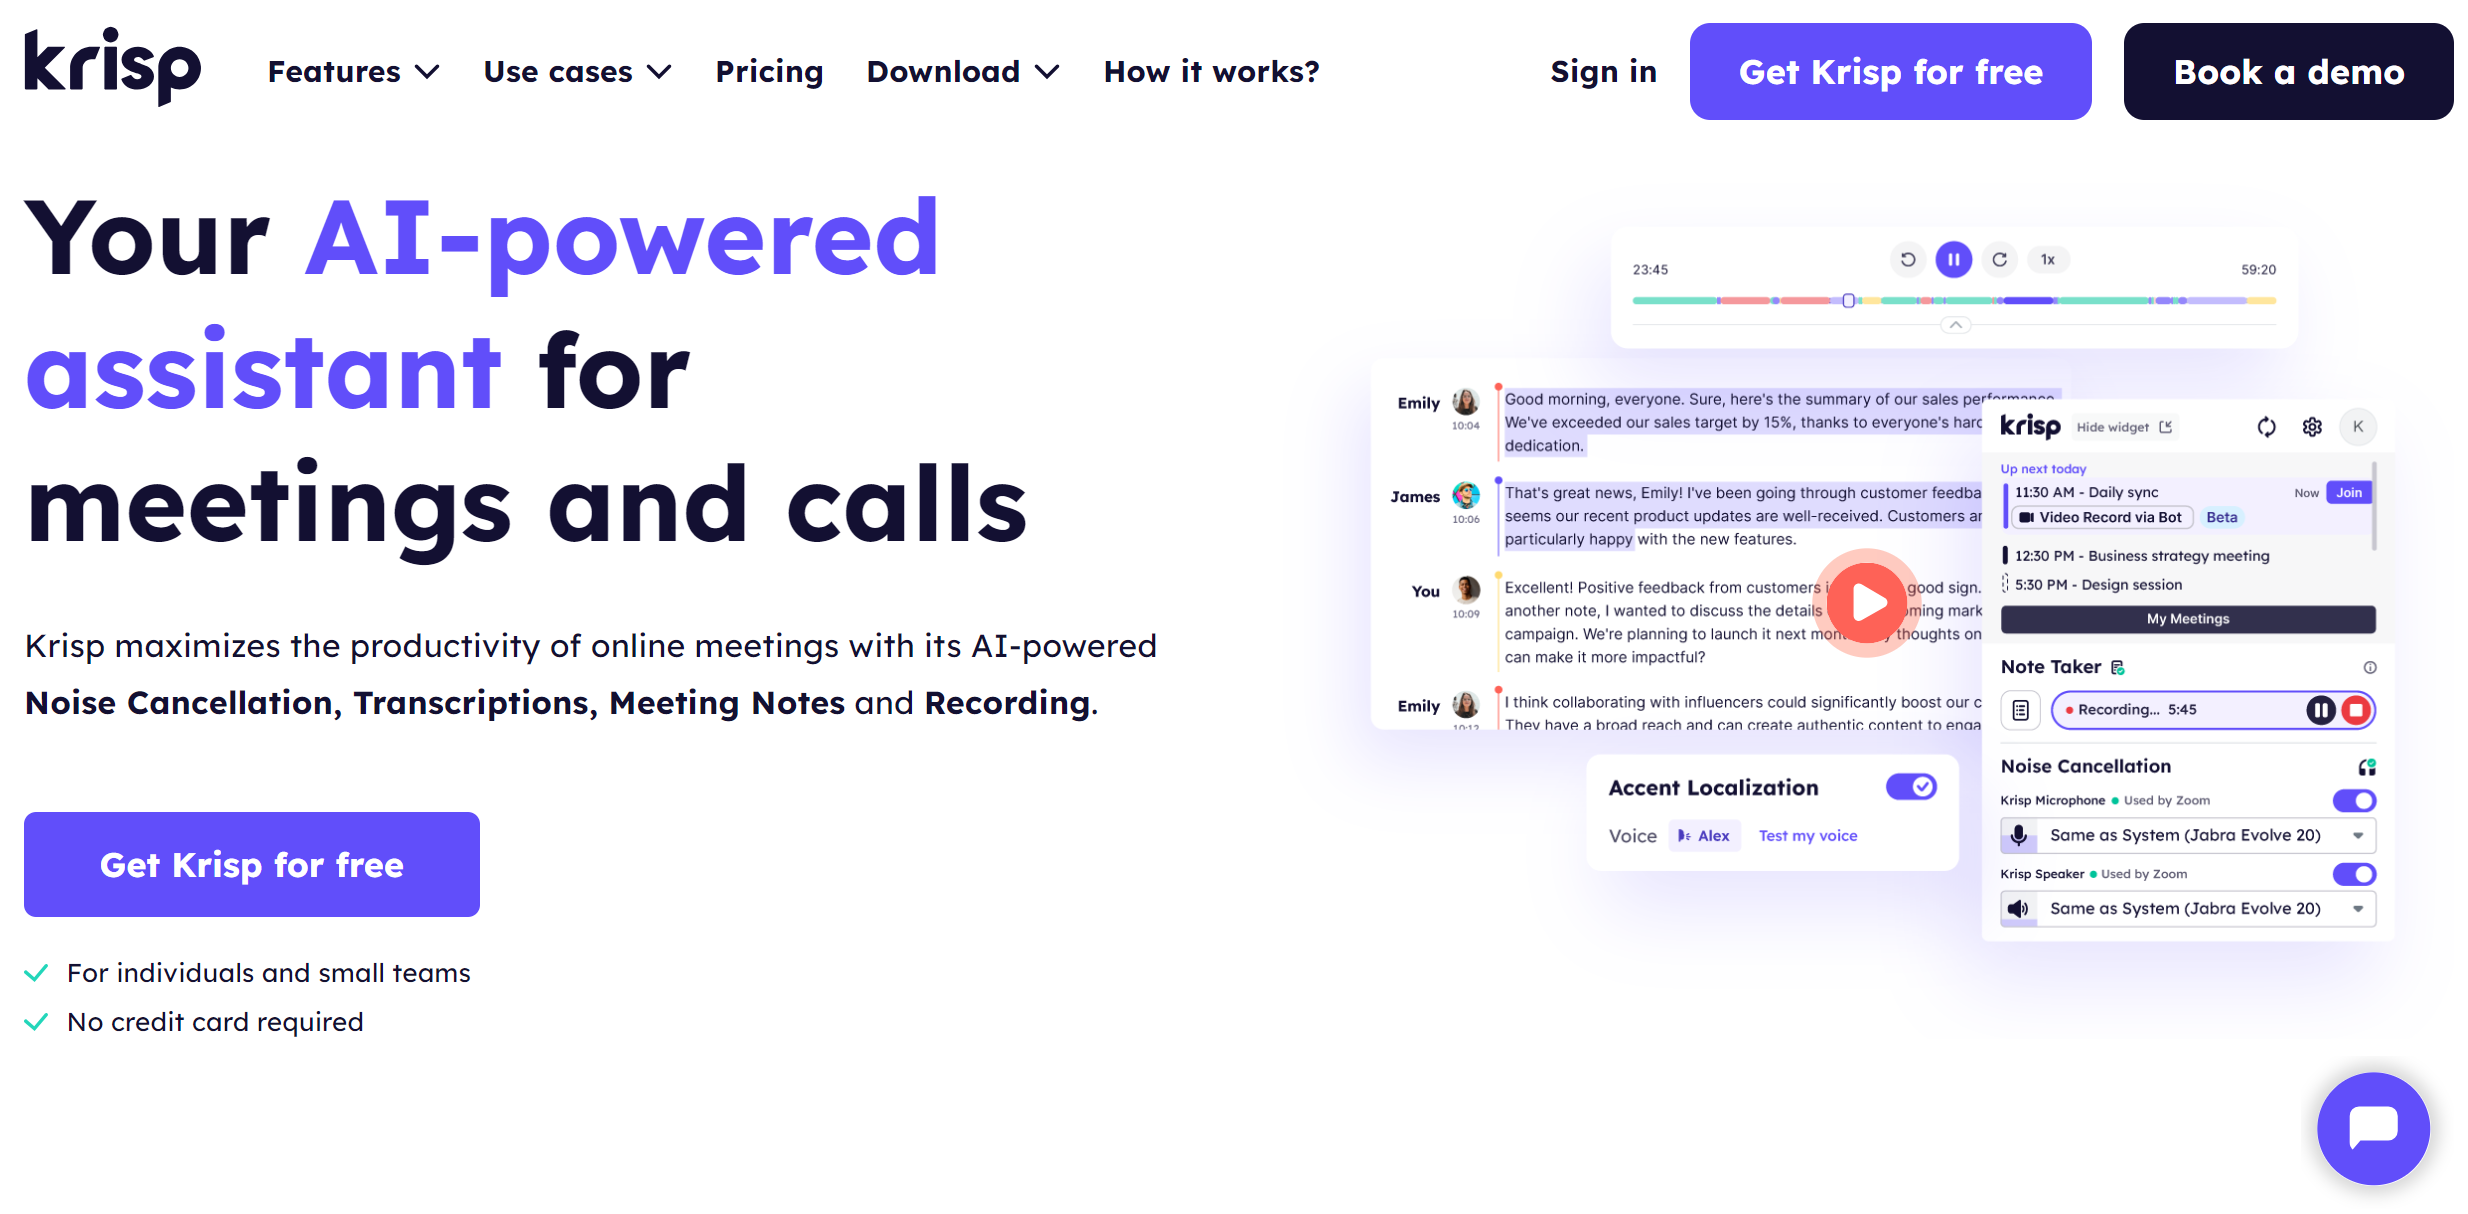
The Krisp AI Meeting Assistant, TIME’s top note-taking app without an in-meeting bot, takes the Zoom Whiteboard experience to the next level. How?
The Krisp AI Meeting Assistant offers clear communication, seamless meeting recording, easy record keeping, and effective collaboration.
How Krisp Makes Your Zoom Whiteboard Sessions Productive
Here is what features Krisp’s AI Meeting Assistant offers and improves your Whiteboard sessions on Zoom:
1. AI Noise Cancellation
Krisp’s Noise Cancellation removes background noises, voices, and echoes exceptionally well. According to users, Krisp’s noise suppression algorithm seems to work ten times better than competitors.
So, you can engage in a Whiteboard session without distractions and interruptions without the need to soundproof the room. This feature is handy when multiple people are participating in a Whiteboard session.
2. AI Meeting Recording
Krisp’s Meeting Recording records online interactions with the best-in-class audio quality. You can save your recorded content to avoid missing any essential discussion points.
You can save your Whiteboard sessions for future reference and share your Zoom recording with others to boost accessibility and collaboration. By the way, do you know how to use Zoom cloud recording?
3. AI Screen Recording
Krisp’s AI Meeting Assistant offers Screen Recording for Meetings without bots. You can easily capture, pause, and resume your meeting recording from the Krisp app or Widget without relying on third-party software.
So, during Zoom Whiteboard sessions, Krisp’s Screen Recording can easily capture the screen while interacting with the Whiteboard. This refers to everything happening on your screen, including real-time annotations, discussions, and presentations,
4. AI Meeting Transcription
Krisp’s AI Meeting Transcription provides 96% accuracy for note taking and note making. So, you can engage in discussions and brainstorming during meetings, and Krisp’s Transcription will take the notes automatically. And you can upload audio and video files directly for transcription.
So, you can have a complete written record of meeting discussions, including key ideas shared on the Whiteboard. The Krisp AI Meeting Assistant uses stellar speaker recognition technology for accurate results.
5. AI Meeting Notes and Summaries
First, Krisp’s Meeting Notes and Summary feature transcribes your discussions. Then, you’ll receive an error-free summary of your meeting notes and action items.
So, you can concentrate on what matters most during your Whiteboard sessions instead of manually creating a summary. As a result, you can enjoy more effective and organized notes.
How to Integrate Krisp AI Meeting Assistant With Zoom
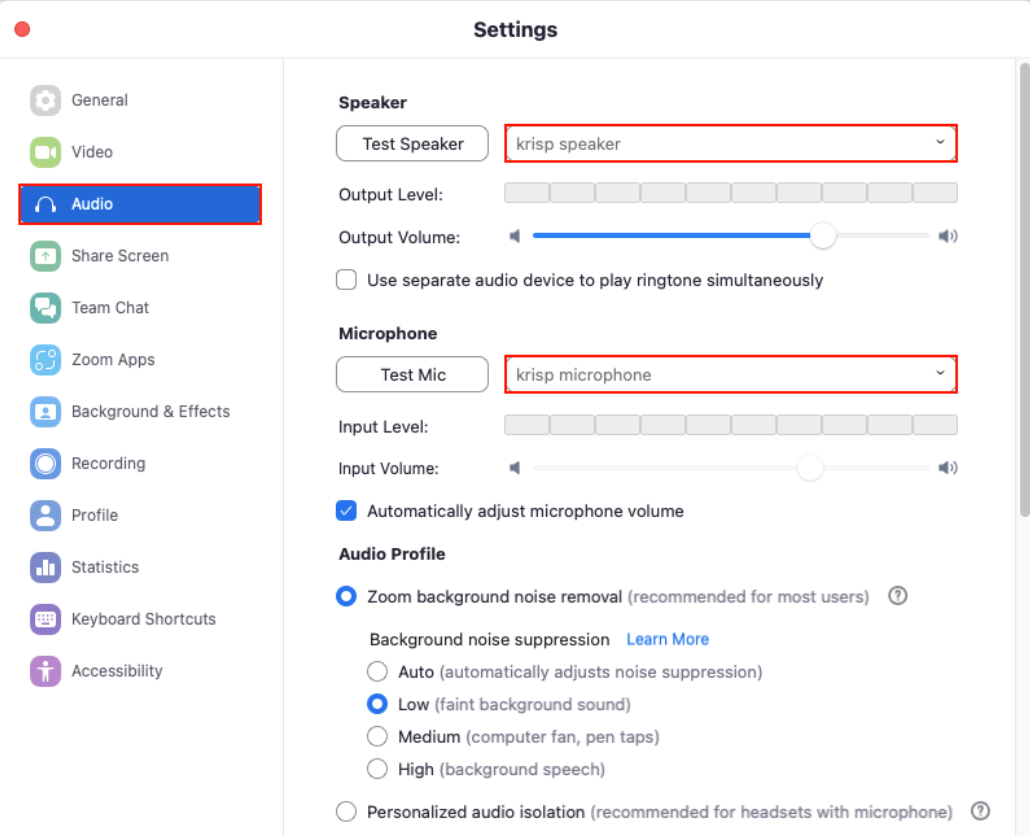
To integrate Krisp with Zoom, follow these steps to enable noise cancellation and enhance your Zoom experience:
1. Download and Install Krisp
- Download Krisp’s AI Meeting Assistant from Krisp’s website for Windows or Mac operating systems.
- Next, install the app and create an account if you need one.
2. Open Krisp’s AI Meeting Assistant
Open the Krisp AI Meeting Assistant app and log in. Make sure it’s running in the background.
3. Set Krisp AI Meeting Assistant as Microphone and Speaker in Zoom
- Open Zoom and go to “Settings” (gear icon).
- Navigate to the “Audio” settings.
- In the “Microphone” dropdown menu, select “Krisp Microphone.”
In the “Speaker” dropdown menu, select “Krisp Speaker” so Krisp’s AI Meeting Assistant can cancel background noise.
4. Enable Noise Cancellation
- In the Krisp app, toggle “Noise Cancellation” for both the microphone and speaker if desired.
5. Begin Your Zoom Meeting
6. Enhance Your Zoom Meeting
- Use tips such as Zoom backgrounds and filters to use the tool to its full capacity.
The Krisp AI Meeting Assistant’s flagship Noise Cancellation technology has been deployed on 200M+ devices. It’s currently processing 80B+ minutes of conversations daily.
Use Krisp’s AI Meeting Assistant on WinOS u MacOS and with videoconferencing tools like Zoom, Goole Meet, and Microsoft Teams.
Wrapping Up
The Zoom Whiteboard is valuable for remote teams, educators, and visual collaboration. The 2024 Whiteboard updates offer new features like drawing tools, templates, and document uploads to enhance productivity.
However, you can integrate the Krisp AI Meeting Assistant to further boost efficiency through Noise Cancellation, Meeting Recordings, Transcriptions, and Summaries. As a result, you can create a more organized and efficient virtual collaboration experience.
Frequently Asked Questions
- Start or join a meeting
- Click the “Share Screen” button
- Select “Whiteboard.”
As a result, you’ll open a blank canvas where participants can collaborate in real time. They can use various drawing, text, and shape tools.
- Navigate to the Chat tab
- Select the channel
- Click the Whiteboard icon at the top.
As a result, you’ll create a collaborative Whiteboard accessible to all channel members. Here, they can edit and collaborate.
- As the host, click the Security button during the meeting.
- Select “Allow participants to annotate on shared content.”
As a result, you can collaborate by writing, drawing, or adding text on the shared Whiteboard in real time.


