You’ve just wrapped up an important Zoom meeting, full of key discussions and valuable insights. You hit “End Meeting,” confident that the recording will be a great resource for later. But when you look for it, you can’t find it anywhere. You search your desktop, dig through folders, and even double-check your email for a link—still nothing.
If you’ve ever wondered where Zoom recordings go and how to access them, you’re not alone. In this article, we’ll walk you through exactly where your Zoom recordings are stored, whether locally on your device or in the cloud and how you can easily access them whenever you need them. Let’s solve the mystery of missing Zoom recordings once and for all.
Where Do Zoom Recordings Go?
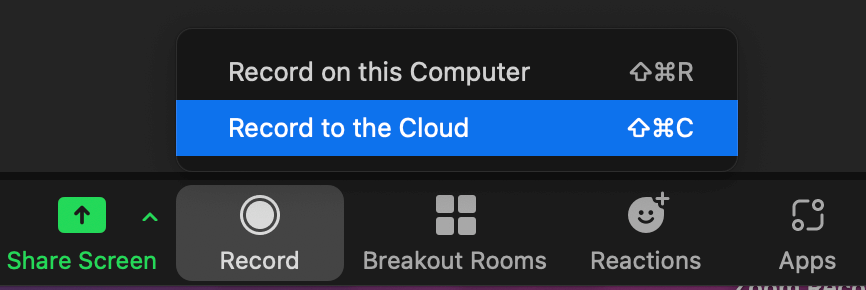
When you record a Zoom meeting, your recording is saved in one of two places: on your computer or in Zoom’s Cloud. It all depends on your account type and the recording settings you choose.
Zoom Cloud Recordings
If you have a paid Zoom account, you can save your recordings in Zoom’s Cloud. This means your meeting videos, audio, and chat files are uploaded to the internet, where you can easily access them from any device. Cloud storage also lets you share recordings with others or manage them through your Zoom account online. There are some extra features too, like automatic text transcripts and streaming options.
Local Recordings
For free Zoom users, recordings can only be saved on your computer (this is called local recording). When you record locally, Zoom saves the files directly to your computer’s hard drive. By default, they’re saved in a folder named “Zoom” inside your “Documents” folder, but you can change this if you prefer a different location.
Where Do Zoom Recordings Go on Your Computer?
By default, Zoom saves all your local recordings in the “Documents” folder on your computer. Here’s how to get to them:
Step 1: Open File Explorer or Finder and Go to Documents > Zoom
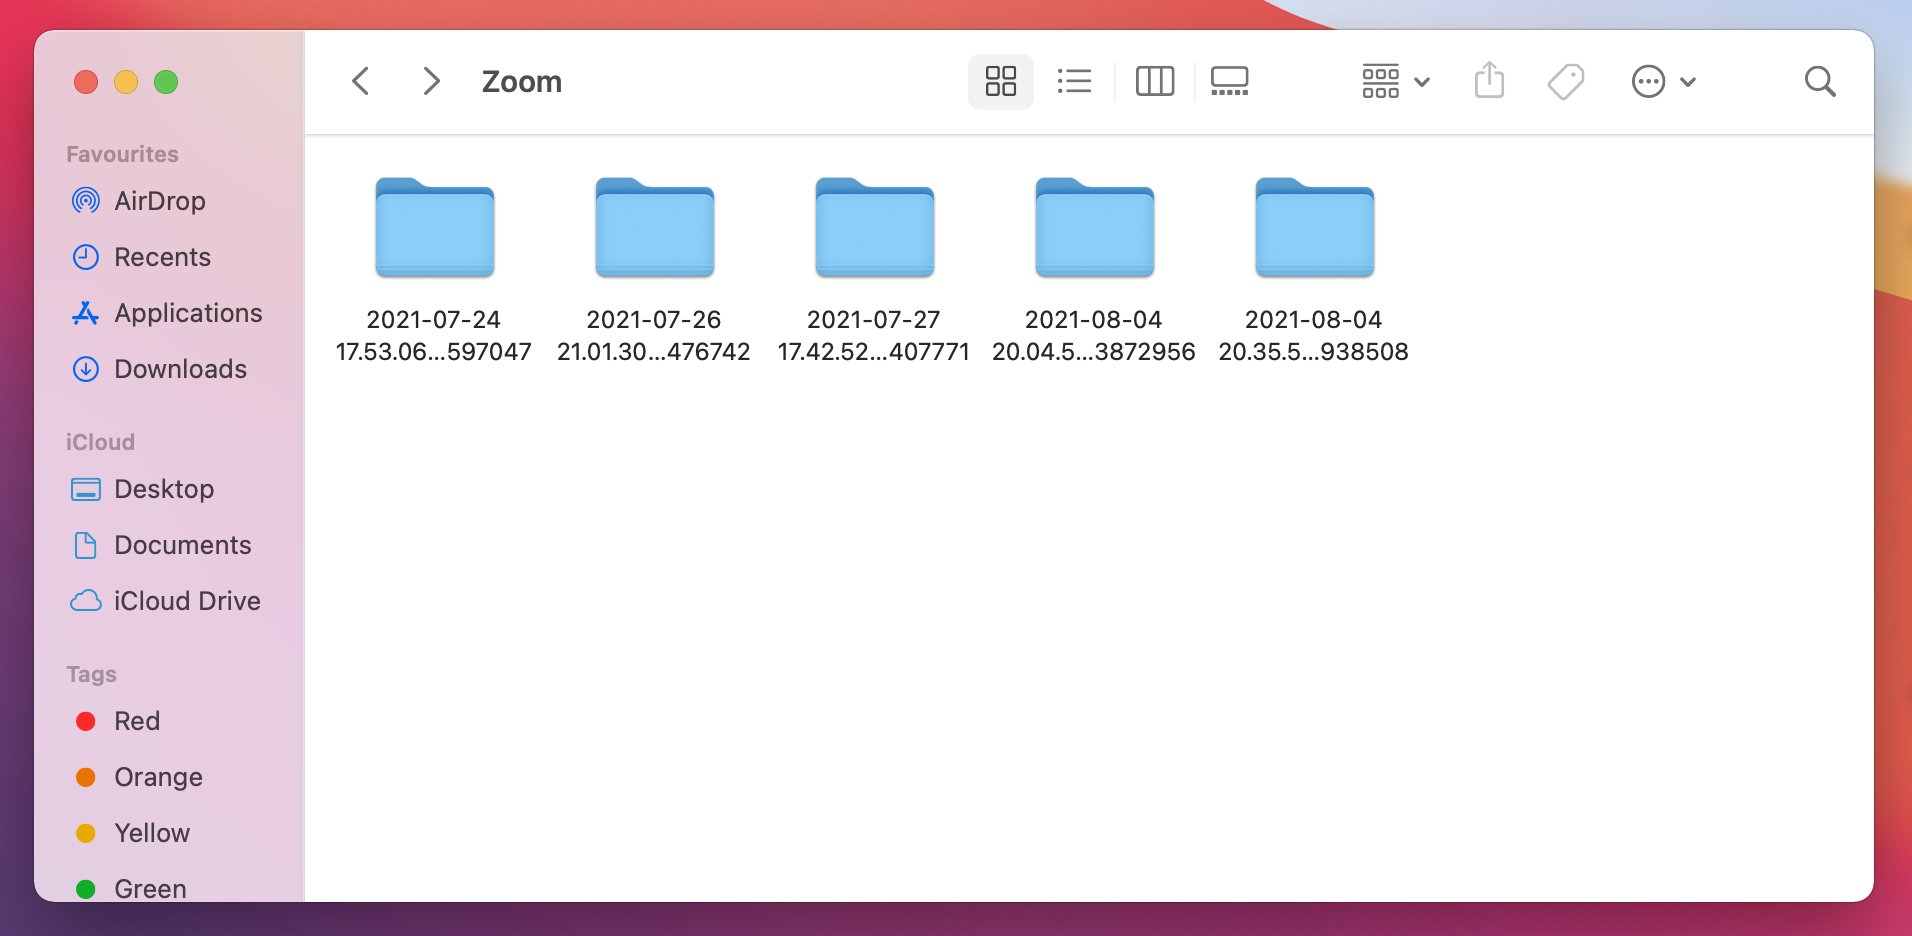
First, open up File Explorer (if you’re on Windows) or Finder (if you’re on a Mac). Then head over to “Documents” and look for a folder named “Zoom.” That’s where Zoom automatically stores your recordings.
Step 2: Find the Right Recording Folder
Inside the “Zoom” folder, you’ll see a bunch of folders named by the date, time, and title of each meeting. If you remember the meeting title, you can search for it to find what you need even faster.
Step 3: Open the Folder and Check Out Your Files
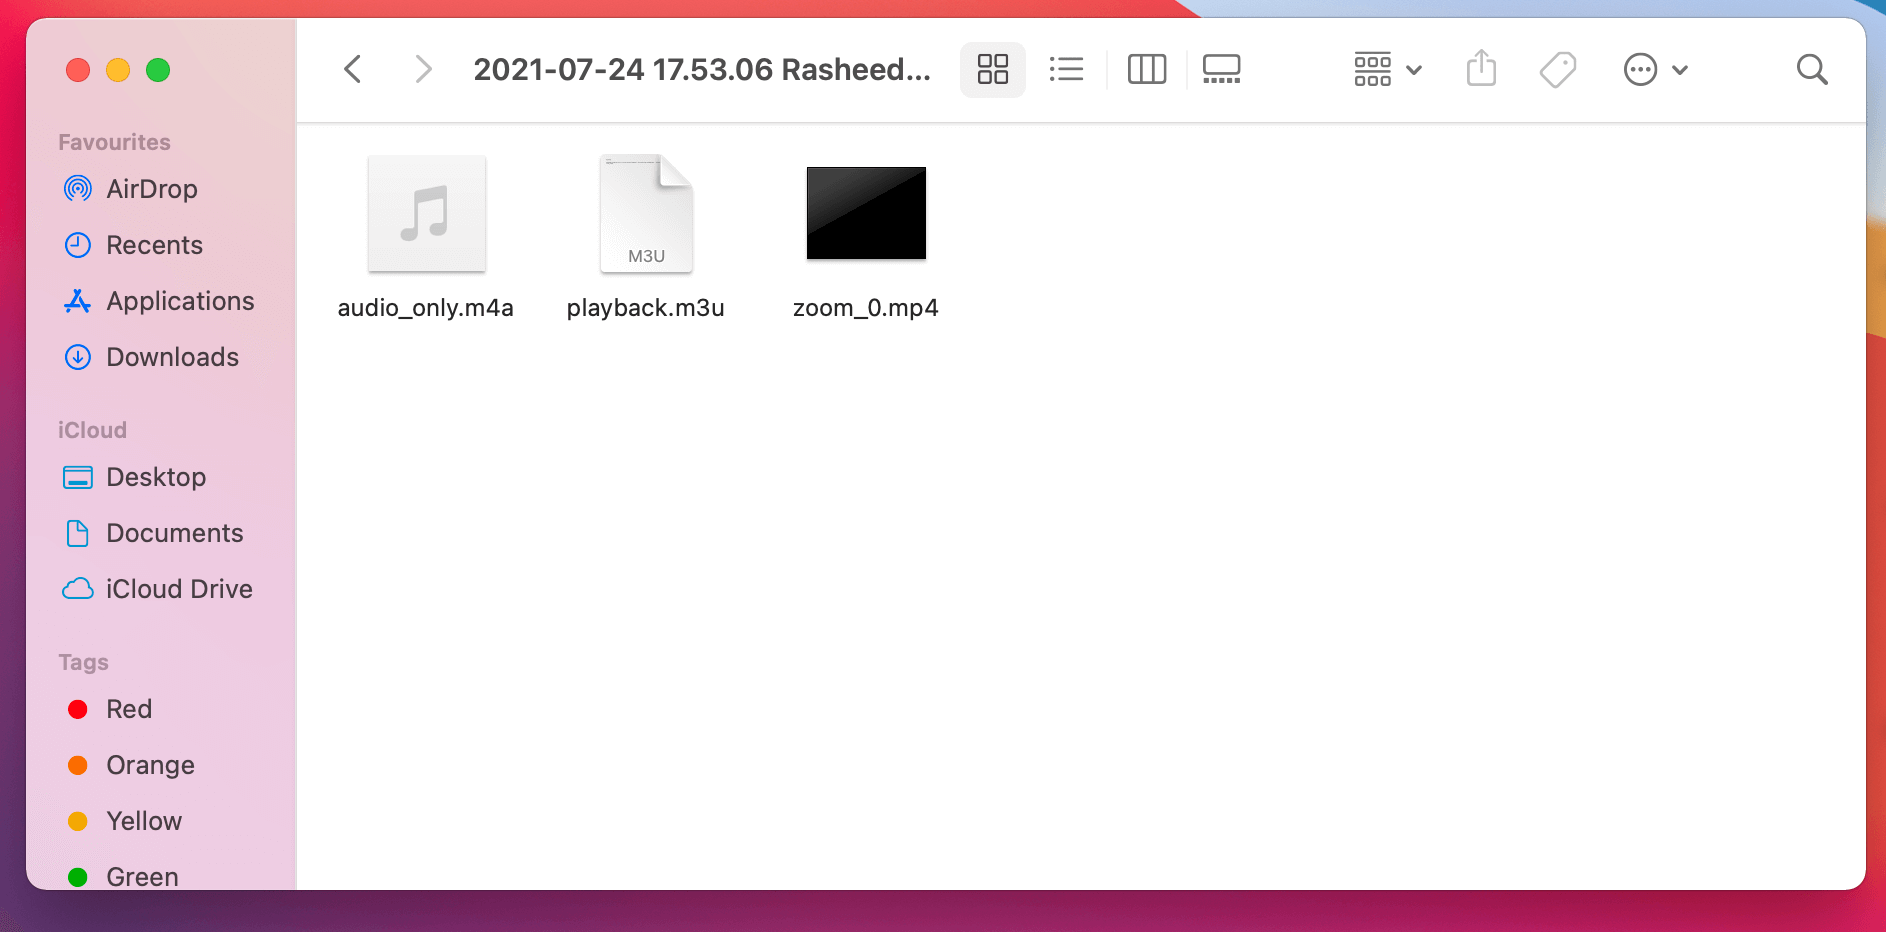
Once you open a specific folder, you’ll find different file types like:
- .m4a for audio only
- .m3u for a playlist linking to the audio and video
- .mp4 for the video with sound
And that’s it! Just three simple steps and you’re all set to access your Zoom recordings on your computer.
Where Do Zoom Recordings Go in the Cloud?
If you’re storing your Zoom recordings in the Cloud, finding them is a breeze. As a licensed user, you can save recordings to Zoom’s Cloud, allowing you to access them from anywhere, anytime. Here’s how to track them down:
Step 1: Go to Zoom.us and Sign In
Head over to the Zoom website and log in to your account using your credentials.
Step 2: Click on “My Account” and Navigate to the “Recordings” Tab
After you log in, click on “My Account” in the navigation bar. Then, locate the “Recordings” tab—this section lists all your recordings.
Step 3: Browse the “Cloud Recordings” and “Local Recordings” Tabs
You’ll see two sections here:
- Cloud Recordings: This tab shows all the meetings you’ve saved in the Zoom Cloud. You can filter recordings by meeting ID, title, date range, or other criteria to find what you need.
- Local Recordings: This tab displays recordings saved on your computer. Just remember, you can’t open these recordings if you’re not on the same computer where the meetings were recorded.
How to Change Where Zoom Recordings Go
If you want to customize where your Zoom recordings go, you can easily set all of your meetings to automatically save to a location of your choice—either on your computer or in the Zoom Cloud. Here’s how to change the settings for all future recordings.
Step 1: Log In to Your Account on Zoom.us
Start by heading over to the Zoom website and signing in with your account.
Step 2: Go to Settings
Once you’re logged in, look at the left-hand menu and click on “Settings”.
Step 3: Click on the “Recording” Tab
In the settings menu, find and click on “Recording” to access options related to where your recordings are saved.
Step 4: Turn On Automatic Recording
Scroll down to find the “Automatic Recording” section. Toggle the switch to turn it on. This ensures that the system automatically records all your meetings.
Step 5: Choose the Storage Location
Now, choose where you want your recordings to be stored. You have two options:
- Record on the local computer: Saves recordings directly to your computer.
- Record in the cloud: Stores recordings in Zoom’s Cloud, which is accessible from any device with an internet connection.
And that’s it! With these settings, you can control where Zoom saves all your recordings.
Zoom Cloud vs. Local Recordings: Where Should Zoom Recordings Go?
Deciding where to save your Zoom recordings—either in the Cloud or locally on your computer—depends on your needs and preferences. Each option has its own advantages, so let’s break down what each one offers to help you make the best choice.
Zoom Cloud Recordings
- Access Anytime, Anywhere: Cloud recordings are stored online, allowing you to access them from any device with an internet connection. This is perfect if you need to share recordings with team members or access them while on the go.
- Extra Features: With Cloud storage, you get some additional perks like automatic audio transcriptions, video streaming, and integration with third-party apps. You can also set recordings to auto-delete after a certain time to manage storage space.
- Storage Limits: Keep in mind that Cloud storage isn’t unlimited. Depending on your plan, you might need to manage space by deleting old recordings or upgrading your storage plan.
Local Recordings
- Stored on Your Computer: When you save recordings locally, they are stored directly on your hard drive. This can be ideal if you don’t have a reliable internet connection or prefer to keep files on your own device.
- No Extra Costs: Unlike Cloud storage, saving recordings locally won’t cost you extra. You don’t have to worry about running out of Cloud storage or paying for upgrades.
- Space Management: The downside is that local recordings can take up a lot of space on your computer. You’ll need to ensure you have enough storage or move files to external storage as needed.
If you frequently share recordings, need access from different devices, or want extra features like transcription, Cloud recording is the better choice. If you prefer keeping everything on your computer and don’t want to worry about Cloud storage limits, local recording is the way to go.
Enhancing Your Zoom Cloud Recording with Krisp
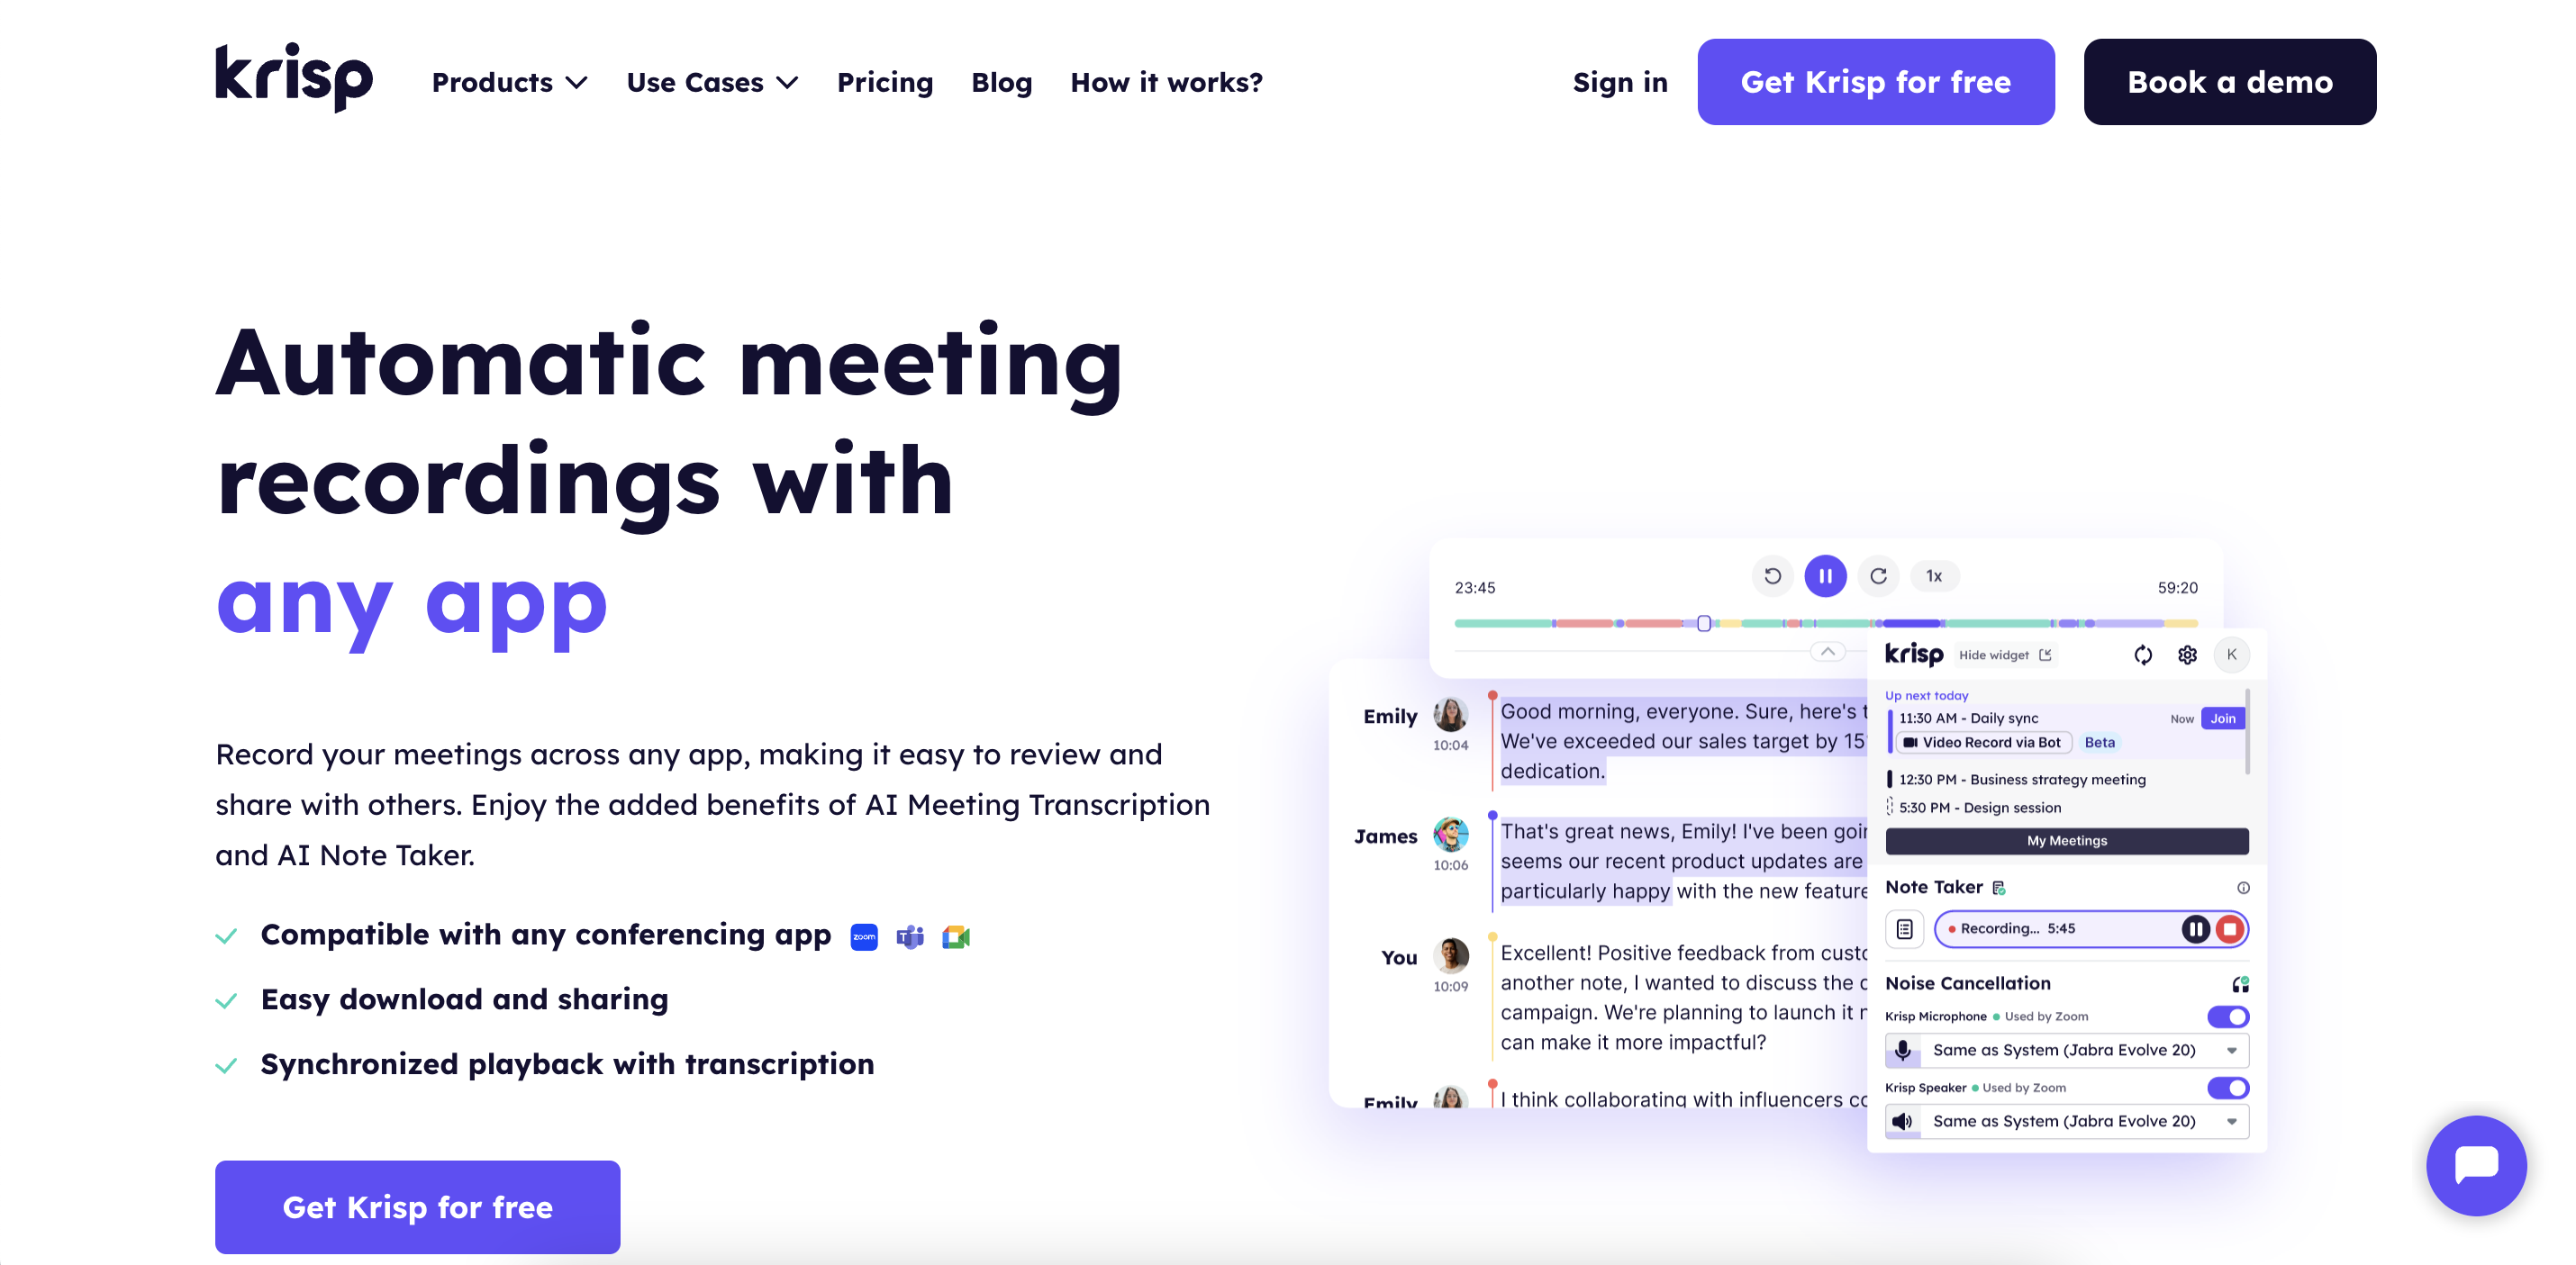
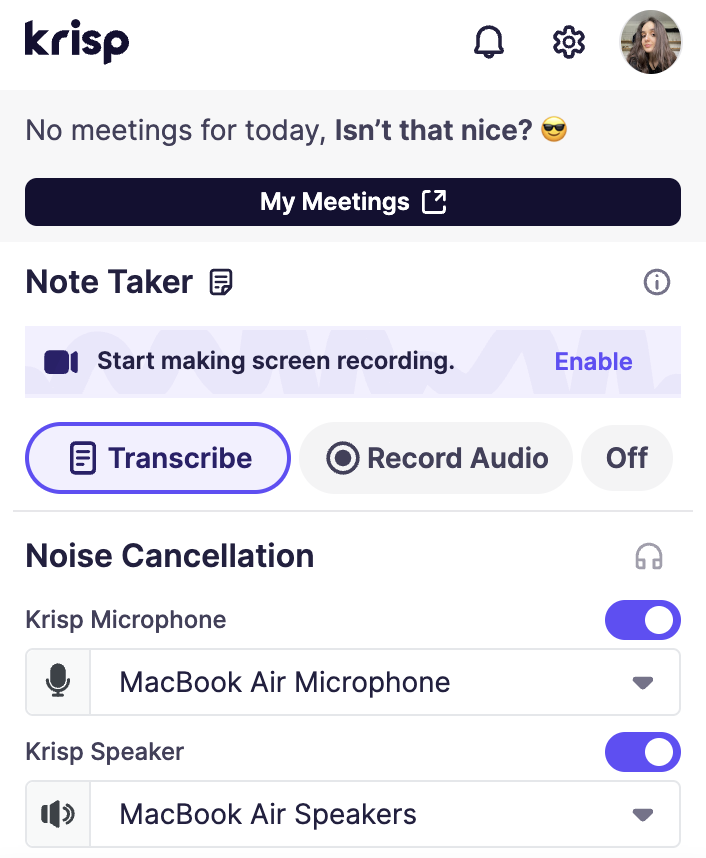
Krisp is an AI-powered meeting assistant that enhances the quality of your Zoom Cloud recordings by removing unwanted background noise—whether it’s traffic, keyboard typing, or other distractions. By ensuring clear and smooth audio, Krisp helps make your remote meetings more productive and professional, while also improving the accuracy of voice-to-text transcriptions.
Krisp goes beyond just filtering out background noise. It also eliminates echoes that bounce off hard surfaces in the room, as well as acoustic echoes caused by your microphone—something Zoom’s built-in tools can’t fully address.
In addition to noise cancellation, Krisp provides automatic meeting transcriptions and notes, making it easy to capture key points from discussions without the need to rewatch entire Zoom Cloud recordings.
Krisp allows you to capture not just audio but also the visual dynamics of your online meetings. This feature is currently available exclusively for Zoom.
How to Set Up Zoom with Krisp
Want to enhance your Zoom meeting recordings with Krisp? Follow these steps to start:
- Download the Krisp App
- Install Krisp on your device by following the Setup Wizard instructions

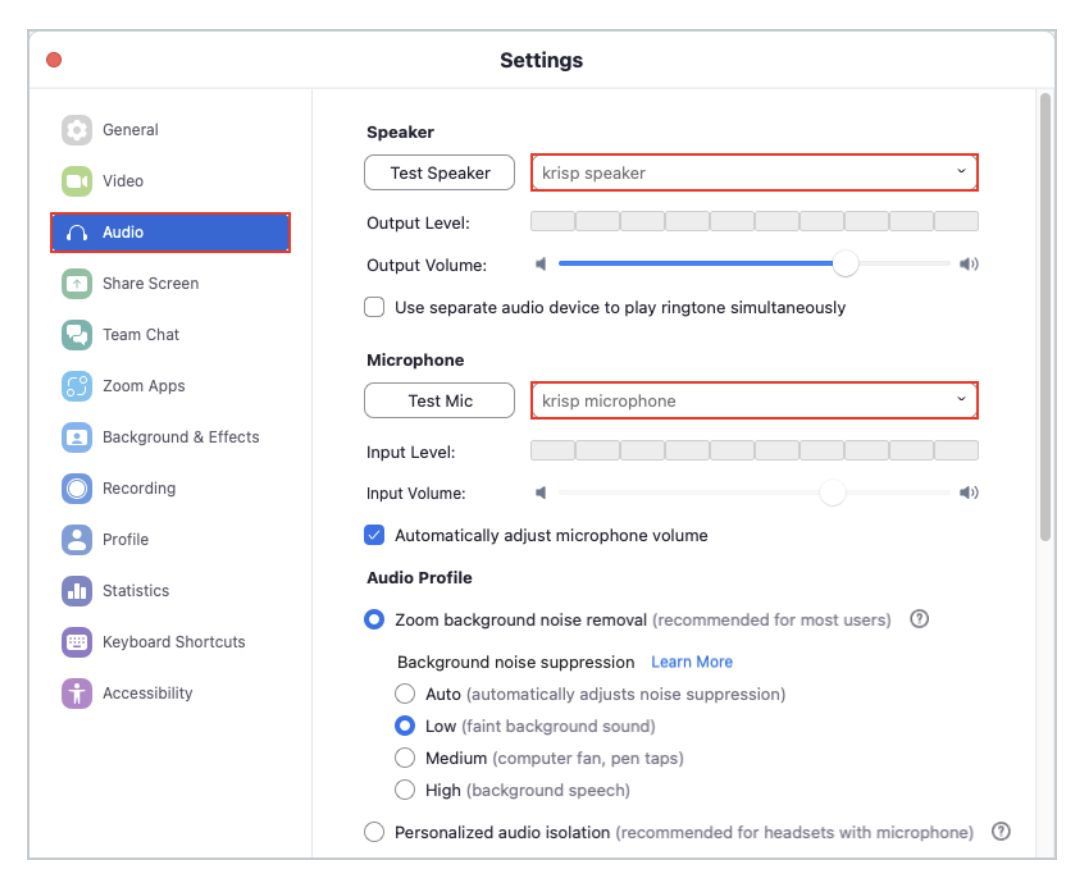
- Configure Zoom Audio Settings

- Open the Zoom Rooms controller device, go to Settings, and select the Audio tab.
- Change the Speaker/Microphone settings to Krisp
- Set Up Krisp
- Open the Krisp app, choose your physical microphone and speaker, and turn on the Noise Cancellation toggles.Adjust Zoom’s Background Noise Settings
- In Zoom’s Audio settings, set the Background noise removal option to Low. Also, this option has a lower level of audio suppression; however, it still allows Krisp to effectively filter out background noise while preserving the natural sound of your voice
- In Zoom’s Audio settings, set the Background noise removal option to Low. Also, this option has a lower level of audio suppression; however, it still allows Krisp to effectively filter out background noise while preserving the natural sound of your voice
- Open the Krisp app, choose your physical microphone and speaker, and turn on the Noise Cancellation toggles.Adjust Zoom’s Background Noise Settings
By following these steps, you’ll enjoy a better Zoom experience, free from distracting noises, and can focus on what truly matters during your meetings.
Krisp’s Online Meeting Recorder unlocks these same benefits not just on Zoom, but across any platform—delivering clear audio, automatic transcriptions, smart meeting notes, and high-quality recordings you can easily revisit and share.
FAQ
1. Open File Explorer (Windows) or Finder (Mac).
2. Go to Documents > Zoom.
3. Look for folders named by the date, time, and meeting title.
1. Go to Zoom.us and sign in.
2. Click “My Account” and then “Recordings.”
3. Under the “Cloud Recordings” tab, filter by meeting ID, title, or date to locate your recordings.


