In our previous entry concerning Webex Meeting Center, we presented a guide which helps new Webex for Mac users navigate through a number of introductory features including:
- Scheduling a meeting,
- Launching a conference,
- Launching an instant meeting from the Webex website,
- Joining a meeting through the Webex website, the options you have to join a meeting,
- Using the Participation Panel during a meeting.
Those working from a variety of locations and are exposed to noisy backgrounds will benefit from using the noise canceling app called Krisp in conjunction with Webex Meeting Center. Krisp will help individuals and teams handle conference calls in a quiet and productive atmosphere.
[demo]
In this guide, we are going to detail the more advanced features Webex for Mac offers those who wish to take advantage of the sleek and smooth pier to pier platform. Your team; no matter the vertical will find use in these intimate features, allowing for fully featured conferences suited towards the needs of multiple verticals.
How To Use Annotation Tools
Once a meeting has been scheduled or is in progress the host can give participants access to annotation tools. These features unlock several options which could come into use during a variety of conferences.
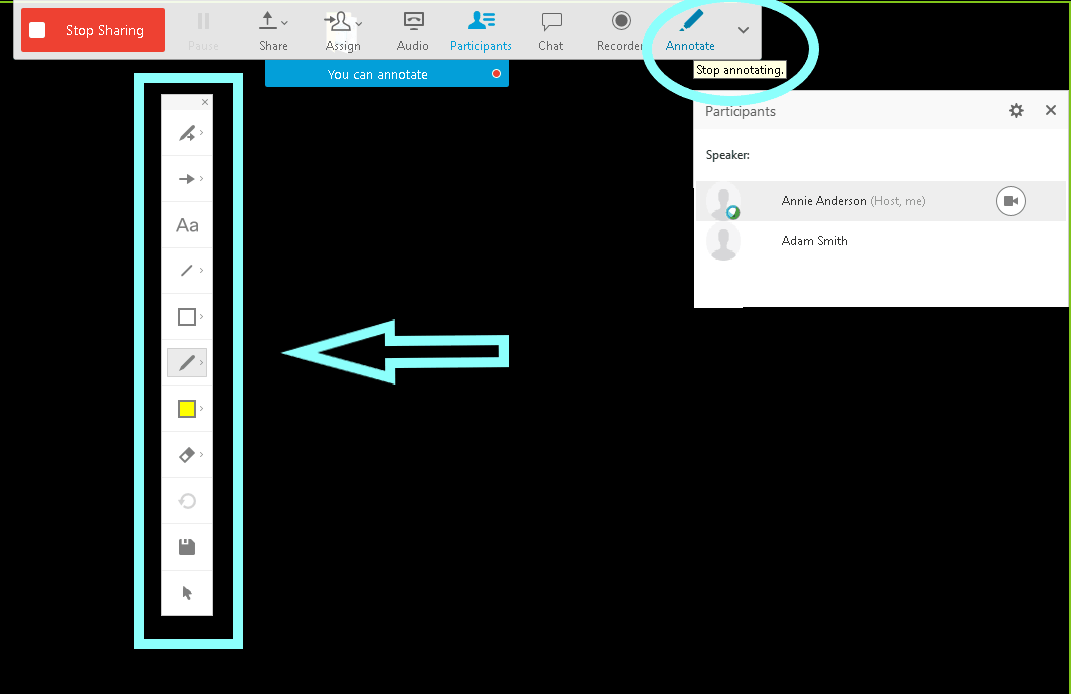
To show or hide annotation tools, click the Show-Hide option which has a pen next to it. If you are interested in enabling or disabling annotation privileges, click Allow to Annotate with the pencil and right arrow next to it. After clicking, select a participant’s name. You also can click an annotation to turn on/off the feature.
The following annotation features are available in Webex for Mac:
- Click the forward arrow icon to use your pointer to draw attention to specific sections on the screen. Participants are assigned a color upon joining a session. Click the icon and then select Name Pointer or Laser Pointer to use.
- Use the text tool (Aa) to add text. After typing, click to display the text to other participants. You can change the color by selecting your color of choice from the color palette.
- You can use the line tool in order to draw straight lines on the screen. You can also change the color by selecting one from the color palette. Click the line icon and drag your mouse to formulate the line.
- You can use the shape tool (square) in order to draw squares, rectangles, ovals, or circles on the screen. It can also be used to add check or x marks. Change the color by selecting from the color palette. Click the icon then select a shape or mark type to use.
How To Share Content
Users can access options for sharing content during meetings from the ‘Share’ menu. The following options are available to you after clicking on the aforementioned menu.
- Select My Desktop to share your computer’s desktop.
- Select File to share a file on your computer in the Content Viewer (this includes audio and video content).
- Select Application to share an application on your computer.
- Select Whiteboard to share whiteboard and annotation tools.
- Select Web Content in order to share a website which allows conference participants to navigate.
- Select Web Browser to share a website that attendees can view.
- Select Multimedia if you would like to share audio or video files which are hosted on a specific URL (web address).
- Select My Meeting Window if you would like to show your entire meeting window.
How To Use The Recorder
The Network-Based Recorder available on Webex for Mac allows users to capture screen activity along with audio on a Webex Meeting Center recording server.

After making the selection the server processes the data recorded, then sends the recording file to your personal recording folder on your Webex service site. Recorded files are saved in Advanced Recording Format (.arf), a proprietary format exclusive to Webex.
The following steps allow you to access the recorder and save your meeting for future review:
- A meeting must be underway in order for the recorder to be initiated.
- If the Quick Start page is displayed, click Record or click the Meeting button to unveil a dropdown menu. Click Start Recording within the menu.
- The Recorder Panel may also be opened by clicking on the Recorder icon (REC) on the icon tray directly below the Participants Panel.
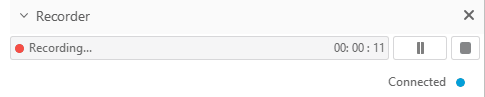
- Once beginning to record click the Pause button in order to briefly cease recording. Re-clicking the pause button will cause the recording to resume.
- Click the ‘Stop’ button to immediately end the recording. You will be prompted to confirm you wish to cease recording, due to a new recording being created each time a recording is stopped and restarted. The pause option allows for one continuous recording file.
- In order to access your recording after the meeting has ended, navigate to My Webex then My Files and finally My Recordings to access the files after the meeting has come to an end.
How To Use Video
Conference participants can utilize Webex for Mac in order to share their video during the screen if they have a readily available webcam.
To begin streaming:
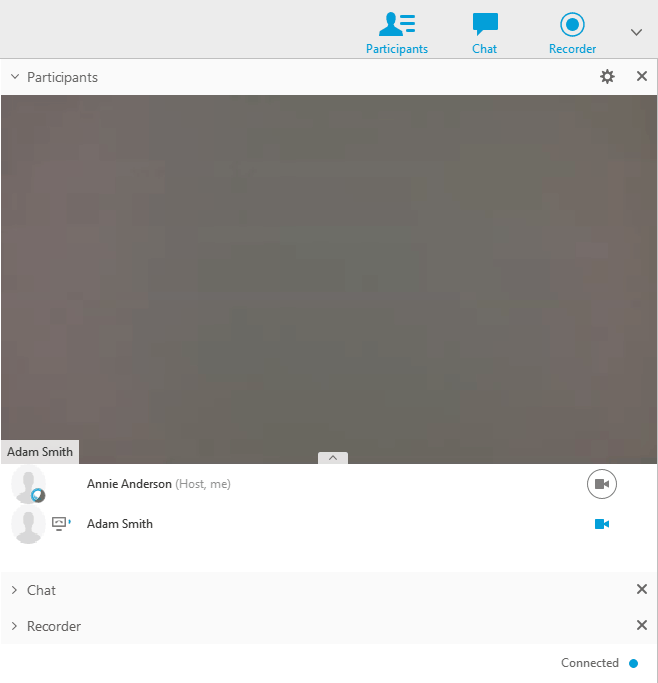
- Click the camera icon in the Participants Panel. The icon should then turn green and cause your video feed to appear at the top of the Participants Panel.
- Clicking the icon a second time will stop your stream.
You can control video settings and switch between multiple cameras on your computer by clicking the Set Video Options icon (gear) beneath the Participants panel.
How To End Or Leave A Meeting
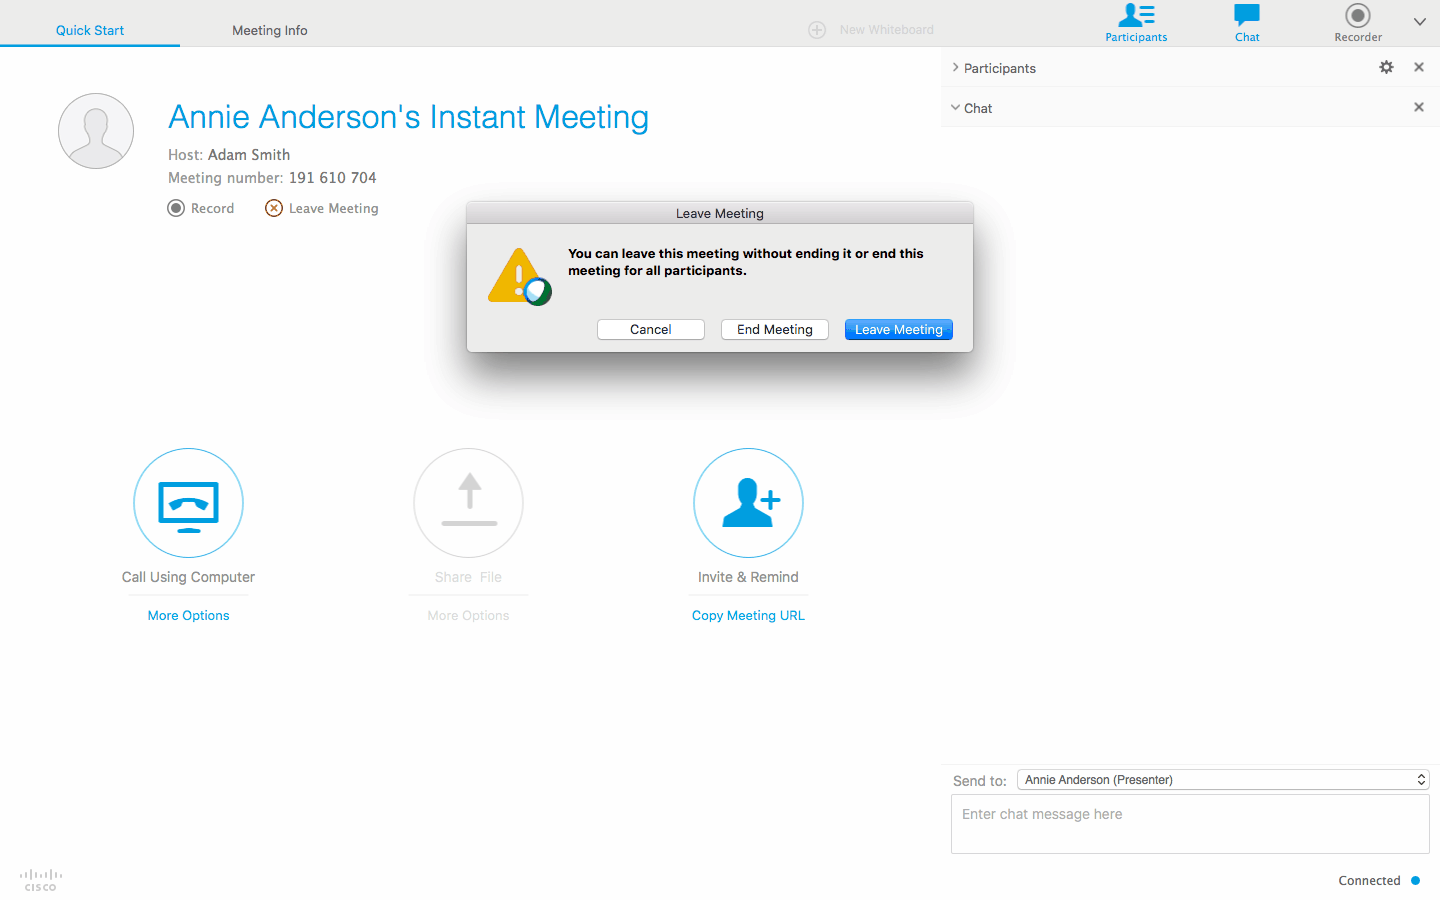
While only a host can end a meeting, the process for leaving is identical for attendees to leave the proceedings. Participants can exit the meeting at any time by clicking the File option which will unveil a dropdown menu. Selecting Leave Meeting will allow a participant to leave, while a host choosing End Meeting will end the meeting for everyone.
We hope this guide is helpful to those who wish to utilize Webex for Mac. Remember, combining Webex with Krisp will provide multiple solutions for your teams’ conference needs.