Navigating the complexities of modern schedules can feel like juggling a dozen clocks set to different time zones. For this reason, it makes sense to learn how to share Google Calendar with your co-workers and create structured schedules for everyone.
Whether you’re coordinating a bustling household, managing a project team, or simply trying to keep your personal and professional lives in sync, Google Calendar is the tool that helps make sense of the chaos.
Sharing your calendar with others can make a difference in how you plan your days, ensuring everyone is aligned and no appointment slips through the cracks. In this guide, we’ll explore the ins and outs of sharing your Google Calendar in 2024, offering you the clarity and control needed to keep your time and team on track.
How to Share Google Calendar With Others
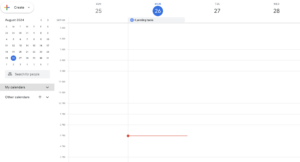
The first transition from an unshared to a shared Google Calendar starts with opening Google Calendar on your desktop. Currently, you can’t share calendars from the Google Calendar app.
Next, on the left, find the “My calendars” section. Click the arrow that is directed below to expand it.
Here, you must already know which calendar you want to share. Is it your personal one, the work calendar, or the calendar you dedicated to a different project?
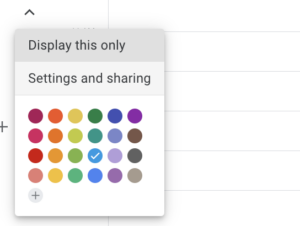
If you hover over the calendar you want to share, you’ll notice three dots on the right side. If you click on that, you’ll see the Settings and Sharing option.
If you scroll down a bit, you’ll notice the “Add people and groups” option under “Share with specific people or groups.”
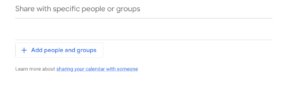
Finally, you can add a person’s or Google group’s email address and use the drop-down menu to adjust their permission settings. To finish off, click “Send.” And if you don’t know how to create a group here, keep reading and you’ll find out how in the next paragraph.
How to Make Google Calendar Public
The process where you share Google Calendar with others publicly is very similar to the one above. But let’s quickly go over that one too.
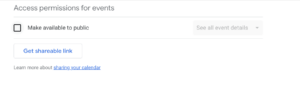
As you repeat the same steps and reach the “Share with specific people or groups” part, you’ll notice an “Access permissions for events” section where you can make your calendar available for the public with a checkmark (image below.)
How to Create a Google Calendar For a Group
At times, you might need to create a Google family calendar or a Google calendar for a specific group in your company, university course, or school project. If you already have a group, that’s great. But if you haven’t, here’s how you can create one:
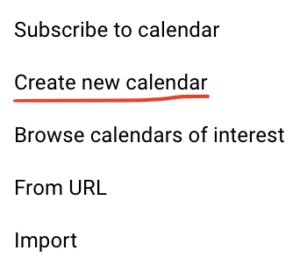
- Open Google Calendar,
- On the left, you’ll see Add and Create new calendar next to Other calendars.

Afterward, you can create a new group and name it how you need to.
In another scenario, there is already a group, and you need to share a calendar with them. You can share a calendar with your whole company or a specific person or group.
- To start with, open your calendar again and click the name of your new calendar on the left.
- Point to the shared calendar, click More with the three dots, and the calendar Settings and sharing option.
From here, you have two options— to share it with everyone in your organization and a specific person or group.
To share it with everyone in your company, check the Make available for your organization box under Access permissions.
To share the calendar, ask users to subscribe to the calendar or share the calendar with an individual or group through the shareable link.
To share it with a specific person or group, click Add People under Share with specific people, and add the email address of the individual or group you want to share the calendar with. Then, you click Send.
Calendar links are included in group invitations, and members receive email notifications with links to the shared calendar.
How to Invite Someone to Google Calendar
In the same way you share the calendar with other people described above, you can share it with anyone you like. That’s because you can add individuals in the same order of actions, and they’ll receive an email about it.
Finally, the above was all you needed to know about how to make a shared Google Calendar and keep it extra functional. Now, let’s see what valuable practices there are to improve your workflow.
Shared Google Calendar Best Practices
Managing a shared Google Calendar requires some best practices to ensure it remains a helpful tool rather than a source of confusion. Here are a few tips:
Set Clear Permissions
Always be clear about who can view, edit, or manage your calendar. This prevents unauthorized changes and ensures everyone knows their level of access.
Keep Events Organized
Use consistent event naming patterns and include all necessary details in the event description. This helps avoid misunderstandings.
Regularly Review Shared Calendars
Periodically review who has access to your calendar and adjust permissions as necessary. This is especially important if team members change roles or leave the organization.
Use Color-Coding
Google Calendar allows you to color-code events. Use this feature to distinguish between different types of events (e.g., meetings, personal appointments, deadlines) to make the calendar more readable.
By following these best practices, you can ensure that your shared Google Calendar remains an efficient and effective tool for collaboration.
Experience Meeting Productivity With Krisp
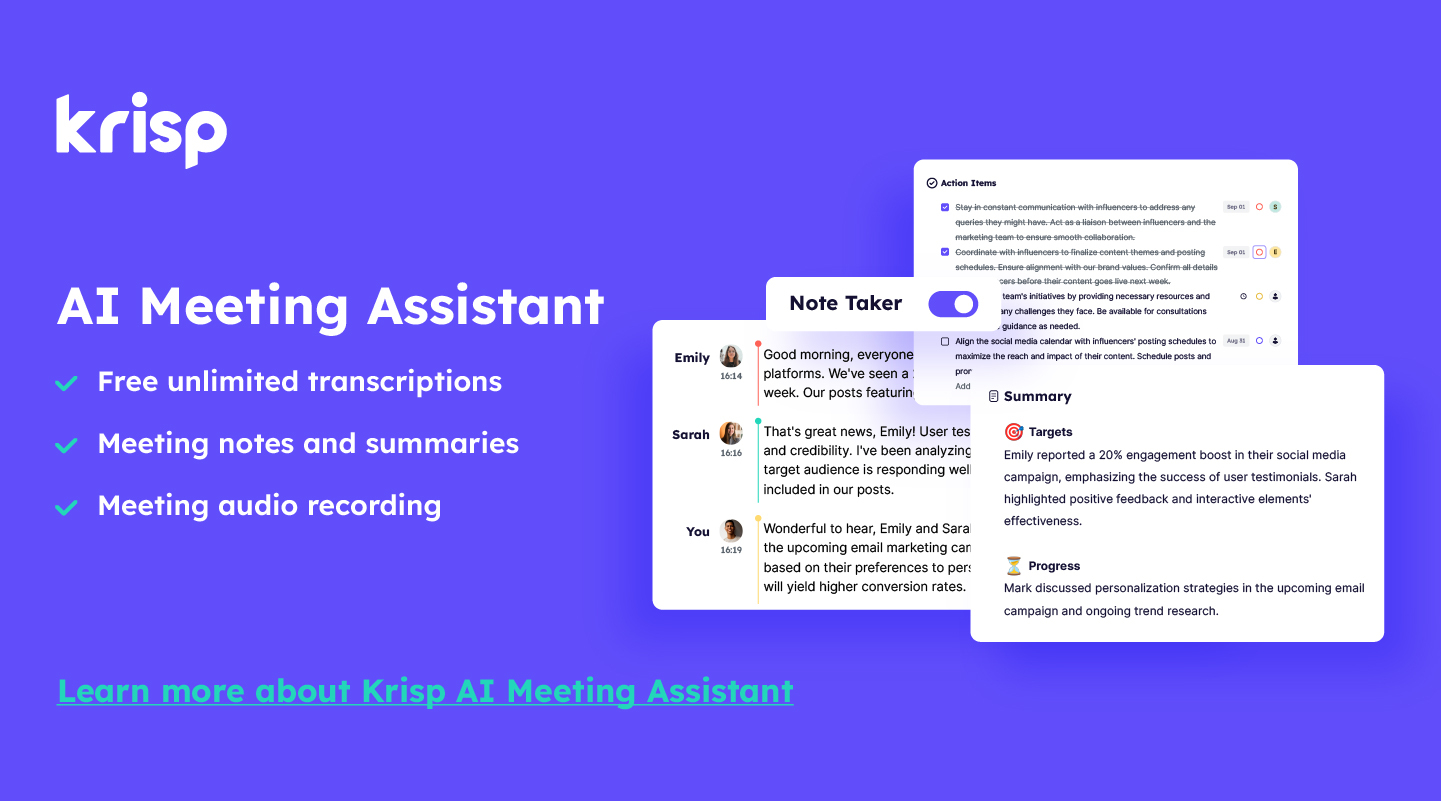
Sharing your Google Calendar, as we already discussed, is a straightforward way of ensuring everyone on your team is on the same page. But why stop at scheduling? Integrating Krisp’s AI Meeting Assistant can make your meetings less of a mental burden and more of an opportunity to connect.
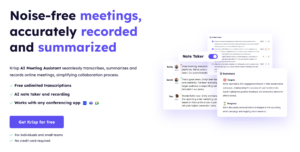
Krisp’s AI Meeting Assistant is like having a personal meeting manager built right into your workspace. It covers the little details that can make or break a virtual meeting.
Access to automatic meeting notes and real-time multilingual transcription is like having an extra set of hands to capture every critical point during a meeting. As a result, you can attend meetings with a relaxed and confident attitude without worrying about being efficient every second of the meeting. With Krisp, you only have to be present and engaged in necessary discussions.
Your meeting notes and summaries are saved in a centralized space on your account. Plus, you can easily share them with anyone you need to in your team or outside it. It keeps everyone involved, and no time is wasted.
Using advanced AI cancels out background noise, ensuring that you and your team are heard clearly, no matter where you’re joining from.
Whether you’re working remotely, in a busy office, or anywhere in between, Krisp’s AI Meeting Assistant ensures that every meeting is productive, focused, and free from distractions.
How to Make Google Calendar Private
Sometimes, you may need to revert a public calendar to private. Or you might want to ensure that only specific people can see your calendar. Here’s how to stop sharing Google Calendar:
- Open Google Calendar, and go to the calendar settings you want to make private.
- Scroll down to the “Access permissions for events” section and uncheck the box next to “Make available to public.”
- In the “Share with specific people” section, review who has access to your calendar and adjust the calendar settings as needed.
- After making these changes, ensure your calendar is no longer accessible to the public or unwanted viewers.
Making your calendar private ensures that your schedule remains confidential and that only those you trust have access.
Fix Problems After You Share Google Calendar With Others
Sometimes, people can’t find your calendar after you’ve shared it with them. It happens, and it may have several reasons:
- First things first—have you added the right email address? You might as well check; nobody’s perfect.
- You should make sure they click the link in the email you sent them.
- If they can’t find your email, it’s a classic case: ask them to check their spam folder.
- It might also happen that your account is managed by your work or school. In this case, your account’s admin may have limited or turned off sharing outside of the organization.
- In the worst-case scenario, remove them from the calendar’s sharing settings and then add them again to see if things change.
With this problem-solver attitude, you can easily learn how to share Google Calendar with anyone you like and make your project processes productive.
Wrapping Up
Having a shared calendar is like having a finely tuned orchestra—everyone knows their part, and harmony prevails. With its intuitive sharing options, Google Calendar brings this harmony to your fingertips, whether you’re organizing a team project, coordinating Google family calendar, or simply syncing up with colleagues. By mastering the art of calendar sharing, you ensure that no meeting is missed, no event overlooked, and no one is left out of the loop.
But scheduling is just the beginning. By integrating tools like Krisp, you elevate your productivity, turning meetings into opportunities for connection rather than stress points. The key takeaway? In 2024, success is as much about your tools as how you use them. Share wisely, collaborate seamlessly, and let your calendar become the backbone of your organized, efficient, and connected life.
Frequently Asked Questions
Check calendar sync in Google Calendar app settings.
Refresh the app or restart your iPhone.
Ensure calendar sync is enabled in iPhone settings under “Accounts.”
Reinstall the Google Calendar app if needed.
Click the three dots next to the calendar and select “Settings and sharing.”
Under “Share with specific people,” add the email addresses.
Choose “Make changes and manage sharing” from the permissions dropdown.
Click “Send.”