If you’re new to the Zoom platform, joining a meeting can feel overwhelming. Are you interested in how to join a Zoom meeting like a pro?
Managing a Zoom meeting is both intuitive and efficient if you know the basics. From how to join a Zoom meeting for the first time to how to configure audio and video options, we’ll get you covered everything in this guide.
Importantly, you’ll learn how the Krisp Meeting Assistant can make your Zoom meetings far more productive and effective.
How to Set Up Zoom

Zoom allows you to connect with colleagues, friends, or clients around the globe. So, how to install Zoom to start a call or join a meeting?
- Download Zoom: Visit the Zoom Download Center and download the Zoom Client for Meetings.
- Install Zoom: Run the downloaded file. The instructions that will appear will tell you how to install the application.
- Create an Account: Open Zoom and sign up using your email or social accounts (Google, Facebook).
- Sign In: Log in to Zoom with your credentials.
- Configure Settings: Go to Settings to adjust audio, video, and general preferences.
- Test Your Meeting: Apply a Zoom test Meeting to ensure audio and video options are set properly before the meeting starts.
- Start or Join a Meeting: Click “New Meeting” to host or “Join” to enter a meeting using a link or ID.
The Zoom video communication app has grown into a household name. In 2024, this videoconferencing platform generated more than $4.5 billion. So, you should know how to use the tool like a pro, as its popularity is on the rise worldwide.
How to Join a Zoom Meeting on a Computer and Phone

Now that you know how to set up a Zoom meeting, let’s look at the different ways to join a Zoom meeting.
How to Join a Zoom Meeting on a Computer
- Receive the Meeting Details: The meeting host will send you a link or ID via an email, calendar invite, or message.
- Open Zoom or Go to the Website: If you have the Zoom app, open it. If not, visit Zoom’s website.
- Join with Link: Click the meeting link received to launch Zoom and connect to the meeting automatically.
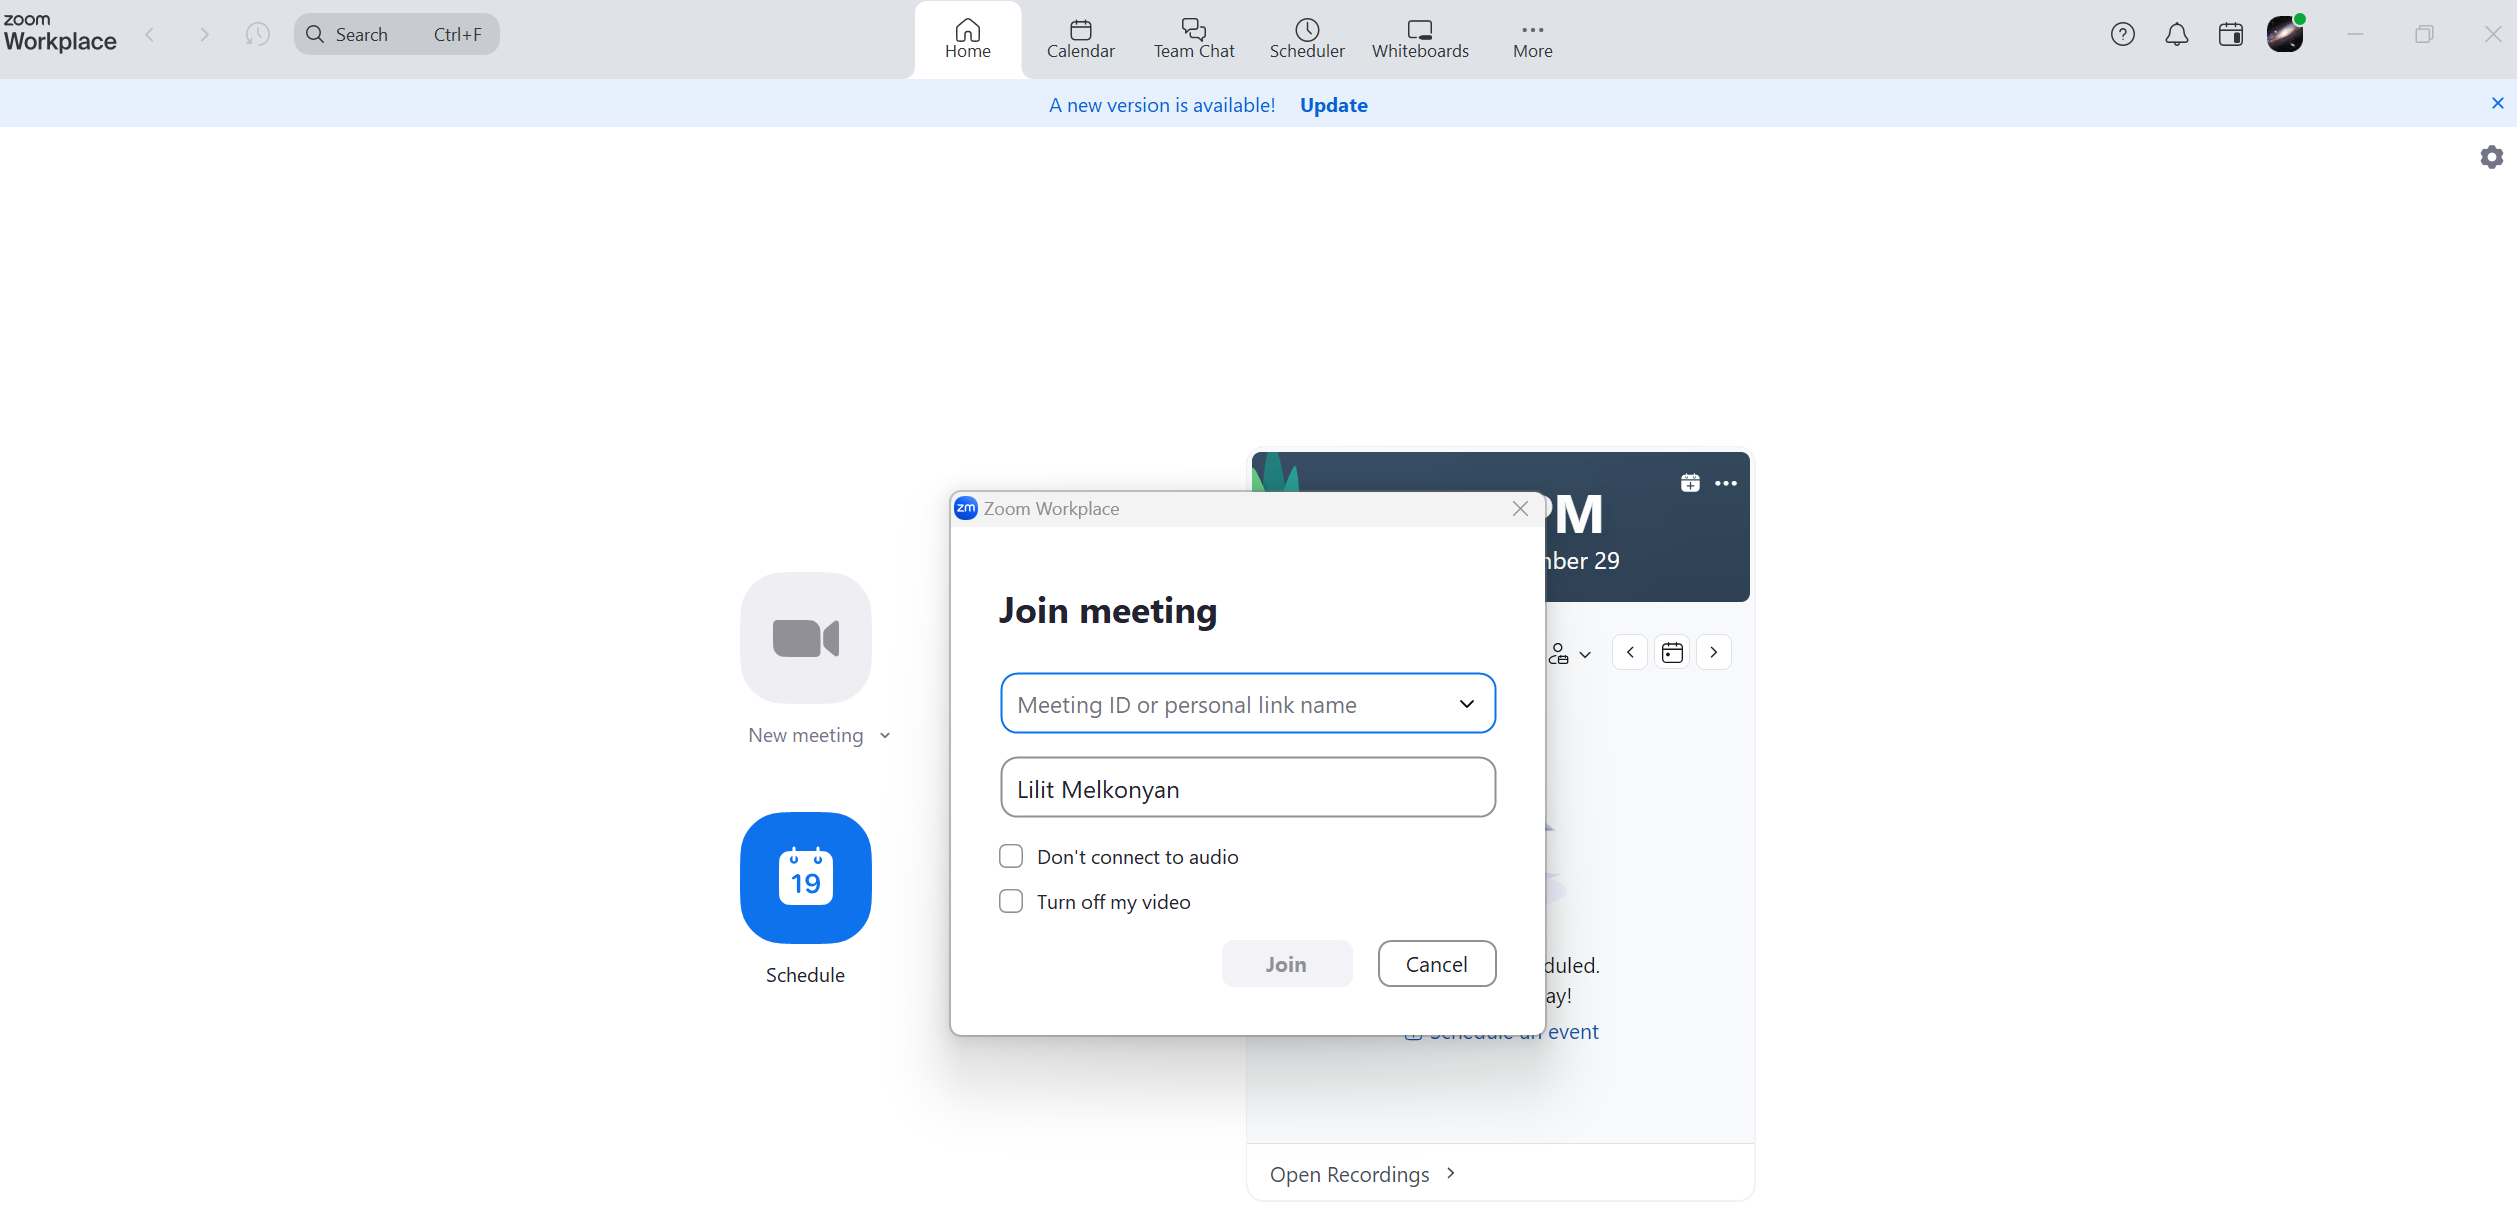
- Join with Meeting ID: Click “Join a Meeting” on the Zoom homepage app. Enter the Meeting ID and passcode if required.
- Adjust Audio/Video Settings: Choose whether to join with video and adjust your audio preferences before entering the meeting room.
- Share Your Screen if Necessary: Share your screen if you need to show your screen to participants.
- Use the Zoom Chat: Chat with participants by clicking “Chat” at the bottom of the Zoom screen.
How to Join a Zoom Meeting by Phone
- Dial the Number: The host will provide a dial-in number in the meeting invite.
- Enter the Meeting ID: When prompted, enter the Meeting ID followed by the pound (#) key.
- Enter passcode (if required): Input the passcode followed by # if needed.
- Join the Audio Portion: You’ll be connected to the audio portion of the meeting.
Joining a Zoom Meeting on iPhone
- Download Zoom from the App Store: Open the app after installation.
- Tap Join a Meeting: Enter the Meeting ID and your name.
- Enter passcode (if needed): Input the passcode provided by the host.
- Adjust Video and Audio: Choose whether to join with video and connect to audio.
- Tap Join: Enter the meeting room.
Joining a Zoom Meeting on Android
- Download Zoom from Google Play Store: Open the app.
- Tap Join a Meeting: Enter the Meeting ID and your name.
- Input Passcode: Enter the passcode if prompted.
- Set Up Your Audio and Video: Choose your settings and tap “Join” to enter.
How to Join a Random Zoom Meeting and Public Zoom Meeting

Here are the steps to take for joining a random and public Zoom meeting:
How to Join a Random Zoom Meeting
Joining random Zoom meetings isn’t recommended due to security risks. However, if you’re exploring webinars or open sessions, check public directories or platforms that list these events. Always ensure the meetings are legitimate and safe.
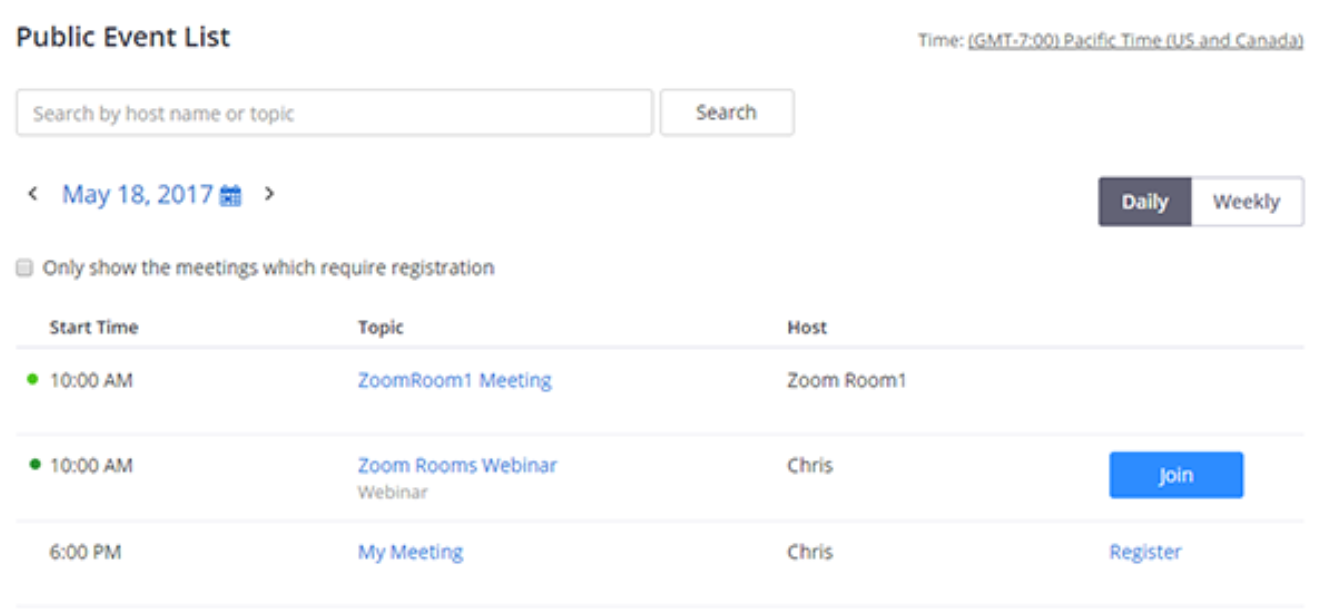
How to Join a Public Zoom Meeting
Public Zoom meetings are often shared on social media, event websites, or within community groups. To join, click the link provided or enter the Meeting ID in the Zoom app. Public meetings usually don’t require a passcode but always double-check for specific entry requirements.
How to Join a Zoom Meeting Without an Account
Don’t you have a Zoom account to join a meeting? No worries.
- Enter Meeting Details: Click on the meeting link provided or enter the Meeting ID on the Zoom app or website.
- Join the Meeting: Choose “Join” a Meeting and input the details. No login required․
Joining a Zoom Meeting with a Meeting ID
- Open Zoom App or Website: Launch the app or visit Zoom’s website.
- Click Join a Meeting: Input the Meeting ID received from the host.
- Enter passcode (if required): Input the passcode if the meeting is protected.
- Join the Meeting: Adjust your video and audio settings, then click “Join” to enter.
How to Join a Zoom Meeting with a Link
- Click the Link: The host will send you a meeting link via email or message. Click on this link.
- Allow Zoom to Open: If prompted, allow your browser to open the Zoom app or join through the web browser if you don’t have the app installed.
- Enter the Meeting Room: Adjust your audio and video settings and enter the meeting.
How to Join a Zoom Meeting Without a Link
- Launch Zoom: Open the app or visit the Zoom website.
- Click Join a Meeting: Enter the Meeting ID and the passcode provided by the host.
- Customize Your Settings: Set your preferred audio and video settings and click “Join.”
Scheduling a Meeting?

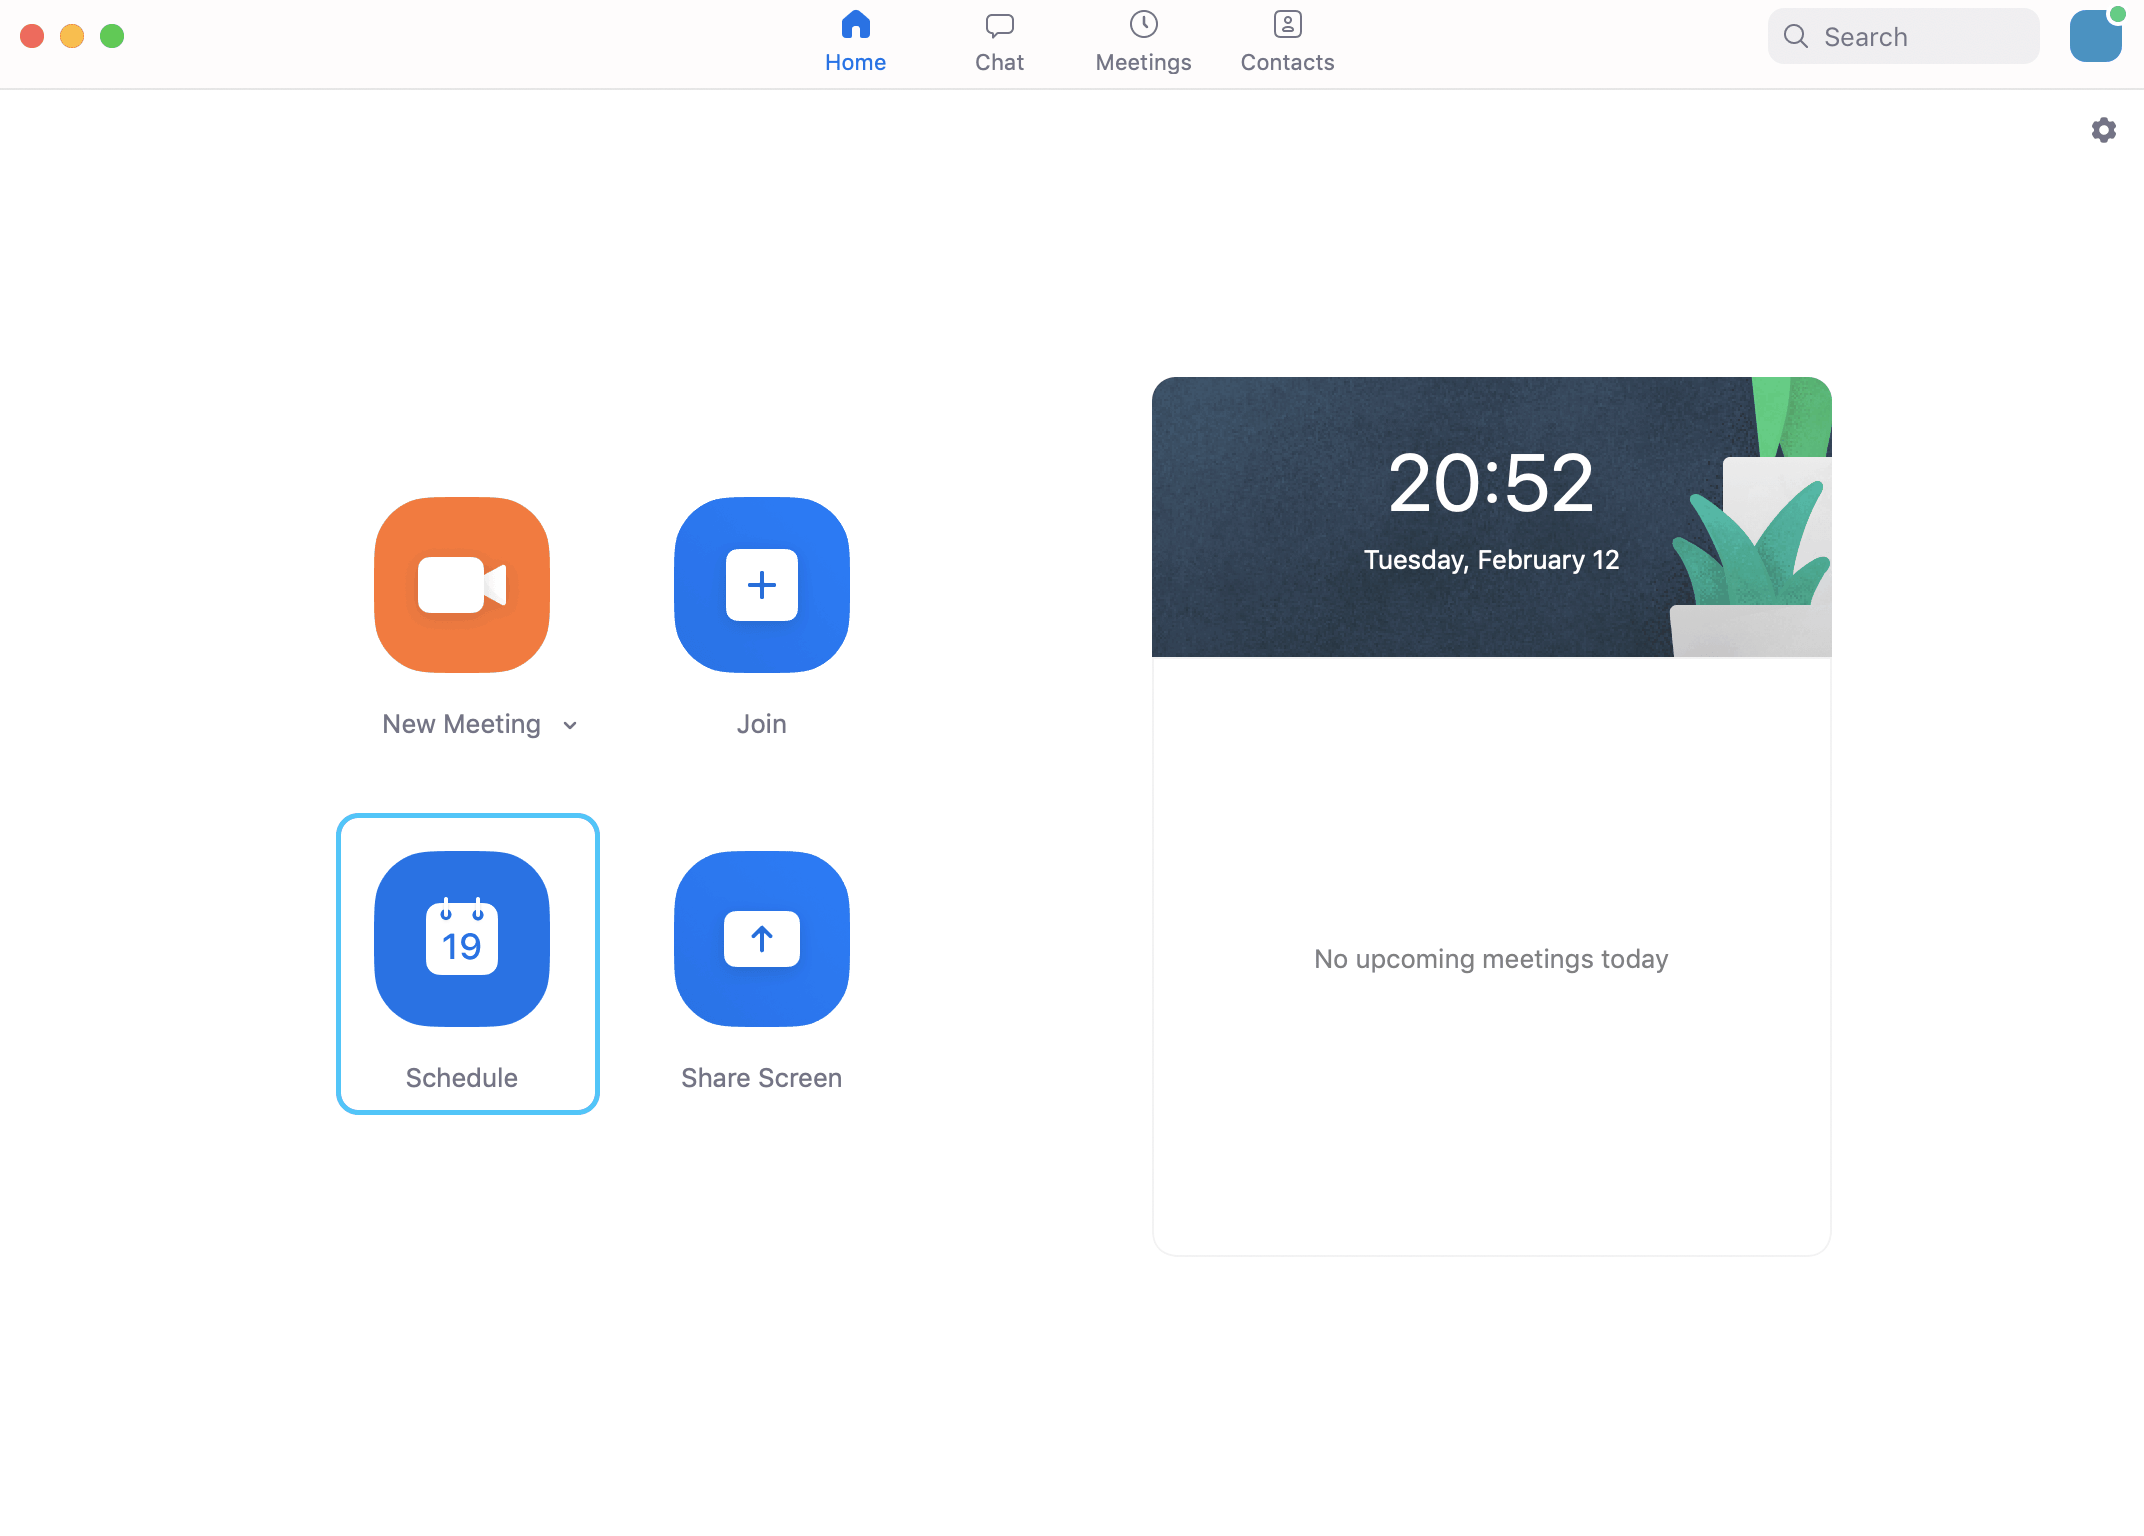
Scheduling your calls lets you set up meetings in advance. You can find the “Schedule” button on the Zoom home screen.
- Customize the meeting’s name.
- Set the date and time.
- Define the duration.
- Mark it as recurring if it’s a regular event.
- Change your name on Zoom before the meeting to be ready when it starts instead leaving it to the last minute.
- Choose your audio options, whether participants will join via phone, computer audio, or both.
- For added security, set a password, ensuring that only invited guests can join.
For instance, suppose you have a weekly team sync. Schedule it as a recurring meeting with a set password to avoid setting up new links each time, keeping things efficient and secure.
How to Configure Your Audio and Video for a Zoom Meeting

Configuring your audio and video settings before a Zoom meeting ensures smooth communication and a professional appearance. For example, did you know you can raise hand in Zoom during the meeting?
Also, go through the Zoom pricing options to se whether it’s convenient for you beforehand. Here’s what you should do:
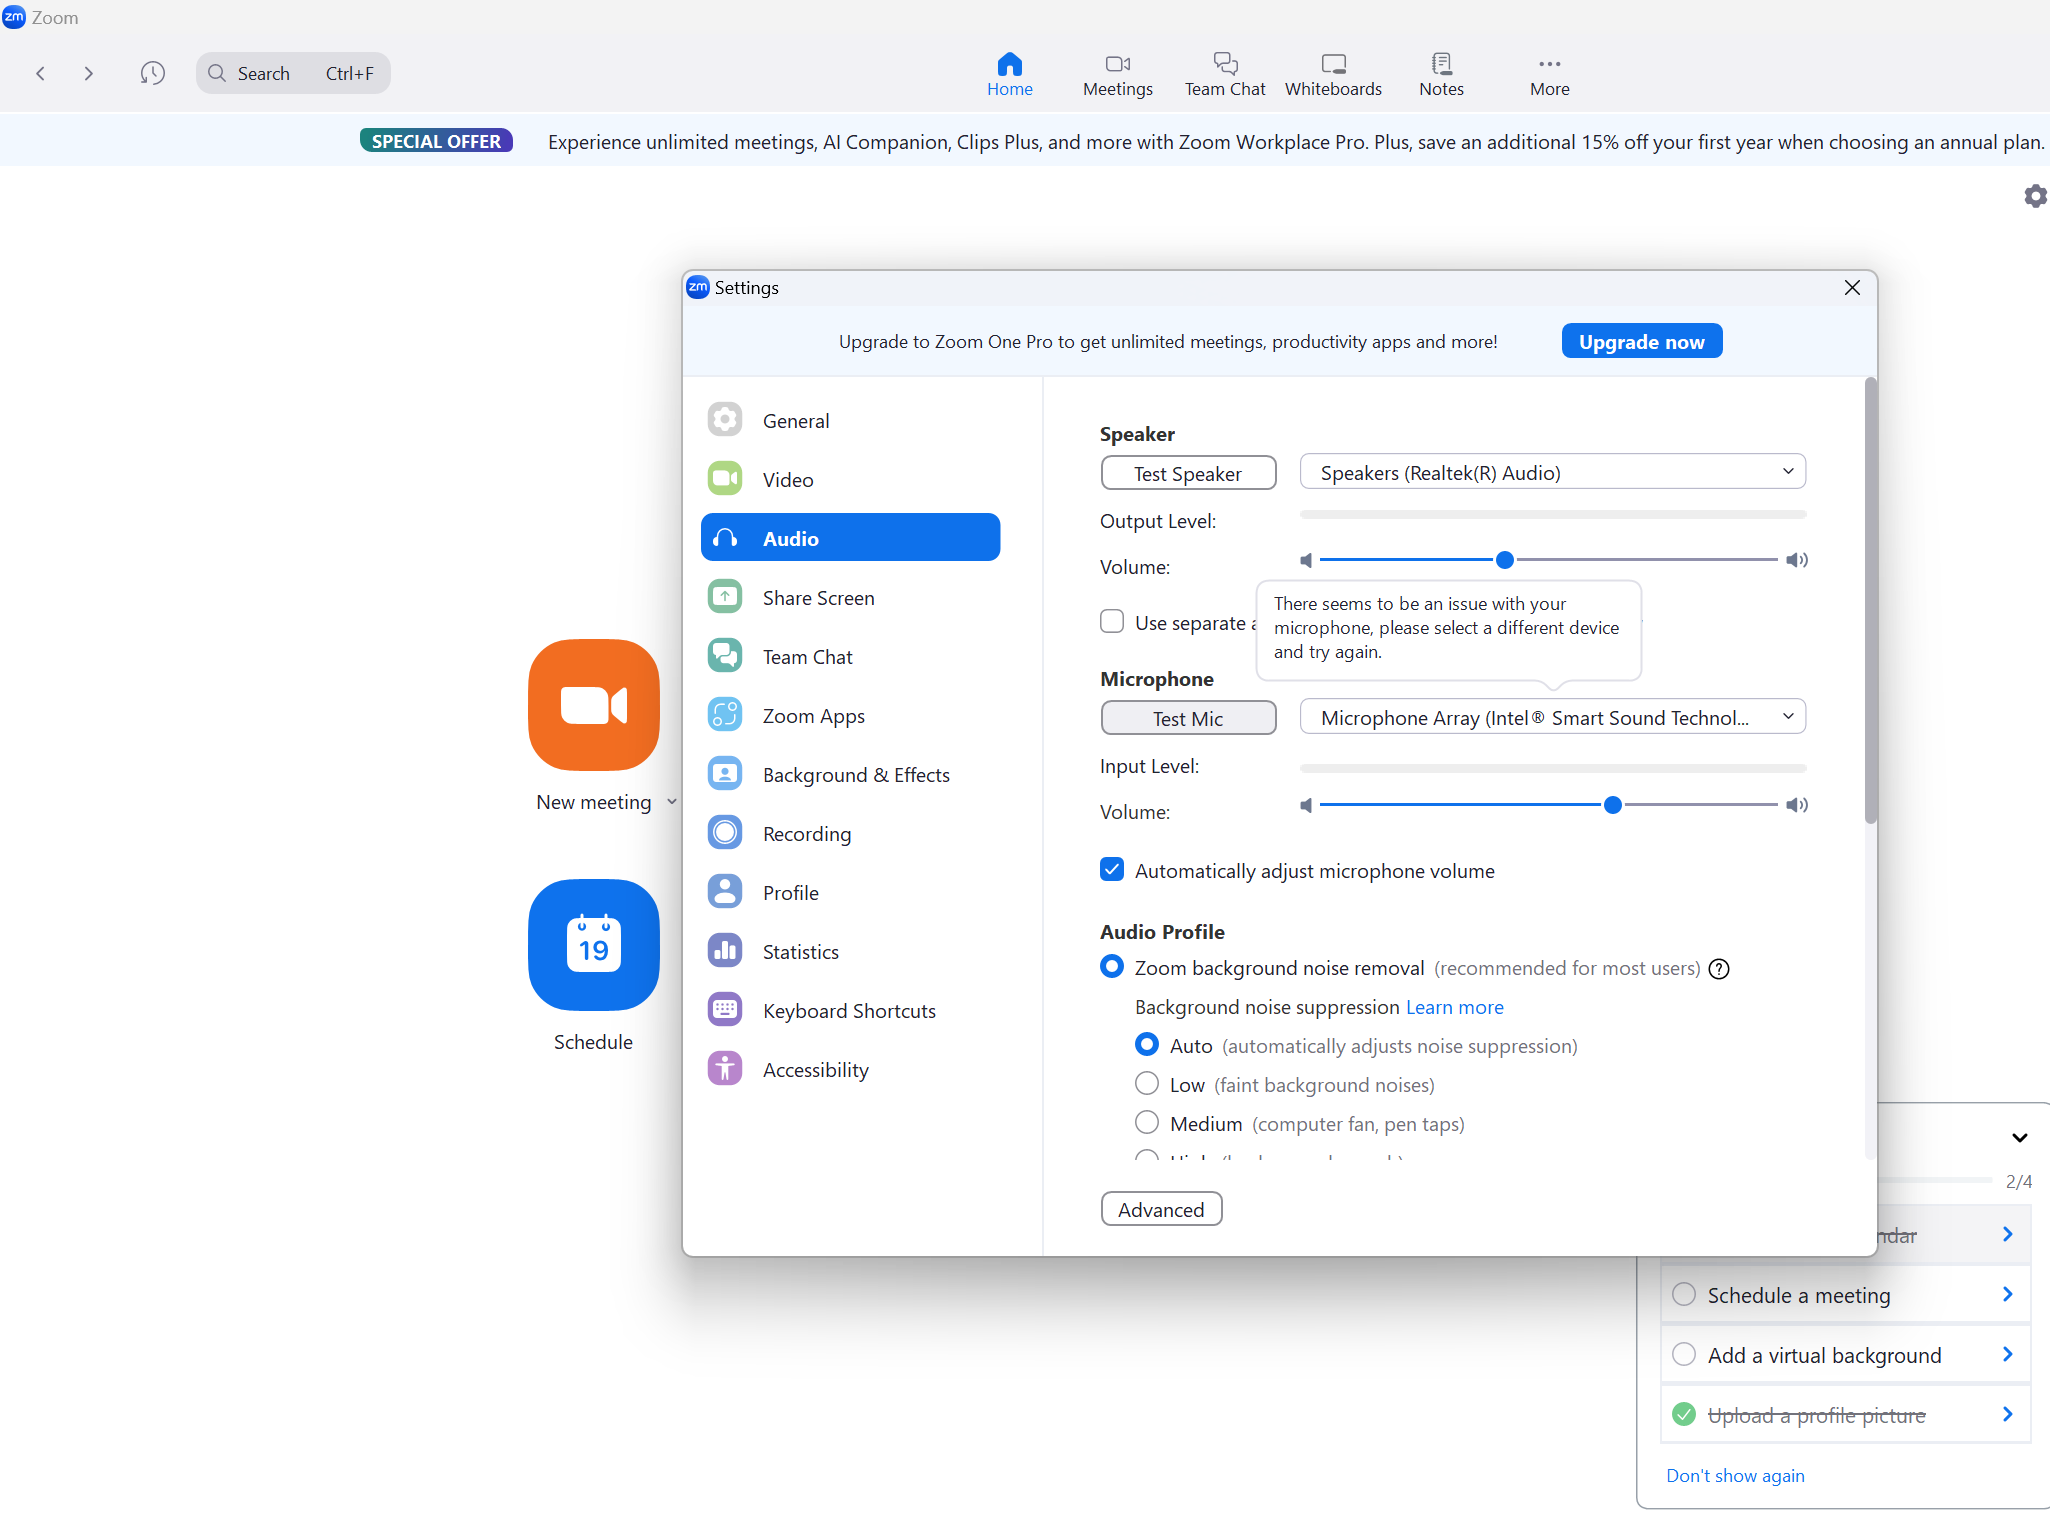
- Open Zoom Settings: Launch the Zoom app and find the gear icon in the top right corner. Click it to open settings.
- Adjust Audio Settings:
- Click on the “Audio”
- Select Microphone: Choose your preferred microphone from the drop-down menu. Test it by speaking to see the input level.
- Select Speaker: Choose your speakers and click “Test Speaker” to ensure you can hear.
- Mute and Unmute Options: Enable “Mute my microphone when joining a meeting” if you want to join silently and adjust volume levels.
- Configure Advanced Audio Options:
- Enable Noise Suppression for Zoom noise reduction.
- Turn on “Echo cancellation” to avoid feedback during meetings.
- Integrate Krisp with Zoom to enjoy unmatched noise suppression. Users note Krisp’s Noise Suppression algorithm seems ten times better than its competitors.
- Configure Advanced Video Settings:
- Click on the “Video”
- Select Camera: Choose your webcam from the list. You’ll see a live preview of your video.
- Adjust Appearance: Use options like “Touch up my appearance” to enhance your video feed.
- Adjust lighting settings for low-light environments.
- Enable HD for clearer video if bandwidth allows.
- Test Settings Before the Meeting: Click “Test Meeting” in the settings menu to preview your audio and video setup. Make any necessary adjustments before joining your actual meeting.
- Join Meeting with Configured Settings: Once satisfied with your setup, click “Join” from the main Zoom interface. Your pre-configured settings will be applied automatically.
- Utilize Hotkeys for Efficiency: Master Zoom’s hotkeys to quickly mute, start recordings, or switch views without clicking around the screen. These shortcuts save time and keep you focused on the conversation.
- Use Virtual Backgrounds: If you’re in a messy space or want to add a professional touch, use Zoom’s virtual backgrounds. You can choose a clean, office-like background that enhances your presence.
- Breakout Rooms: Perfect for workshops or team exercises, Breakout Rooms let you split participants into smaller groups. You can jump between rooms to facilitate discussions and bring everyone together with a click.
Note: You can use the Zoom cloud recording to store and review your meetings, presentations, and discussions and share them with others. As a result, you can avoid costly manual recording and storage management.
How the Krisp AI Meeting Assistant Enhances Zoom Meetings

Knowing how to join a Zoom meeting isn’t enough: what about enhancing your Zoom experience?
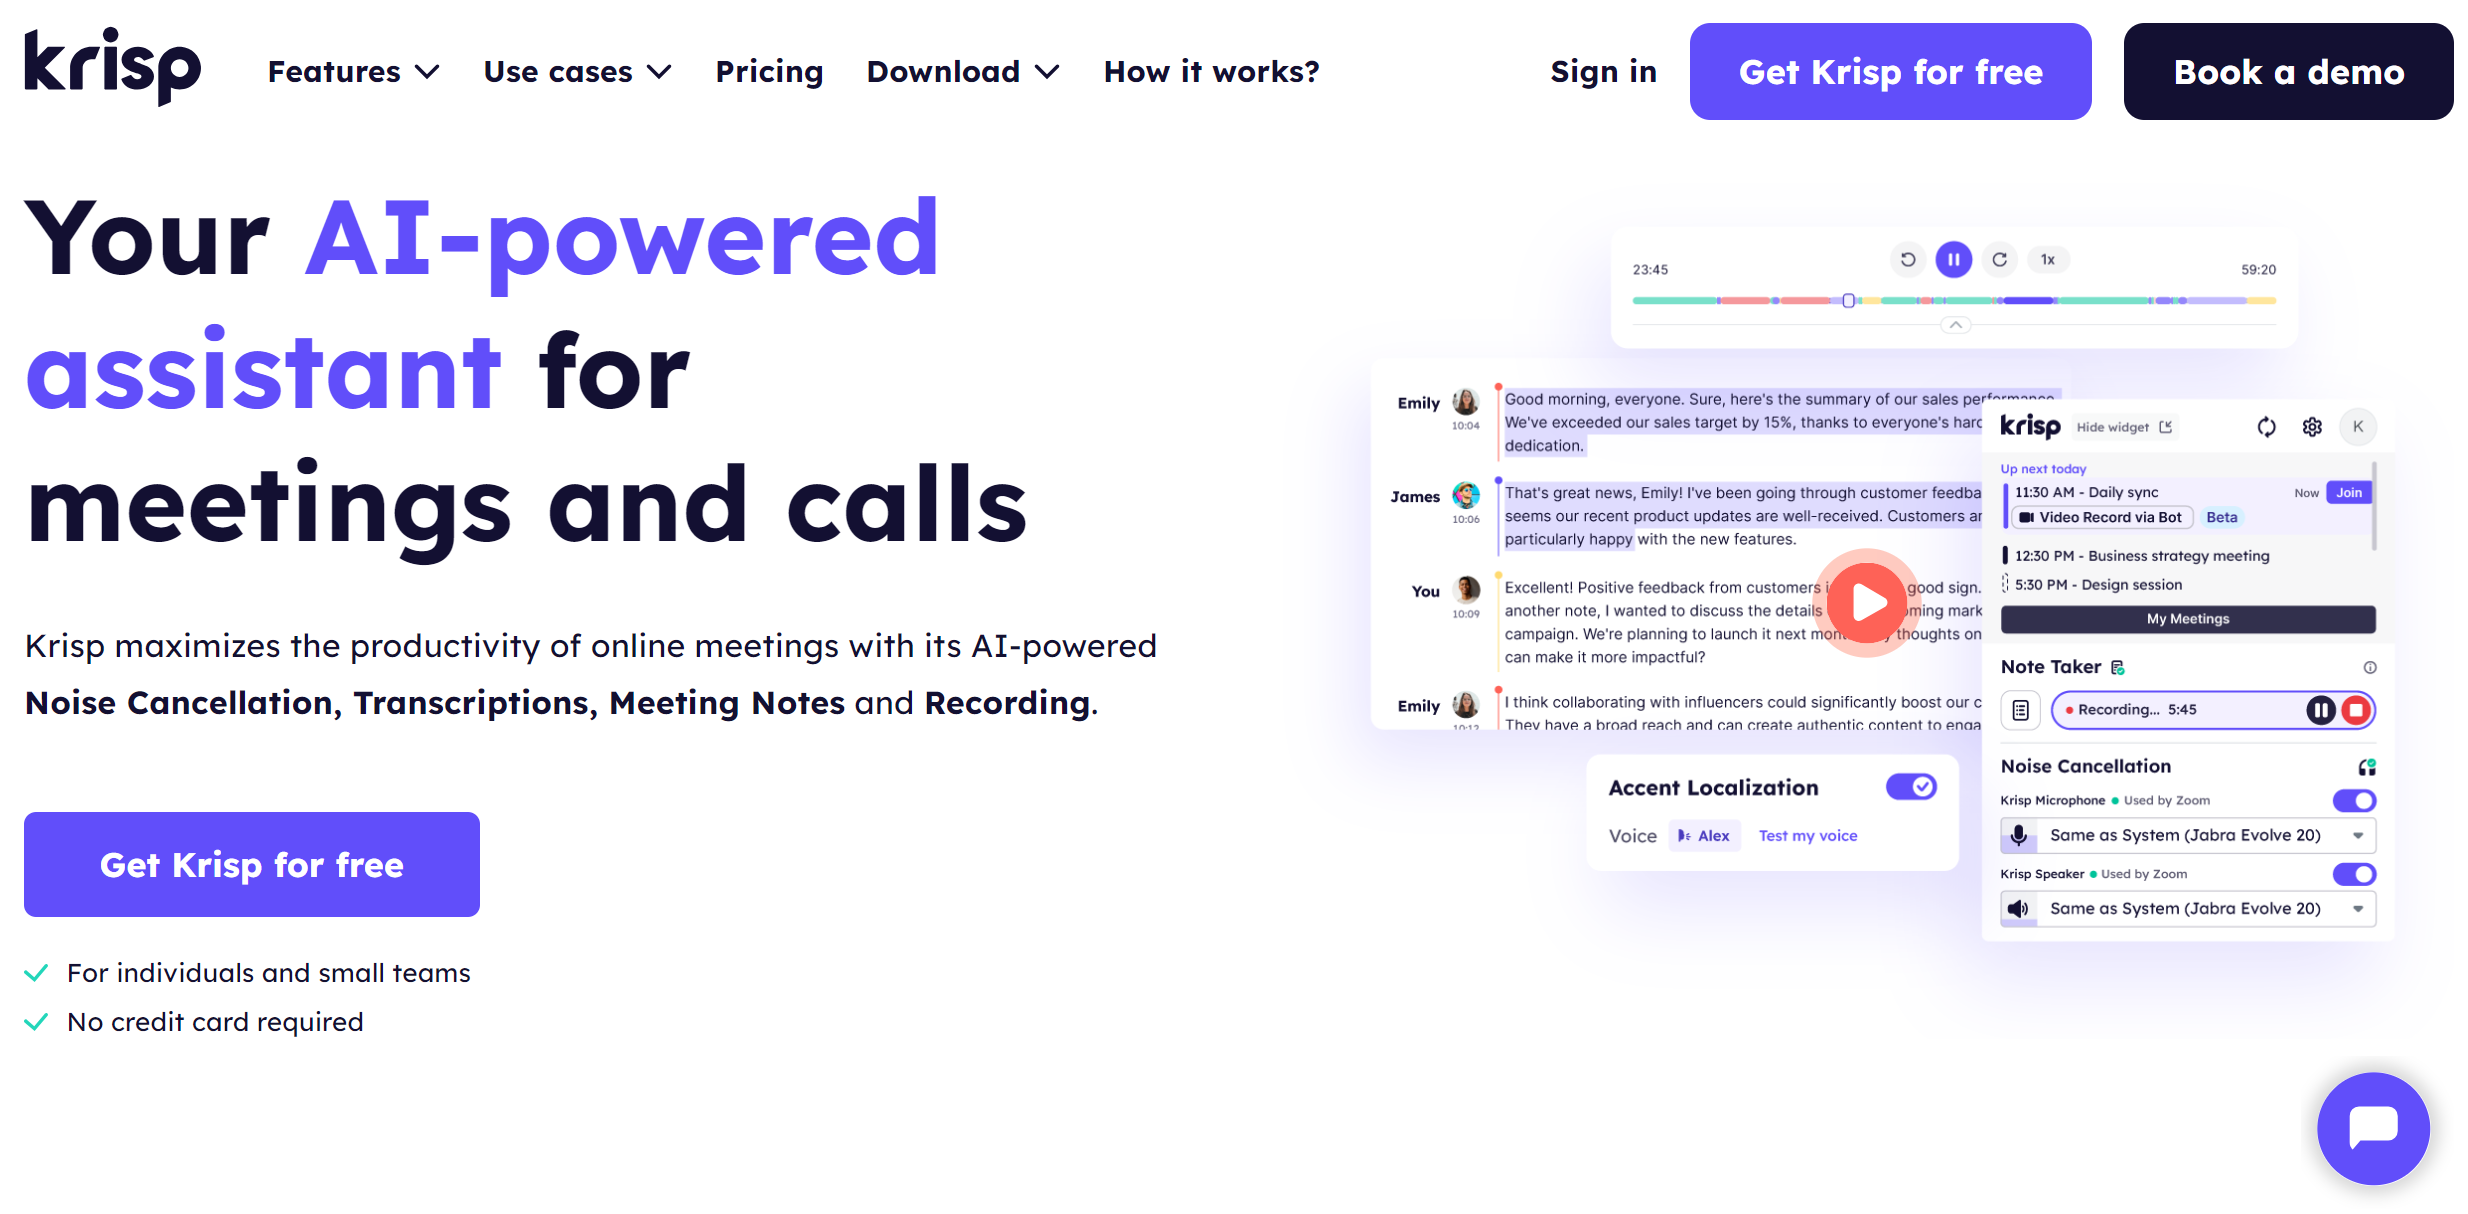
How Krisp’s Meeting Assistant Makes Your Meetings Productive
Here is how Krisp’s AI Meeting Assistant makes your online interactions distraction-free, saving you time and keeping your meetings organized and focused.
-
Krisp’s Noise Cancellation Removes Background Noise
Krisp’s AI Noise Cancellation feature provides excellent noise suppression to cancel background distractions during calls. So you can be sure to enjoy a distraction-free environment for meetings.
-
Krisp Automatically Records Meetings
The Krisp AI Meeting Recording feature automatically joins your online calls to record them with excellent audio quality. This can’t be said about similar Meeting Assistants. These recordings will help you never miss critical discussions and allow you to review them anytime.
-
Krisp Transcribes Meetings with Exceptional Accuracy
Krisp’s AI Meeting Transcription feature transcribes online meetings in real time and with 96% accuracy. Krisp’s stellar speaker recognition lets you store your notes in excellent quality and focus on the discussions instead of taking notes manually.
-
Krisp Provides Error-Free Summaries
The Krisp AI Meeting Assistant not only records and transcribes online meetings but also summarizes key points and action items. You can avoid missing critical discussion details thanks to Krisp’s AI Meeting Notes and Summaries feature. Moreover, you can quickly prioritize tasks and post-meeting actions, boosting overall productivity.
How to Integrate the Krisp AI Meeting Assistant with Zoom
Here is how to set up Krisp with Zoom:
- Download and Install Krisp: Download Krisp from ai and set it up on your computer.
- Open Zoom Settings: Launch Zoom and go to “Settings.”
- Configure Audio: Change the microphone and the speaker to Krisp under the “Audio” tab.
- Start a Meeting: Your Zoom meeting will now use Krisp’s noise cancellation, ensuring clear communication without background noise.
The Krisp AI Meeting Assistant is compatible with WinOS u MacOS and works well with videoconferencing apps like Zoom, Goole Meet, and Microsoft Teams. Today, the Krisp Meeting Assistant processes 75+ billion minutes of voice conversations monthly.
Final Word
Managing Zoom meetings can be easy and stress-free by mastering key features and using tools like Krisp. Whether hosting a team meeting, teaching, or socializing with friends, following tips like how to join a Zoom meeting and configure audio and video is essential.
Importantly, it’s critical to know how to use AI tools like the Krisp AI Meeting Assistant with Zoom to create an engaging and efficient experience. Krisp removes distractions, records meetings, and provides exceptionally accurate meeting notes and summaries.
Frequently Asked Questions
How Do I Join a Zoom Meeting for the First Time?
To join your first Zoom meeting, open the meeting link provided by the host. You’ll be directed to the Zoom app or website. Once there, enter the meeting, adjust audio/video settings, and join without a Zoom account.
Do I Need to Install Zoom to Join a Meeting?
No, you don’t need to install Zoom. If you don’t have the app, you can join via your web browser by clicking the meeting link and selecting “Join from your browser.” However, installing the app provides a smoother experience.
Moreover, the Krisp Meeting Assistant further enhances your Zoom experiences through excellent Noise Cancellation, crystal-clear Meeting Recording, and exceptionally accurate Meeting Notes and Summaries.
How Do I Join a Meeting With Zoom Link?
Click on the meeting link sent by the host. This will automatically open Zoom or prompt you to download the app. Follow the on-screen instructions, adjust settings, and join the meeting directly without entering a Meeting ID.
How Do I Join a Zoom Meeting by Meeting ID?
Open Zoom, click “Join,” and submit the Meeting ID received from the host. You’ll be prompted to enter a passcode (if required). Then, adjust your video and audio settings before joining the meeting.
When using Krisp, change the microphone and speaker to Krisp before joining the meeting.
How Do I Invite a Zoom Meeting?
Start your Zoom meeting and click the “Invite” button in the control panel. From there, copy the meeting link or send invitations via email, messaging apps, or Zoom’s contact list feature for easy access to participants.