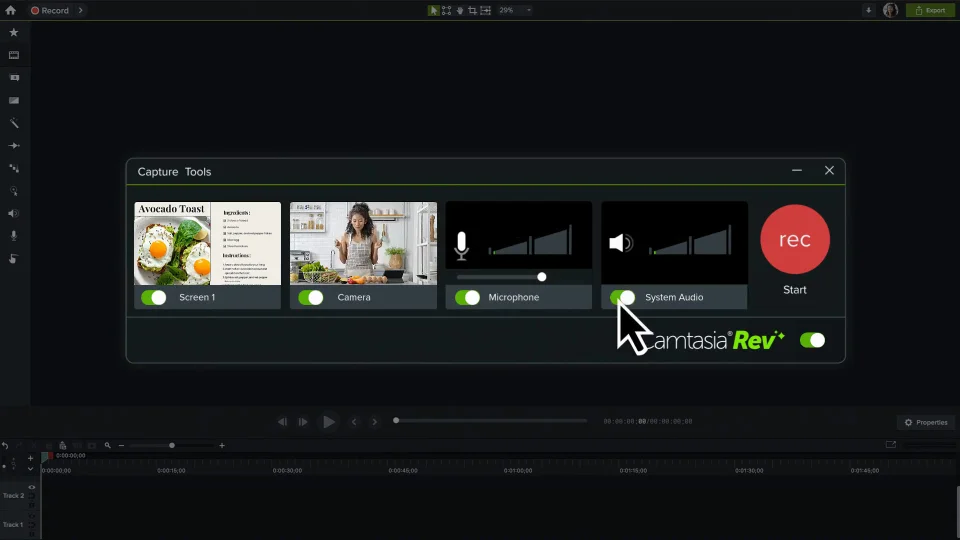
Screen recording tools have become super useful for everyone, from professionals and teachers to gamers and content creators. As AI reshapes how we work, live, and play, it’s no surprise that it’s also powering many of our technology solutions, making high-tech tools like best recording software mainstream must-haves. Thanks to AI these tools are now smarter and easier to use than ever. They can do cool things like edit your videos in real-time, add subtitles automatically, and even give you helpful suggestions to save time and effort.
In this article, we’ll show you the best recording software of 2024. We’ll look at what makes each one special and how they can help you create amazing recordings. Whether you’re making tutorials, working with a team, or just saving important moments, these tools can make your life so much easier. Let’s explore the options and find the right one for you!
What Should You Look for in the Best Recording Software?
When choosing the best recording software, understanding your priorities is essential to ensure a seamless and productive experience. The ideal software combines core functionality and quality, offering high-grade recording, user-friendly interfaces, and powerful editing tools that transform raw material into polished results. Equally important is technical compatibility and customization, which guarantees smooth integration with your system, hardware, and workflows while providing the flexibility to tailor settings to your unique needs. Finally, consider efficiency, accessibility, and support, as features like file management, cost-effectiveness, and responsive customer support ensure long-term satisfaction and ease of use. Together, these categories form the foundation of a well-rounded and dependable recording solution.
1. Core Features for Functionality and Quality
- User Interface and Ease of Use: Drag-and-drop functionality, clear menus, and logical workflows ensure you can start recording and editing without spending hours deciphering the software.
- Recording Quality: High-quality recordings ensure the final output is professional and enjoyable for listeners or viewers. Support for high bitrates, sample rates (e.g., 24-bit/192kHz for audio), and video resolutions (e.g., 1080p or 4K). Also, look for features that minimize distortion or signal degradation during recording.
- Editing Tools: Editing enhances raw recordings by fixing mistakes, adding effects, or improving sound clarity. For audio, prioritize features like noise reduction, EQ, compression, multi-track editing, and pitch correction to ensure clear and professional sound. For video, best recording software includes trimming, cutting, adding transitions, color grading, and text overlays to create polished visuals. Advanced tools such as automation, dynamic range control, and layering capabilities are crucial for handling complex projects with precision and creativity.
2. Technical Compatibility and Customization
- Compatibility: Software incompatibility with your system can lead to frustrating delays and workarounds. Make sure the software is compatible with your operating system, whether you use Windows, macOS, or Linux, for seamless functionality. Verify that it supports your hardware, including microphones, cameras, and external devices like audio interfaces. Additionally, choose software that handles a wide range of audio and video file formats, such as WAV, MP3, MP4, and MOV, to ensure versatility.
- Customization Options: Options to tweak bitrates, resolution, compression levels, and codec settings. Look for custom presets or templates for repeated tasks while choosing the best recording software.
- Integrations and Add-Ons: Seamless integration with other tools can save time and enhance your workflow. Look for the best recording software that supports VST or AU plugins to enhance audio or video quality with advanced effects and tools. Ensure it integrates seamlessly with third-party platforms like Zoom, OBS, or DAWs such as Ableton Live or Pro Tools for improved workflow. Additionally, choose software with cloud service integration, enabling direct uploads to platforms like Google Drive or Dropbox for easy file management and sharing.
- Real-Time Features: For live environments, real-time capabilities ensure smooth and accurate recordings without post-production delays. Choose software with real-time monitoring to keep track of audio and video levels as you record for better accuracy. Opt for the best recording software that allow live application of EQ, filters, or visual overlays to enhance recordings instantly. Real-time transcription is also a valuable feature, especially for meetings or lectures, as it simplifies note-taking and documentation.
3. Efficiency, Accessibility, and Support
- Storage and File Management: Select software with built-in file organization features, allowing you to sort files by date, type, or project for easy access. Look for seamless integration with cloud storage services to enable automatic backups and safeguard your work. Additionally, prioritize efficient compression capabilities to manage storage space while maintaining high-quality recordings.
- Cost and Licensing: When considering paid software, compare subscription plans to one-time payment models to determine the most cost-effective solution for your needs. Take advantage of free trials to test features before committing, and be aware of potential extra costs like paid plugins or updates to avoid unexpected expenses.
- Support and Community: Choose the best recording software with responsive customer support teams to ensure prompt assistance with technical issues. Comprehensive documentation, including tutorials, user guides, and FAQs, is essential for learning and troubleshooting effectively. Additionally, active online communities, such as forums, YouTube tutorials, or Reddit groups, provide valuable insights and shared solutions from experienced users.
Top AI-Powered Screen Recording Tools in 2024
Finding the best recording software can be complicated. The right software not only enhances the quality of your recordings but also streamlines your workflow with intuitive tools, seamless compatibility, and essential customization options. In this guide, we’ll explore the best recording software options that cater to diverse needs and budgets, helping you find the perfect fit for your projects.
1. Krisp
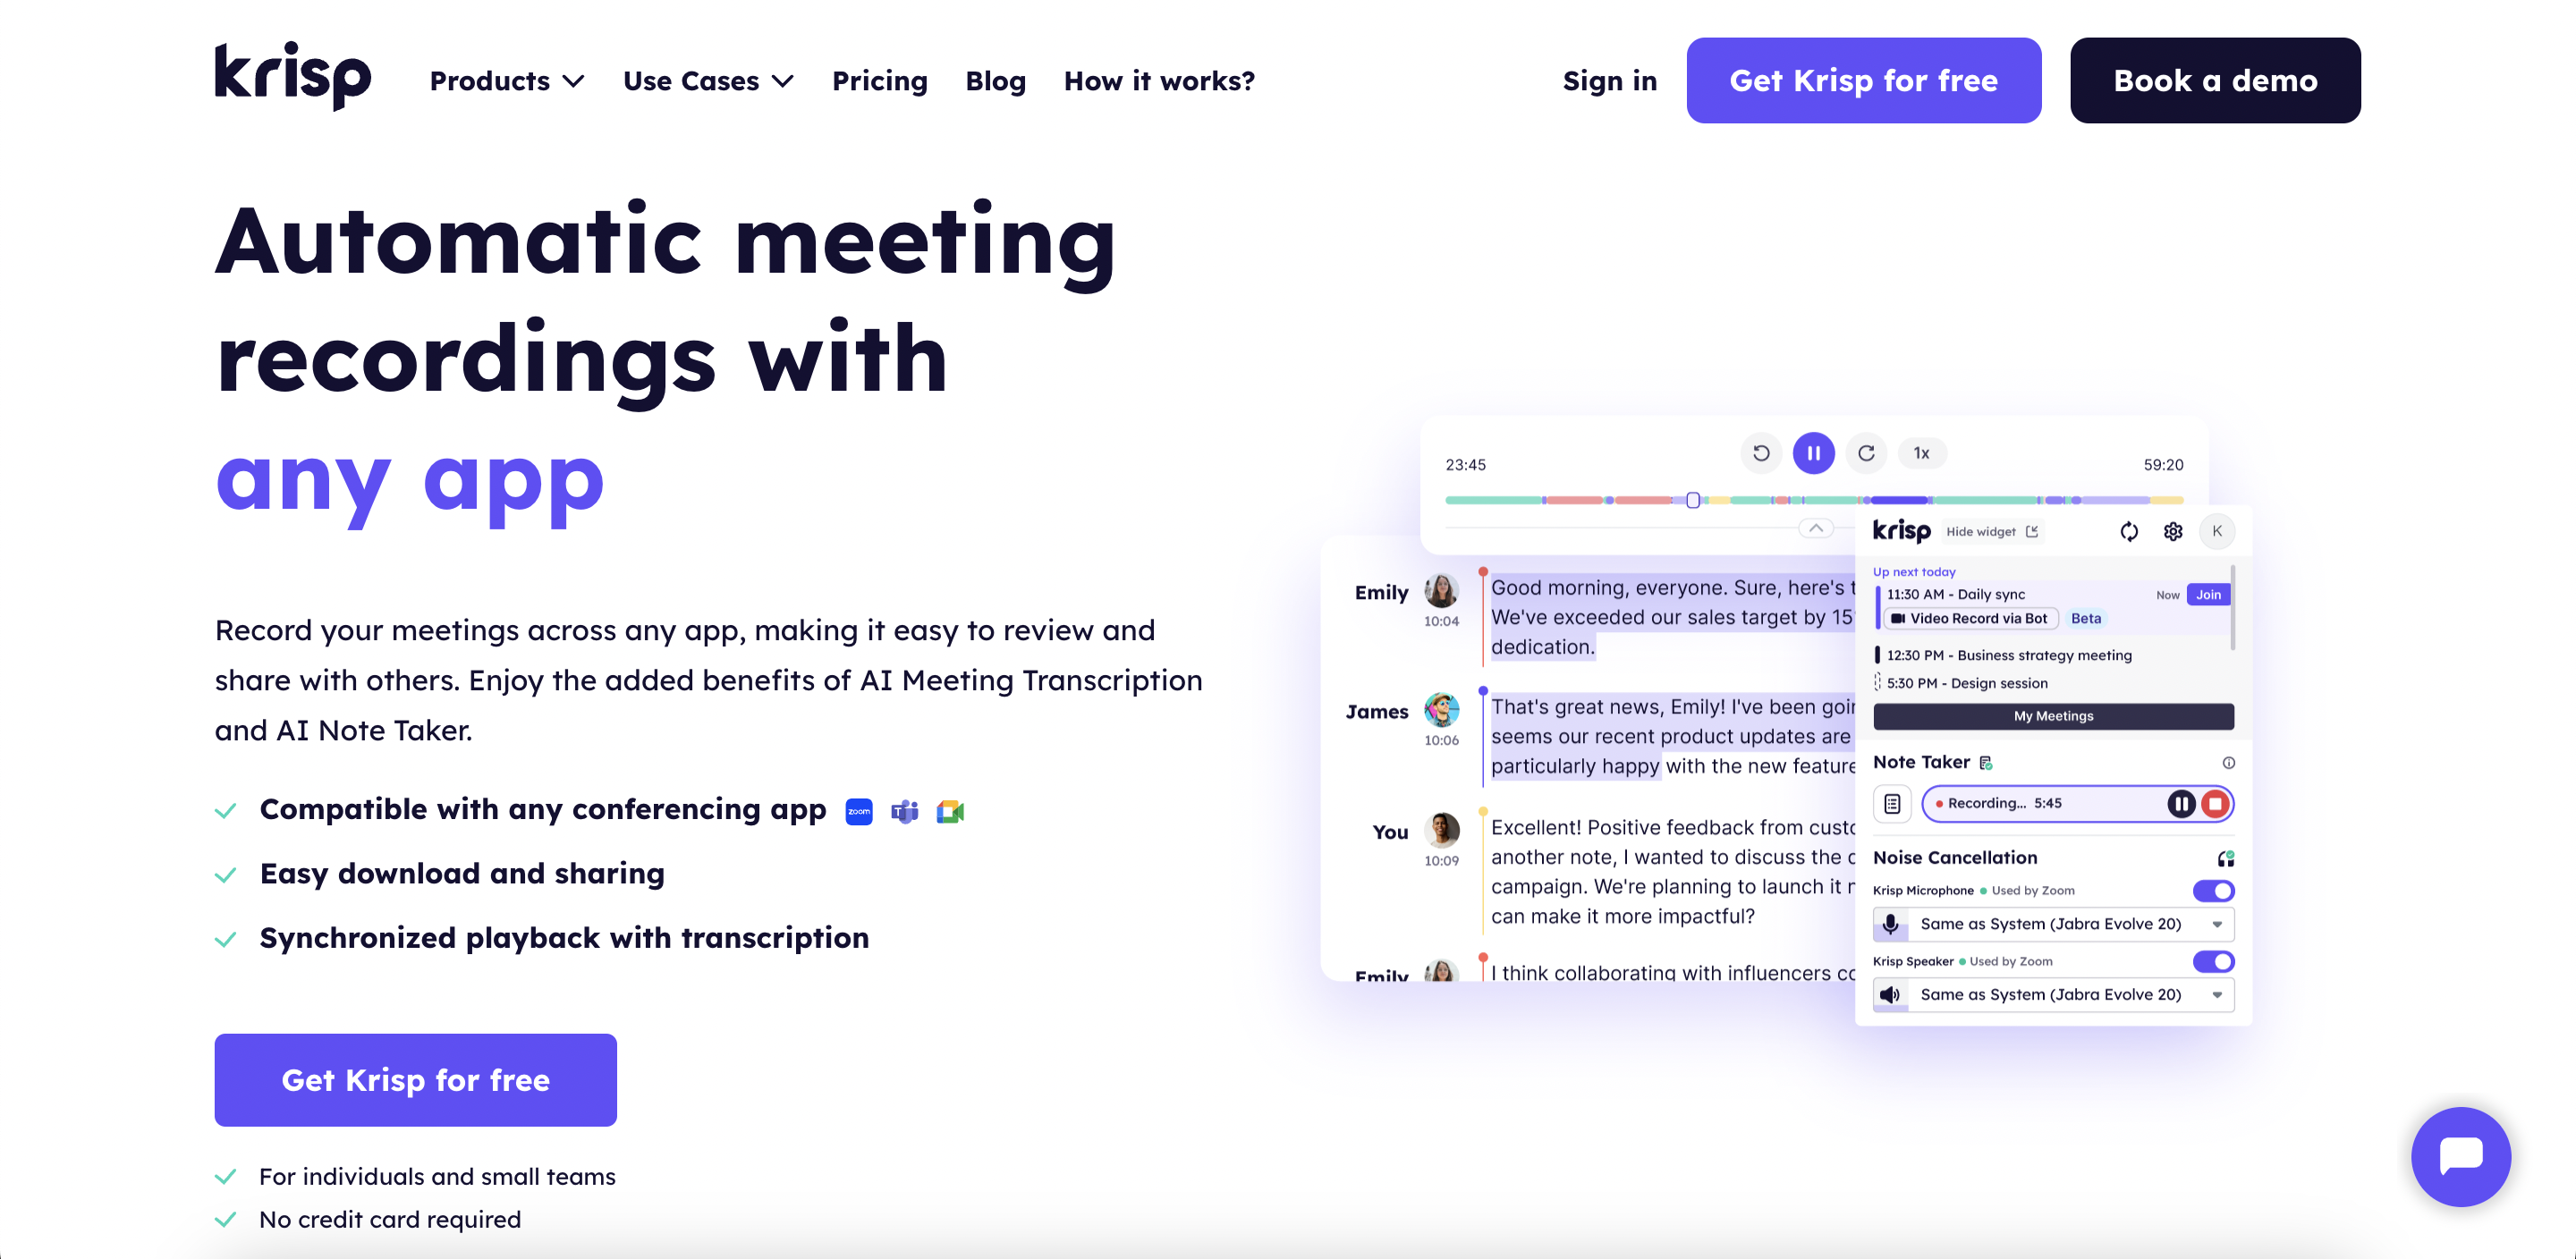
Krisp stands out as one of the best softwares for screen recording, thanks to its combination of cutting-edge features and user-friendly design. It excels in core functionality and quality, offering high-definition screen recording with crystal-clear audio capture, enhanced by its AI-powered noise cancellation. This ensures your recordings are professional and free from background distractions, making it ideal for online meetings, tutorials, or presentations. Its technical compatibility and customization further solidify its position. Krisp integrates seamlessly with popular platforms like Zoom, Microsoft Teams, and Google Meet, ensuring a smooth workflow without additional setup hassles. It supports multiple operating systems and provides customization options to tweak audio and video settings, allowing users to achieve the best results based on their unique requirements.
Krisp prioritizes efficiency, accessibility, and support. Its simple, intuitive interface allows you to start recording in just a few clicks, while its cloud integration makes managing and sharing recordings effortless. With responsive customer support and a wealth of tutorials, Krisp ensures users can resolve issues quickly and make the most of its features. Combining innovation, compatibility, and reliability, Krisp emerges as a top choice for anyone seeking a high-quality screen recording solution.
Key Features:
- Capture critical visual details alongside crystal-clear audio during your meetings.
- Perfect for client presentations, team collaborations, and post-meeting reviews.
- Operates seamlessly without bots, ensuring no interruptions.
Why Use Screen Recording?
- Save important slides, workflows, and visual notes for future reference.
- Streamline collaboration with recorded whiteboard sessions and visual brainstorming
- Revisit decisions and shared content with full meeting recordings.
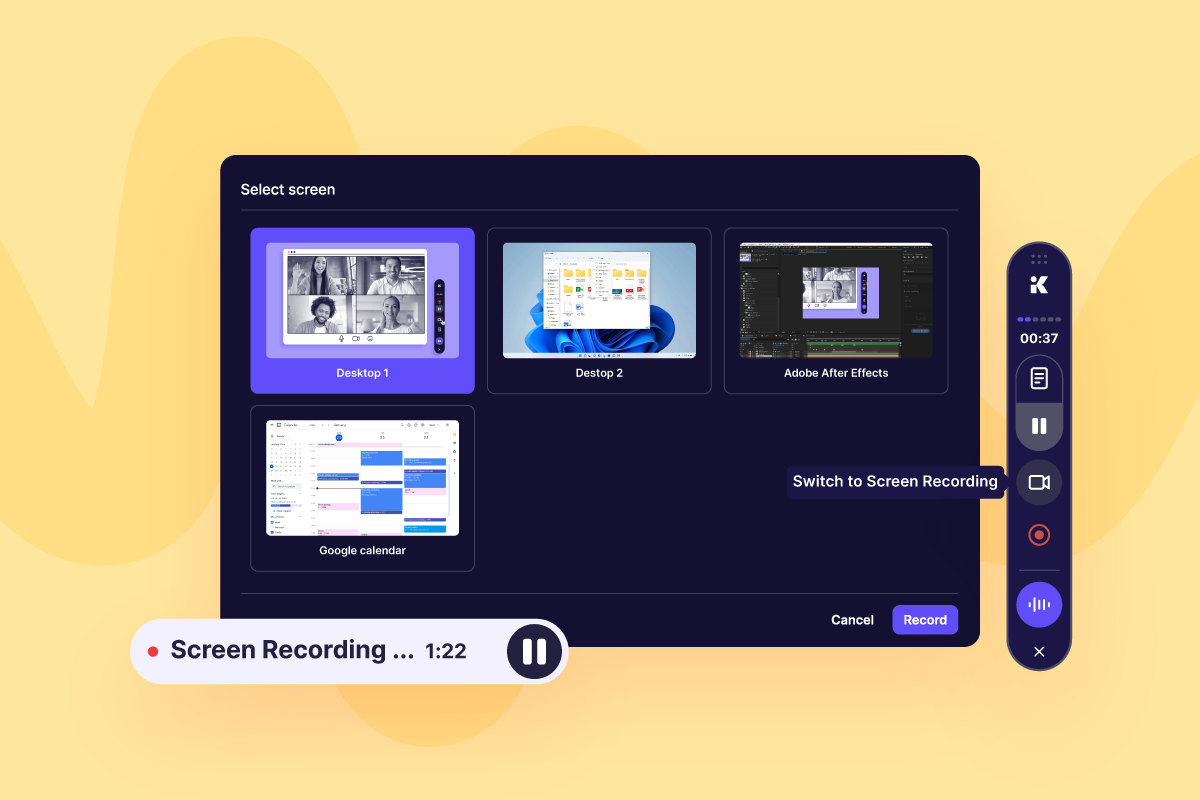
- Unlike other tools, Krisp’s recording is integrated directly into the app for a smoother experience.
- Manage your recordings seamlessly with pause and resume options.
How It Works:
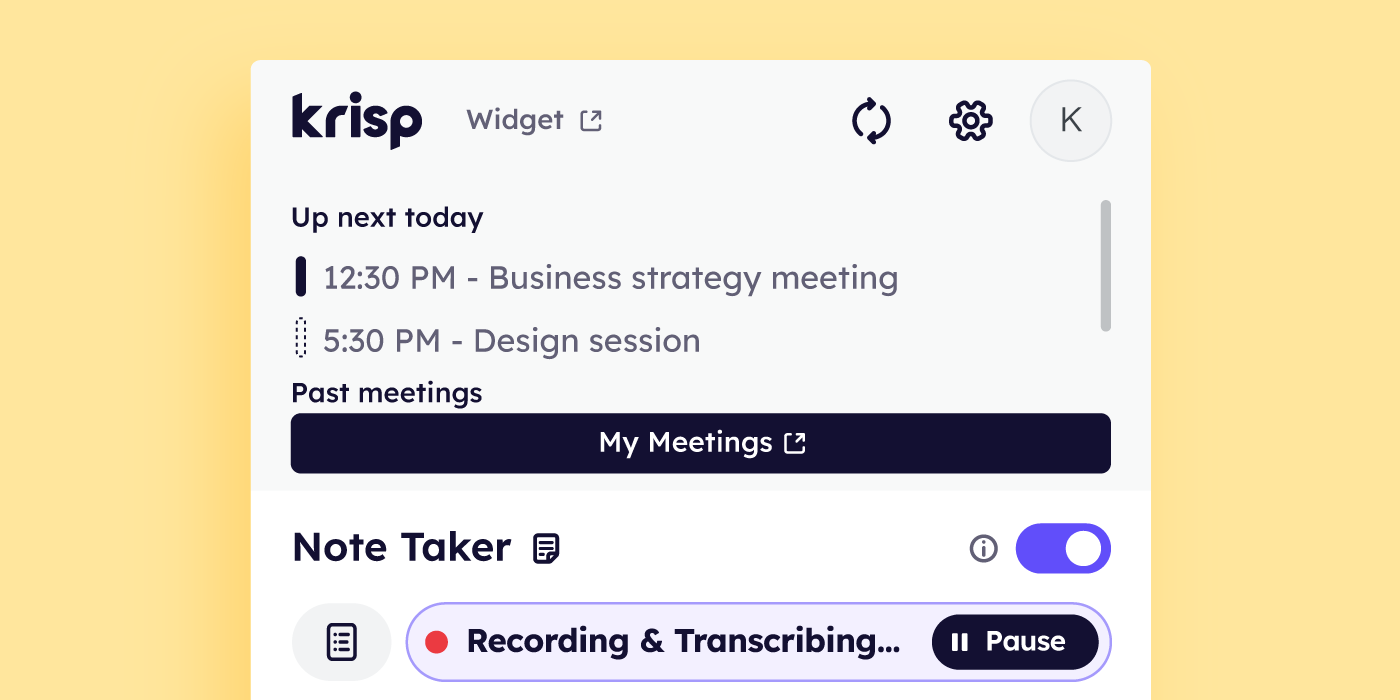
- Activate Recording:
Enable Transcribe or Record Audio mode in the Krisp app.
- Start Screen Recording:
Begin recording directly through the app or widget, no bots needed.
- Pause and Resume:
Pause and resume the recording anytime during the meeting without missing a beat.
Availability:
- Who Can Use It: Available for Krisp and Business users now.
- Get Started: Visit our Help Center for a step-by-step guide.
2. Screencast-O-Matic
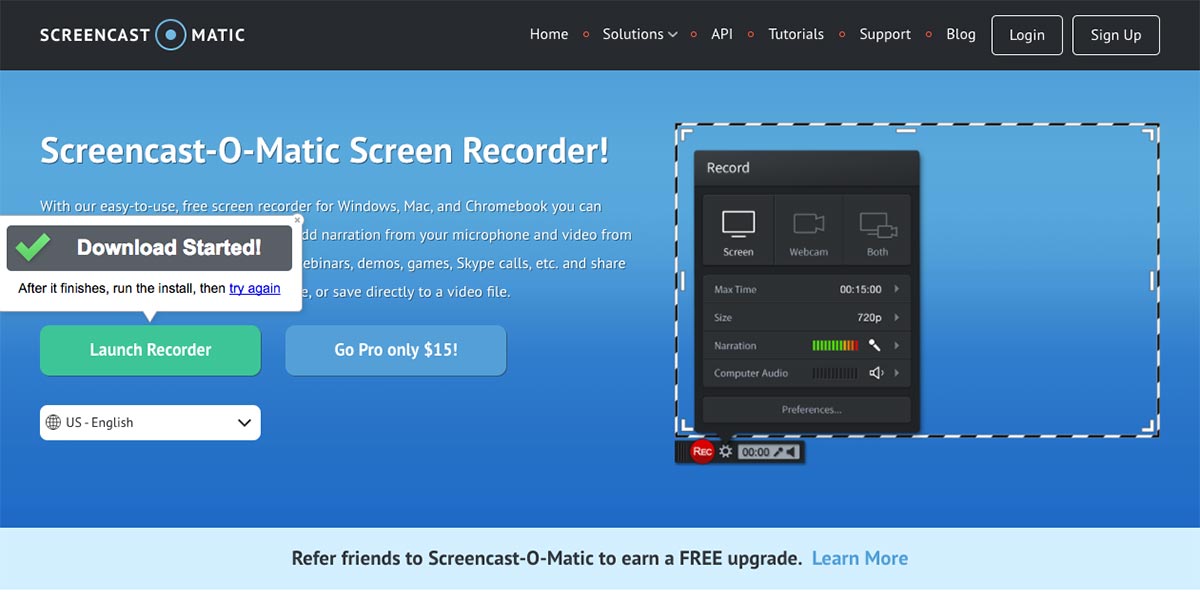
Screencast-O-Matic offers a lightweight solution for recording screens and webcams. It allows users to narrate their recordings and add simple annotations. However, the free version has notable limitations, including a watermark on all outputs and a 15-minute recording cap. Its editing tools are minimal, and it doesn’t excel in handling audio, often leaving background noise untreated.
Key Features:
- Easily record your screen and webcam simultaneously for simple tutorials or presentations.
- Add voice narration to guide your audience through key points during the recording.
- Annotate recordings with text, shapes, or highlights for added clarity.
- Basic video trimming lets you remove mistakes, though editing options are minimal.
Why Use Screencast-O-Matic?
- Capture quick demos or instructions to share with teammates or clients.
- Save time with a straightforward interface designed for beginners.
- Perfect for casual use, like recording a software bug or creating a short tutorial.
- Watermarked outputs are a reminder to upgrade for higher-quality results.
How It Works:
- Launch the app, choose your screen area, and hit record.
- Speak into your microphone to narrate your video while recording.
- Highlight key sections or add simple text overlays.
- Save your file or share it directly, keeping in mind free version limitations.
Availability:
- Accessible on Windows, macOS, and Chromebooks for users seeking a lightweight tool.
- Upgrade to unlock extended recording time, watermark removal, and basic editing features.
3. Bandicam
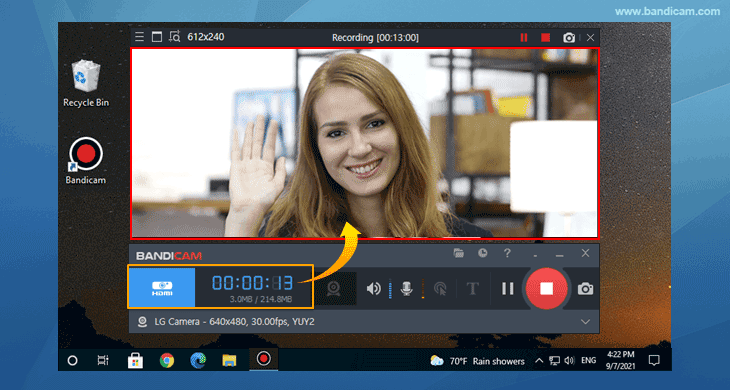
Bandicam is primarily known for its ability to record gameplay, screens, and webcams in high resolution, up to 4K. It supports DirectX and OpenGL, making it a go-to for gamers. However, its interface is overly basic, and the free version restricts recordings to 10 minutes while watermarking all outputs. It also lacks integrated editing tools, requiring users to use third-party software for post-production.
Key Features:
- High-definition screen recording for capturing gameplay, tutorials, or presentations.
- Optimized for recording graphics-intensive applications using DirectX and OpenGL.
- Compresses videos during recording to save storage space, though it may sacrifice quality.
- Simple interface makes it easy to start recording immediately.
Why Use Bandicam?
- Create quick gameplay recordings or step-by-step software demos without a steep learning curve.
- The compressed file sizes are convenient for sharing or storage.
- A good fit for gamers wanting basic features without unnecessary extras.
- Free version adds a watermark, making it ideal for non-professional use.
How It Works:
- Choose Screen Recording, Game Recording, or Device Recording mode.
- Set the recording area and quality preferences before starting.
- Begin capturing your screen or gameplay, then export files in popular formats.
Availability:
- Only available for Windows users, with a one-time license fee to unlock full features.
4. Camtasia
Camtasia is an all-in-one screen recording and video editing tool that allows users to create polished content. It provides built-in effects, transitions, and annotations to enhance recordings. While its editing suite is comprehensive, it can be overwhelming for beginners and doesn’t address real-time audio issues, such as background noise or uneven sound levels. Its focus on post-production means it’s better suited for static projects rather than dynamic live recordings.
Key Features:
- Record your screen and webcam with integrated editing features for a polished final product.
- Add effects, transitions, and captions to make videos more engaging.
- Customize videos with multi-layer editing and drag-and-drop functionality.
- Export in high resolutions suitable for professional presentations or tutorials.
Why Use Camtasia?
- Create training videos, walkthroughs, or tutorials with an all-in-one tool.
- Perfect for users who want to combine screen recording and video editing in one software.
- The variety of effects makes it suitable for semi-professional video creation.
- The high price point makes it less appealing for casual users or quick projects.
How It Works:
- Select your recording area, start recording, and capture visuals and audio.
- Use the timeline editor to trim, add effects, or insert transitions.
- Polish your video and save it in your preferred format.
Availability:
- Works on Windows and macOS, with a costly one-time license for full functionality.
5. Snagit
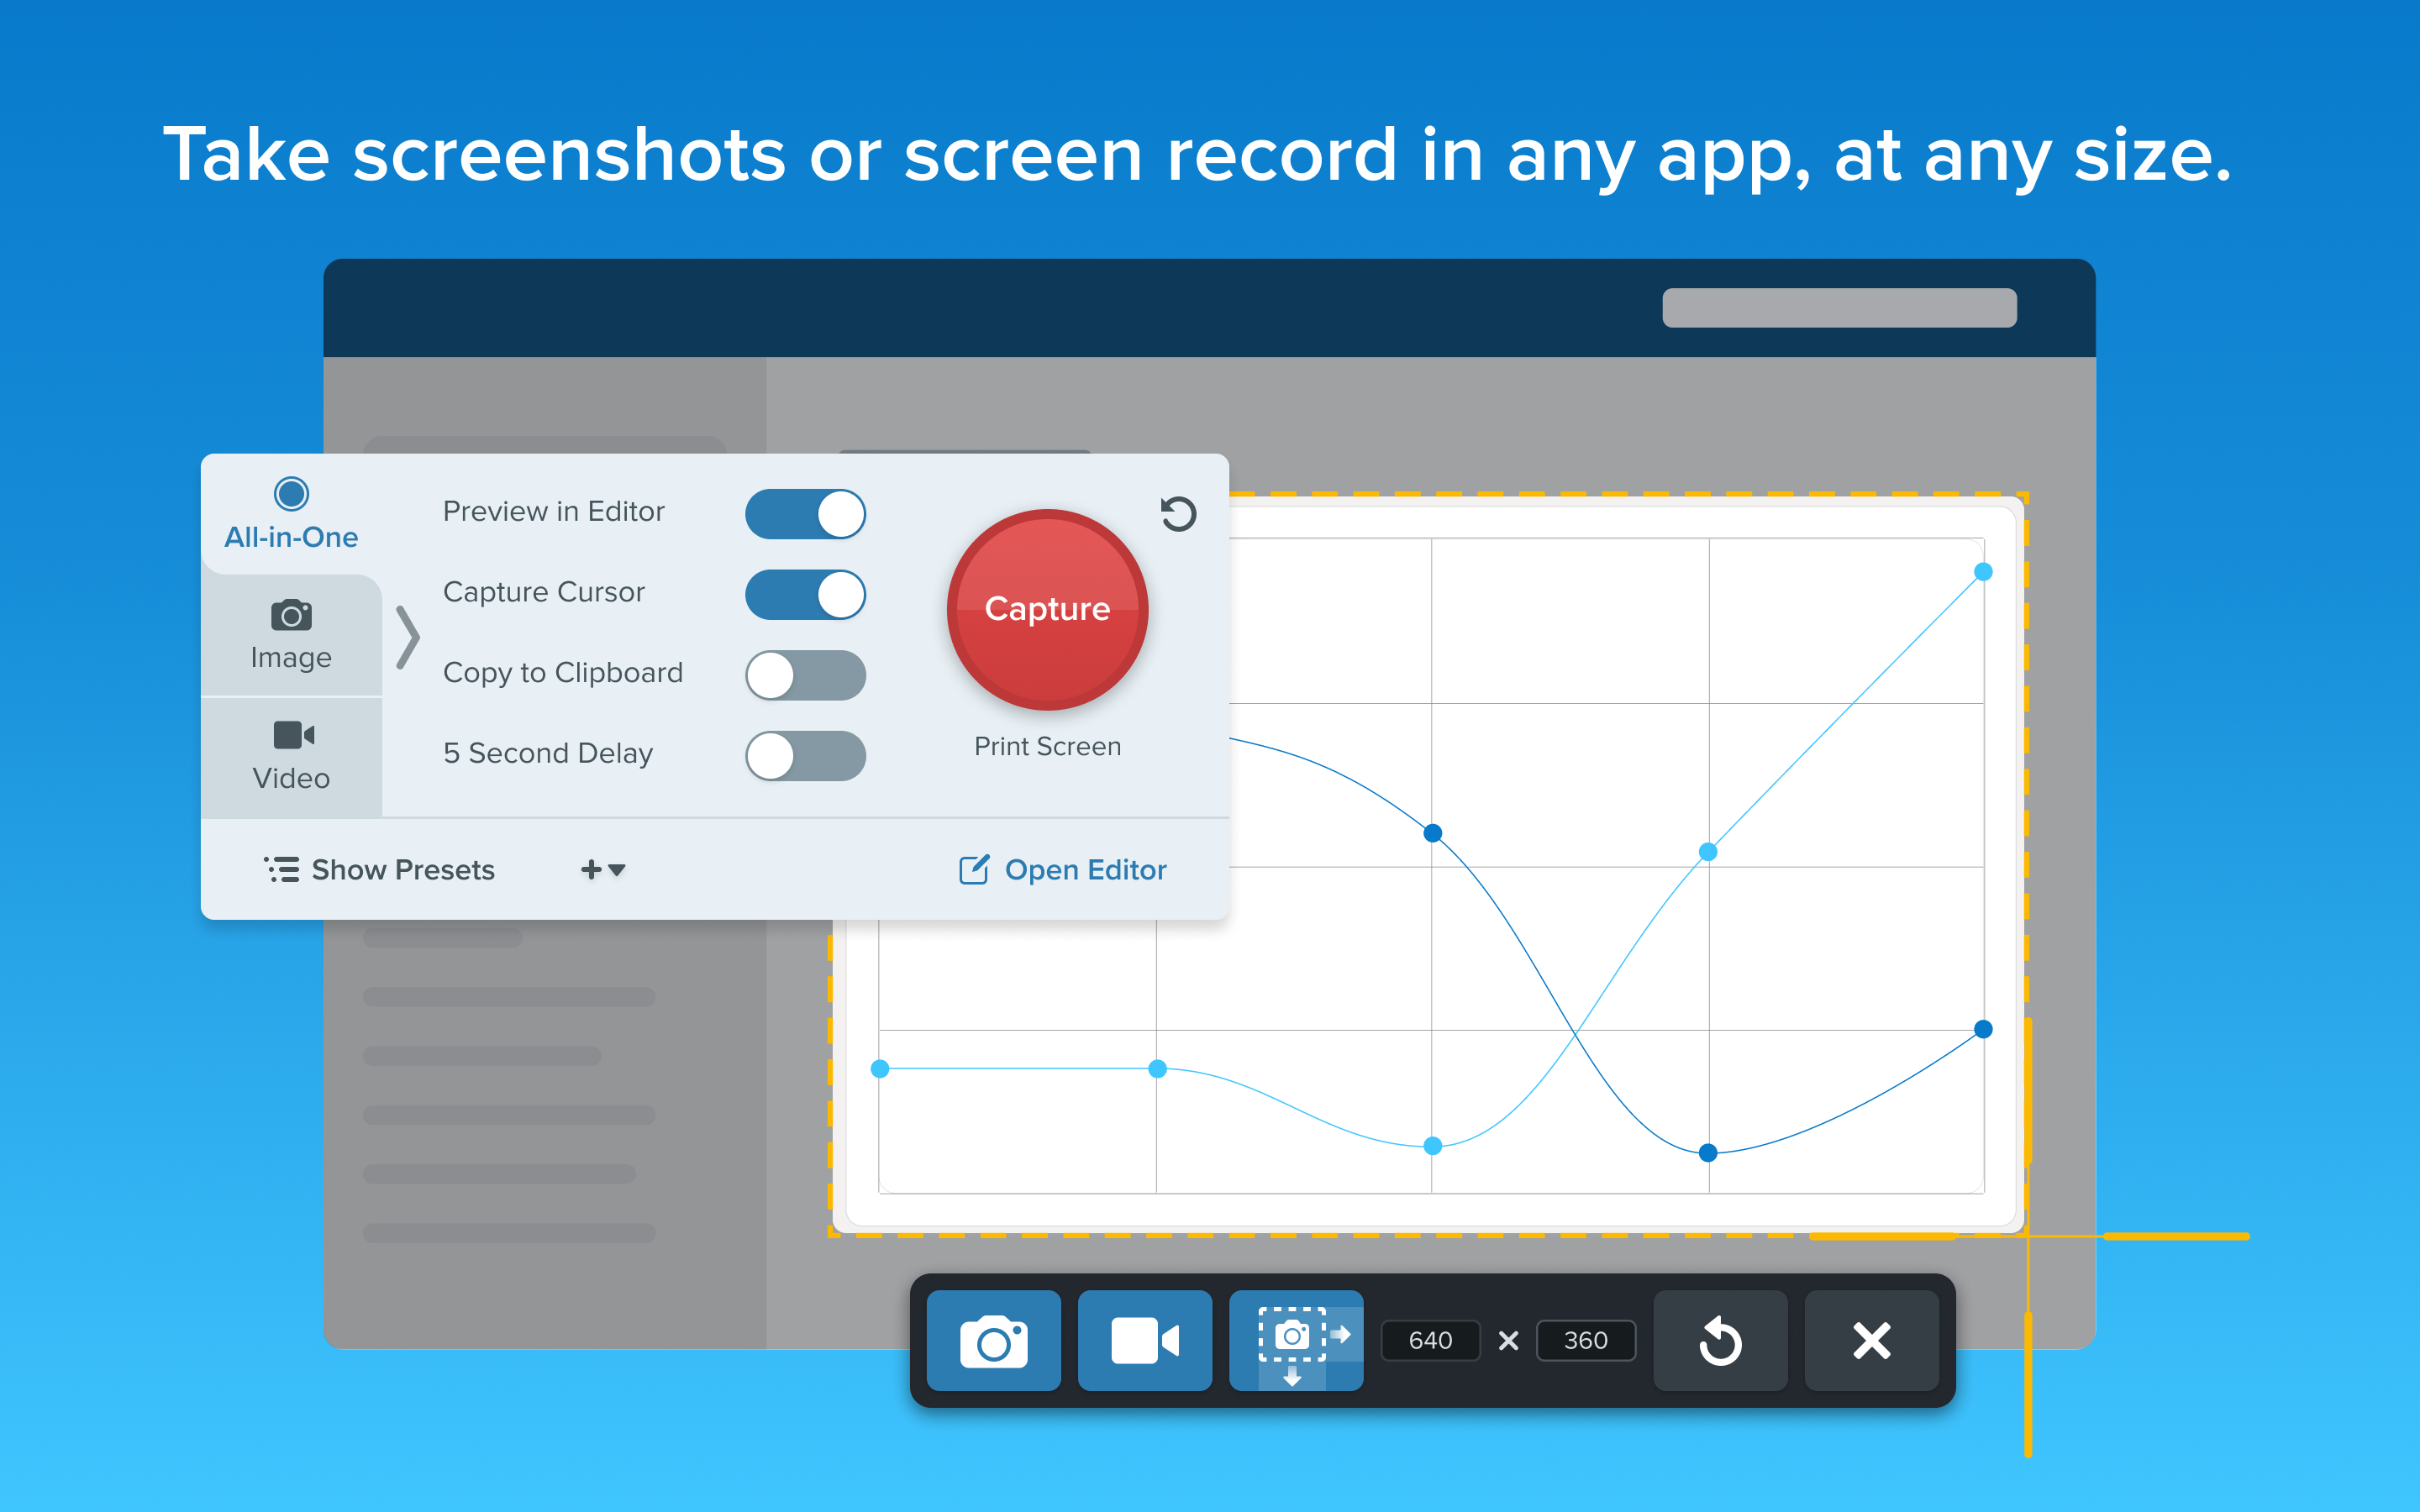
Snagit is primarily geared toward quick screen captures, with basic video recording capabilities. Its straightforward interface makes it accessible, but it lacks robust features for audio processing or advanced video editing. While it allows for annotations and simple trimming, it falls short when compared to other tools that offer multi-layer editing or audio filtering.
Key Features:
- Capture static screenshots or record your screen for quick demonstrations.
- Annotate visuals with arrows, text, and shapes for clearer communication.
- Minimal video editing options allow basic trimming but lack depth for complex projects.
- Quick-access toolbar helps users capture content on the fly.
Why Use Snagit?
- Ideal for creating short how-to clips or annotating screenshots.
- A go-to tool for educators or professionals needing simple visual explanations.
- Easy to use, but its simplicity may limit more advanced users.
- Minimal focus on audio or visual refinement for professional recordings.
How It Works:
- Choose between screenshot or video recording mode.
- Add quick notes, arrows, or highlights to your captures.
- Export and share your files directly through integrated platforms.
Availability:
- Available for Windows and macOS with a one-time purchase, plus optional upgrade fees.
6. Icecream Screen Recorder

Icecream Screen Recorder offers essential recording features, such as the ability to capture specific screen areas, annotate during recording, and export in common formats. While it includes basic editing, like trimming and cutting, it doesn’t offer advanced features for enhancing video or audio quality. The free version includes watermarks and a time limit, and even the paid version lacks features found in more premium tools.
Key Features:
- Record screen, webcam, or a specific region with straightforward tools.
- Basic editing includes trimming and adding annotations to recordings.
- Export videos in common formats like MP4, though advanced customization is absent.
- Limited free version imposes watermarks and time restrictions on recordings.
Why Use an Icecream Screen Recorder?
- A simple option for creating instructional videos or recording webinars.
- Works well for casual users or students needing quick screen captures.
- The interface is easy to navigate, though it lacks advanced functionality.
- Better suited for lightweight tasks rather than professional or detailed projects.
How It Works:
- Define the recording area on your screen and adjust settings.
- Capture your content and add text or shapes in real-time.
- Export the recording to a file or share directly, keeping free version limits in mind.
Availability:
- Compatible with Windows, macOS, and Android, with a paid version unlocking more features.
How to Choose the Best Recording Software for Your Needs?
Selecting the right screen recording software depends on your goals, technical expertise, and the specific features you value. Here are some key factors to consider when making your decision:
- Assess Audio Quality: Clear audio can make or break your recordings, especially for tutorials or presentations. Choose software that records system sound and microphone inputs clearly, and ideally includes noise cancellation or audio enhancement.
- Stay Within Your Budget: Unlike other tools, Krisp’s recording feature is seamlessly integrated without additional hidden costs for extra tools or features. It offers value for money with its focus on professional-grade functionality within an accessible subscription model.
- Built-in Editing Capabilities: While Krisp focuses on recording excellence, its simplicity makes it easy to pause, resume, and manage recordings. These features allow users to create seamless, distraction-free content that’s ready to share or refine externally.
- System Resources: If you’re using an older computer, look for lightweight tools that won’t slow down your system during recording.
- Ease of Use: Beginners benefit from intuitive interfaces and tools that simplify the recording and editing process. Avoid overly complex tools unless you’re comfortable with a learning curve.
- Trusted by Professionals: Krisp is recognized by remote teams, educators, and business professionals for its ability to handle dynamic meeting environments. Its recording tool integrates seamlessly into workflows, making it a trusted choice for those who value clarity and efficiency.
Choosing the best screen recording software is about aligning features with your specific needs. Krisp is more than just a screen recording tool; it’s an all-in-one solution for capturing critical moments with unparalleled audio clarity and effortless usability. Its focus on noise-free audio, intuitive recording options, and seamless integration make it the best choice for professionals and anyone serious about quality.


