Microsoft Teams has become an indispensable tool in modern work environments. It supports a wide range of activities, including meetings, webinars, team-building exercises, brainstorming sessions, and more. Microsoft Teams is a game-changer for remote workers, making virtual collaboration seamless and efficient. One feature that enhances Teams experience is its integration with Krisp.
Why choose Krisp? Because it’s the ultimate noise-cancellation wizard! With Krisp, every meeting is filtered through its advanced noise-cancellation technology, eliminating all background noise—from the hum of traffic to the faintest rustles. This ensures crystal-clear communication, even in less-than-ideal environments. But you may wonder, “How to screen record on Teams?” After all, some meetings contain critical information that’s too important to forget. This article will explore how to screen record on Teams and much more.
All You Need to Know About Microsoft Teams
There’s so much you might not know about Microsoft Teams, even if you use it every day. Microsoft Teams, as the name suggests, is a collaboration platform developed by Microsoft. It’s an excellent tool for both in-office and remote work settings, enjoyed by millions of users worldwide. By combining chat functionality, video conferencing, file sharing, and integration with Microsoft 365 applications, Microsoft Teams brings all your collaboration needs into one convenient platform.
Key Features of Microsoft Teams
Chat and Messaging
Microsoft Teams isn’t just for virtual calls, as many believe—it’s also an outstanding platform for messaging. With real-time messaging for individuals or groups, you can share emojis, GIFs, and files effortlessly. This feature is useful not only for professional communication but also for personal use, making it a versatile tool for staying connected.
Video and Audio Meetings
As you might expect, Teams excels at video and audio meetings. But did you know you can elevate your meetings to the next level with Krisp? By integrating Krisp, your meetings can become completely noiseless and distraction-free, offering a professional experience like no other. You can take advantage of Krisp’s incredible noise cancellation and other features with just one simple step.
Additionally, Teams includes useful features like screen sharing and customizable background effects, enhancing the overall meeting experience.
File Sharing and Collaboration
Microsoft Teams allows you to securely share files and collaborate on documents in real-time. Integrated apps like Word, Excel, and PowerPoint make it easy to work together on projects without switching between platforms.
Channels and Teams
Organize your workspace efficiently by creating dedicated channels for projects, departments, or specific topics. This feature helps you keep conversations and files in one place, ensuring that your team stays focused and productive.
How to Screen Record on Microsoft Teams (Using Built-in Features)
If you want to make a reference later or just share it with your absent team members, then you should learn how to screen record on Teams. Microsoft Teams offers built-in functionality for recording meetings. Here’s how to use it:
1. Start a Meeting
- Launch Microsoft Teams and start or join a meeting.
- Ensure you’re either the meeting organizer or have recording permissions set by the organizer.

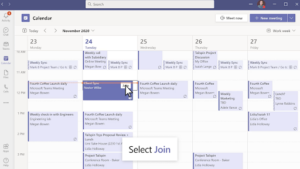
Source: Microsoft Teams
2. Begin the Recording
- During the meeting, click on the More Options menu (three dots) in the toolbar.
- Select Start Recording.

Source: Microsoft Teams
3. Notify Participants
- Teams automatically notifies all participants that the meeting is being recorded.
- Ensure you have consent from attendees, especially if required by law.
4. Stop and Save the Recording
- To end the recording, click on Stop Recording from the same menu.
- The recording is saved to your organization’s Microsoft Stream account or OneDrive, depending on your organization’s settings.
How to Screen Record on Teams by Yourself
Third-party screen recording tools are a great alternative if you need to record a Teams session without using the built-in feature or if you’re not in a meeting. Here’s how to do it:
1. Use Windows Game Bar (Windows Only)
The Windows Game Bar is a free, built-in tool for Windows users.
- Press Win + G to open the Game Bar.
- Select the Capture option.
- Click Record to start recording your Teams session.

Source: Microsoft Teams
2. Use QuickTime Player (Mac Users)
For Mac users, QuickTime Player offers easy screen recording.
- Open QuickTime Player.
- Click File > New Screen Recording.
- Select your screen area and start recording.

Source: Apple Support
3. Use Dedicated Tools Like Krisp
Krisp is one of the best tools for recording your meetings, seminars, and more. It allows you to record sessions across any app, making it easy to review and share recordings. Krisp stands out with its advanced features, which make it a top choice for recording:
- Noise Cancellation: Record meetings with Krisp’s super noise cancellation, ensuring clarity even in noisy environments.
- AI Meeting Transcription: Automatically transcribe your recorded meetings, making it easy to reference key points.
- AI Note Taker: Summarize meetings into concise, actionable notes.
- Enhanced Sharing: Save recordings effortlessly and share them with your team.
How to Use Krisp with Microsoft Teams for Screen Recording
As you know how to screen record on Teams, now it is time to make that experience even smoother and enjoyable with Krisp. Learning how to integrate Krisp with Microsoft Teams is essential to enhancing your Microsoft Teams meetings with Krisp’s top-notch features. The straightforward integration process can greatly improve your audio quality during meetings. Krisp’s advanced noise cancellation technology removes background noise and ensures your voice comes through clearly, making your Teams meetings more professional and distraction-free. Now, let’s learn how to integrate Krisp with Microsoft Teams:
Steps to Use Krisp with Microsoft Teams:
1. Download and Install Krisp
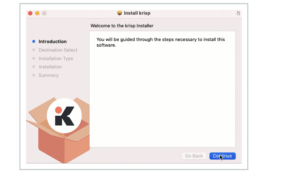
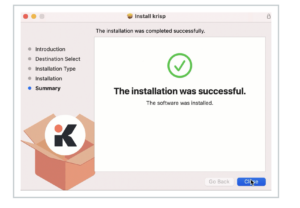
- Visit the Krisp website and download the compatible application with your operating system.
- Follow the installation instructions to set up Krisp on your device.


2. Set Krisp as Your Audio Input and Output Device
-
- Open the Krisp app and select your preferred microphone and speaker in the app’s settings.
- Krisp will act as a noise-filtering layer between your physical devices and Teams.
3. Configure Teams to Use Krisp
-
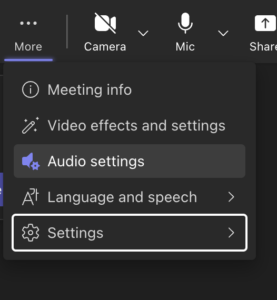
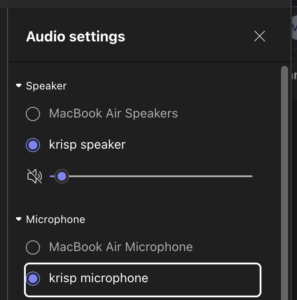
- Launch Microsoft Teams and go to Settings (click your profile picture and select Settings).
- Navigate to Devices in the left-hand menu.
- Under Microphone, select Krisp Microphone from the dropdown list.
- Under Speaker, select Krisp Speaker for optimal noise-free output.
4. Start Your Meeting with Noise Cancellation
-
- Once configured, join a Microsoft Teams meeting.
- Krisp will automatically filter out background noise from your audio and that of other participants (if you enable speaker noise cancellation).
Benefits of Using Krisp with Microsoft Teams
Krisp offers a host of benefits with its powerful features. The most significant advantage is the professional edge it provides. Background noise in your audio can detract from your professional image and demeanor, which may lead others to judge your skills unfairly.
While it’s not ideal to assess someone solely based on audio quality, the reality is that many people do. To stay on the safe side, having clear audio and video is essential. Here are some of the key benefits you’ll enjoy by simply downloading Krisp and integrating it with Microsoft Teams:
- Professional Audio Quality: Krisp ensures your voice remains crystal clear, even in noisy environments. This advantage applies to both you and your meeting participants, fostering effective communication.
- Distraction-Free Communication: By eliminating background noise for all participants, Krisp enhances focus and collaboration. Not only will you appear more professional, but you’ll also enjoy a distraction-free environment that positively impacts your professional growth.
- Easy Integration: Krisp integrates seamlessly with Microsoft Teams without the need for a complex setup or additional software, making it a hassle-free solution for enhanced meeting experiences.
Conclusion
Important discussions and meetings often need to be recorded for later reference or to share with other team members. That’s why Microsoft Teams’ screen recording feature is invaluable in any working environment. Whether you use Microsoft Teams’ built-in recording feature or rely on third-party tools like Krisp, understanding how to record effectively ensures you never miss a critical detail.
Microsoft Teams’ versatility as a collaboration platform, combined with Krisp’s powerful features, creates a seamless and professional experience for both in-office and remote workers. Krisp’s noise cancellation, AI Meeting Transcription, and AI Note Taker make it more than just a screen recording tool—it’s an all-in-one solution for elevating your virtual meetings.
Integrating Krisp with Microsoft Teams ensures your meetings are distraction-free, crystal clear, and easily accessible for review or sharing. Start exploring these tools today to transform how you manage and document your meetings, and make every conversation count!
FAQ
To screen record on Teams, use its built-in recording feature. Start or join a meeting, click on the More Options menu (three dots) in the toolbar, and select Start Recording. Ensure you have permission to record, as Teams notifies all participants when recording begins. The recording will be saved to your organization’s Microsoft Stream or OneDrive account.
To record a Teams meeting, follow these steps:
- Start or join the meeting.
- Open the More Options menu (three dots) on the meeting toolbar.
- Select Start Recording.
- Notify participants if needed (Teams automatically alerts them).
- Stop the recording when the meeting ends, and access it from Microsoft Stream or OneDrive.
Screen recording a Teams meeting without notifying participants is against Microsoft Teams’ policy and could violate privacy laws or organizational guidelines. Teams automatically notifies all participants when a recording starts. If you need to record, always inform attendees and obtain their consent.
To screen record a Teams meeting with audio on an iPhone:
- Open Settings > Control Center > Customize Controls, then add Screen Recording to your Control Center.
- Join the Teams meeting on your iPhone.
- Swipe down to open the Control Center and press the Screen Recording button.
- To capture audio, long-press the Screen Recording button, enable the microphone, and start recording.
- Stop the recording when finished, and find the video in your Photos app.
Note: Always ensure you have permission to record. Some apps may restrict audio recording due to privacy concerns.


