Webinars have become indispensable for businesses, educators, and thought leaders. They have allowed people from different spheres to communicate seamlessly, educate, and conduct brand outreach.
But what happens when you can’t make it to a live session or want to repurpose the content later? The answer is in recording your webinar.
This guide will walk you through how to record a webinar effectively, from preparation to post-production, ensuring you capture every valuable moment without missing a beat.
What Is The Point of Webinar Recordings?
Recording your webinars isn’t just about convenience. Recorded webinars are part of a powerful strategy that extends the reach and impact of your content. Here’s why it matters:
Audience Flexibility
Recorded webinars allow participants to watch at their convenience, helping you cater to audiences in different time zones or those with conflicting schedules.
Content Repurposing
A recorded session can be turned into multiple formats like blog posts, highlight videos, or podcasts, maximizing your content’s lifespan and utility.

Performance Analysis
Reviewing your recorded webinars helps you refine your presentation skills, adjust content for future sessions, and gather feedback from your audience for continuous improvement.
Things to Do Before You Record a Webinar
Before hitting the record button, ensure all the elements are lined up. Here are some critical things to prepare:
Plan Your Content
Outline the main topics and ensure your presentation is structured to engage your audience. Rehearsing beforehand helps smoothen your delivery.
Check Your Equipment
A good quality microphone, webcam, and a stable internet connection are essential for a professional recording. Test these in advance to avoid technical errors.
Choose The Right Platform
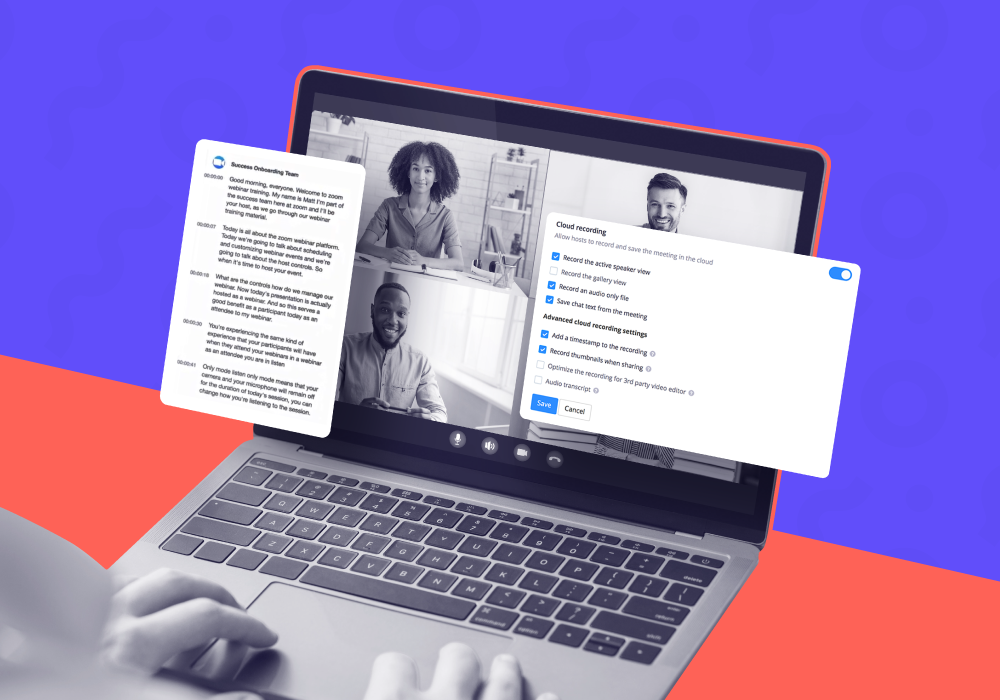
Some platforms like Zoom, Microsoft Teams, and Google Meet have built-in recording options. Ensure the chosen platform supports your recording needs, including file formats and quality.
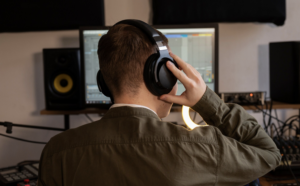
Set up The Right Audio Experience
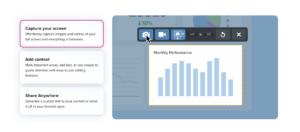
To ensure your recorded webinars sound professional, minimizing background noise is necessary. Krisp’s advanced noise cancellation technology filters out unwanted sounds during the live webinar and post-production, ensuring a clear, distraction-free audio experience.
This makes your recording more polished and engaging. In the visual below, you can see how it works:
Notify Your Audience
Finally, before recording a webinar, inform your attendees beforehand if you plan to share the webinar recording. This not only sets expectations but also ensures compliance with privacy standards.
Now that you’re good to go, we can discuss your options for recording webinars these days.
How to Record a Webinar—Your Options For 2024
Webinar recording methods have evolved, offering multiple options to suit different needs. Here’s a look at your top choices:
Built-in Platform Recording
Most webinar platforms, like Zoom and Webex, have built-in recording features that can save sessions directly to your local drive or the cloud. These options are straightforward and ideal for those who prefer an all-in-one solution.
Screen Recording Software
Tools like OBS Studio or Camtasia provide more control over the recording process, allowing for high-resolution video and audio capture, customization, and advanced editing options.
Third-Party Recording Solutions
For those seeking premium quality, some platforms offer professional-grade recording capabilities with options to invite guests, manage multiple tracks, and export recordings in various formats.
Necessary Tools For Supreme-Quality Recorded Webinars
Having the right tools in place is essential to achieve great-quality webinar recordings. A combination of quality equipment and reliable software ensures that your recordings look professional and capture the essence of your presentations.
Microphone And Webcam
Invest in a high-quality microphone and webcam to ensure your audio and video are clear and professional.
Lighting Equipment
Proper lighting can significantly enhance the visual quality of your recordings. Simple setups like ring lights can make a substantial difference.
How to Record a Webinar on Your Computer
Recording a webinar on your computer can vary slightly depending on whether you’re using Windows or a Mac. Still, both systems offer built-in tools and more advanced software options that make capturing your screen easy and effective.
Windows
One of the simplest ways to record on a Windows PC is by using the built-in Game Bar, designed primarily for gamers but perfectly capable of capturing webinars. To start, press the Windows key + G to open the Game Bar, then select the screen recording option. This straightforward method requires no additional downloads, making it great for quick captures.
Another option available on Windows is PowerPoint, which many people don’t realize has a screen recording feature. Simply navigate to the “Insert” tab and choose “Screen Recording.” This method is ideal for simple recordings, especially if you’re already working within PowerPoint or must simultaneously record slides and a presentation.
Mac
Mac users can take advantage of QuickTime Player, a versatile tool that is pre-installed on all Macs. QuickTime allows you to record your screen easily—open the application, select “New Screen Recording” from the File menu, and start capturing your webinar. It’s a user-friendly solution that doesn’t require any additional setup, making it perfect for quick recordings.
For those who need more control over their recording quality and settings, OBS Studio is a powerful free software that works well on Mac. With OBS, you can customize your video resolution, choose different audio inputs, and even set up multiple screens or camera angles if needed. It’s perfect for producing higher-quality recordings with more advanced features.
Windows and Mac offer built-in and advanced options to suit various recording needs, making capturing valuable webinar content directly from your computer easy.
Best Way to Record a Webinar on Android or iPhone
Mobile users can easily record webinars for free using built-in tools. Here are the steps that lead to recording your webinar on the phone:
For Android:
- Swipe down from the top of your screen to access the notification panel.
- Tap the Screen Record icon (you may need to add it to Quick Settings by tapping the Edit button).
- Select your recording settings, such as audio source (microphone, device audio, or both).
- Tap Start to begin recording before the webinar starts.
- To stop recording, swipe down again and tap the Stop button. Your recording will be saved in your gallery.
For iPhone:
- Open the Control Center by swiping down from the top-right corner (iPhone X or later) or up from the bottom (iPhone 8 or earlier).
- Tap the Screen Recording button and ensure that the microphone is enabled if you want to capture your voice.
- Wait for the three-second countdown and start recording your webinar.
- To stop, tap the red status bar at the top of the screen and select Stop. The recording will be saved to your Photos app.
These steps ensure that you can effortlessly capture webinars directly from your mobile device, keeping important content accessible whenever you need it.
How to Record a Webinar as an Attendee For Free
Recording a webinar as an attendee is possible, even without being the host. Whether for personal reference or to revisit valuable content later, here are some of the most effective tools and methods to capture webinars effortlessly.
Loom
Loom is a straightforward tool that lets you record your screen and audio. As an attendee, you can use Loom to capture important moments of a webinar right from your browser. With a few clicks, you’re recording, making it perfect for those who need a quick and easy solution without complicated setups. Its free plan allows you to capture brief segments, making it suitable for recording the most critical parts of any session.
Loom offers a free plan that allows you to record up to 25 videos, each limited to 5 minutes. It’s perfect for capturing brief segments of webinars but might not be suitable for full-length recordings without upgrading.
OBS Studio
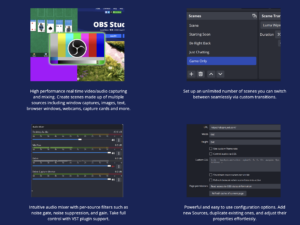
OBS Studio is an excellent choice for those who want more control and higher-quality recordings. While it’s a bit more advanced, OBS offers extensive customization options, such as setting your preferred resolution, audio quality, and screen capture area. OBS Studio can record webinars in HD, making it ideal if you plan to revisit the content for detailed analysis later.
OBS Studio is completely free and open-source, providing extensive customization options for high-quality recordings. It’s ideal for those needing control over settings like resolution and audio quality, making it a top choice for full webinar captures.
Snagit
Snagit might be your go-to if you’re looking for something simpler than OBS but still packed with features. It’s user-friendly and lets you capture your screen activities, including webinars, with just a few clicks. Snagit also has built-in editing tools, enabling you to trim the recording, annotate sections, and even extract screenshots from your captured video.
Snagit is not free but offers a trial period to explore its screen capture and editing features. Post-trial, it requires a one-time purchase, making it more suitable for users who need detailed video and screenshot capabilities beyond the trial period.
WebEx

WebEx is a robust choice for professional and high-quality webinar recording experience, particularly in corporate settings. Known for its reliable performance, WebEx offers built-in recording features that save your webinars to the cloud or your local drive. This flexibility makes it convenient for users to access and manage their recordings post-session.
WebEx does not provide a free recording option for attendees, but recordings can be done if the host allows it. It’s best suited for professional environments where recording permissions are granted, and it typically requires a subscription for full access to its recording tools.
These options cater to different needs, from completely free and customizable solutions like OBS Studio to brief, shareable recordings with Loom’s free plan.
Your Next Steps After Recording a Webinar
Recording a webinar is just the start; you can take several important steps to maximize the value of your content and make it more accessible and engaging. Here are some key actions to consider:
Edit And Improve The Recording
After recording, it’s essential to polish the content. Editing software like Camtasia or Adobe Premiere Pro can trim unnecessary parts, adjust audio levels, and add branding elements such as logos and captions. This makes your recording look more professional and ensures it aligns with your brand’s visual style.
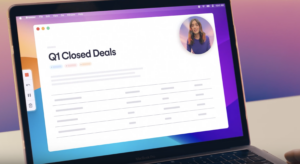
Transcribe And Summarize For Accessibility
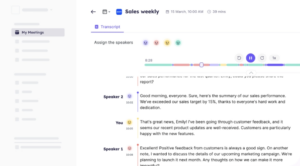
Providing a transcript of your webinar can make it accessible and more manageable for viewers to follow along, especially those with hearing impairments. Krisp’s AI-powered transcription feature automatically transcribes your recordings with 96% accuracy, allowing you to create precise notes, summaries, and even action items directly from the meeting.
Krisp reduces the manual effort required to convert spoken content into text, making your webinar more accessible and easier to repurpose into other formats like blog posts or social media snippets.
Share And Repurpose the Content
Once your webinar is edited and transcribed, distribute it wisely. Share the full recording on platforms like YouTube and your website, or use it as a gated resource on your blog to capture leads.
Thanks to Krisp’s ability to generate AI meeting summaries and action items, you can quickly create concise highlights or bite-sized videos to post on social media, maximizing the reach and impact of your content.
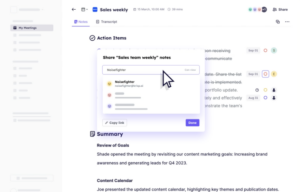
These steps refine your recorded webinar and transform it into versatile, valuable content that continues to work for your audience long after the live session ends. By using Krisp’s unique features, you streamline the post-recording process, making it more efficient and less labor-intensive.
Wrapping Up
Recording webinars not only preserves your content but extends its reach and utility. With the proper preparation, tools, and post-recording strategy, you can turn every webinar into a valuable asset that keeps working for you long after the live session ends.
Frequently Asked Questions
What's the best way to record a webinar?
The best way to record a webinar depends on your needs. For built-in simplicity, Zoom or Webex’s native recording options work well. For advanced customization, OBS Studio or specialized platforms are ideal
Can you record a webinar if you are not the host?
Yes, attendees can record webinars using third-party tools. Always check for permissions and ensure compliance with privacy regulations before recording.