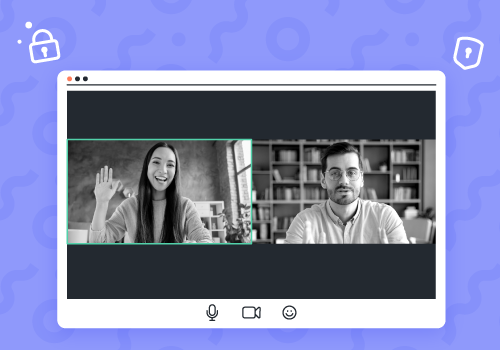
In the age of remote work and online learning, video conferencing apps like Zoom have become a critical part of our lives. By allowing us to stay connected with our colleagues and clients no matter where we are, these apps have made working from home a lot easier.
However, as convenient as they are, video conferencing apps also come with their own set of security and privacy concerns. In this blog post, we’ll be sharing our top ten Zoom security tips.
1. Protect Your Account
Out of all of our Zoom security tips, protecting your account is one of the easiest and most preventive. Like all online accounts, your Zoom account is not an entirely secure platform. Hackers are known to exploit vulnerabilities in the software, leading to information leaks and other security breaches.
Choosing a strong password that includes a mix of letters, numbers, and symbols is the best place to start. You should also enable two-factor authentication for an extra layer of security.
Additionally, it is best to keep your software updated to the latest version, as Zoom regularly releases patches to fix potential security issues.
2. Use Your Work Email
When registering for a Zoom account, it is best to use a work email. This will help ensure that your account is set up properly and that you can access all the features you need. In addition, using a work email will help you maintain a professional appearance when communicating with clients and colleagues.
By contrast, a personal email account will share your personal contact information with anyone you communicate with through Zoom, which could lead to privacy issues down the road.
3. Beware of Fake Zoom Applications and Invites
In the past, there have been fake applications that masquerade as Zoom. These fake applications are designed to trick users into giving away personal information such as credit card numbers and login credentials. Some of these fake applications have even been used to install malware on victims’ computers.
Fake Zoom invites are also commonly sent to users via email as phishing scams. These invites often contain links that lead to malicious websites. To avoid falling victim to these scams, only download Zoom from the official website and be wary of any suspicious-looking emails you receive.
Make sure you have DMARC setup correctly to avoid phishing and email fraud. Only accept invitations to join Zoom meetings from people you know and trust. If you are unsure about an invitation, reach out to the person directly to verify that it is legitimate.
Furthermore, you should only download Zoom from official sources such as the App Store or Google Play.
4. Don’t Share Zoom Links on Social Media
While it may be tempting to share your Zoom meeting link on social media, it is best to avoid doing so. By sharing the link on a public platform, you run the risk of someone else joining the meeting uninvited.
For optimal Zoom meeting privacy, only share the link with the people who are supposed to be in the meeting. Then, you can send the link via email or another secure messaging platform.
If you are hosting a webinar or a meeting with several people outside your organization, create a funnel that allows users to RSVP. Then, you can send the link to those who fill in their information. This will help to ensure that only the people who are supposed to be in the meeting have access to the link.
5. Password Protect Every Meeting
During the pandemic, “Zoombombing” was a common issue that online educators faced. A “Zoombomb” is similar to a photobomb; someone unexpectedly joins your Zoom meeting and disrupts it.
Unlike most of our Zoom security tips, password protection is usually a default setting. To check, open up your Zoom settings and go to the “Meeting” tab. Then, scroll down to the “Passcode” option and make sure it is on.
Password protecting your meetings is one of the best ways to prevent Zoombombs. By setting a password, you can ensure that only people with the correct information are able to join the meeting.
6. Set Up a Waiting Room
A waiting room is a feature that allows the host to control who joins the meeting. When you set up a waiting room, everyone who tries to join the meeting will be placed in a holding area.
As the host, you can then admit people into the meeting one by one. This means that you can screen each of the participants before they join the meeting, which can help to prevent Zoombombs and other unwanted disruptions.
For example, if you are a college professor, you could use this feature to cross-reference each person who joins the meeting with your class roster to ensure that they are enrolled in your class.
To set up a waiting room, open your Zoom settings and navigate to “Meeting Settings.” Then, check the box next to “Enable Waiting Room.”
7. Disable Private 1:1 Chats
In some cases, 1:1 chats may be necessary, but in most, they are not. If you do not want any attendees to be able to chat privately with each other during the meeting, you can disable this feature.
To do so, open your Zoom settings and navigate to “Meeting Settings.” Then, scroll down to the “In Meeting (Advanced)” section and uncheck the box next to “Private chat.”
By disabling private chats, you can help to ensure that all conversations during the meeting are visible to everyone in the group.
8. Disable the “Join Before Host” Feature
The “Join before host” feature lets people funnel into a Zoom meeting before the organizer joins. While this may be convenient for some people, it can also increase the chances of Zoombombs and other disruptions. If you want to be able to prescreen everyone who comes into your meeting, you must disable this functionality.
If you want to disable this feature, open your Zoom settings and navigate to “Meeting Settings.” Then, scroll down to the “Join before host” section and uncheck the box next to “Allow participants to join before host.”
9. Disable “Allow Removed Participants to Rejoin”
If you remove someone from your Zoom meeting, you usually do so for a reason. Whether they are being disruptive or you simply don’t want them there, once you remove someone from the meeting, you probably don’t want them to be able to rejoin.
Fortunately, Zoom gives you the option to disable this feature. If you want to prevent removed participants from rejoining your meeting, open your Zoom settings and navigate to “Meeting Settings.” Then, scroll down to the “In Meeting (Basic)” section and uncheck the box next to “Allow removed participants to rejoin.”
10. Disable Recording of Meetings
Recording your meeting can be a helpful way to create a record of what was discussed. You may need to record your meeting if it is a:
- Webinar
- Sales presentation
- Classroom lecture
- Interview
- Conference keynote
In many cases, however, recording your meeting is unnecessary. For Zoom meeting privacy, it is best to disable this feature.
To disable local recording, open your Zoom settings and navigate to “Recording.”
Then, uncheck the box next to “Local Recording.” You can also choose to save recordings to the cloud instead of locally on your computer.
If you do need to record your meeting, you can do so by starting the recording from within the Zoom application.
Bonus tip: Use Krisp noise cancelling app as a meeting insurance to remove background noises from your calls and stay productive.
[demo-new]
Final Thoughts on Zoom Meeting Privacy
By following the tips in this article, you can help to ensure that your Zoom meetings are private and secure. While no system is perfect, these tips will give you a good starting point for protecting your Zoom meetings from unwanted disruptions and security breaches.
Do you have any other Zoom security tips? Let us know in the comments below!