Zoom has become the go-to platform for virtual meetings, webinars, and online classrooms. Often, there are moments during a Zoom call that you might want to capture for later reference, whether it’s a slide, an important document, or a discussion. Screenshots offer a quick way to save these moments, and learning to take them properly can improve productivity, make it easier to take notes, and even share insights with others. This comprehensive guide covers everything you need to know about taking screenshots and recordings on Zoom across Mac, Windows, and using third-party tools.

Why Screenshots are Useful During Zoom Meetings
Screenshots help capture content shared during meetings in a visual format, which can be particularly useful when:
- Taking Notes: Visual notes are easier to remember than written text, especially for slides, flowcharts, and diagrams.
- Saving Visual Information: Capture presentations, shared files, or whiteboard sessions for later reference.
- Sharing Insights: Screenshots make it easy to share specific details with teammates who couldn’t attend quickly.
Taking screenshots during Zoom calls can be invaluable, whether for educational, work, or personal reasons. Before starting, ensure you have permission from all participants and that you’re mindful of privacy and data security.
How to Take Screenshots on a Mac
Mac offers multiple ways to take screenshots, giving users control over the type of capture they need.
Capture Entire Screen
The quickest method to capture everything on the screen:
- Press Command + Shift + 3 to capture the entire screen.
- The screenshot will be saved directly to your desktop, labeled with the date and time.

Capture a Selected Area
This option allows you to capture just a portion of the screen:
- Press Command + Shift + 4.
- Your cursor will change to a crosshair, which you can drag to select the area you wish to capture.

Capture a Specific Window
To capture an entire Zoom window only:
- Press Command + Shift + 4, then hit Spacebar.
- Click on the Zoom window to capture only that.

These options make capturing important parts of a Zoom call easy without taking a full screenshot, helping you stay organized.
How to Take Screenshots on Windows
Windows offers several ways to capture screenshots, whether it’s the whole screen, a specific area, or an active window.
Capture Entire Screen
Press PrtScn (Print Screen) on your keyboard to capture the entire screen. The screenshot is copied to the clipboard, and you can paste it (Ctrl + V) into any application like Paint or Word to save it.

Capture Active Window
If you only need a screenshot of the active Zoom window:
- Press Alt + PrtScn.
- This will capture only the Zoom window and copy it to the clipboard.
Capture a Selected Area
Windows 10 and later versions allow for selective screenshots:
- Press Windows + Shift + S.
- Drag the cursor to select the area you want to capture. The screenshot is copied to the clipboard, where you can paste and save it.
Each method provides flexibility in capturing what you need, making Windows screenshots easy to customize.
Using Third-Party Screenshot Tools
While Mac and Windows have built-in options, third-party tools offer additional features like editing, cloud storage integration, and more advanced annotation. Here are some popular options:
- Greenshot
Greenshot is a free, user-friendly tool that provides features like:
- Annotating and highlighting parts of your screenshot.
- Saving screenshots directly to cloud storage or your computer.
- Sharing options, including email integration.
- Lightshot
Lightshot allows quick capturing and is known for its simplicity. Features include:
- Instant sharing with a unique link for each screenshot.
- Basic editing tools for cropping, annotating, and highlighting.
- Compatibility with both Windows and Mac.
These third-party tools make capturing, editing, and sharing screenshots easy, making them ideal for more professional or detailed work.
Take Zoom Screenshots with Snipping Tool
The Snipping Tool on Windows provides a straightforward way to capture specific areas or windows without needing a keyboard shortcut.
- Open the Snipping Tool from the Start menu.
- Choose the type of snip you want: Free-form, Rectangular, Window, or Full-screen.
- Once selected, click “New” to create a new screenshot.
- Save or copy the snip for later use.
The Snipping Tool is especially handy for Zoom because it allows you to capture specific areas without needing to crop images afterward.
How to Screen Record on Zoom
Recording the Zoom meeting is a useful alternative if you need more than just a screenshot.
Recording Directly in Zoom
Zoom includes a built-in recording function:
- Open Zoom and start your meeting.
- Select the “Record” button at the bottom of the window. You may be able to choose between “Record to this Computer” or “Record to the Cloud” (depending on your account).
- Once the meeting is over, Zoom will process and save the recording, typically as an MP4.
Managing and Editing Zoom Recordings
Zoom allows users to manage recordings in the “Recordings” tab under settings. For advanced editing, consider using video editing software like iMovie (Mac), Camtasia, or even the built-in Windows 10 editor.
How to Record Zoom with High-Quality Audio
Good audio quality is essential for reviewing recorded meetings. Here are a few tips for achieving the best sound:
- Choose the Right Microphone: Use an external mic rather than your computer’s built-in microphone for a clearer sound.
- Adjust Audio Settings in Zoom: Go to Settings > Audio to adjust mic sensitivity and enable background noise suppression.
- Use Noise-Canceling Software: Krisp is ideal for reducing background noise, making audio clearer and more professional.
How to Share Screenshots and Recordings Effectively
Sharing screenshots or recordings is easy but requires some organization to keep things accessible and efficient.
- Organizing Screenshots: Create folders by project or meeting date to keep your files organized.
- Using Cloud Storage: Platforms like Google Drive, Dropbox, and OneDrive allow you to store and access screenshots and recordings from any device.
- Best Practices for Sharing: Use links instead of files whenever possible for easy access, and consider setting permissions to protect sensitive information.
Zoom Recording and Screenshot Etiquette
Before taking screenshots or recordings in Zoom, it’s important to keep etiquette and privacy in mind.
- Get Permission: Always inform participants if you’re taking screenshots or recording a session.
- Avoid Sensitive Information: Be mindful of confidential information and try to blur or avoid capturing it.
- Storage Security: Use encrypted cloud storage for sensitive files and adjust access permissions to keep them secure.
Krisp and your Experience with Zoom
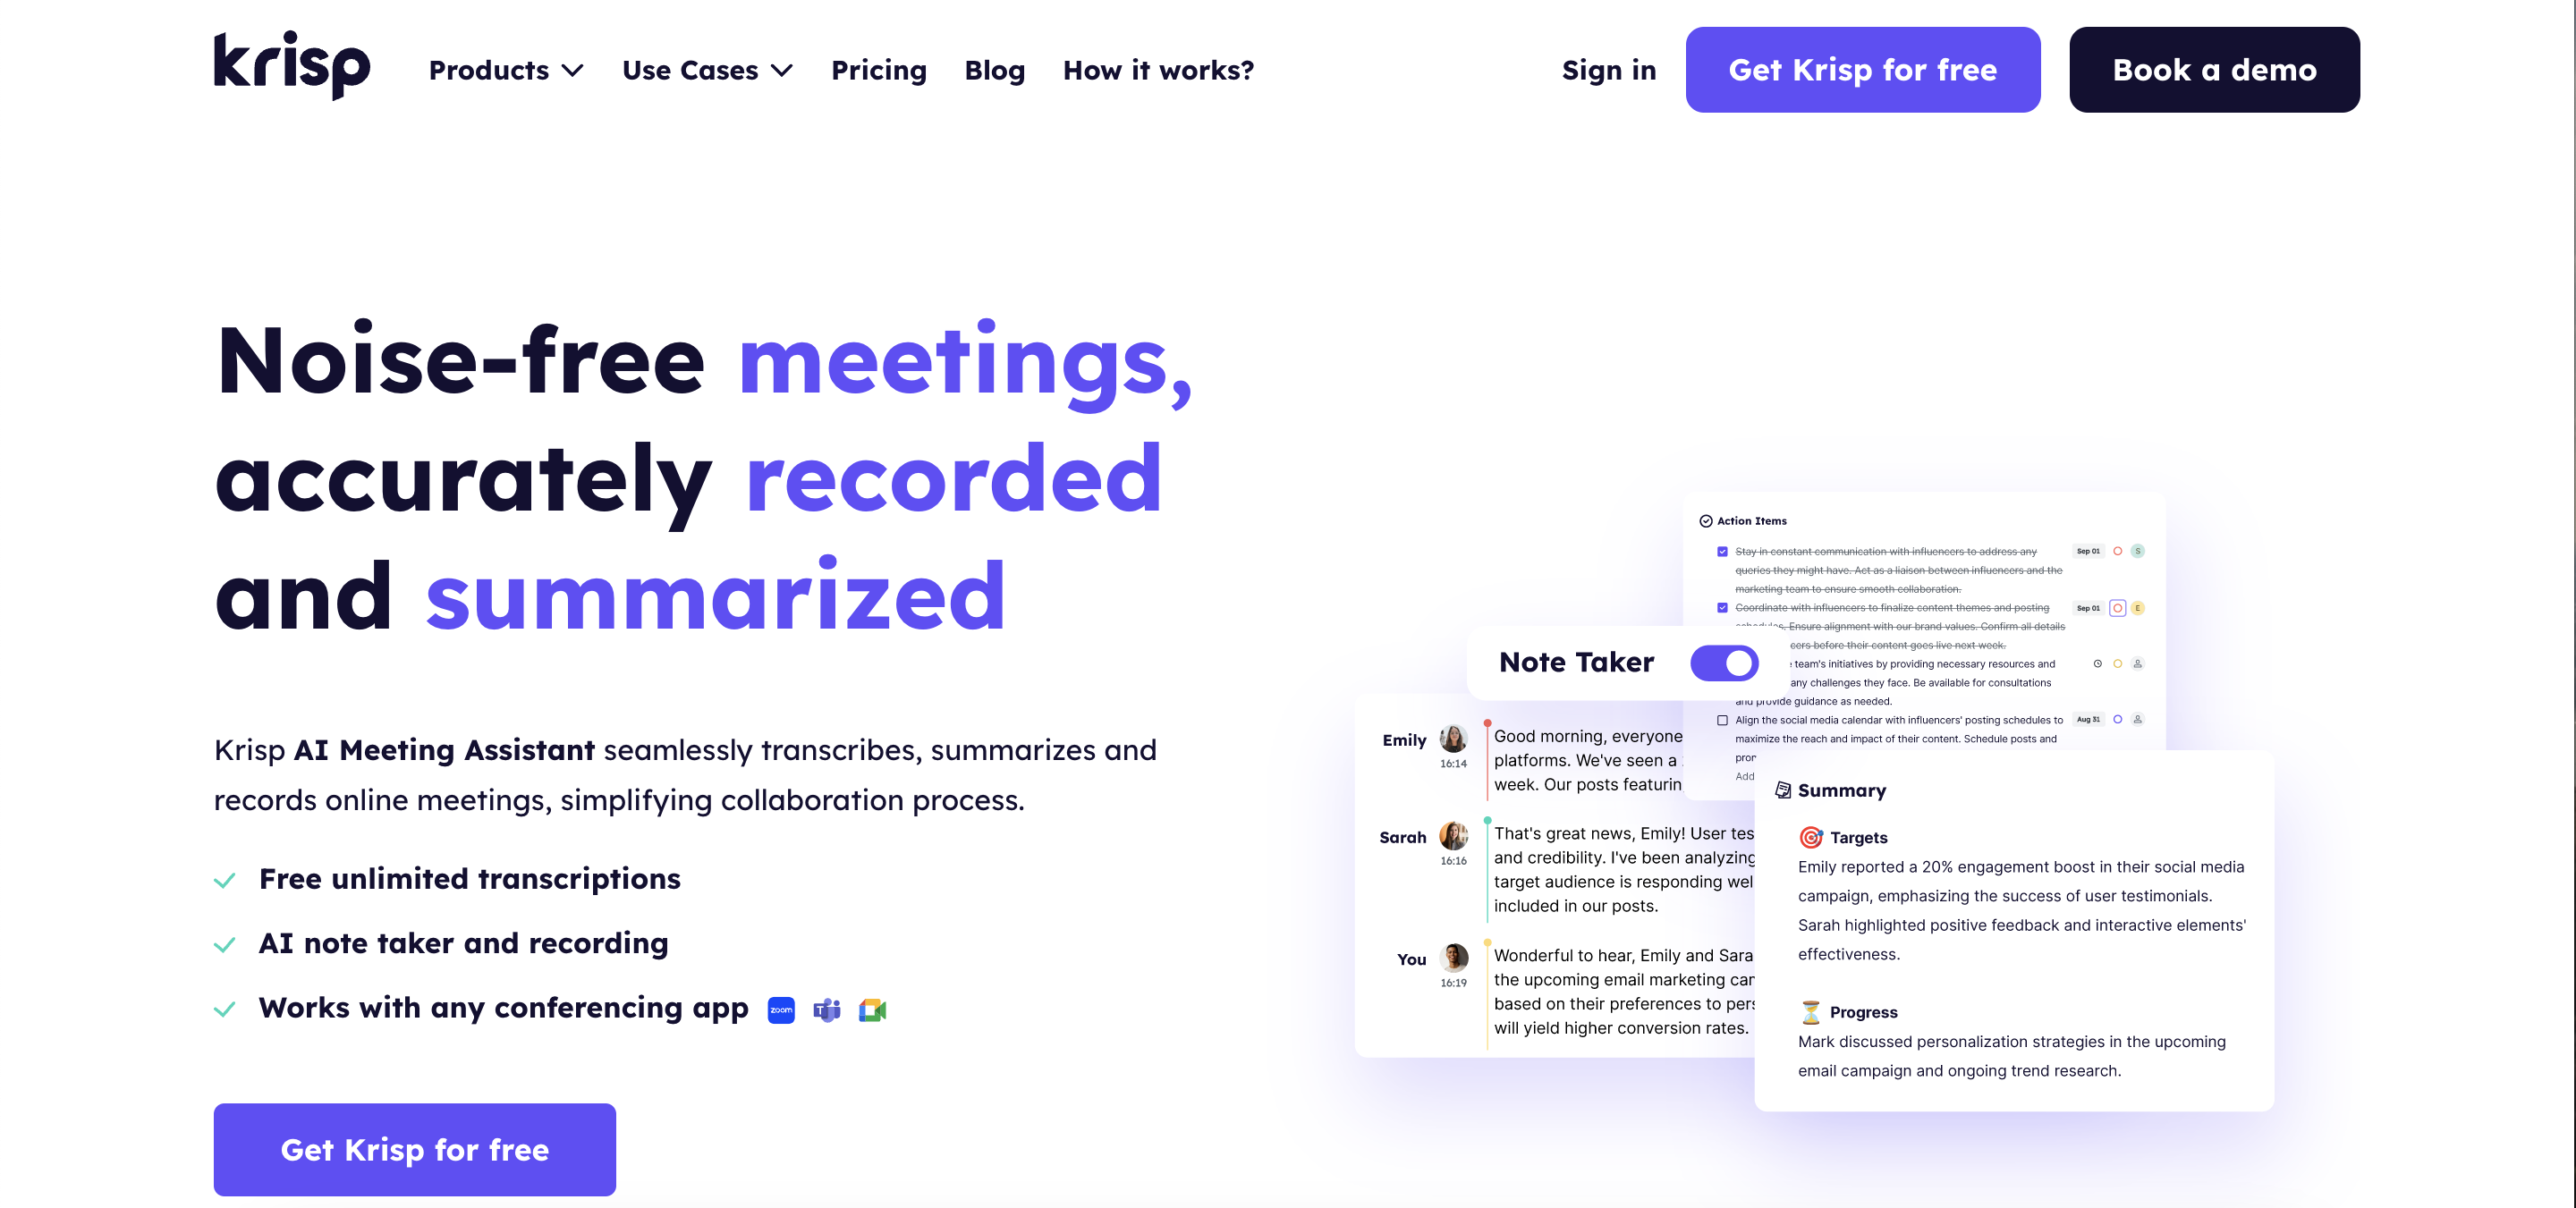
Krisp brings a new level of efficiency and clarity to your Zoom meetings by integrating powerful tools for real-time transcription, AI-generated notes, and automatic recordings. By enhancing each Zoom session with these advanced features, Krisp ensures that no detail gets overlooked, making it the ultimate companion for anyone looking to maximize productivity and clarity in virtual meetings.

Real-Time Meeting Transcription
During a Zoom meeting, Krisp’s real-time transcription captures every word as it’s spoken, providing a live, searchable transcript that helps teams keep track of important information. This feature is invaluable for distributed teams or anyone who wants to stay focused on the conversation rather than note-taking. For instance, in a fast-moving brainstorming session, the transcription enables participants to easily refer back to ideas and keep the flow of discussion uninterrupted.
AI-Powered Meeting Notes and Summaries
After each Zoom session, Krisp’s AI generates clear and concise meeting notes and summaries, extracting key points, action items, and decisions. Instead of sifting through an entire recording or transcript, team members can quickly access the main takeaways and immediately get to work on follow-ups. This is especially helpful for project managers who need a clear view of next steps or for team members catching up on a meeting they missed. AI-powered summaries allow users to stay aligned on goals and avoid any miscommunication.
Automatic Meeting Recording Across Platforms
Krisp also enables seamless, automatic recording of Zoom calls, ensuring that each meeting is captured in full. Beyond Zoom, Krisp’s recording capabilities work across multiple communication platforms, giving you a reliable archive of all discussions. These recordings become valuable resources for revisiting client conversations, training sessions, or even onboarding materials. With Krisp’s noise-canceling technology, these recordings are crisp and free from distractions, creating polished resources for future reference.
For anyone creating content or sharing information through Zoom, Krisp is an essential tool that transforms communication. By keeping audio clean and focused, Krisp helps you deliver a higher level of clarity, ensuring your meetings, trainings, and presentations are easy to follow, impactful, and thoroughly professional.
Integrating Krisp with Zoom for Enhanced Recording
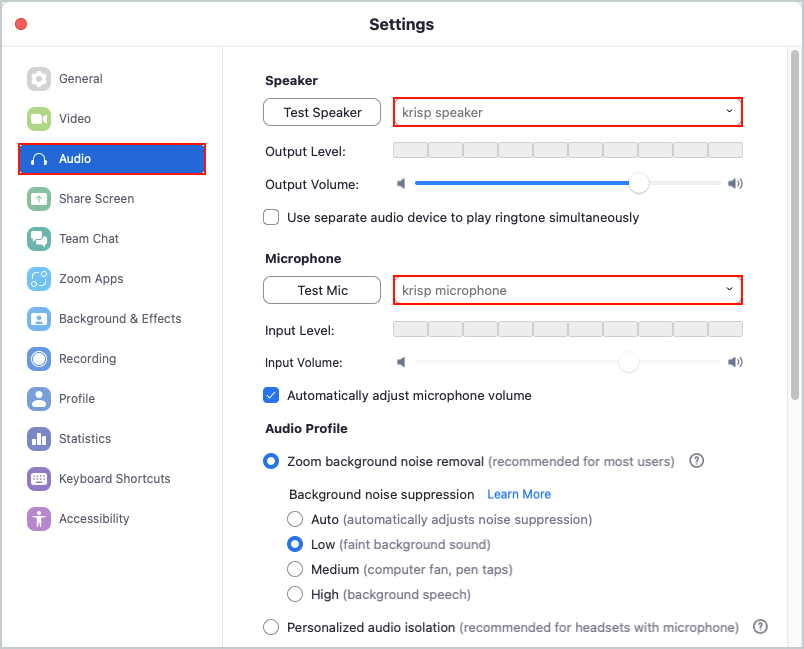
Here’s how to set up Zoom with Krisp for noiseless calls on your Mac or Windows device. You can enjoy calls free from background noise by configuring Krisp as your microphone and speaker in Zoom.
To start, open Zoom and navigate to Settings by selecting the gear icon in the upper-right corner. Go to the Audio tab, where you’ll see options for Speaker and Microphone—set both to Krisp. Then, open the Krisp application and choose your physical microphone and speaker, enabling the Noise Cancellation toggles for each.

When you’re on a call, Krisp will display “Used by zoom.us” to indicate an active session, ensuring noise cancellation is in effect.
For optimal results, we recommend selecting Low in Zoom’s Background Noise Suppression setting, as it complements Krisp’s capabilities. Higher levels of noise suppression in Zoom may interfere with your voice quality, so it’s best to avoid using Medium or High options. Additionally, Zoom’s “Automatically adjust microphone volume” setting does not affect Krisp, so you can enable or disable it based on preference.
With these configurations, you’re ready to enjoy crystal-clear calls with Krisp and Zoom.
Final thoughts
Screenshots and recordings can significantly enhance the value of your Zoom meetings, whether it’s for notetaking, record-keeping, or simply sharing information with others. By mastering the built-in tools on Mac and Windows, as well as exploring third-party software and recording tools, you can become adept at capturing the essential parts of every Zoom meeting. With clear audio using tools like Krisp, your recordings will be high-quality, clear, and accessible for future reference.
FAQs


