Have you ever wanted to rewatch a Google Meet but were not sure where the recording was stored? Whether you missed a key detail or need to share the call with teammates who couldn’t attend, knowing how to access your Google Meet recordings can make all the difference.
With nearly 83% of employees spending up to a third of their workweek in meetings, it is easy to see how things can slip through the cracks. 92% of workers admit to multitasking during virtual meetings. That means it is no surprise if you miss key points or forget to take notes. Thankfully, with Google Meet’s recording feature, you can go back and review calls or share them with anyone who needs to catch up.
But where do Google Meet recordings go, and how can you easily find, download, and share them? In this article, we’ll walk you through everything you need to know about accessing your Google Meet recordings.
Where are Google Meet Recordings Saved?
Let’s start by pointing out that the Google Meet recording feature is only available to Google Workspace users. You can access this recording option if you are on the Business Standard plan, which costs $12 per month. However, it is important to note that recordings can only be made on a computer, so this feature won’t be available if you use a mobile device.
Now, where do these recordings go? Once you record a meeting, the file will automatically be saved in the meeting organizer’s Google Drive, specifically in a folder called “Meet Recordings.” Just make sure there’s enough storage space on your drive.
Another useful detail is that if your Google Meet is scheduled through Google Calendar and you start recording during the scheduled meeting time, the recording will also be automatically attached to the calendar event.
Additionally, the meeting organizer and the person who initiated the recording will receive an email containing the recording link.
It is also important to remember that the recording feature will only work if you are the meeting organizer or if you are in the same organization as the host and have been promoted to co-host.
How To Find, Download, and Share Your Google Meet Recording?
As mentioned earlier, your Google Meet recordings can be accessed in three different places: Google Drive, through email links, and via Google Calendar. Luckily, finding them is quick and simple. Here’s how you can find them:
-
Find Google Meet Recording in Google Drive
To find your Google Meet recording in Google Drive, follow these simple steps:
1. Open Google Drive: First, go to Google Drive and log in with the account used to organize or record the meeting.
2. Locate the “Meet Recordings” Folder: Once you are in, navigate to the left menu and click “My Drive.” From there, look for a folder named “Meet Recordings.” When you record a meeting, Google automatically creates this folder for you, so it should be easy to find.
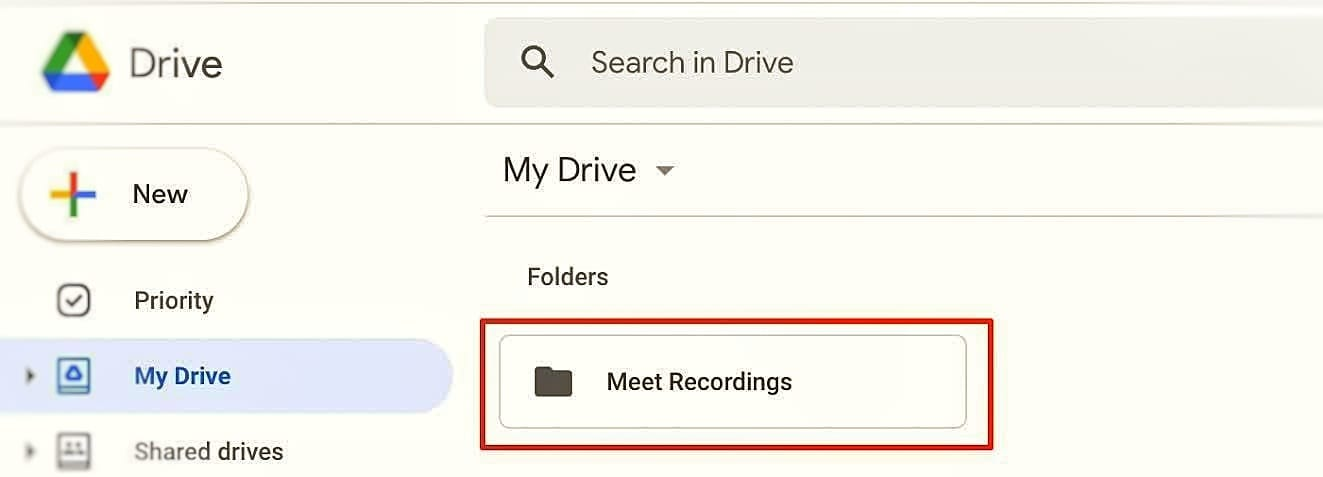
3. Open the Folder: Click on the “Meet Recordings” folder to see your recorded meetings. Each file, along with the date and time, will be named after the meeting, making it easier to identify.
4. Play or Download the Recording: Double-click the file to watch the recording. If you want to download it to your computer, right-click on the recording and choose “Download.” You can also share the recording by right-clicking and selecting “Share.”
That’s it! All your recorded meetings will be neatly stored in one place, ready to access whenever you need them.
-
Find Google Meet Recordings in Your Email Inbox
To find your Google Meet recordings in your email inbox, follow these easy steps:
1. Open Your Email: Log into the email account you used to organize or participate in the Google Meet. This is where the recording link will be sent.
2. Search for the Email: Once in your inbox, use the search bar at the top. Type in keywords like “Google Meet recording” or the name of the meeting to quickly locate the email. Google will automatically send a link to the recording once the meeting has ended.
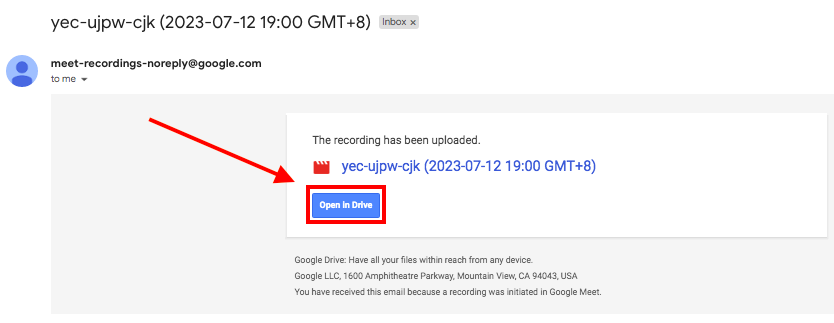
3. Open the Email: When you find the email, click to open it. Inside, you will see a link to the recording, which you can click on to watch directly or download for later use.
4. Share or Save the Link: If you need to share the recording with others, you can simply forward the email. Or, if you’d prefer, click the link and save the file to your Google Drive or download it to your device for safekeeping.
-
Find Your Google Meet Recordings Through Google Calendar
Accessing the recording is easy if your Google Meet was scheduled through Google Calendar. Here’s how you can find it:
1. Open Google Calendar: Head over to Google Calendar and log in with the account you used to schedule or join the meeting.
2. Find the Meeting Event: Scroll through your calendar or use the search bar to find the specific event where the meeting took place. Just type in the name of the meeting, and it should pop up right away.
3. Click on the Event: Once you’ve located the meeting, click on it to open the event details. You’ll see a range of options, but what you’re looking for is the Google Meet recording link.
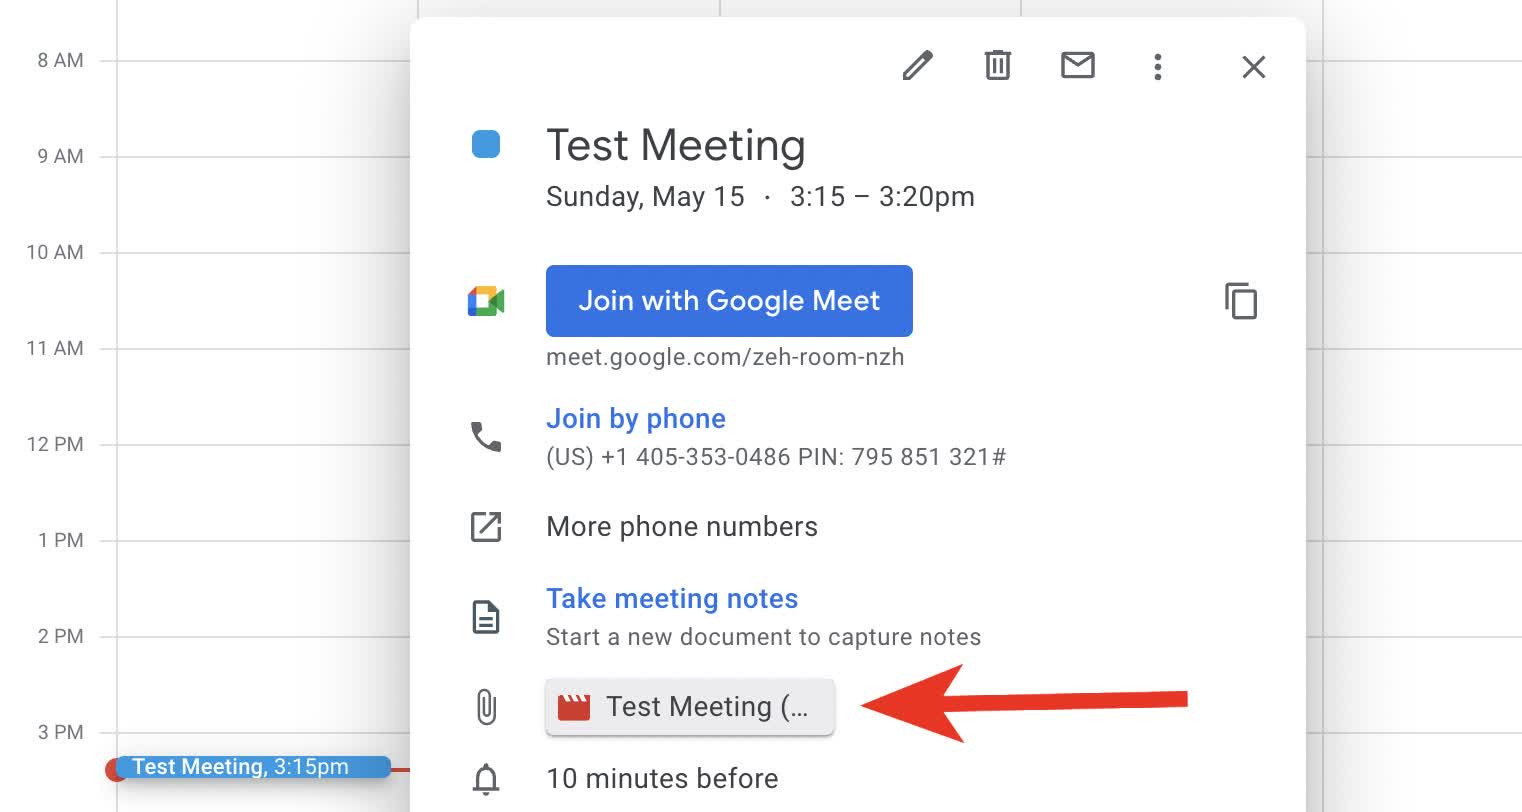
4. Access the Recording: The recording link will be attached under the event details, often labeled as “Meeting Recording.” Simply click the link, and it will take you directly to the recording.
5. Download or Share: From here, you can either watch the recording, download it, or share the link with others if needed.
Pro Tip: How to Record Google Meet When You Are Not the Host
As we mentioned earlier, the recording feature in Google Meet is only available to the host if they have a Google Workspace account.
But what if you are in a meeting, you are not the host, and you really need to record the session for future reference or to capture key points?
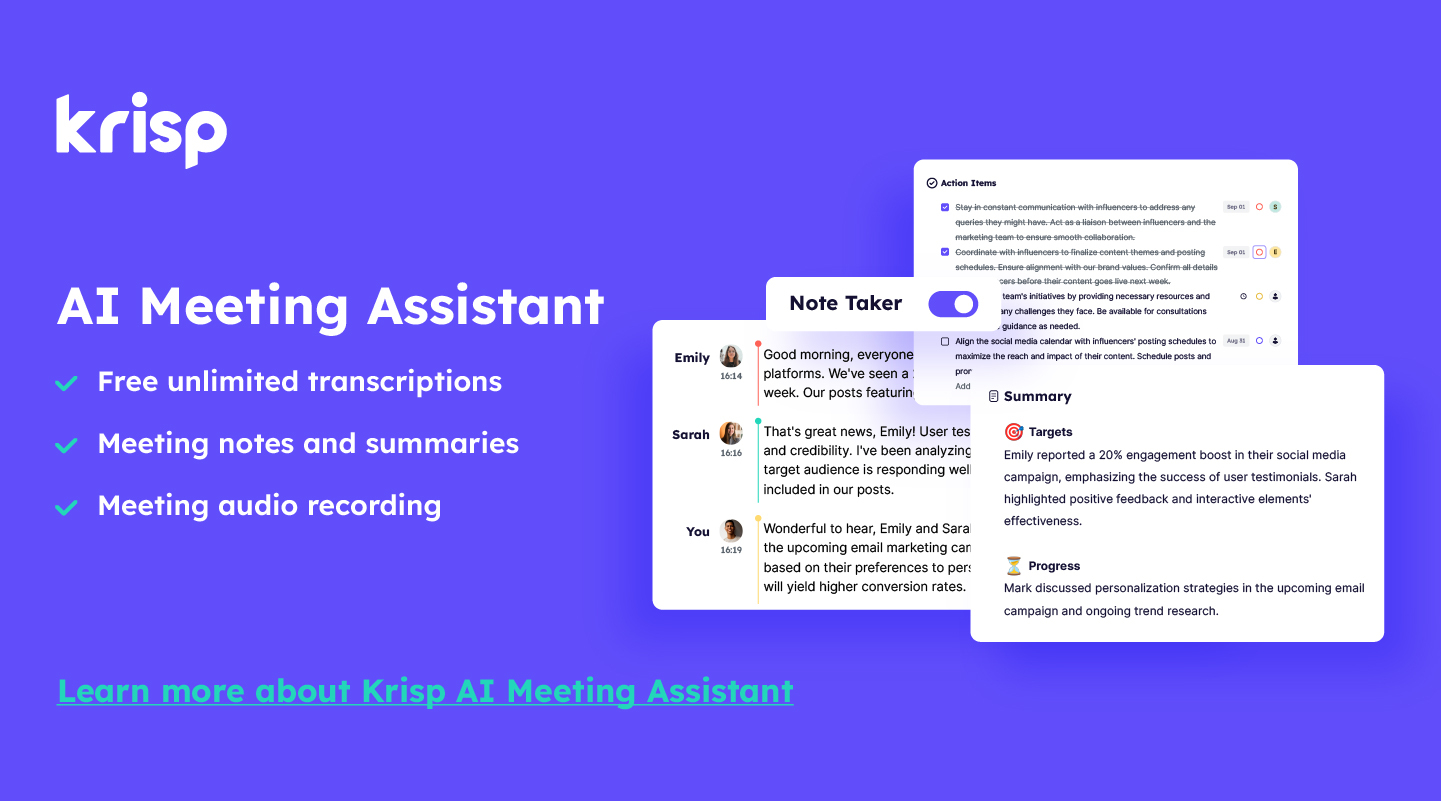
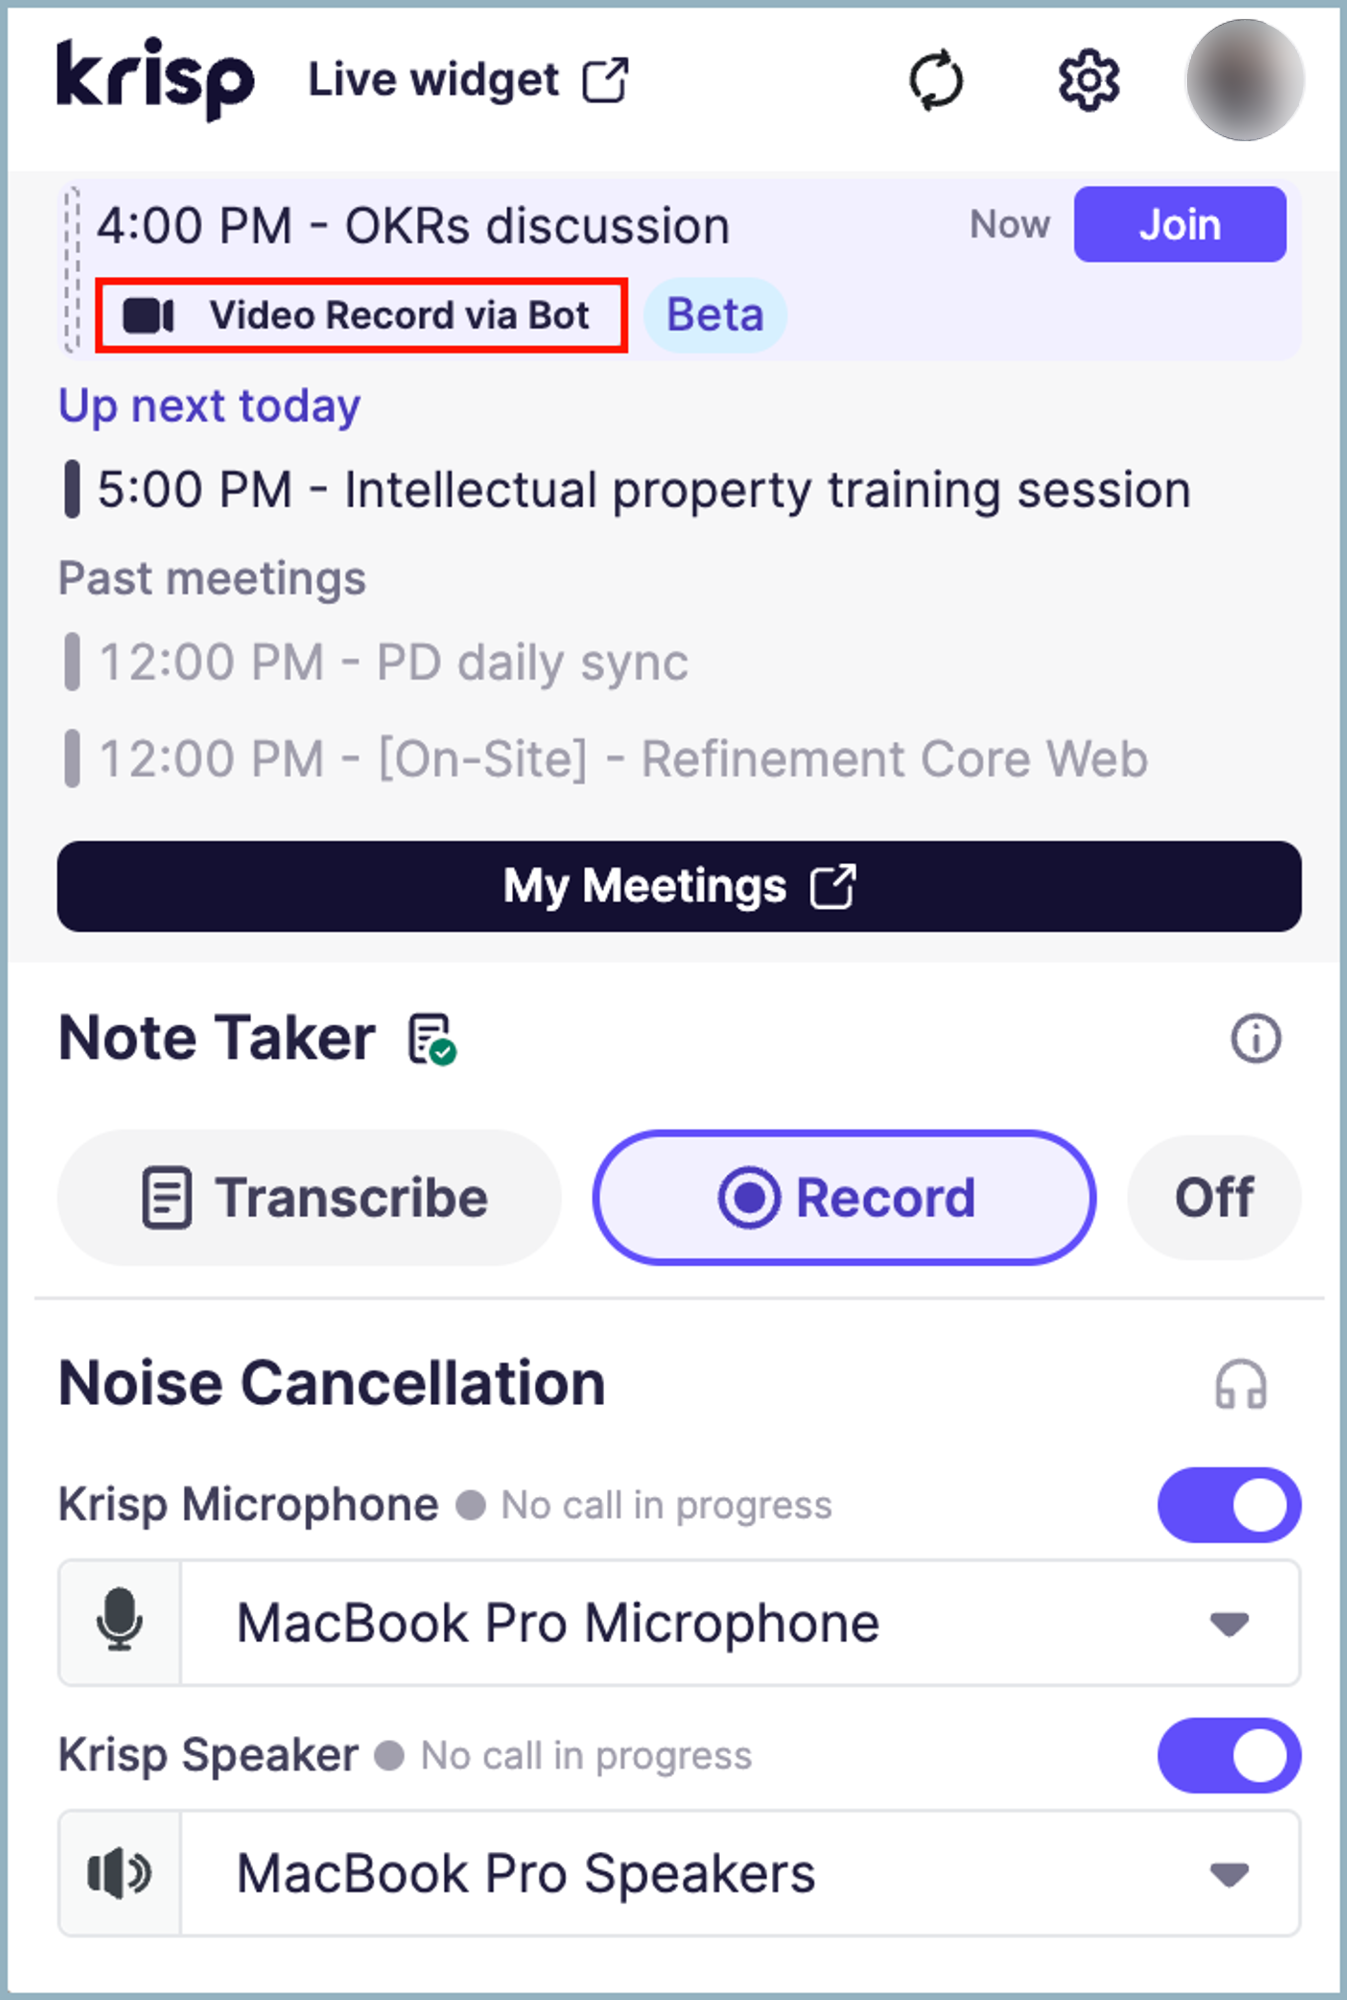
This is where Krisp comes to the rescue. Krisp allows you to record meetings across all video conferencing platforms, including Google Meet, Zoom, and more. Not only does it record your calls, but it also provides a full meeting transcription of your virtual discussions. After your meeting, you will have access to a detailed transcript of everything that was talked about.
But Krisp does not stop there! You can easily turn the transcript into a concise summary, capturing the key points of your discussion. Krisp automatically generates action items, so if important tasks or project details were discussed but you forgot to jot them down, Krisp will have you covered. It makes staying organized and on top of tasks easier than ever.
Here is a step-by-step guide on how to use Krisp for meeting recording, transcription, and generating action items:
1. Download and Install Krisp: If you have not already, go to the Krisp website and download the app. Install it on your computer and log in to your account.
2. Start Your Meeting: Open your video conferencing platform (Google Meet, Zoom, etc.) and begin your meeting as usual.
3. Activate Krisp: Before or during the meeting, open the Krisp app. You can either activate the AI noise cancellation or directly start using the recording features.
4. Start Recording: Once Krisp is open, select the option to record the meeting. Krisp will now record the audio and video of your entire session in the background while you focus on the discussion.
5. Enable Transcription: After the meeting ends, Krisp will automatically transcribe the entire conversation. You’ll receive a detailed transcript of everything that was said during the call.
6. Generate a Summary: From the transcript, you can easily create a summary. Krisp’s AI will pull out the most important points and give you a concise overview of the meeting’s key takeaways.
7. Get Action Items: Krisp also highlights tasks or action points discussed during the meeting. These action items will be generated automatically, making it easy to track what needs to be done next.
8. Access and Share the Recording: Once your meeting is recorded, you can access the file through Krisp and download or share it as needed.
5 Common Issues Faced with Google Meet Recordings
Using Google Meet’s recording feature can be incredibly helpful, but sometimes things don’t go as smoothly as planned. Here are some common issues people face with Google Meet recordings and how to fix or understand them.
1. Recording Option Not Showing Up
One of the most frustrating moments is when you want to record a meeting, but the option is not available. This typically happens if you’re not using a Google Workspace account. Google Meet recordings are only available to users with a Business Standard plan (or higher) and are limited to desktop users. If you’re a participant and not the meeting organizer, this feature won’t be available to you either.
Solution: Ensure you’re logged in with a Google Workspace account that has recording privileges. If you’re not the host or do not have a Google Workspace account but still need to record the meeting, you can use a tool like Krisp, which offers a more affordable alternative.
2. Recordings Not Saving to Google Drive
You’ve finished a meeting and hit the stop recording button, but the file is not there when you check your Google Drive. This can happen if there’s not enough storage space in your Drive. Since recordings are automatically saved to the organizer’s Google Drive, a lack of storage will prevent the recording from being stored.
Solution: Double-check your Drive storage before starting the meeting to make sure you have enough space. If you are running low, you can either free up some space or upgrade your Google Drive storage.
3. Not Receiving the Recording Link
Sometimes, after recording a meeting, the email link to the recording doesn’t show up in your inbox. Email delays or technical hiccups can cause this. In some cases, if you’re not the meeting organizer, you might not receive the email at all.
Solution: First, give it a little time—email delivery can sometimes take a few minutes. If you’re still not seeing the email, you can always go directly to Google Drive and look in the “Meet Recordings” folder. If you are not the organizer, ask them to share the recording link with you.
4. Recording Doesn’t Include Audio or Video
You might find that your recording has either no sound or no video, making it essentially useless. This is usually due to poor internet connection or technical glitches during the meeting itself. Sometimes, browser permissions can block access to your microphone or camera, affecting the recording quality.
Solution: Make sure your internet connection is stable before starting the recording. Double-check your browser settings to ensure Google Meet has access to your microphone and camera. Testing these before the meeting can save you a lot of trouble later on.
5. Can’t Record on Mobile Devices
If you’re joining a Google Meet from your mobile device and want to record, you might notice the option isn’t there. Unfortunately, Google Meet’s recording feature is only available on desktops, which can be limiting if you’re on the go.
Solution: If recording on mobile is essential, try switching to a desktop or laptop for that meeting. Alternatively, you can use tools like Krisp, which work across different platforms and offer additional features like transcription and action item generation.
Wrapping Up
In conclusion, knowing how to find, download, and share your Google Meet recordings is incredibly useful, especially when you need to revisit important discussions or share the meeting with those who could not attend. Whether it is through Google Drive, an email, or Google Calendar, accessing your recordings is quick and easy as long as you are a Google Workspace user. And if you ever run into limitations, like not being able to record as a non-host, tools like Krisp can step in, offering recording, transcription, and even summary features across multiple platforms. Now that you are all set, you will never have to worry about losing track of those valuable conversations again!