Microsoft Teams is one of the top platforms for meetings, webinars, lectures, collaboration, and more. It offers a wide range of features, and when integrated with Krisp, it can make your experience smoother than ever. Microsoft Teams’ useful features and Krisp’s noise cancellation create an environment for clear and uninterrupted conversations. But, it is not just it. One of Microsoft Teams’ most valuable features is its polling option. In this article, you will find a “How to Create a Poll in Teams” step-by-step guide.
Polls are incredibly useful for gathering quick opinions and feedback and facilitating decision-making, whether for research purposes or workplace voting. Instead of asking each person individually, polls allow you to get instant results, saving time and increasing efficiency.
Why Create a Poll in Microsoft Teams?
You might wonder why you can’t just ask your team members how they feel about a certain question. Whether you have a small team or a large one, it can take a lot of time to hear everyone’s opinion. You can’t expect simple “Yes” or “No” answers—conversations often lead to more questions, and you might find yourself talking with one team member for an hour or more. If you repeat this process with everyone on the team, you could end up losing two or three workdays on what could have been a quick poll.
Fortunately, we now have virtual options for polling. One of the best tools is Polls in Microsoft Teams, which allows you to get quick answers to your questions. All you need to do is create a poll in Microsoft Teams.
Here’s why it’s helpful to create a poll in Microsoft Teams:
- Quick Decision-Making: There’s no time for long discussions in today’s fast-paced world. While having conversation with your team, a competitor could launch a product and get ahead of you. That’s why decisions must be made quickly, using the available tools—like a poll.
- Engagement: Polls save time and provide an interactive way to keep every team member engaged.
- Anonymous Feedback: People are often more honest when they can provide feedback anonymously. Creating an atmosphere of honesty is essential for growth; anonymous voting is a great way to achieve this.
How to Create a Poll in Teams Using Microsoft Forms
There are various ways to create polls in Teams, one of which is by using Microsoft Forms. This built-in tool integrates seamlessly with Teams, allowing you to create different types of polls. Microsoft Forms helps you collect feedback and make the decision-making process faster and more interactive.
Here is the step-by-step guide:
Step-by-Step Guide:
- Open Microsoft Teams: First, open Microsoft Teams and navigate to the team or channel where you want to create the poll.
- Start a New Conversation: Click the “New conversation” button in the chat or channel.
- Click on Forms: Under the message box, click the ellipsis (three dots), then search for and select “Forms.”
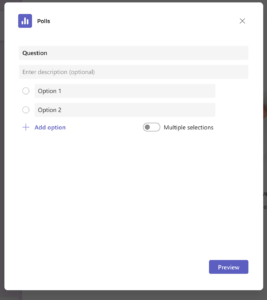
- Create Your Poll: A pop-up will appear, allowing you to create a poll. Enter your question and the options for participants to choose from.
- Preview and Send: After setting up the poll, you can preview how it will look. Once you’re satisfied, click “Send.” The poll will be posted in the chat or channel, and team members can vote.

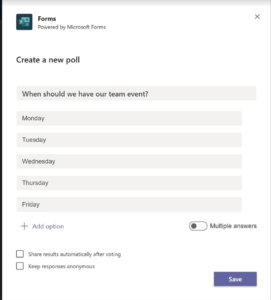
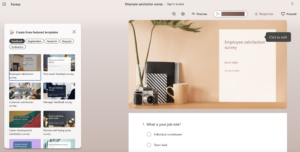
Here, you can also see a sample of a feedback form. You can edit the questions and options to suit your needs and customize the design to match your preferences. Ensure the form is straightforward for all your team members to understand.
How to Create a Poll in Teams Chat
Do you have some ideas for a corporate party and a few options in mind? Share them with your coworkers and see which one wins! Keep reading if you’re unsure how to create a poll in Teams chat. The process is simple and similar to creating a poll in a channel. You can still use Microsoft Forms to make a quick survey directly in the chat.
Step-by-Step Guide:
- Open Microsoft Teams Chat: Go to the chat window where you want to create the poll.
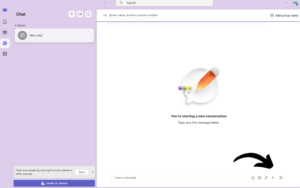
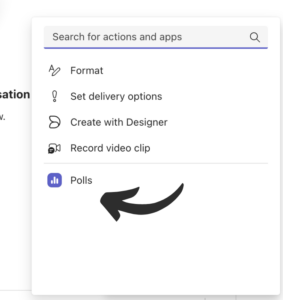
- Click on +: In the chat, click the + in the message box and select “Polls.”
- Create Your Poll: Add your questions and options. You can ask anything from “Where should we go for a corporate party?” to “What should we do there?”
- Send the Poll: Once you’ve created the poll, click “Send,” and it will appear in the chat. Team members can vote immediately, and you’ll see the results in real time.
How to Create a Poll in MS Teams Meeting
When you’re in the middle of a meeting discussing something important but controversial, it can be helpful to take a break and vote. It’s often difficult to reach a consensus when there are many team members involved. Voting can help avoid disagreements and streamline decision-making. You can easily conduct a vote during the meeting. Polls in Team meetings are an excellent way to engage participants and gather real-time feedback or votes. You can create polls before or during the meeting using Microsoft Forms or Polly.
Step-by-Step Guide:
- Create a Meeting in Teams: Schedule your meetings as you normally would, inviting all participants.
- Access the Poll Option: Click the “Chat” icon in the toolbar during the meeting. Then click on the ellipsis (three dots) and select “Forms.”
- Create a Poll: Enter your poll question and options. You can set it to be anonymous or allow participants to see the results in real time.
- Send the Poll: Once the poll is ready, click “Send,” and it will appear in the meeting chat. Participants can respond while the meeting is in progress.
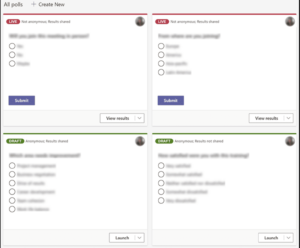
This is a great way to make decisions quickly without waiting for the results of the meeting. You discuss an issue with the team, vote, and then immediately have the answers—problem solved.
Troubleshooting Common Poll Issues in Microsoft Teams
First, don’t worry if issues arise while creating polls. It is quite an easy process, but you must remember the details to avoid missing something. Here are some common problems and solutions:
- Poll Not Showing Up: Ensure that Forms is installed and that you have permissions to use them in your chat or channel. If you don’t have Forms installed you will find nothing.
- Participants Can’t Vote: Check if the poll has been anonymous and all participants have the necessary permissions.
- If poll Results Are Not Displayed, Refresh the chat or channel window or ensure that the poll settings allow participants to see results.
Creating a poll is fun and exciting experience just make sure you did everything right.
Better Microsoft Teams Experience with Krisp
If you want a smoother experience with Microsoft Teams, integrate Krisp. This is a useful tool for meetings as it ensures noise-free communication with your coworkers, friends, classmates, and more. Krisp effectively removes background noise on both your end and your team members’ end, providing uninterrupted, high-quality conversations.
You can hold meetings from anywhere, choosing places that inspire you to work more efficiently. Krisp ensures that no noise gets in the way of your productive workday, which is filled with meetings and polls on bright ideas. By combining Krisp’s advanced noise cancellation with the collaboration features of Microsoft Teams, you can enjoy smoother, more productive meetings without distractions.
Conclusion
Polls are a helpful feature for every workplace. Microsoft Teams offers various options for creating polls. Incorporating polls into meetings makes decision-making and gathering feedback easier and the process more interactive.
For an even better experience, integrating Krisp ensures that your conversations remain crystal clear and free of distractions. Whether you’re making key decisions or running interactive meetings, combining these tools will enhance your team’s productivity and communication. You can foster a more efficient and collaborative work environment with the right tools.
FAQ


