- Prerequisites for Using Zoom Annotation
- How to Annotate on Zoom Web Browser?
- How to annotate in Zoom on Mac and Windows?
- How to Annotate on Zoom Chromebook?
- How to Annotate in Zoom on Mobile?
- How to Annotate on Zoom When Someone Else’s Screen?
- Tips for Using Annotations Effectively
- 1. Plan Ahead and Get Comfortable
- 2. Color is Your Friend—Use It Strategically!
- 3. Keep It Simple, Keep It Clear
- 4. Encourage Team Input with Stamps and Text
- 5. Use the Spotlight and Arrow Tools to Guide Attention
- 6. Save Those Key Annotations
- 7. Don’t Be Afraid to Clear the Screen
- 8. Set Some Ground Rules for Group Annotations
- Troubleshooting Common Annotation Issues on Zoom
- 1. Annotation Tools Not Showing Up
- 2. Annotations Not Working in Browser Version
- 3. Annotations Not Visible to Participants
- 4. Delay or Lag with Annotations
- 5. Annotations Keep Disappearing
- 6. Participants Can’t Annotate on Shared Screen
- 7. Annotation Tools Are Grayed Out
- Enhance Your Zoom Annotations with Krisp’s AI Meeting Assistant
- FAQs

Looking to boost collaboration in your meetings? Learning how to annotate on Zoom can make presentations and brainstorming sessions more interactive. This guide covers everything you need to know, from enabling annotations across devices to using Krisp’s AI Meeting Assistant for a smoother, distraction-free experience.
Prerequisites for Using Zoom Annotation
Before diving into Zoom’s annotation features, let’s make sure you’re set up to use them smoothly. Here’s what you need to have in place:
Updated Zoom App
- Ensure your Zoom app is up-to-date. Annotation tools may not be available if you’re using an older version.
- To check, simply go to your Zoom app, click on your profile picture, and select “Check for Updates.”
Screen Sharing Permissions
- If you’re the host, you can enable annotations by allowing screen sharing.
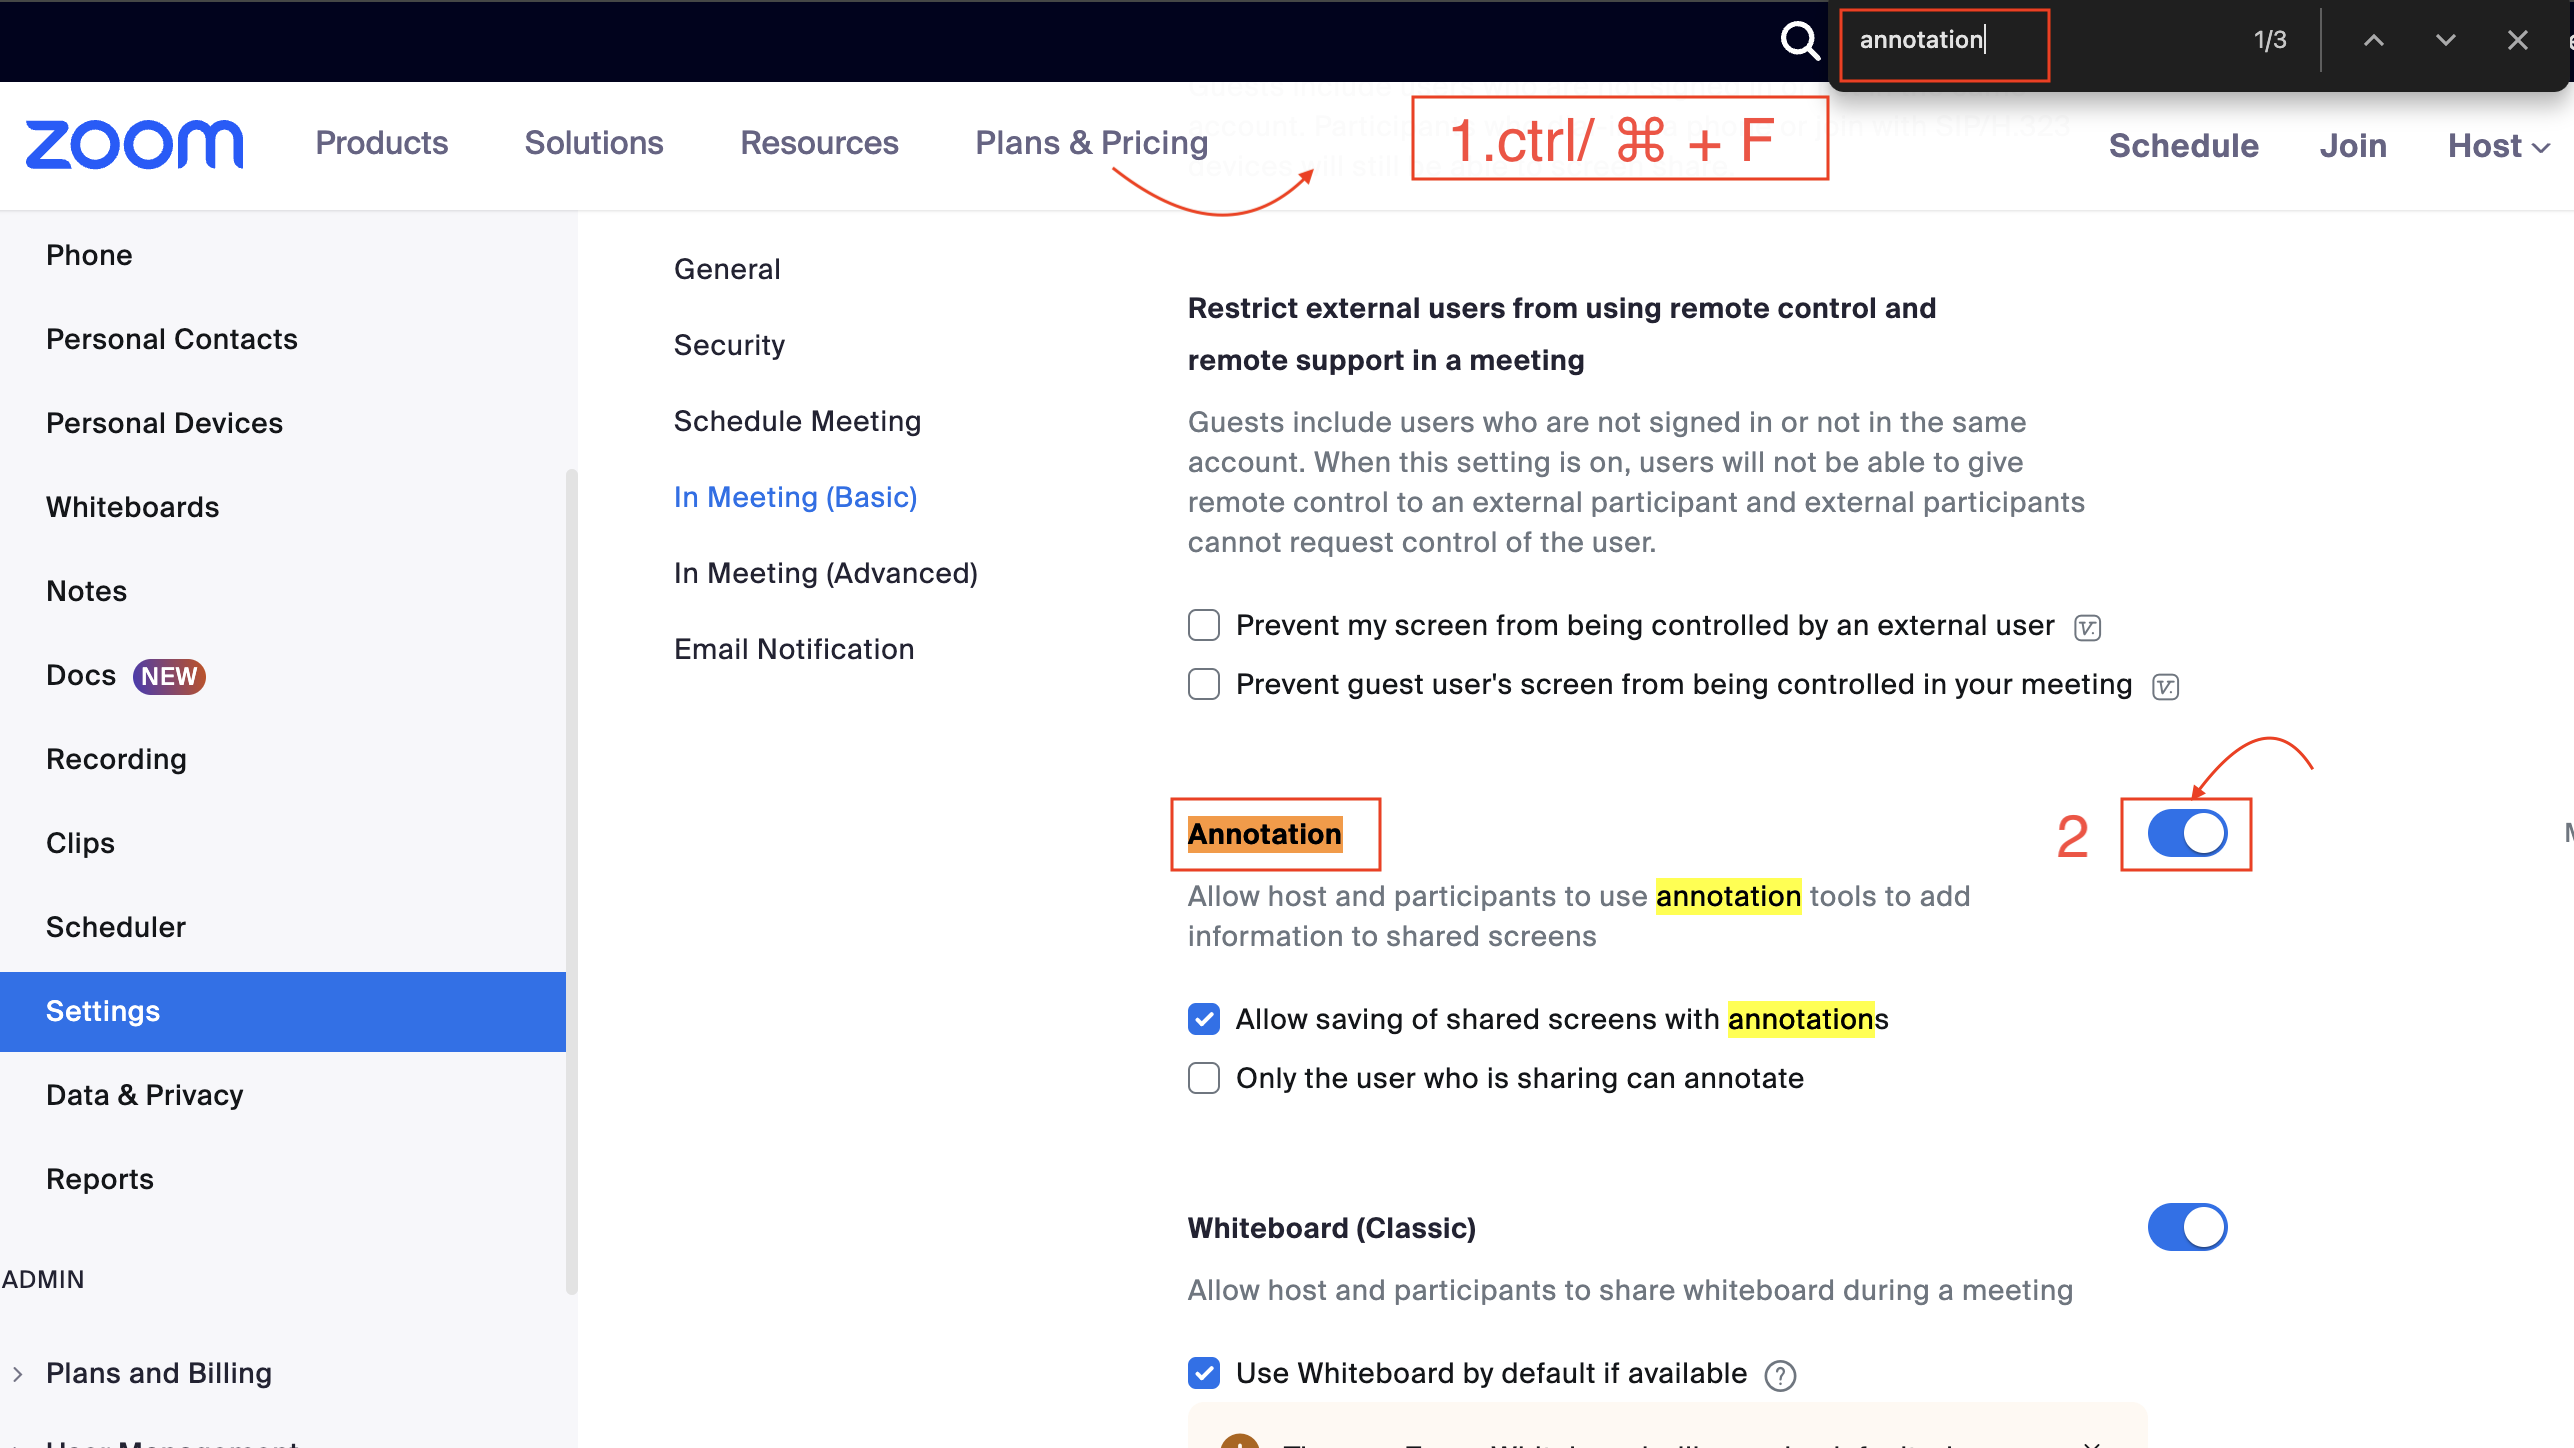
- Navigate to “Settings” in the Zoom web portal, then “In Meeting (Basic),” search for the word “Annotation” to quickly find the function. Make sure “Annotation” is enabled.
- Hosts also have the power to control whether participants can annotate during screen sharing.

Compatible Device
- While most devices support annotation, some features may work differently on desktops, Chromebooks, or mobile devices.
- If you’re planning to use annotations on multiple devices, make sure each device has the latest Zoom app installed.
Account Type
- Free accounts can use basic annotation features, but some advanced options may only be available on Zoom Pro or Business plans.
- It’s a good idea to double-check which features are included in your plan.
Know the Basics
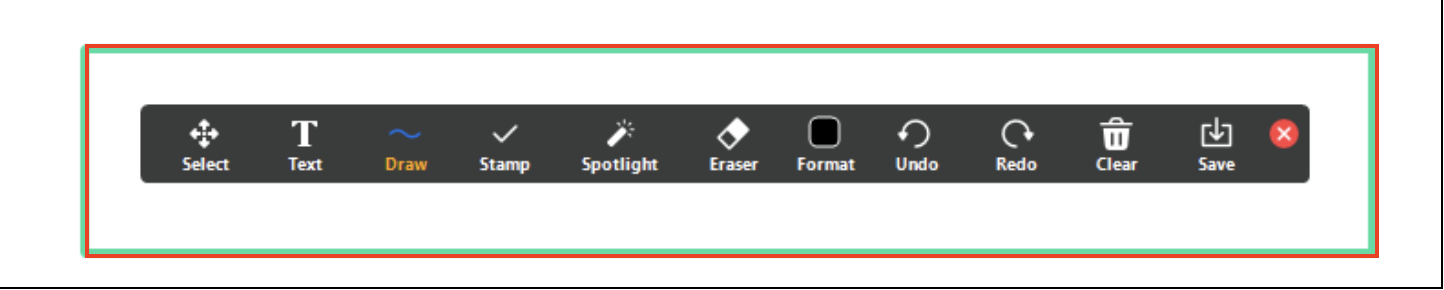
- Familiarize yourself with Zoom’s main tools: Text, Draw, Stamp, Spotlight, and Eraser.
- You’ll find these tools in the “View Options” menu during screen sharing.
Here’s a table summarizing the Zoom annotation tools and their specific functions:
| Tool | Function |
|---|---|
| Select Tool | Allows you to select and move any annotations on the screen. |
| Text Tool | Lets you type text directly onto the shared screen with customizable font size, color, and alignment. |
| Draw Tool | Offers freeform lines, straight lines, arrows, rectangles, and circles for drawing. |
| Stamp Tool | Provides shapes like checkmarks, stars, and hearts for quick marking. |
| Spotlight Tool | Includes a spotlight cursor (red dot) and arrow tool for pointing. |
| Arrow Tool | Adds an arrow labeled with your name, indicating who’s pointing at a specific area. |
| Shapes Tool | Found within the Draw Tool, adds shapes with fill and color options. |
| Eraser Tool | Erases any annotations you’ve made (doesn’t affect others’ annotations unless you’re the host). |
| Format Tool | Customizes color, line width, and font size for annotations. |
| Undo/Redo | Quickly undo or redo the last annotation action. |
| Clear Tool | Clears all annotations. Options to clear your annotations, others’ annotations, or all (host only). |
| Save Tool | Saves a screenshot of the screen with annotations as a PNG or PDF. |
How to Enable “Annotate” on Zoom?
Enabling annotations on Zoom is easy and helps boost interaction during meetings. Here’s how you can turn it on:
1. Go to Settings in the Zoom Web Portal
-
- Open your web browser, log in to your Zoom account, and navigate to Settings.
- Under the “In Meeting (Basic)” section, look for the Annotation option.
2. Enable Annotation
-
- Toggle the switch to On for the Annotation setting. This allows participants to annotate during screen sharing.
- Toggle the switch to On for the Annotation setting. This allows participants to annotate during screen sharing.
3. Set Permissions (Optional)
-
- If you’re the host, you can control who can use annotations.
- Once you start a meeting, go to Share Screen, select “More”, and then “Disable Annotation for Others” to prevent participants from using annotations, or leave it enabled for all to collaborate.
You’re all set! Now you and your participants can use the annotation tools during screen sharing sessions.
How to Disable “Annotate” on Zoom?
Sometimes, you may want to limit annotations to keep everyone focused. Here’s how to turn it off:
During a Meeting
- Start a scheduled Zoom meeting and share your screen.
- In the control bar, select “More”, then “Disable Annotation for Others.” This will prevent participants from using the annotation tool while you’re sharing.
In Your Account Settings
- Go to the Zoom Web Portal and navigate to Settings > “In Meeting (Basic)”.
- Find the Annotation option and toggle it Off. This will disable annotation for all future meetings, but you can easily enable it again if needed.
By managing annotation permissions, you can control the flow of interaction and focus during your Zoom sessions. Now you’re ready to customize the feature as you see fit!
How to Annotate on Zoom Web Browser?
Using Zoom in your web browser and want to annotate? Here’s how to do it:
- Start or Join a Meeting
-
- Open Zoom in your preferred web browser and either start or join a meeting.
- Share Your Screen
-
- Click “Share Screen” and choose what you want to share. Unfortunately, the web version has limited annotation features compared to the desktop app, but you can still use basic tools.
- Access Annotations
-
- Look for the toolbar that appears at the top of your screen. Click on “Annotate” to open up the annotation options.
Since the web browser version has fewer annotation tools, if you need more advanced features, consider switching to the desktop app.
How to annotate in Zoom on Mac and Windows?
Annotating on the desktop app for Mac and Windows gives you the full range of tools. Here’s how to get started:
- Share Your Screen
-
- Launch the Zoom desktop app and either start or join a meeting. Click “Share Screen” and select the window you want to share.
- Open the Annotation Tools
-
- Once you’re sharing, a toolbar should appear. Click on “Annotate” to access options like Draw, Text, Spotlight, and Eraser.
- Customize Your Annotations
-
- Use the toolbar to pick colors, change line thickness, or add shapes. You can even save your annotated screen by clicking on “Save” in the toolbar.
With the desktop app, you get the most robust set of tools, whether you’re on Mac or Windows.
How to Annotate on Zoom Chromebook?
Annotating on a Chromebook is straightforward, though a bit limited compared to the desktop app. Here’s how:
- Join or Start a Zoom Meeting
-
- Open Zoom in your Chrome browser, start or join a meeting, and then choose “Share Screen”.
- Access the Limited Annotation Toolbar
-
- The Chromebook experience doesn’t offer the full annotation suite, but you can still use basic tools through the web browser interface. Look for “Annotate” in the toolbar at the top to get started.
- Alternative Option
-
- If you need full features, consider using a tablet or another device with the Zoom app for more advanced annotations.
Chromebooks work best for basic annotations, so keep this in mind if you plan on using more complex tools.
How to Annotate in Zoom on Mobile?
Annotating on Zoom’s mobile app is handy for quick mark-ups and pointers. Here’s how:
- Open Zoom and Start Sharing
-
- Start or join a Zoom meeting on your mobile device. Tap “Share Content” and choose what you want to share.
- Tap on the Annotation Tool
-
- Once sharing, tap on “Annotate” from the menu at the bottom. You’ll get options like Draw, Text, and Spotlight, though they’re a bit simpler than the desktop version.
- Use Mobile-Friendly Tools
-
- You can draw, highlight, or erase, but the mobile app doesn’t support as many customization options. Still, it’s perfect for quick and simple notes on the go.
Mobile annotations are great for quick adjustments, even if they don’t have all the bells and whistles.
How to Annotate on Zoom When Someone Else’s Screen?
- Wait for the Host to Enable Annotations
-
- The host or presenter has to enable the annotation feature first. Once it’s active, you’ll see “View Options” at the top of the screen.
- Select “Annotate” from the View Options Menu
-
- Click “View Options” and select “Annotate”. Now you can use tools like the Pen, Text, and Stamp to make your mark on the shared screen.
- Collaborate Freely
-
- Use the toolbar to highlight points or draw attention to key areas. When you’re done, click “Clear” to erase your annotations, or simply exit the meeting to leave them behind.
Tips for Using Annotations Effectively
Using Zoom’s annotation tools can really take your meetings to the next level, but a few tips can make a big difference. Let’s dive into how to use annotations like a pro:
1. Plan Ahead and Get Comfortable
- Take a little time to explore the annotation tools before your meeting. Getting familiar with them in advance means you won’t be fumbling during the call. Plus, it helps you look and feel confident!
- Run a quick practice session—maybe with a colleague or friend—to test everything out. This way, you’re all set to deliver a smooth, professional presentation.
2. Color is Your Friend—Use It Strategically!
- Colors are a great way to make your annotations pop. Try using contrasting colors that stand out against the background. You’ll want your key points to be easy to spot.
- Give each color a purpose. For example, red could highlight crucial points, blue might signal supporting details, and green could indicate action items. This makes it easier for everyone to follow along.
3. Keep It Simple, Keep It Clear
- Less is more when it comes to annotations. Try not to clutter up the screen with too many drawings or notes. Stick to the essentials, like shapes, arrows, or highlights, to make your points.
- Remember, clutter can be distracting. Clean and focused annotations help keep everyone on track and make your message clearer.
4. Encourage Team Input with Stamps and Text
- Want to make it interactive? Invite participants to use the Stamp tool to add their ideas or approvals. It’s a quick way to collect feedback, and everyone gets a say.
- The Text tool is also great for this. Let everyone label ideas or add short comments. It’s perfect for collaborative meetings where multiple voices are needed.
5. Use the Spotlight and Arrow Tools to Guide Attention
- The Spotlight tool is like a laser pointer—super handy for drawing attention to a particular area without leaving marks all over the screen. Great for keeping everyone’s focus right where you want it!
- The Arrow tool is also useful, especially when there are multiple presenters. You can even label your arrows, so people know who’s pointing at what.
6. Save Those Key Annotations
- Need to remember what was discussed? Use the Save tool to grab a snapshot of your annotated screen. It’s perfect for follow-ups or sending out notes to participants afterward.
- Saving is also a lifesaver for training sessions or project meetings where you need to keep a record of everything. It reinforces the main points and helps everyone stay on the same page.
7. Don’t Be Afraid to Clear the Screen
- When you’re ready to move on, clear the annotations to keep things fresh. The Clear tool lets you wipe away everything so you can start with a clean slate for the next topic.
- You can clear just your own annotations or everyone’s if you’re the host. It’s a great way to signal a new focus and make sure no one’s lingering on old info.
8. Set Some Ground Rules for Group Annotations
- In a big meeting, it helps to have a few rules for when and how people can annotate. This way, you can avoid a free-for-all and make sure everyone’s input is respected.
- You’re in control as the host. If things start getting out of hand, you can temporarily disable annotations and bring them back when it’s time for feedback.
Troubleshooting Common Annotation Issues on Zoom
Annotation tools not working quite like they should? Don’t worry—these tools can be a bit finicky sometimes. Here are some quick fixes to common issues with Zoom annotations:
1. Annotation Tools Not Showing Up
- Check Your Permissions: If you can’t see the annotation tools, it might be because the host hasn’t enabled them. Ask the host to go to Settings in the Zoom web portal and ensure that Annotation is turned on.
- Try Rejoining the Meeting: Occasionally, Zoom just needs a little nudge. Leave the meeting and rejoin—it can reset the tools and bring them back.
2. Annotations Not Working in Browser Version
- Switch to the Desktop App: The web version of Zoom has limited annotation features, so if you can’t access all the tools, try using the desktop app instead. It offers a fuller suite of annotation options.
- Update Your Browser: Make sure your browser is up-to-date, as older versions can sometimes interfere with Zoom features. Chrome and Firefox usually work best for Zoom.
3. Annotations Not Visible to Participants
- Check Share Settings: If participants can’t see your annotations, make sure you’re actually sharing your screen and not just a window. Zoom annotations are linked to the shared screen, so if you’re sharing a single application, they might not show up for others.
- Enable Annotations for Participants: As the host, you control who can annotate. Double-check your settings to ensure you’ve allowed participants to use annotations. You can find this option in the More menu during screen sharing.
4. Delay or Lag with Annotations
- Reduce Bandwidth Use: Lag can be caused by a weak internet connection. Try turning off your video to free up bandwidth for annotations.
- Close Other Programs: If you have other programs running, they could be eating up resources. Close unnecessary applications to give Zoom more power.
5. Annotations Keep Disappearing
- Disable Auto-Clearing: Some screen-sharing tools automatically clear annotations when you stop sharing. If this is an issue, make sure Auto-Clear isn’t enabled in your settings.
- Save Annotations Regularly: If you’re concerned about losing your annotations, use the Save tool frequently. This way, even if they disappear, you’ll have a backup.
6. Participants Can’t Annotate on Shared Screen
- Make Sure Annotation is Enabled for Everyone: Go to More in your screen-sharing toolbar and select Enable Annotation for Others. This should allow participants to start marking up the screen.
- Update Zoom App: Occasionally, outdated versions of Zoom can restrict certain features. Have everyone update their app to ensure compatibility.
7. Annotation Tools Are Grayed Out
- Check Zoom Settings: Sometimes, annotations might be disabled at the account level. Log in to the Zoom web portal, go to Settings, and confirm that Annotation is toggled on.
- Confirm Host Controls: If you’re not the host, check with them to see if they’ve restricted annotation tools for participants.
Enhance Your Zoom Annotations with Krisp’s AI Meeting Assistant
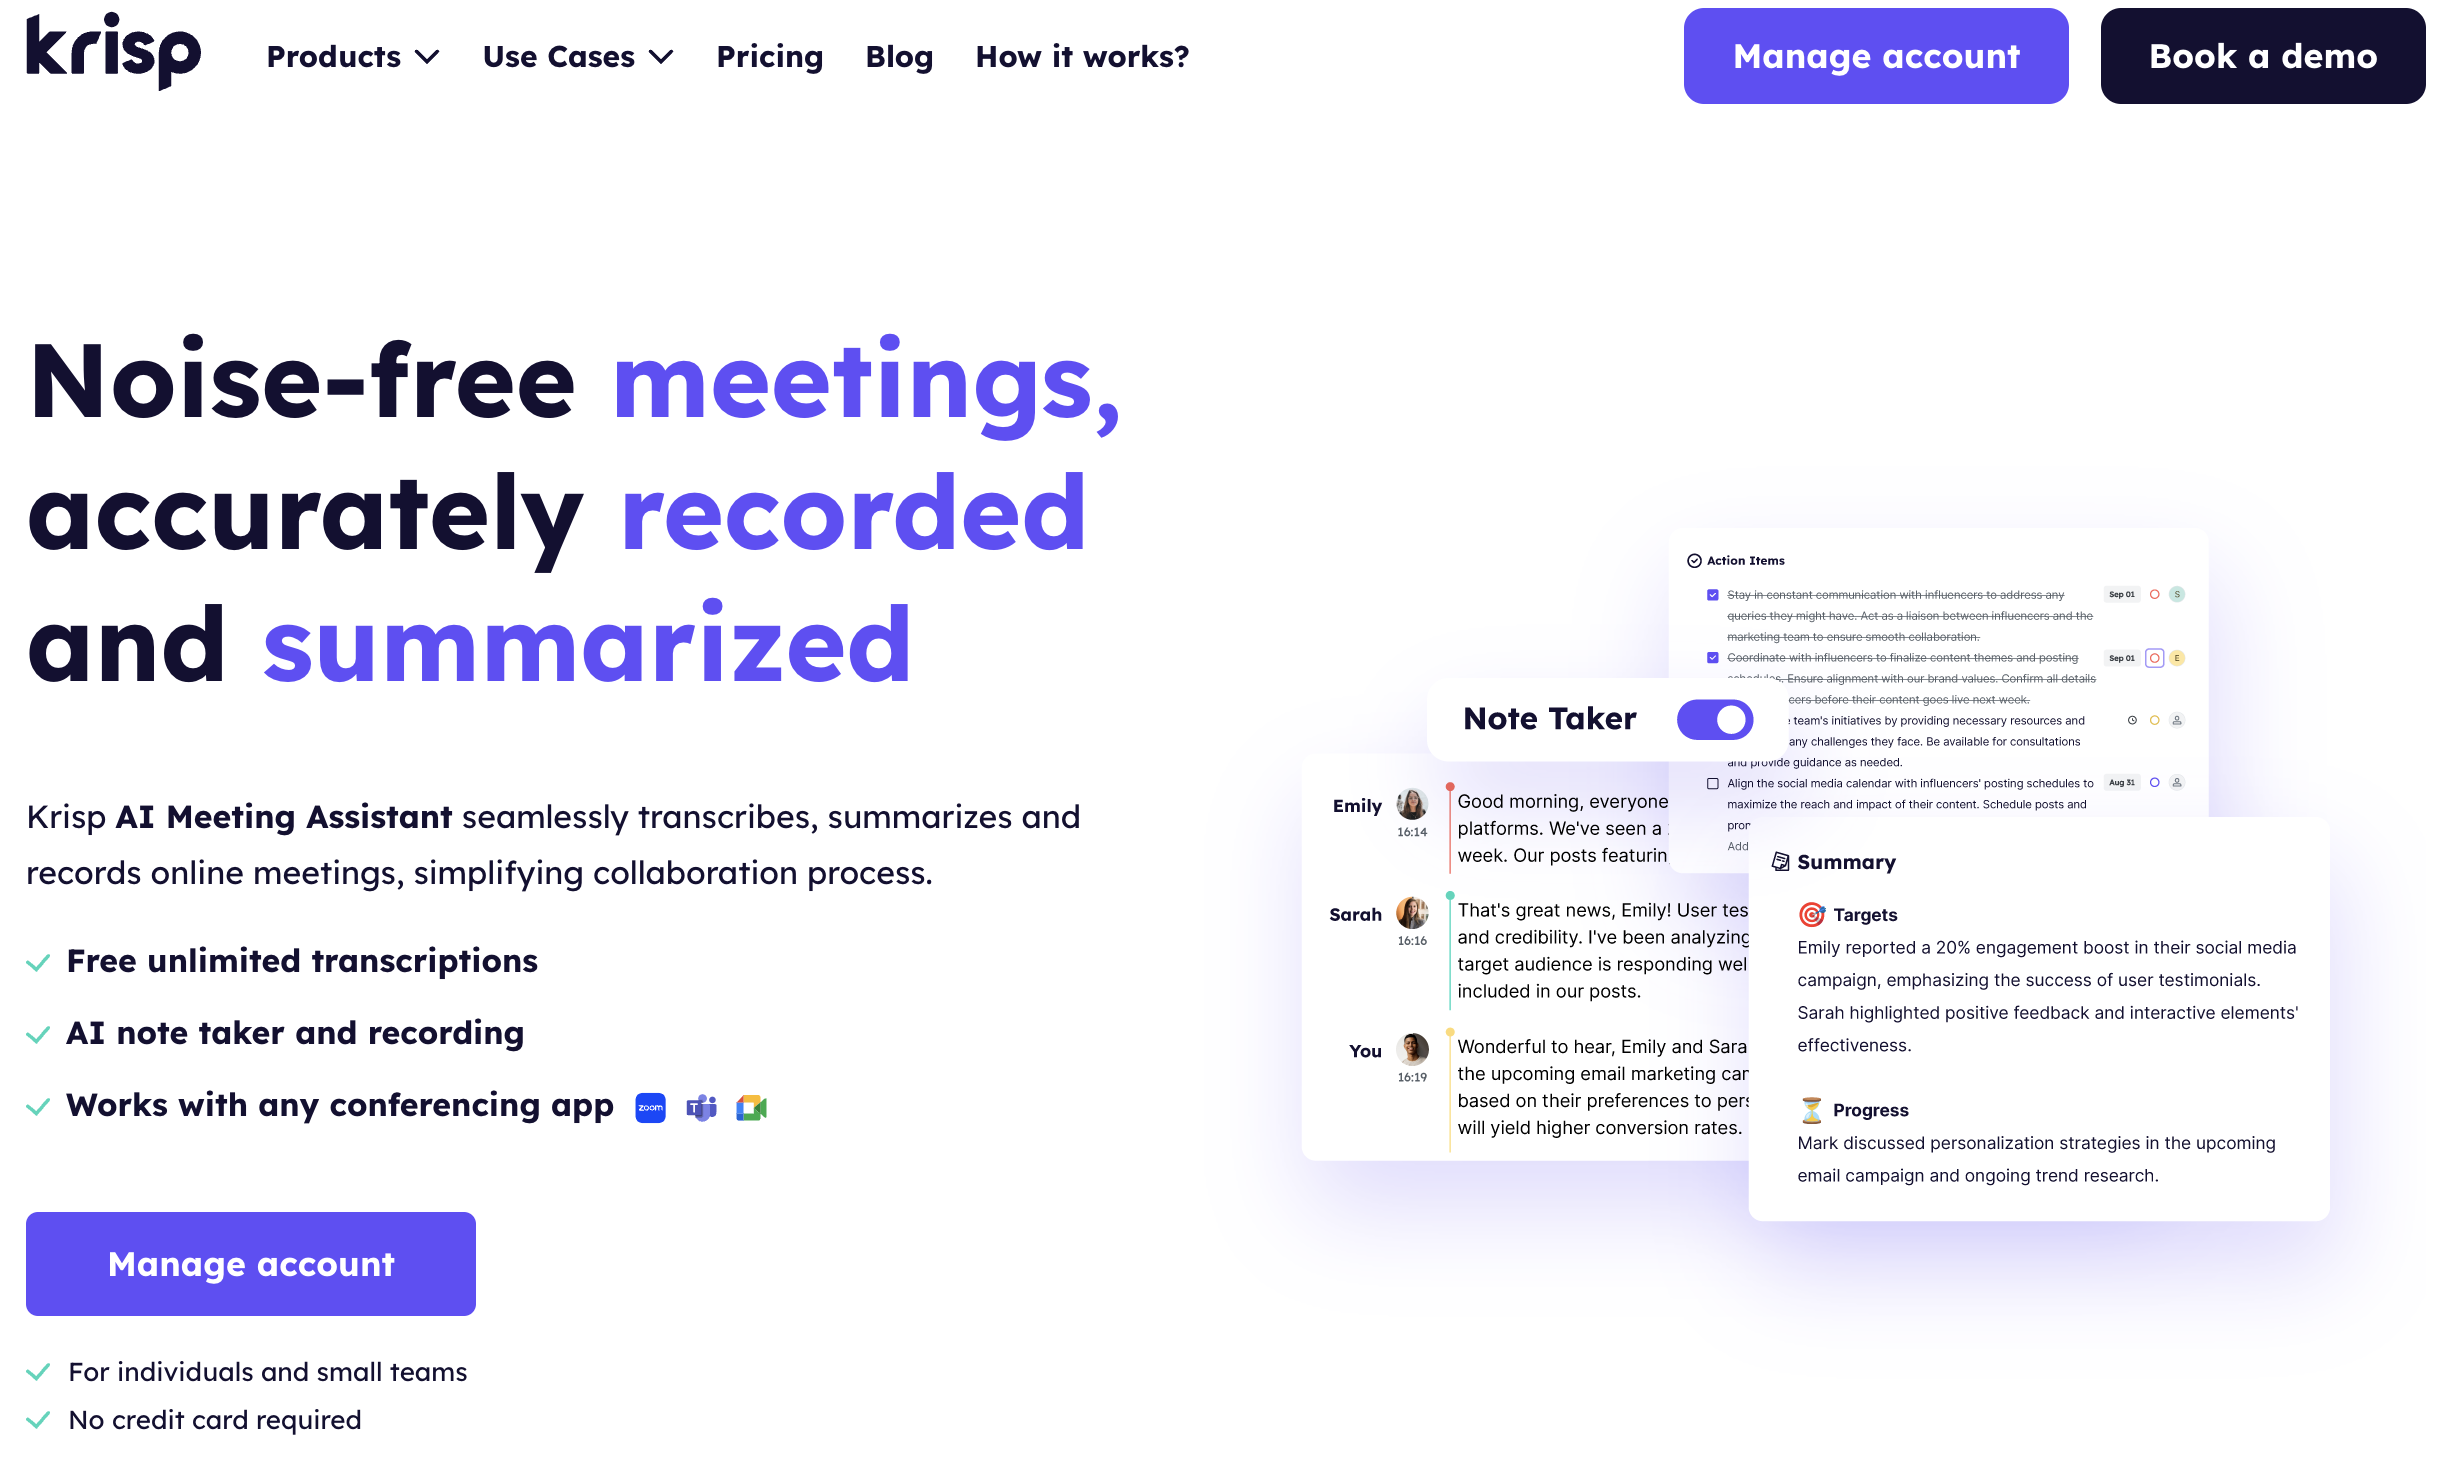
While Zoom’s annotation tools can really boost collaboration, they’re even better when combined with Krisp’s AI Meeting Assistant. Here’s how Krisp can level up your Zoom experience:
Minimize Background Noise for Clearer Conversations
Krisp’s AI Meeting Assistant helps eliminate background noise, so you can focus on the annotations and discussion without distractions. No more worrying about barking dogs or noisy neighbors!
Automatic Transcriptions for Better Follow-Ups
Krisp can automatically transcribe your meetings, capturing everything from your annotations to the full conversation. This makes it easy to review and share key points later on, without missing any details.
Enhanced Focus and Productivity
With Krisp’s AI Assistant reducing interruptions, your team can stay focused. Whether it’s a brainstorming session or a virtual workshop, Krisp ensures your annotations and conversations are crystal clear for everyone involved.
FAQs