Can you record a Zoom meeting if you’re not the host? Absolutely! While Zoom usually reserves recording permissions for hosts, there are still some handy ways to capture those important meetings as a participant.
In this guide, we’ll show you how to record a Zoom meeting without needing permission from the host, and walk you through different options.
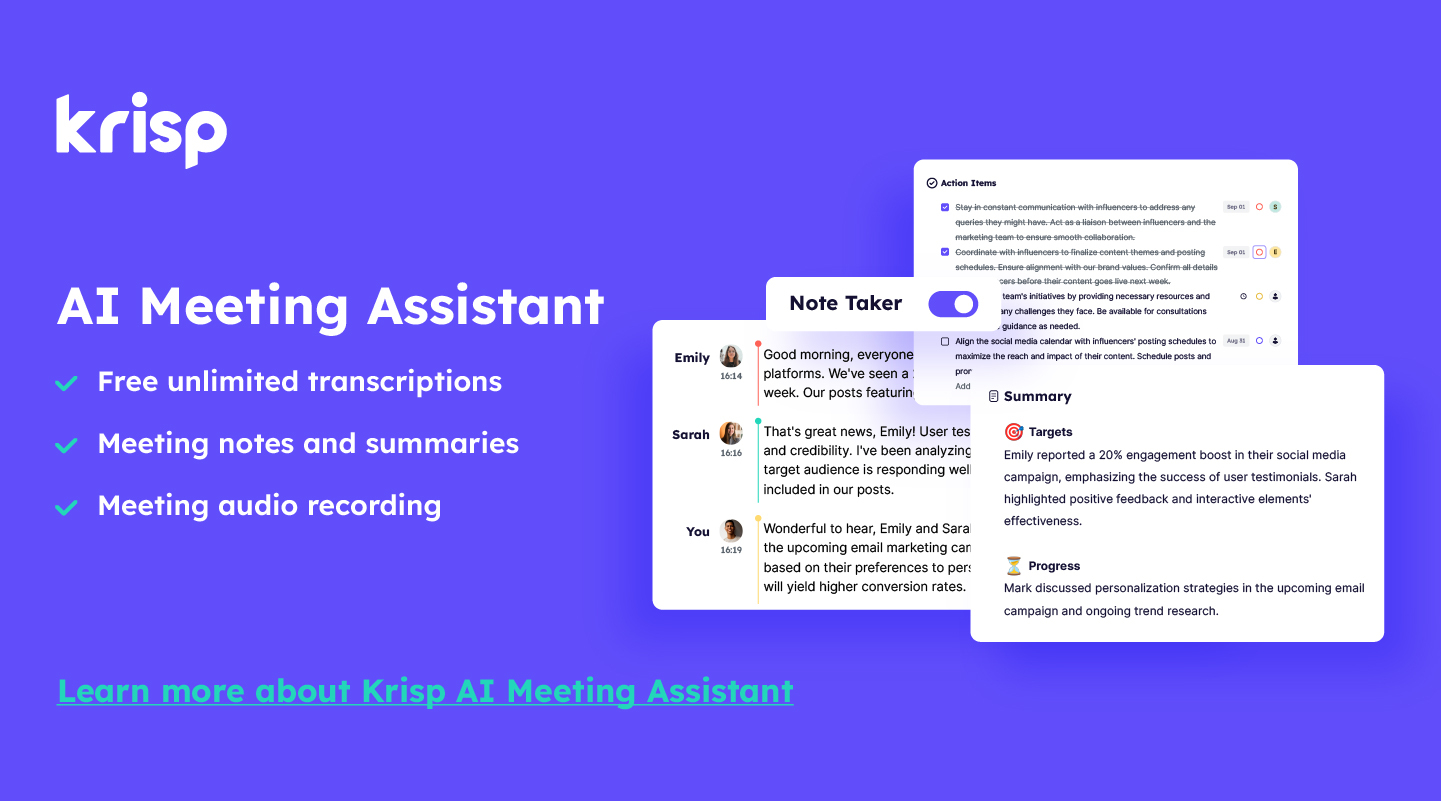
Recording meetings can be a game-changer, especially if you want to save key moments, take better notes, or share the content with others. We’ll cover a few different methods, including Krisp’s new meeting recording feature that makes it easy to record with crystal-clear audio—no background noise, just the important stuff. Plus, we’ll share some tips for recording ethically and making sure you get the best quality possible. Let’s dive in and make sure you’re ready to record like a pro!
How to Record a Zoom Meeting Without Host Permissions
Recording a Zoom meeting without host permissions is easier than you might think. Let’s explore a few methods that let you capture your meetings without needing to be the host.
Option 1: Request Permission from the Host
The easiest way is to just ask the host. Here’s how you can go about it:
- Ask the host politely: Just send a quick message or mention it in the meeting. Explain why you’d like to record—maybe you need it for notes or to review later. Most hosts are usually fine with it and they can set the permissions when scheduling the Zoom meeting.
- Get recording permission: If they say yes, they’ll grant you recording access through Zoom. You’ll get a notification when it’s done.
- Hit record: Once you see the record button on your Zoom toolbar, just click it and you’re good to go. When the meeting ends, your recording will either be saved to the cloud or on your computer, depending on the settings.

Option 2: Use Krisp’s Meeting Recording Feature
If you want a bit more control, Krisp’s meeting recording feature is perfect. Here’s how to use Krisp to record your Zoom meeting:
- Open up Krisp: If you don’t have it yet, go ahead and download Krisp. Once you’re set up, find the recording feature—super easy to spot.
- Adjust your recording settings: Choose your video quality and audio source, and definitely enable noise cancellation. That way, you get clear audio without any background noise.
- Join your Zoom meeting: Go ahead and open Zoom, join your meeting, then head back to Krisp.
- Start recording with Krisp: Just click the record button in Krisp. It’ll run in the background while you’re in Zoom, so you can focus on the meeting.
- Wrap up and save: When you’re done, stop the recording in Krisp, and it’ll save right to your computer. Easy as that!

This feature is especially useful if you want a seamless experience without juggling multiple applications. Plus, you get the added benefit of being able to revisit the recording to help with follow-up tasks.
Option 3: Use Screen Recording Software
Finally, you can use screen recording software to capture your Zoom meetings without needing permission. Here’s how it works:
- Pick a screen recording app: There are tons of options out there—OBS Studio for computers or built-in screen recorders on mobile work great.
- Set up your audio and video: Make sure your app is set to capture both system audio and your microphone. This way, you’ll get both sides of the conversation.
- Join the Zoom meeting and start recording: Once you’re in Zoom, hit record on your app. Minimize distractions on your screen for a cleaner recording.
- Save the recording: After the meeting, stop and save your recording. Most apps let you choose where to save it, so you can easily find it later.
How To Use Krisp’s Screen-Recording for a Zoom Meeting on Different Devices?
Recording on Windows
- Open Krisp: Make sure you’ve downloaded and installed Krisp on your desktop. Launch the app and navigate to the screen recording feature.
- Set Your Recording Preferences: Choose whether to record your entire screen or just specific windows, and set your video and audio quality. Enable noise cancellation for clear audio.
- Join Your Zoom Meeting: Start your Zoom meeting as you normally would. With Krisp, there’s no need to switch between multiple apps—it handles everything within its interface.
- Start Recording with Krisp: Hit the record button in Krisp to begin. The app will capture both video and audio in high quality, and it doesn’t require any bots to join the meeting.
- Access the Recording on Your Web Account: Once the meeting wraps up, Krisp automatically saves the recording to your web account’s Meetings page. You can review it later and access key details easily.
Recording on Mac
If you’re using Krisp’s screen recording feature on macOS, there are a few extra steps to ensure the app has the necessary permissions to capture your screen and audio. macOS has built-in privacy and security protocols, so apps that record your screen or audio need explicit permission from you.
1. Open Krisp and Start the Screen Recording Feature: Launch Krisp and navigate to the recording option. When using the screen recording feature for the first time, a banner will appear, prompting you to grant Krisp permission to record your screen and audio.
2. Grant Screen Recording Permissions: Click on “Open System Settings” when prompted. This will take you directly to the settings where you can adjust permissions.
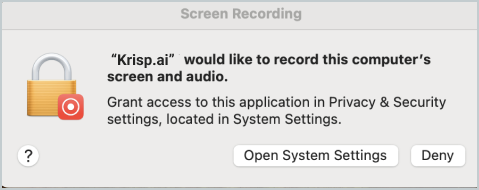
3. Toggle On Permissions for Krisp: In the System Settings window, find the “Screen Recording” option in the Privacy & Security section. Locate Krisp in the list of apps, and toggle it on to allow Krisp to access your screen.
4. Join Your Zoom Meeting and Start Recording: Once permissions are granted, return to Krisp and start your Zoom meeting. Hit the record button to begin capturing both video and audio. Krisp’s noise cancellation ensures you get clear audio quality, all without needing any bots to join your meeting.
5. Review Your Recording on Krisp’s Web Account: When you’re done, the recording will be saved to your Krisp web account, where you can access it for easy playback and reference.
Can You Record a Zoom Meeting Without Permission?
You actually can. Zoom’s recording feature is usually limited to the host, but there are ways to record as a participant with the help of third-party tools.
One option is Krisp’s meeting recording feature, which allows you to record Zoom meetings without needing host access. It also includes noise cancellation, so you’ll get clear audio without background distractions. Another method is to use a screen recording app, which can capture both video and audio, although quality can vary depending on the software you choose.
While recording without permission is possible, it’s always good to consider privacy and ethics. If you can, let others know that you’re recording so everyone stays informed and comfortable.
Best Practices for Recording Zoom Meetings
Here are some best practices to keep in mind when recording Zoom meetings, especially when you’re a participant:
- Notify Participants: Whenever possible, let others know that you’ll be recording. Transparency helps maintain trust and ensures everyone is on the same page.
- Check Your Audio and Video Settings: Before the meeting, make sure your audio and video settings are configured correctly. This will help you capture clear sound and visuals, especially if you’re using a tool like Krisp with noise cancellation.
- Use High-Quality Recording Software: Choose a reliable recording tool that suits your needs. Krisp is a good choice if you want clear audio with minimal background noise, but there are other screen recording options if Krisp isn’t available on your device.
- Secure Your Recordings: After recording, store your files in a secure location to protect sensitive information. If you’re sharing the recording, consider using password protection or other security measures.
- Test Your Setup in Advance: If you’re new to recording, do a quick test run before the actual meeting. This way, you can troubleshoot any technical issues ahead of time.
- Follow Ethical Guidelines: Recording without permission can sometimes be a gray area, so be mindful of privacy and respect others’ preferences. It’s best to get consent from participants whenever possible.
- Use Noise-Canceling Features: For a better listening experience, consider using noise cancellation to reduce background noise. This can be especially helpful if you’re in a noisy environment or have other distractions nearby.
FAQs