Zoom is now one of the most popular tools for meetings, classes, and virtual events. But running a Zoom meeting smoothly—especially with a big group—can be tricky. That’s where the co-host feature comes in. By making someone a co-host, you can get help managing the meeting, like handling participants, muting people when needed, and keeping everything on track. It’s a simple way to share responsibilities and make your meeting run smoother. If you’re wondering how to set someone as a co-host in Zoom, this guide will walk you through it.
Prerequisites for Adding a Co-Host
Before you can make someone a co-host on Zoom, there are a few things to check off to ensure everything goes smoothly. Here’s what you need:
- Account Type: First, make sure you’re using a Zoom Pro, Business, Education, or Enterprise account. The co-host feature is only available on these paid plans, so if you’re on the free version, you’ll need to upgrade to get access.
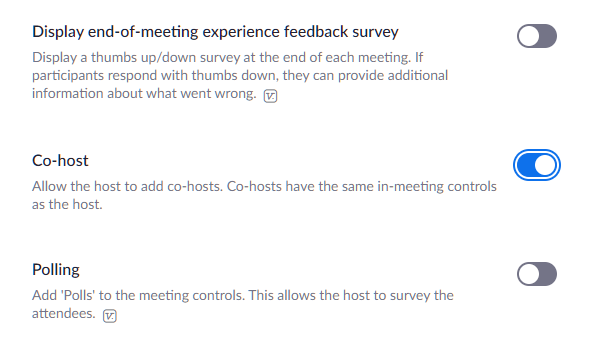
- Enable the Co-Host Feature: Next, double-check that the co-host option is turned on in your Zoom settings. To do this, log in to the Zoom web portal (you’ll need to do this from a browser, not the Zoom app). Go to Settings > In Meeting (Basic), and scroll until you see the “Co-host” setting. Toggle it on, and you’re all set to start adding co-hosts to your meetings.

- Access to Host Controls: Finally, remember that you need to be the host of the meeting to assign co-host roles. Only the main host has the power to give others co-host permissions, so make sure you’re the one who started the meeting or has host privileges.
Once these basics are covered, you’re ready to add a co-host and take your Zoom meeting to the next level.
How to Make Someone a Co-Host on Zoom?
When adding a co-host on Zoom, the process varies slightly based on whether you’re an individual user or part of a group or account (such as a business or educational institution):

For Account
To enable or disable the co-host feature for all users in the account:
- Sign in to the Zoom web portal as an administrator with the privilege to edit account settings.
- In the navigation menu, click Account Management then Account Settings.
- Click the Meeting tab.
- Under In Meeting (Basic), click the Co-host toggle to enable or disable it.
- If a verification dialog appears, click Enable or Disable to verify the change.
- (Optional) To prevent all users in your account from changing this setting, click the lock icon , and then click Lock to confirm the setting.
For Group
To enable the or disable the co-host feature for a group of users:
- Sign in to the Zoom web portal as an administrator with the privilege to edit groups.
- In the navigation menu, click User Management then Groups.
- Click the applicable group name from the list, then click the Meeting tab.
- Under In Meeting (Basic), click the Co-host toggle to enable or disable it.
- If a verification dialog appears, click Enable or Disable to verify the change.
- If the option is grayed out, it has been locked at the account level and needs to be changed at that level.
- To prevent all users in your group from changing this setting, click the lock icon , and then click Lock to confirm the setting.
For User
To enable the co-host feature for your own use:
- Sign into the Zoom web portal.
- In the navigation menu, click Settings.
- Click the Meeting tab.
- Under In Meeting (Basic), click the Co-host toggle to enable or disable it.
- If a verification dialog appears, click Enable or Disable to verify the change.
- If the option is grayed out, it has been locked at either the group or account level, and you will need to contact your Zoom administrator.
How to assign a co-host during a meeting?
- Start the meeting as the host.
- In the meeting controls toolbar, click the Participants icon .
- Hover over participant’s name who will be a co-host, and choose More.
- Click Make Co-Host.
Once a participant becomes a co-host, they’ll have access to the co-host controls.
Limitations and Permissions of Co-Hosts
While co-hosts are super helpful for running a Zoom meeting smoothly, they don’t have full control like the main host. Here’s a quick overview of what co-hosts can and cannot do:
What Co-Hosts Can Do?
- Manage Attendees: Co-hosts can help keep the meeting organized by muting participants, removing disruptive attendees, and managing the chat.
- Start and Stop Recordings: If your meeting needs to be recorded, co-hosts can start and stop the recording as needed. This can be a lifesaver when the main host is busy with presentations or other tasks.
What Co-Hosts Cannot Do?
- Breakout Rooms: Co-hosts can join and manage breakout rooms but can’t create or start them. Only the main host has the power to set up and open breakout rooms.
- End the Meeting: Co-hosts don’t have permission to end the meeting for everyone. Only the main host can fully close the session.
Make the most of co-hosts by giving them specific roles. For example, one co-host can handle questions in the chat while another manages participants’ audio. This way, the meeting runs smoothly without too much overlap. Knowing these limits helps ensure that everyone’s on the same page, making it easier for co-hosts to support the main host without stepping on each other’s toes.
Tips for Efficient Use of the Co-Host Feature with Krisp
Using Krisp’s capabilities during Zoom meetings can significantly improve audio quality and reduce distractions. Here are some key benefits of using Krisp alongside Zoom’s co-host feature:
- Real-Time Noise Cancellation: Krisp removes background noise for both the speaker and listeners, ensuring that important information is heard clearly without disruptions from surrounding sounds.
- Echo and Voice Cancellation: Krisp helps eliminate echoes and unwanted voices, making it easier for co-hosts to manage discussions and ensure everyone can focus on the main speaker.
- High-Quality Voice Clarity: With Krisp’s HD voice clarity, co-hosts and hosts can communicate more effectively, allowing for smooth interaction and better understanding among participants.
- Enhanced Privacy: Krisp filters out background voices, which is especially useful when multiple co-hosts or participants are working from shared spaces, maintaining a professional sound environment.
- Noise-Free Meeting Recordings: Krisp’s noise cancellation applies to recorded audio as well, ensuring that meeting recordings capture only the speaker’s voice without any background noise. This results in clearer, more professional recordings that are easier to review and share.
- Enhanced Audio Quality for Playback: With Krisp’s echo and voice cancellation, recorded meetings maintain high audio quality, making it easier for attendees or team members who review the recordings to understand the content without distractions.
- Consistent Quality for Co-Hosts: Co-hosts can use Krisp to maintain audio clarity during their sections, ensuring that each part of the meeting—whether live or recorded—has the same, high-quality sound.
How to Set up Zoom with Krisp?
Recording Zoom meetings with Krisp is a smart choice—it lets you capture every discussion as a participant (no host permissions needed) while delivering clear audio, accurate transcripts, and concise automated notes with summaries and action items. So grab a step-by-step guide of the set up process.
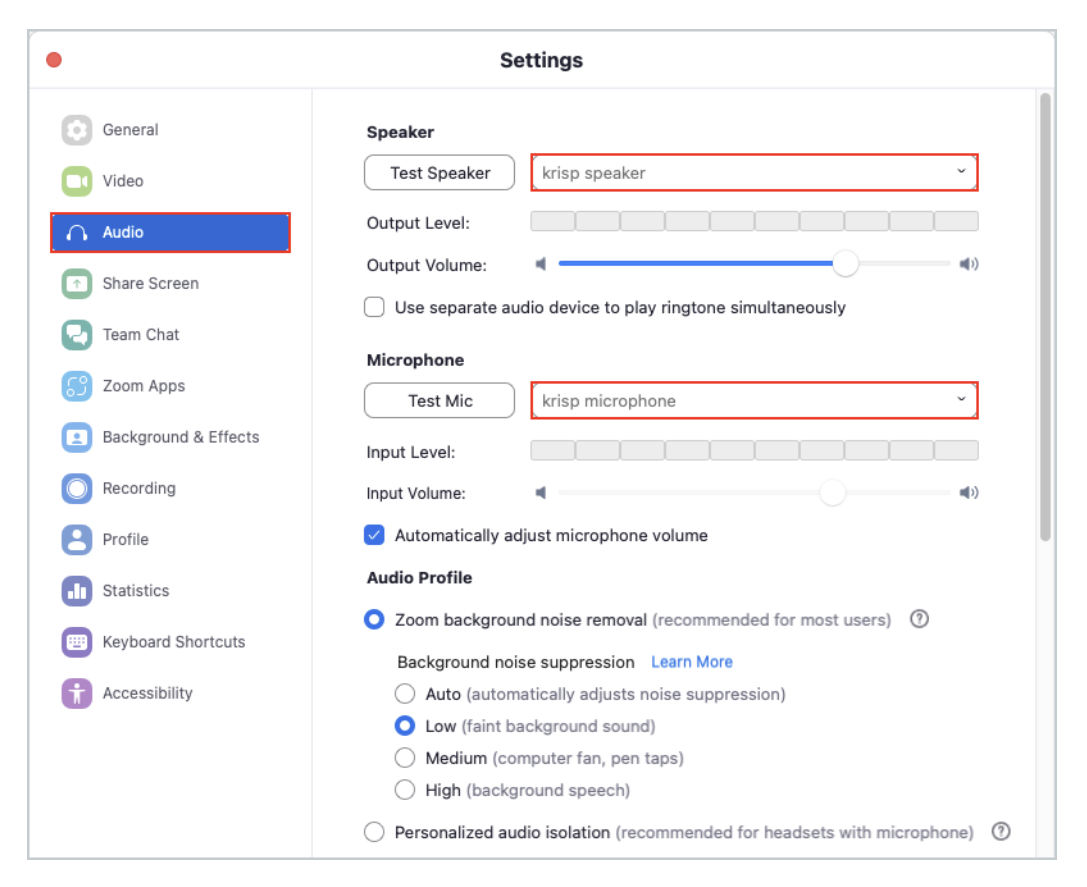
- Select Krisp Microphone and/or Speaker to work in Zoom. For that, go to Zoom and click on the Settings icon from the upper right corner of the screen.

- From Settings, go to the Audio tab and change the Speaker/Microphone to Krisp.
- Open Krisp and pick the physical microphone and speaker you wish to use and turn on Noise Cancellation toggles.
- Start your noiseless call
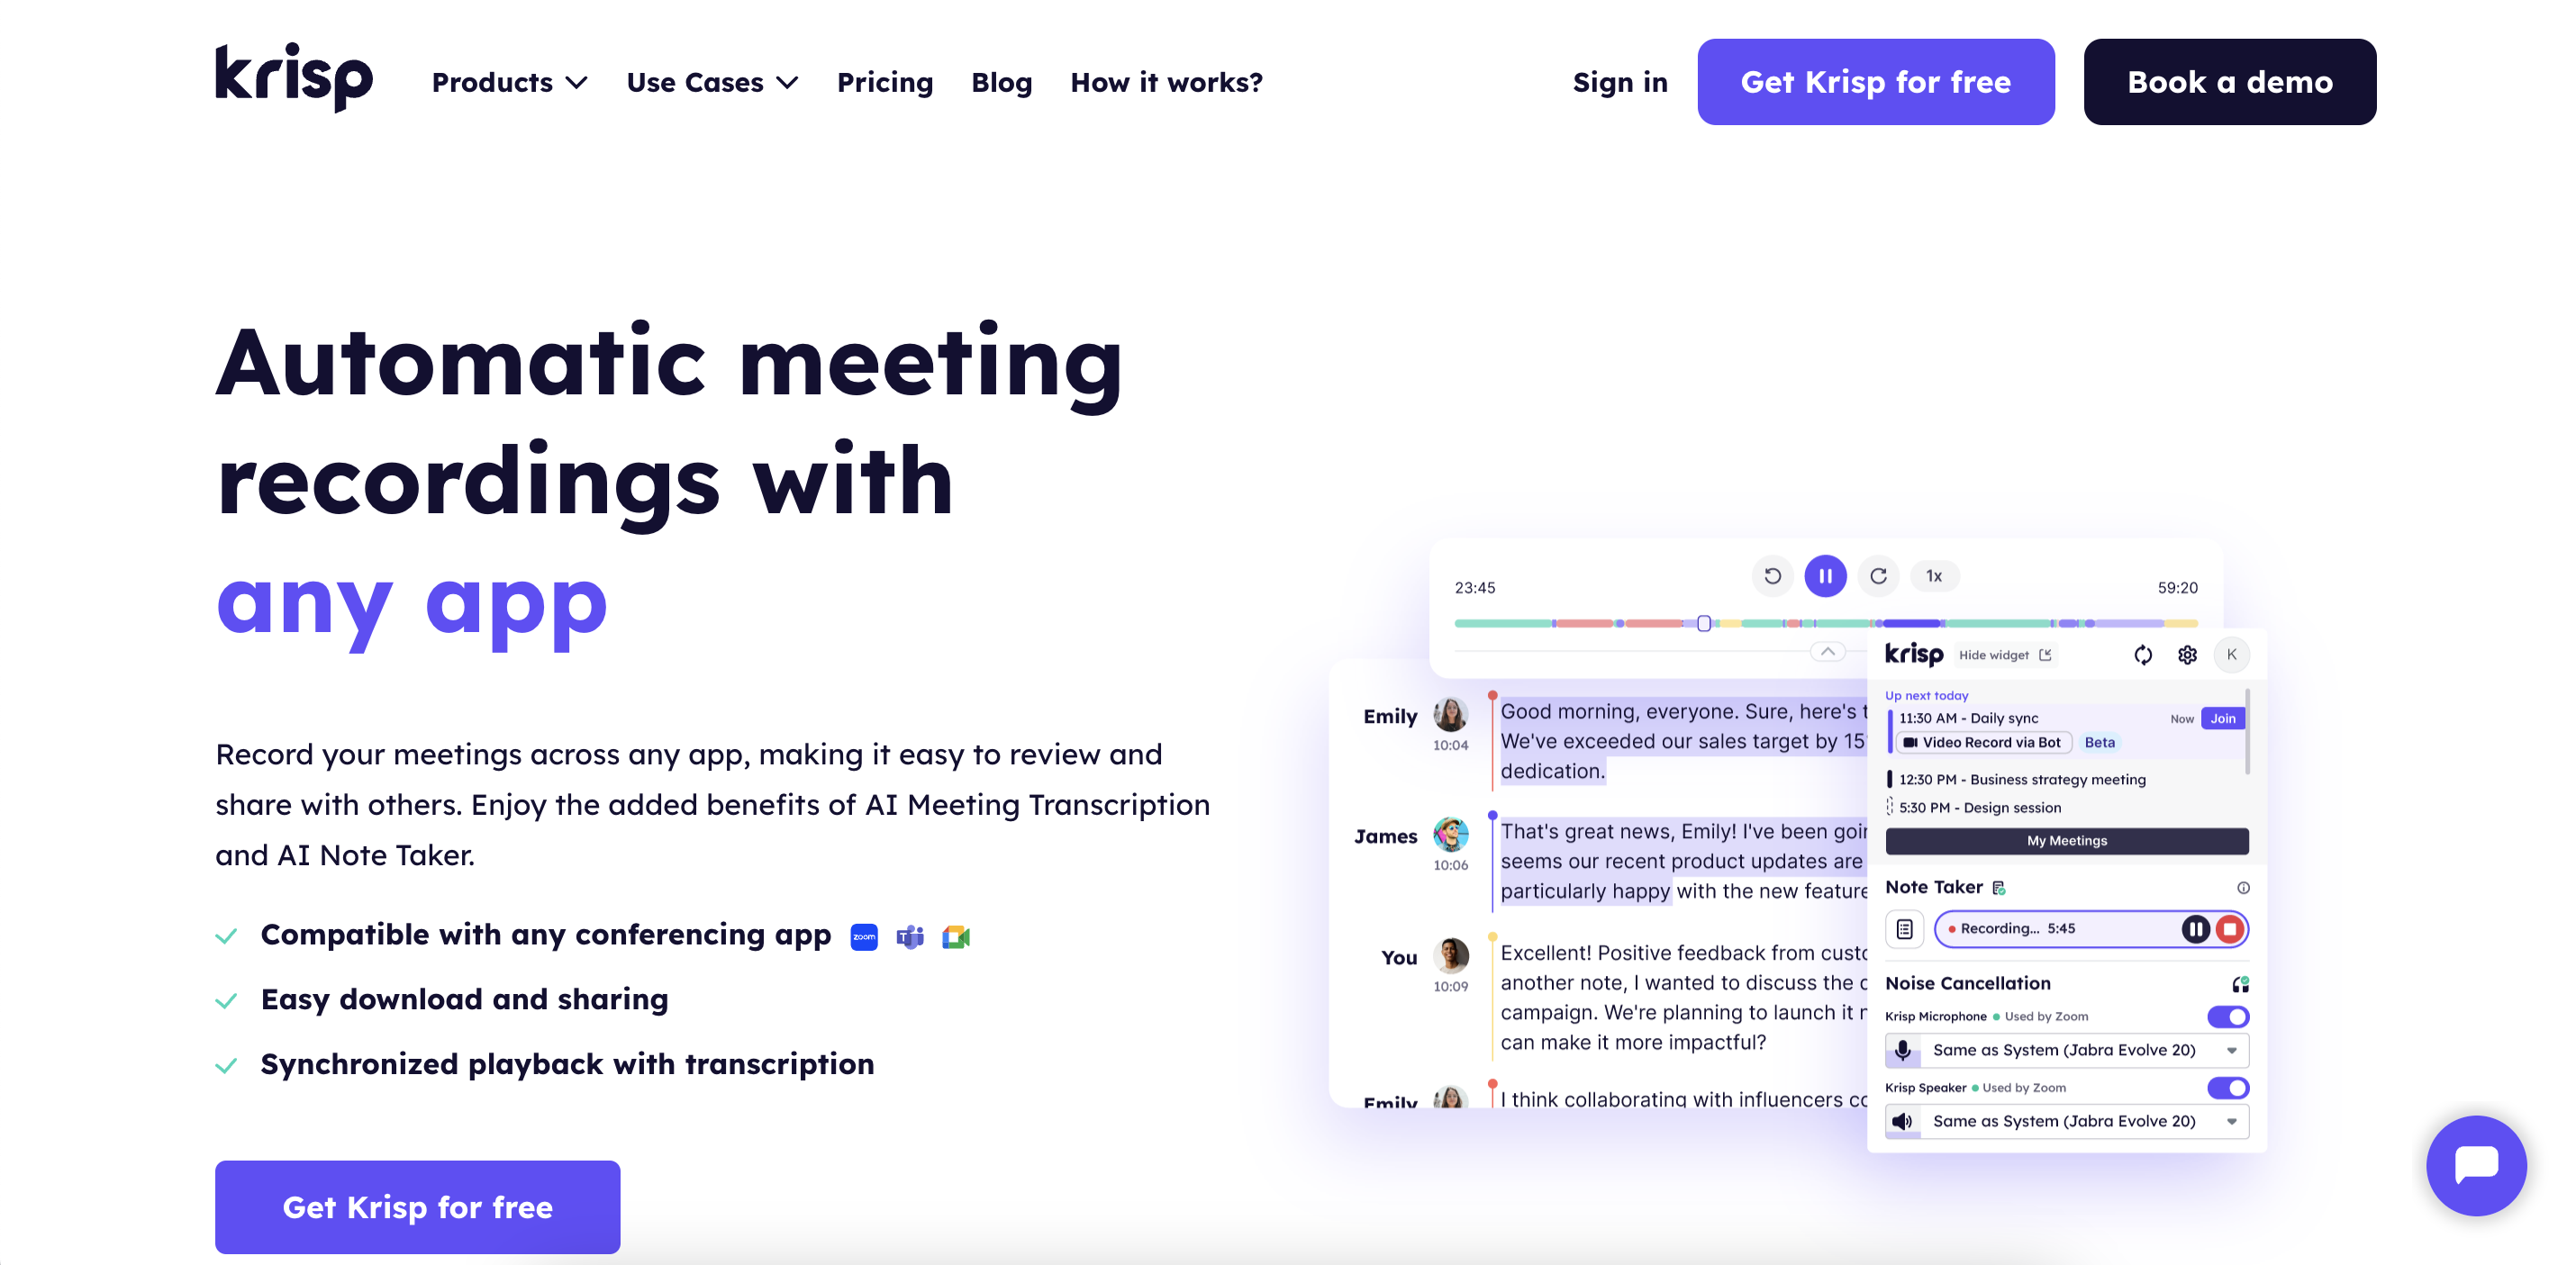
Whether you’re meeting on Zoom, Google Meet, Microsoft Teams, or any other platform and need ai video recording for your meeting, Krisp lets you record the conversation with clear audio, transcriptions, smart meeting summaries, and all your key takeaways organized in one place.
FAQ
Account Type: The co-host feature is only available on Pro, Business, Education, and Enterprise Zoom accounts, so if you’re on the free version, it won’t be available.
Host Role Required: Only the meeting host can assign co-hosts, so ensure you’re logged in as the host or have been granted host privileges.
1. Sign in to the Zoom web portal and go to Meetings.
2. Find and select the meeting you want to edit.
3. In the Alternative Hosts field, type the email address of the person you want to add (they must be on the same Zoom account).
4. Save your changes.
The designated alternative host will receive an email with the link to start the meeting, allowing them to act as the main host if you’re unavailable


