Audio transcription is a powerful tool for transforming spoken content into written text, making it easier to search, share, and analyze. Whether you’re capturing meeting notes, creating accessible content, or repurposing podcasts into blogs, transcription can streamline your workflow and enhance productivity. With Krisp’s audio transcription feature, the process becomes even simpler and more accurate.
This guide covers everything you need to know about transcribing audio files with Krisp, including step-by-step instructions, best practices, and practical applications. Discover how to leverage Krisp’s unique benefits—like noise cancellation and multi-language support—for fast, reliable transcription results.
What is an audio transcription?
Audio transcription is simply the process of converting spoken words from an audio file into written text. Imagine you’ve recorded a meeting, a podcast, or maybe even a lecture. Instead of listening back to every minute of audio, transcription lets you have a text version that’s easier to reference, search through, or repurpose.
Whether you’re taking notes, creating content, or need a quick way to review important discussions, transcription makes it all faster and easier. With tools like Krisp, which now offers an audio and video file transcription feature, you can get accurate text from your audio files (meeting recordings) without the hassle of manual typing. It’s a huge time-saver and perfect for anyone looking to stay organized and efficient.
Step-by-Step Guide to Transcribing an Audio File Using Krisp
Ready to turn your audio into text? Here’s a simple step-by-step guide on how to transcribe audio (or even video) files with Krisp’s latest feature.
Step 1: Open Krisp and Log In
First, make sure you’re logged into your Krisp account. If you’re new, sign up—it’s quick, and you’ll be ready to go in minutes.
Step 2: Head to the Meetings Page
Once you’re in, go to the Meetings page, where you’ll find the option to start importing files.
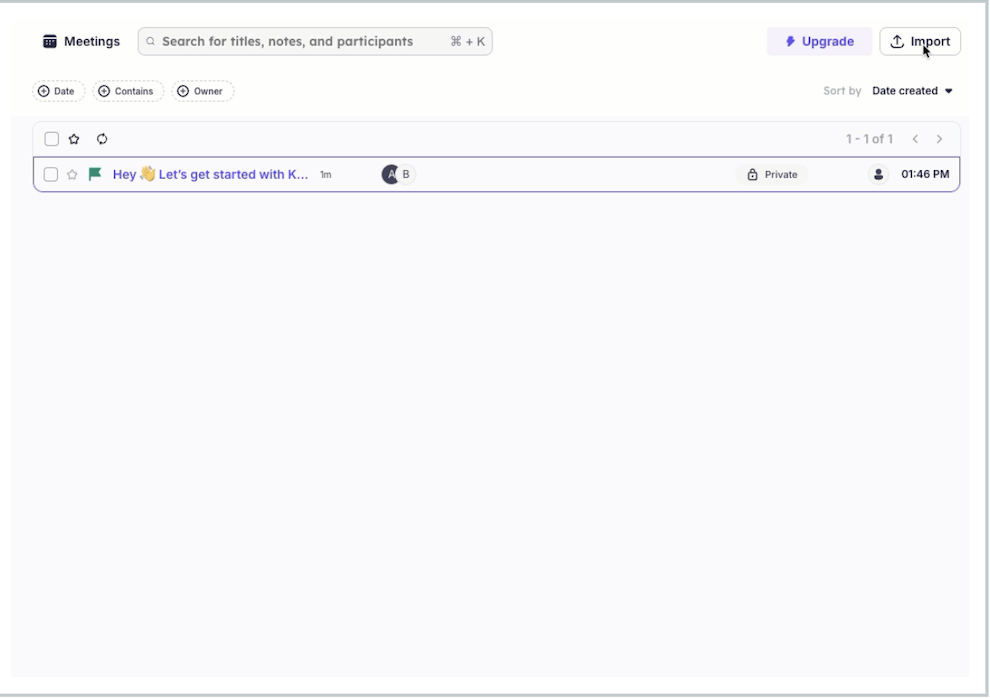
Step 3: Click the Import Button
In the top-right corner of the Meetings page, click the “Import” button. This will open a new window for uploading your audio or video file.
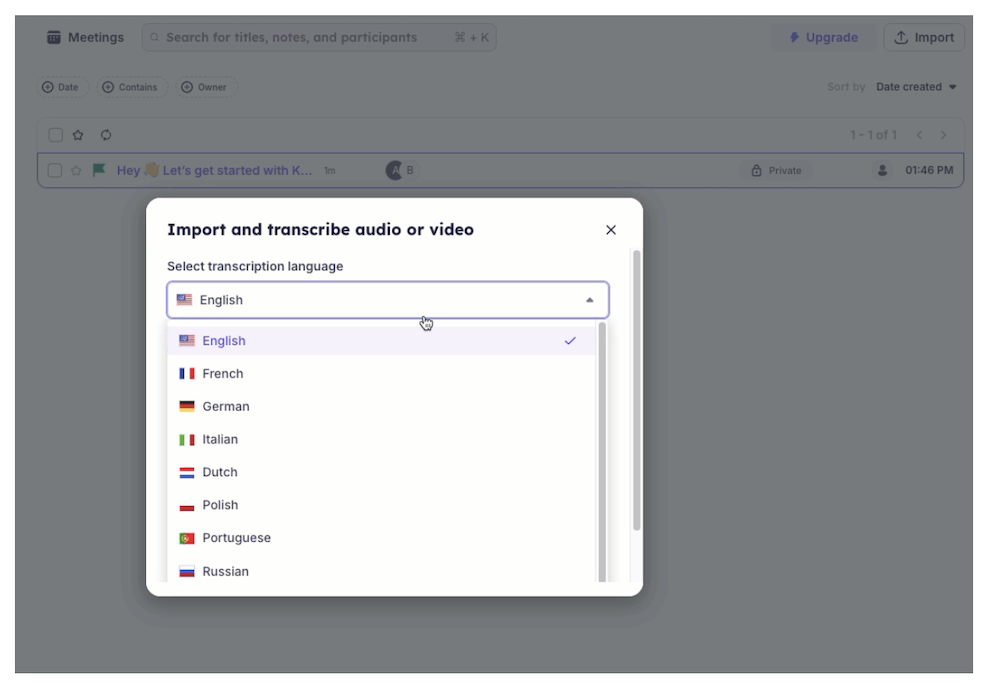
Step 4: Select Your Transcription Language
In the import window, you’ll see a dropdown list to choose your transcription language. By default, Krisp will use English, but you can change it to any of the nine other supported languages if needed.
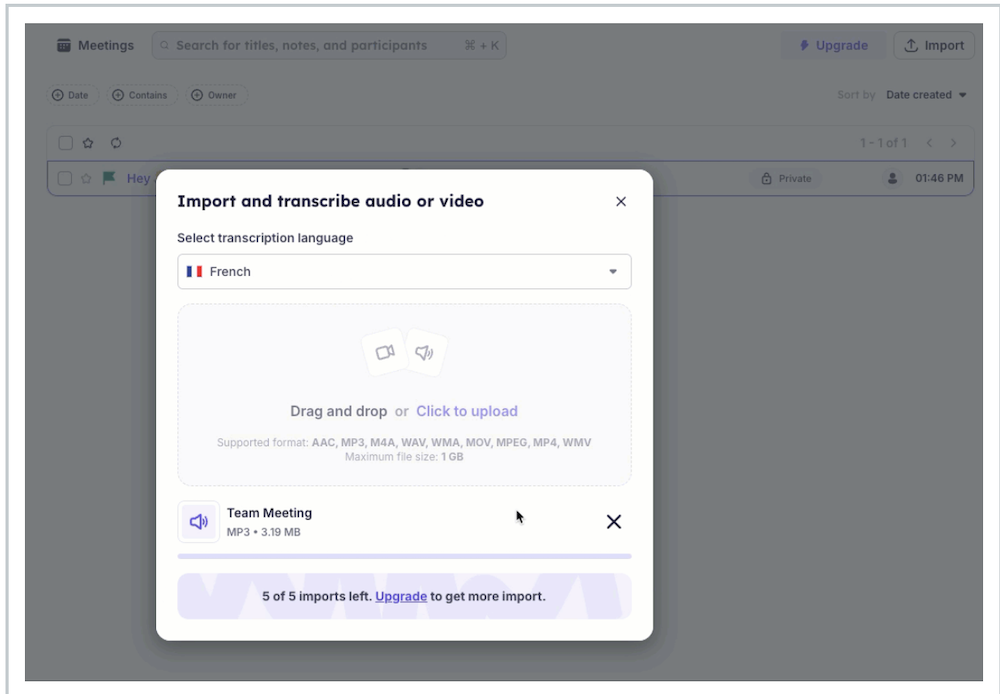
Step 5: Upload Your File
Now, it’s time to upload your file. You can either drag and drop your audio or video file into the upload box or select it directly from your device.
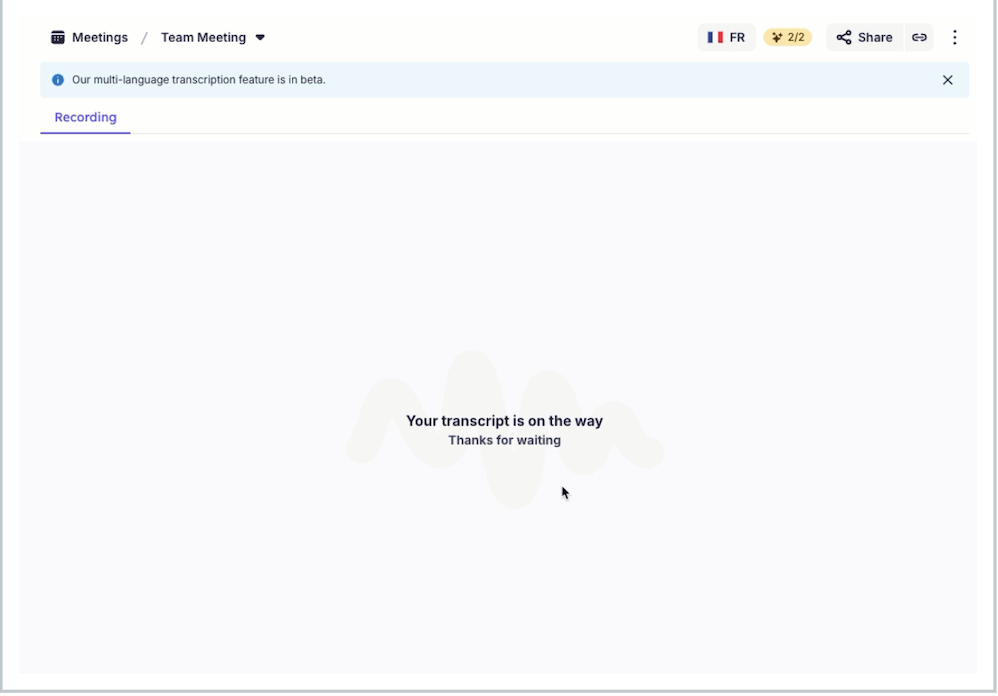
Step 6: Let Krisp Work Its Magic
Once uploaded, Krisp will automatically begin transcribing your file. After a short processing time, you’ll have a full transcript ready for review and summarizing.
Types of audio transcription files
When it comes to transcribing audio, you’ll often encounter different types of transcription files, each suited to specific needs. Let’s break down the main types you might use or come across:
| Type of Transcription | Description | Ideal Use |
|---|---|---|
| Verbatim Transcription | Captures every word, including filler words, false starts, and background noises. | Legal recordings, interviews, and research projects where exact wording is crucial. |
| Clean or Intelligent Verbatim | Omits filler words and stutters, making the text cleaner without losing essential meaning. | Business meetings, presentations, and contexts where readability is key. |
| Edited or Summarized Transcription | Provides a condensed version of the audio, focusing on key points and main ideas. | Reports, overviews, and situations where concise insights are needed. |
| Timestamped Transcription | Includes timestamps at intervals or specific moments, such as speaker changes. | Multimedia content creation, editing, and research requiring reference to specific audio parts. |
| Transcript for Captioning/Subtitling | Tailored for video, includes time codes to sync with visual content for accurate captioning or subtitling. | Video content requiring precise alignment of text and spoken words. |
How Long Does It Take to Transcribe Audio into a Text File?
The time it takes to transcribe audio into text can vary based on a few factors:
1. Manual Transcription
- Average Time: For most people, manual transcription takes around 4-6 hours to transcribe 1 hour of clear audio.
- Factors: This can be affected by audio quality, speaker accents, and the presence of background noise. It’s also slower if you’re trying to create a verbatim transcript.
2. Using Automated Transcription Software
- Average Time: Automated tools, like Krisp, can transcribe 1 hour of audio within minutes.
- Factors: The processing speed may depend on file size and the level of background noise. However, automated transcription is generally very fast and efficient.
3. Human-Assisted AI Transcription
- Average Time: Some services use AI transcription with human editors to improve accuracy. This typically takes 1-3 hours per audio hour.
- Factors: While faster than pure manual transcription, it depends on how much editing the human reviewer needs to do.
Practical Applications of Transcription
Transcription isn’t just about converting audio to text—it’s a powerful tool with practical uses across various fields. Here are some popular ways transcription can add value:
1. Meeting Notes and Summaries
- Use: Transcribe team meetings or client calls to create accurate notes and summaries.
- Benefit: Helps team members stay on the same page, especially if someone couldn’t attend the meeting. Transcriptions make it easy to review discussions and decisions without re-listening.
2. Content Creation and Repurposing
- Use: Content creators, podcasters, and YouTubers can transcribe audio to generate blog posts, social media content, or e-books.
- Benefit: Allows for seamless repurposing of content, saving time and extending audience reach by turning audio into shareable text.
3. Research and Analysis
- Use: Transcribe interviews, focus groups, and field recordings for qualitative research.
- Benefit: Makes it easy for researchers to analyze and reference information accurately, speeding up data collection and allowing for in-depth study.
4. Legal Documentation
- Use: Convert court recordings, depositions, or witness statements into written transcripts.
- Benefit: Essential for legal professionals who need precise and searchable records for case preparation and evidence review.
5. Accessibility and Inclusion
- Use: Create transcripts for video or audio content, making it accessible to people with hearing impairments.
- Benefit: Enhances accessibility and complies with standards like ADA, broadening your audience and fostering inclusivity.
6. SEO and Searchability
- Use: Transcribe video or audio on websites to improve SEO and make content searchable.
- Benefit: Boosts SEO by adding keyword-rich text, helping users find relevant information faster.
7. Language Learning and Practice
- Use: Language learners can use transcripts to follow along with audio and practice reading comprehension.
- Benefit: Provides a dual learning approach by allowing students to compare spoken and written language, which can speed up learning.
With Krisp’s transcription tool, these applications become even more accessible, helping you streamline workflows, improve accessibility, and unlock insights across different types of content.
Audio Transcription Best Practices
Transcribing audio accurately and efficiently can save time and ensure high-quality results. Here are some best practices to make the most out of your transcription process:
1. Choose High-Quality Audio
Ensure the audio file is clear and free from background noise as much as possible. Better audio quality improves transcription accuracy and reduces the need for edits.
2. Use Consistent Speaker Labels
If your transcription involves multiple speakers, label each speaker consistently. This helps maintain clarity, especially in meetings or interviews.
3. Add Timestamps for Key Moments
Including timestamps at specific points (e.g., topic changes or speaker shifts) can make it easier to reference key parts of the transcript later on.
4. Edit for Clarity
After auto-transcribing, go through the text to correct any misheard words and clean up fillers or repetitions if needed. This ensures readability and makes the transcript more useful.
5. Select the Right Transcription Type
Choose the transcription type (verbatim, clean, summarized) based on the context. For example, a clean transcription may be better suited for business purposes, while a verbatim one is ideal for legal documentation.
Benefits of Using Krisp’s Transcription Over Other Solutions
Krisp’s transcription feature stands out from other transcription tools for several key reasons:
Noise Cancellation for Improved Accuracy
Krisp’s built-in noise-canceling technology reduces background noise, resulting in more accurate transcriptions even in less-than-ideal audio environments.
Quick Turnaround
Krisp’s fast transcription process means you can get a full text version in minutes, perfect for busy professionals who need instant results.
Multi-Language Support
Krisp offers transcription in multiple languages, making it versatile and useful for global teams or multilingual content.
Built-in Summarization
With Krisp, you can generate concise summaries of long transcriptions, which is ideal for users who want quick insights without reading the full text.
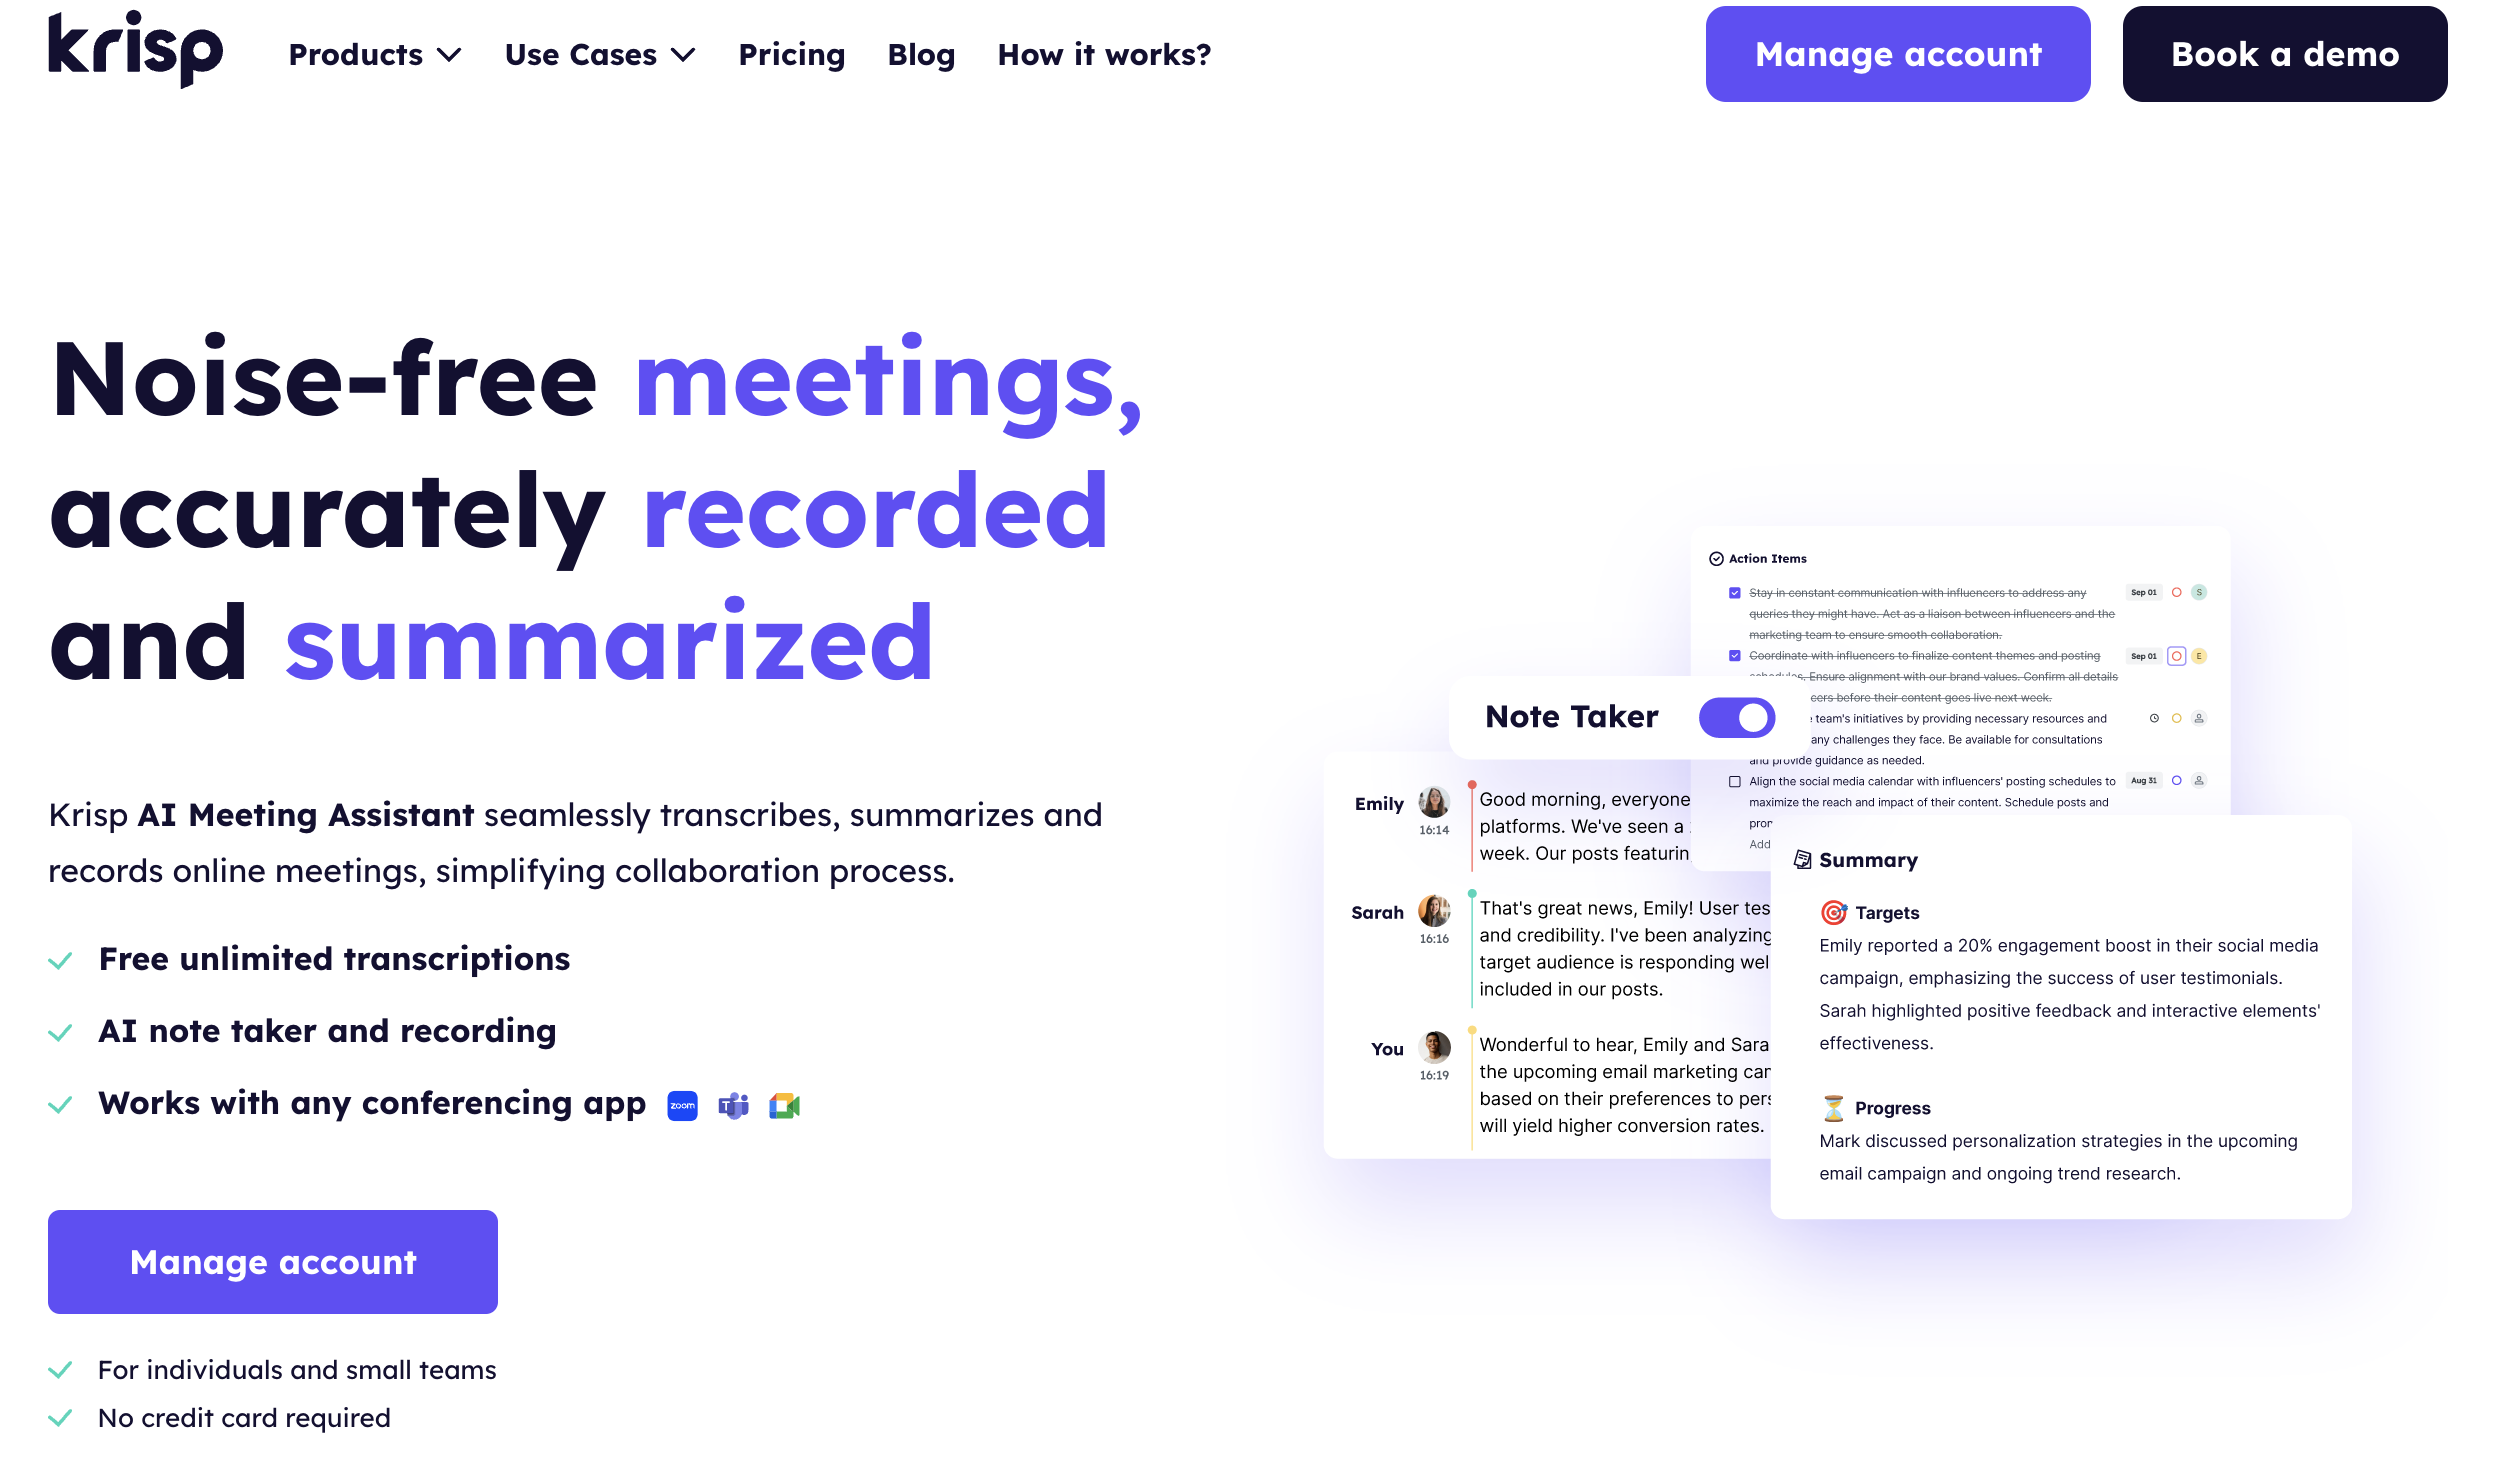
These benefits make Krisp an efficient choice for professionals who value speed, accuracy, and easy-to-use tools, whether you’re transcribing meetings, podcasts, or research interviews.
FAQs


